Case For Raspberry Pi3 With ControlBlock
-
This has been asked before, but never answered. Is there a recommended case to use when pairing a ControlBlock with an RPi3? I want to make sure it fits in there nicely and at the same time does not crowd the case and reduce its ability to cool. I will have heat sinks on the RPi3.
Thanks in advance.
-
I too, am seeking this information.
-
I don't have an 'off the shelf' solution for you, but my Pi is in one of these black cases, and I've modified it to fit the power block. I've not got any pictures just yet as I've been doing it this afternoon, but all I've used is a craft knife, a little bit of sandpaper and some time.
The only issue I've had so far is that the lid doesn't fit back on, but I'm looking into that. The plastic on the case is pretty soft so it's easy to manipulate/cut.
I'll post some images in a bit more detail when I've done.
Dan -
In for pictures. I have the PI 2 but will eventually be getting a 3. I have heat sinks and the same case Danorak1981 has. I think I could get the controlblock to fit in the same case but it would hover right over the heat sinks. I've been hesitant to try that. For now I have a ribbon cable and the control block is outside the case. However plugging in a ribbon cable to the control block does interfere with the player 2 wire hookups on the block.
-
Does it need to be a closed design? There are many open designs that would likely work.
I use this case:

Open design + fan if going to give you good cooling, and I have the PowerBlock on mine.
-
Ok, so I've successfully butchered my Pi case to take the Powerblock and with a little bit of modification I have managed to get the lid to go back on.
I still don't have any pictures uploaded as I don't presently have a Photo hosting account, but I'll sort that possibly over the weekend. What I actually ended up doing was taking an older soldering tip and burning the plastic to create the holes I needed to add the switch and LED, and to modify the underside of the lid so that the capacitor wasn't stopping the lid sitting flush.
The other issues were the header pins for the LED and the switch --although I should say that you attempt this at your own risk-- I successfully and very carefully managed to bend the pins 90° which then meant the wires could be soldered directly to them and the lid could go back on. I was conscious that I could snap a pin, but the elements used to make the Powerblock are of good quality and the pins are fairly strong, but also if the worst did happen, I would have de-soldered them anyway and soldered the wiring directly to the board.
Now I know that the case will take the PowerBlock, I have ordered a new identical case which I can modify properly. The only thing I will be changing is the LED. I have a 5mm white LED, I think a 3mm is more fitting AND I need one which isn't as bright-when I'm playing the Pi in bed it's too obtrusive.
As soon as I have sorted a Photo hosting account I'll get some images up.
But anyone reading this who is just researching the PowerBlock should commit to buying one-brilliant piece of hardware that should be a must buy for anyone with an RPi.
-
@Concat that's cool. Link to the product please?
-
@batesman
It's an ebay case: http://www.ebay.com/itm/Transparent-Clear-Case-Enclosure-Box-Cooling-Fan-for-Raspberry-Pi-3-2-Model-B-/301727422137?hash=item46405b16b9:g:nHkAAOSw~gRV47oyI am pretty happy with it. Mine is in a cabinet so didn't need to be portable or provide the protection of an enclosed case. It also lifts the RPI a bit so the bottom isn't touching anything. Great if you want a heatsink on the RAM.
-
So, I've finally managed to find some time to assemble my RP in the OneNineDesign case.
This was V2, the first one was a bit trial and error, so I bought another case (under a fiver delivered!) and set about working on it today. I did purchase a 3mm white LED as the 5mm almost lit the room up-the 3mm is still bright but not as bad. I also purchased a set of diamond hobby files from Maplin for about £6 so I could file the edges of the holes I drilled. I also made sure to cover the unit in masking tape as it marks so easily, but also good for getting measurements right.
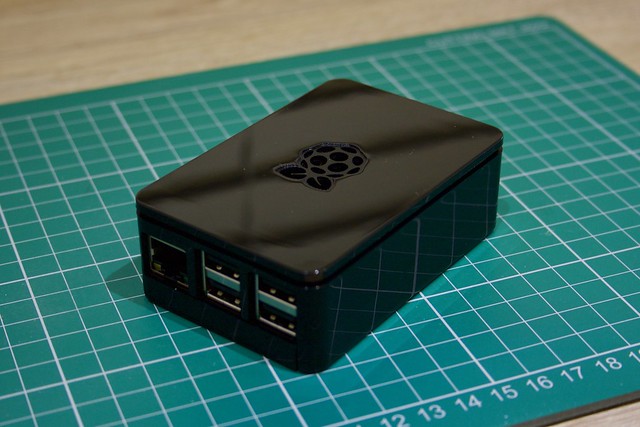
So, this is the case:
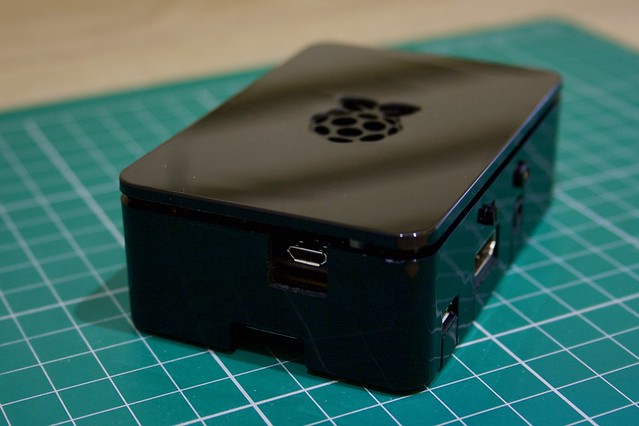
Cut out for power:
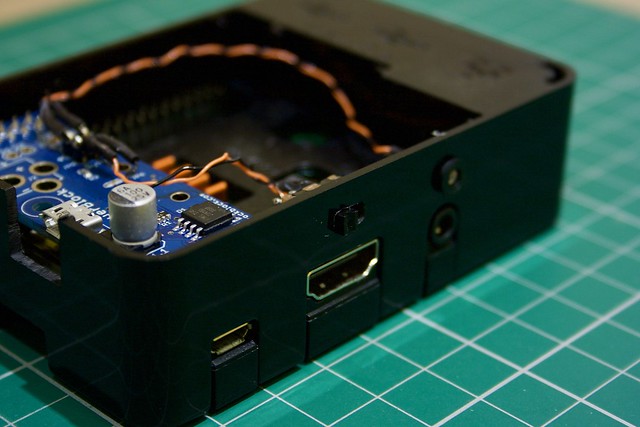
Switch and LED (lined them up with the audio output and HDMI to make it look a little more in line with factory cut outs):
Here you can see the header pins bent down to allow the original lid of the case to go back on:
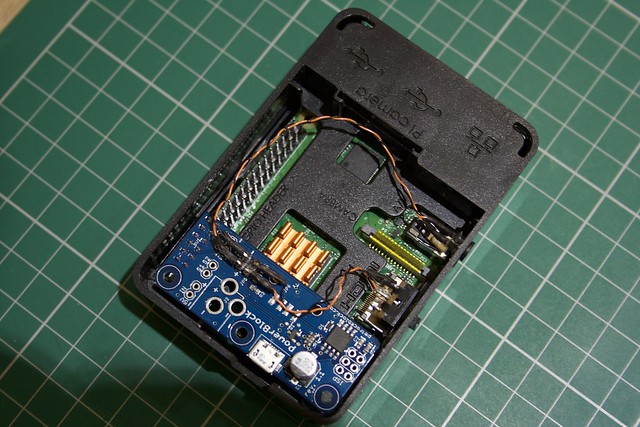
And here are the parts I had to file off in order to let the lid sit back on as it should:
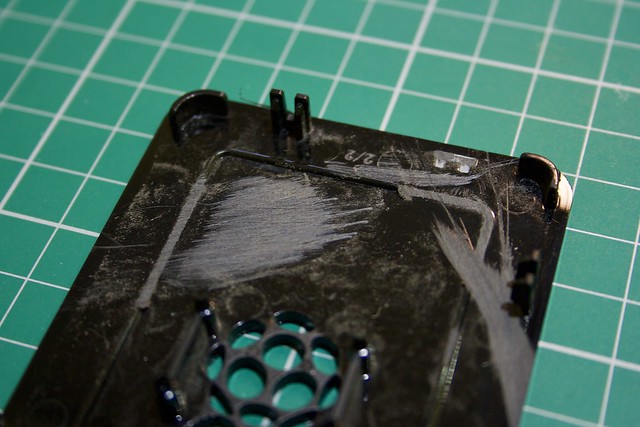
All in all, I'm really pleased with the outcome. I was nervous about bending the pins on the ControlBlock, but I was so careful and it worked out fine: to look at it doesn't look any different from how it did originally. The wiring is quite fiddly and it is a kind of semi-permanent modification, but the with is only held in with hot glue so peels away easily, and the LED & it's retaining clip slide out easily should I need to take it apart.
I was a little concerned about heat, but running NES/SNES/Megadrive emulators it gets warm, only slightly warmer when running the N64, but if it gets too hot I just take the lid off: but so far, no issues.
Contributions to the project are always appreciated, so if you would like to support us with a donation you can do so here.
Hosting provided by Mythic-Beasts. See the Hosting Information page for more information.