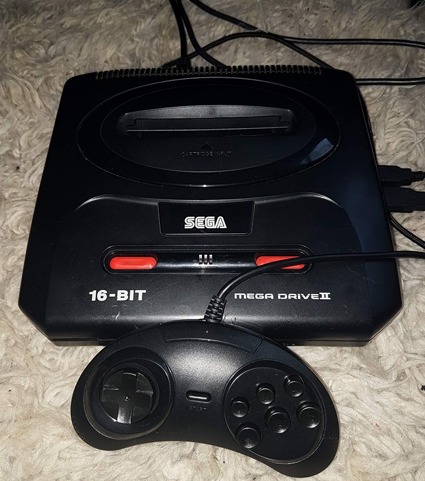
Retro Pi in a Mega Drive II
-
 @obsidianspider said in Retro Pi in a Mega Drive II:
@MadRikXIV Looks like it will be a nice project.
If you can, I'd suggest wiring up an adapter so you can use real controllers in the original ports. I used one from Raphnet, but there are also many others that will work via USB.
I haven't seen anyone else go the route that I did of putting a TFT inside a game cartridge, but if you do decide on that, I'll be glad to offer any insight I can.
Good luck!
The screen idea is a way off at the moment, need to re aquaint myself with the dremel first, but is a definite maybe.
The Mayflash, is a convertor for plugging in old controllers that I have somwhere, goes to USB, when I locate it, pull it apart, hoping it fits in the current ports with minimal cutting, plan on getting them for other sysytems as well, as I at least have the other controllers for them, and cheaper than buying 2 new USB ones, gotta have authentic controllers if I'm not allowed space for all the original hardware
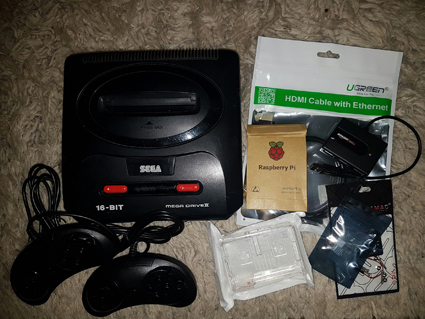
Took some persuading to allow my Amiga 1200 with a USB disk drive and Compact Flash WinLoad drive in the living room.
-
@mattrixk something I have considered, but then, 128gb USB stick should cope with anything I need, no need for bulky PSOne images, still got my Original Playstation in the TV cupboard, and about 200 Games on the shelf.
Remove the cartridge slot (will look at trimming it so at least the flaps are still there) adds a bit of depth where the Pi will sit, depends how much coiling of leads is needed, got the shortest 50cm ones possible, just waiting on a couple to turn up.
-
@MadRikXIV No need for a dremel, at least not for the controller adapter. You could desolder the original wiring from the Mega Drive and solder it up to an adapter like you posted. Taking apart a USB adapter should be pretty easy.
-
@obsidianspider Excellent, need to get in my loft and box of wires and stuff to find it, less cutting the better.
So far, just the HDMI, power in location of the old holes at the back, then a network port, just because, if its open, may as well, and 3 USB slots on the old expansion slot.
I know the USB and HDMI leads can snake inside the case, keep trying it, itching for the rest
-
@MadRikXIV If it were my project I'd take apart the Mega Drive, taking lots of pictures as I went, and look at what the original board for the controllers as well as the power and reset switch look like and see if I could reuse them. Heck, even the part where the game plugs in could be used to have the USB port use the original pins. That's how my screen on my Super Famicom Pi works, the cartridge slot is wired up to the Pi and the screen is wired to the game PCB (I desoldered all the chips) and then if I don't want to use the screen I just take the cartridge out.
-
@obsidianspider There will be pics when I start, looking to keep it simple ish to begin with, the switch may be useable, was investigating it when I opened the case up, just a square one with 4 solder points, not sure on the control ports yet, but they looked to just be soldered to the board, so could be a case of working out which pin is which.
When I find the adapter, it should only be a few wires to join together, to the USB board.
Did it with the same plug when I added them to my Original big black XBox for the C64/Amiga Cruiser sticks
-
So this weekend, I got the Dremel and dug out the USB adapter and cracked out the soldering iron...(Some pics, not as many as I should have taken but a few of the changes)
The last pieces turned up so it was time to get altering, I held a moments silence for all the pleasure Sega provided me.
So, opened up the case, nice and symbol, just a few screws, and removed the metal shielding and a circuit board I was never going to work out why it didn't want to play anymore...
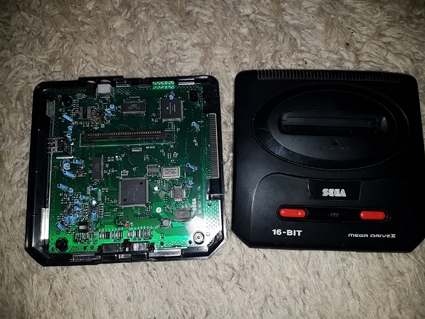
Removed the circuit board, and cartridge slot, I wanted to make as much space inside as possible for the leads to run, about.
First job I did was cutting the base grooves out, and any fixings that aren't needed anymore, the masking tape being a reminder of which ones are screw holes, and I cut the cartridge slot down to just the screw holes.
I used the Amazon Basics 4 port hub in the side, taking out the old Mega CD port, bit of masking tape, and cut 3 small grooves, the USB ports slotted in, sure port 4 couldn't be accessed, but that has been utilized with an ESYNIC keyboard dongle, so not wasted.
Placing the USB ports upside down, made for an easy fit, but the motherboard stuck out too far, so I cut about 4mm off of it using the Dremel, and the top fitted perfectly.
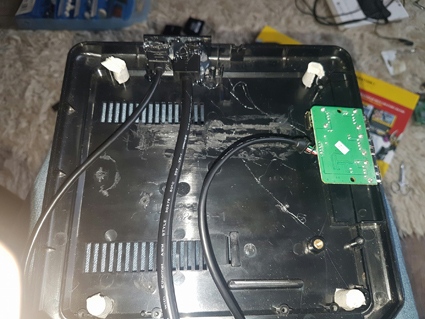
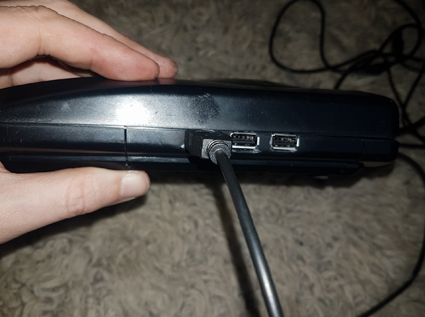
Two holes in the old AV and power positions, and the HDMI extender and power extender slotted in with a little pressure, with a liberal amount of hot glue to hold them in place.
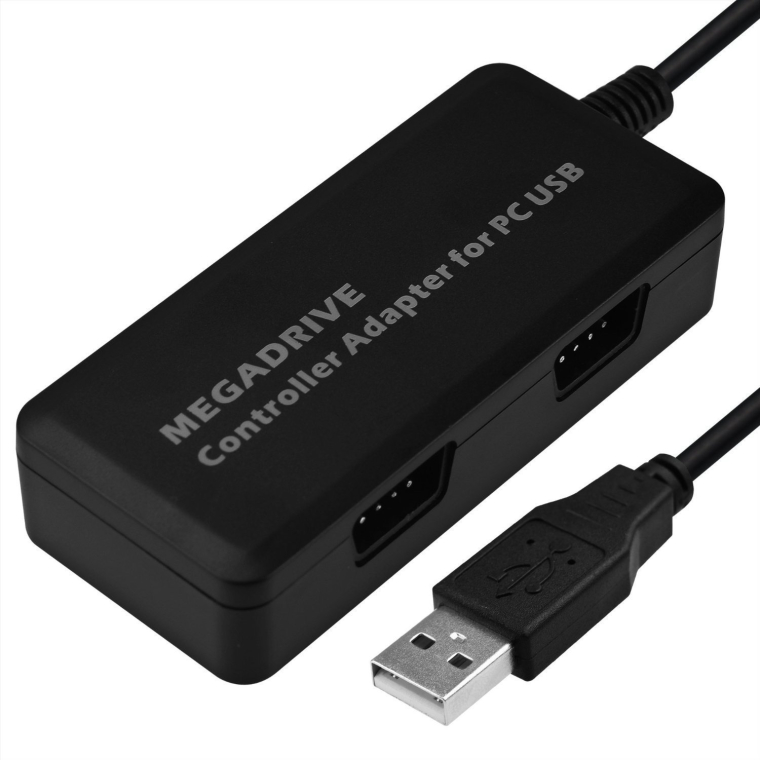
My biggest challenge, the Mayflash adapter
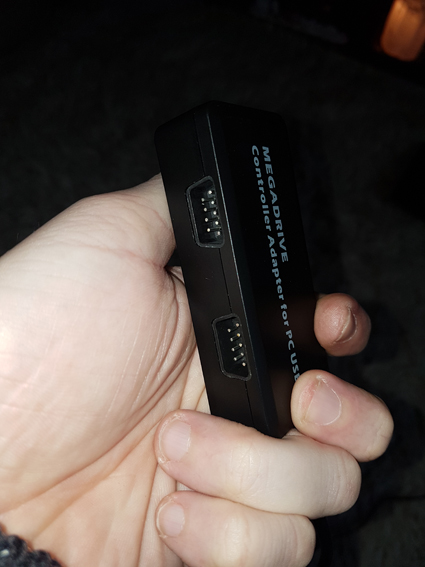
How inconsiderate, just a fraction and this could fit with ease, but no...
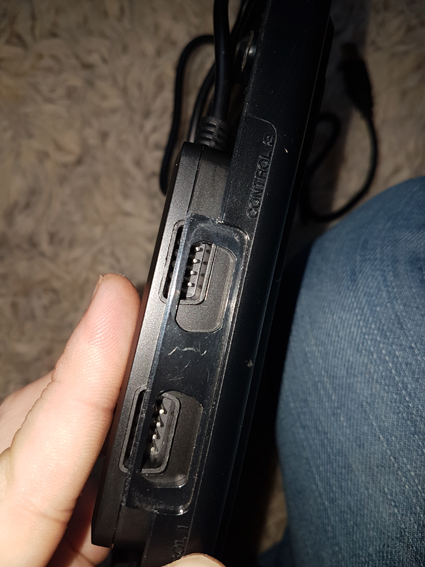
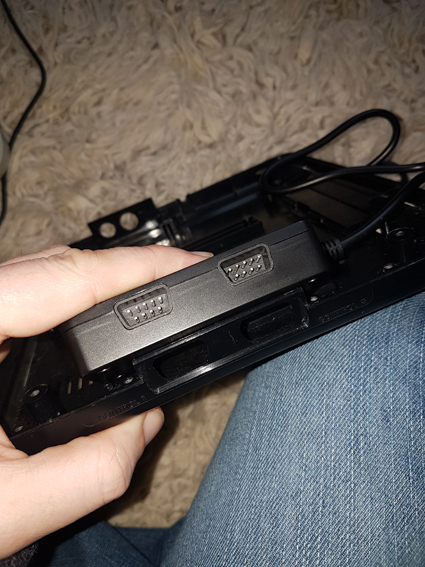
So I un soldered the original JoyPad ports from the Mega Drive Motherboard, cracked the case open on the adapter and slowly soldered the wires between the ports, lot of swearing as no where had a 'Helping Hands' in stock, and it's been a long time since I played with solder, and the only leads I had are from an old PC case, gotta recycle when I can.
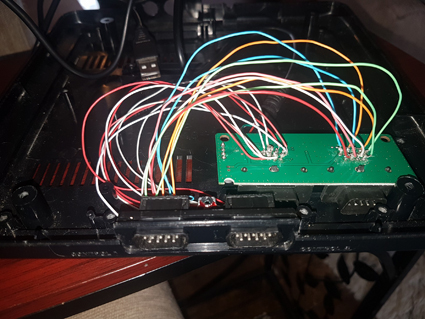
Nice and easy...
Time to check this will all fit
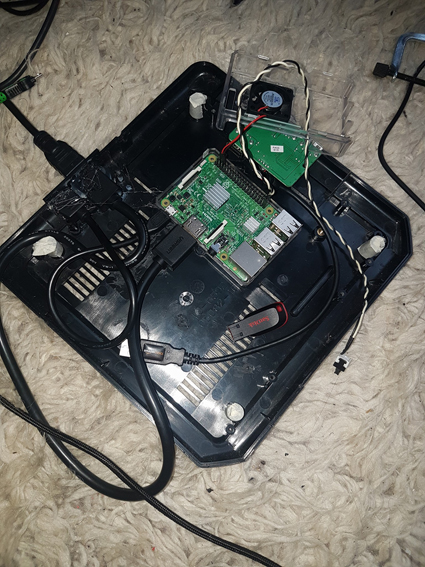
Added a fan to my Pi, just well, just in case I look at Kodi and stuff, and well, it's cheap and there if needed.
Found a power switch lead from a PC, so edited the script to allow it to run the shut down script that was on this forum, editing the pins to 12 and 14, when finished, the switch can be mounted easily under the old power switch.
Moment of truth time, will this all fit?...
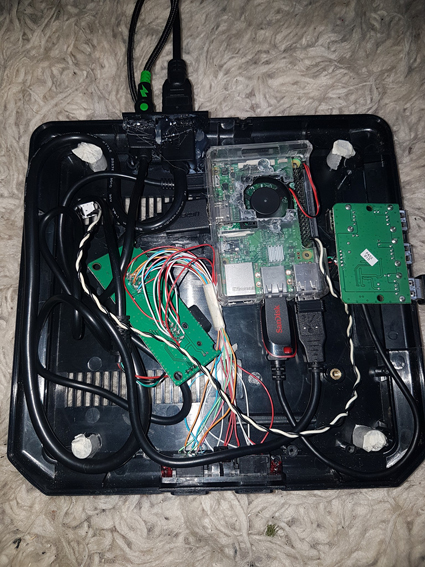
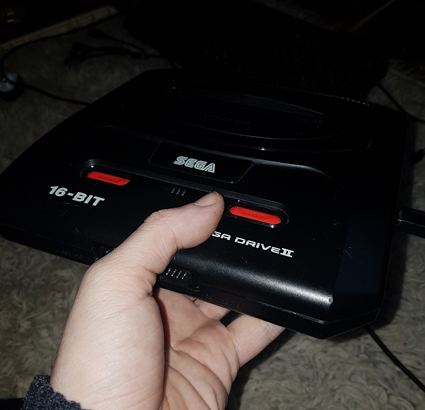
Result, it does and the case goes on, and looks fairly tidy.
No One would know the difference..
Rear HDMI and power plug...
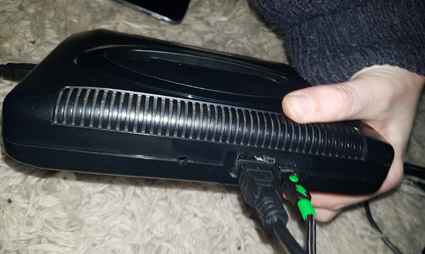
Right hand side, 3 USB ports...
And a full frontal, just waiting on a couple of new Mega Drive Controllers to turn up for the real deal.
Left to do...
Waiting on an Ethernet extender to possibly add to the back of the case, WiFi is poor, even with the edit to the Pi, but, not a deal breaker, as I'm not likely to sort another hub out near the telly, but, may add it, just well, because I can.LED power light, I have a spare one from a PC case with jumper pins, but seeing that everyone adds a resisitor in line, so need a resistor to add.
Check and hope my Mayflash wiring is working, once my controllers turn up.
Some Retro Pi tweeks, this had me swearing, as got the White Screen when changing themes, so had to edit back to it, only tweek I plan on doing is to add a 'Segaaaaa' video splash screen.
Was certainly a fun Sunday, although, the smell of solder and hot plastic is still with me, not a major modification, but I'm pleased with the results, kept the original shape, and at first glance, you wouldn't notice the diffference.
-
This looks amzing. Great work :)
-
Quite happy, the Mayflash soldering to the original Joystick ports WORKS.
Not too shabby for a sunday morning detox, first bit of soldering in over a decade.
Just need to order for a Mausberry, for a total on off option, and add the LED to it, as the current switch only safe shuts down to a sleep state.
Maybe use the switch as an 'Esc' button on the GPIO pins and put that on the reset switch to exit stuff, as not all controllers have enough buttons (My old Cruiser and Zip sticks have a good old fashioned one button config).
Just got to google and search how to do that bit of script, some tricks take longer for this old dog to work out.
Looks like another international delivery for me, then, quietly get the parts and another Pi for the Famicom version :D
-
@MadRikXIV This is awesome. I still remembering opening up my Sega Genesis on Christmas morning visiting my Grandpa. Best gift ever.
You're making me want to start a similar project on nostalgia alone -
Another awesome piece of gaming history converted into a laggy emulation box. Hopefully the original motherboard didn’t get thrown away and went to a person that wanted it.
-
@ivirtualzero said in Retro Pi in a Mega Drive II:
Another awesome piece of gaming history converted into a laggy emulation box. Hopefully the original motherboard didn’t get thrown away and went to a person that wanted it.
Ah yes.. This butthurt guy again.
Apparently you didn't see in either post that the units were non-functional before they were modified. Can you show me on the doll where Retropie hurt you?
-
Awesome! Good luck! I just finished doing something similar with my Master System 2: blog post here


I had a hell of a time fitting all the cables inside.
Contributions to the project are always appreciated, so if you would like to support us with a donation you can do so here.
Hosting provided by Mythic-Beasts. See the Hosting Information page for more information.