Famicom (not Mini) build (WIP)
-
I only used hot glue, although when you first think the glue has set, it feels a little rubbery to touch, give it a proper hour or 2, and its very solid
-
Just woke up and went to check how the Famicom does in its new bleach bath.
The water was getting kinda milky so at first I thought it attacked the Famicoms plastic.
But looking closer it wasn't the Famicom that was beeing attacked but the aluminum tray that I used.
Metal + bleach = not good. Totally forgot about that. So immediately flushed the bleach away.Looks like I'll be shopping again for a new tray (plastic) and new bleach.
-
@FlyingTomahawk whoops!! :D
-
So I am gonna give this bleach thing a second try today.
Got the box already, plastic this time ;-) , and I am not sure what I should do with that red long Famicom label up front.
Doing some research some guys take that away before bleaching other leave it as is... I am worry that I break it while trying to remove it.
I guess just go for it and see what happens right?I also found these labels here for printing. They came in lcx file format but I converted it to PDF so anyone can print them.
Wish me luck.
-
be careful with the bleach, bleach can make some plastics brittle. I have had a cola bottle get eaten away when storing bleach in it. It would be a shame to damage the plastics of your console.
-
Thanks for the advice.
It's not 100% bleach like the real strong industrial stuff. But it does attack metal, aluminium and other metallic materials.
Plastic should be OK. Others have done it before and they all had good results. -
@FlyingTomahawk said in Famicom (not Mini) build (WIP):
Thanks for the advice.
It's not 100% bleach like the real strong industrial stuff. But it does attack metal, aluminium and other metallic materials.
Plastic should be OK. Others have done it before and they all had good results.When you say bleach, do you mean Peroxide like the hair lightening stuff?
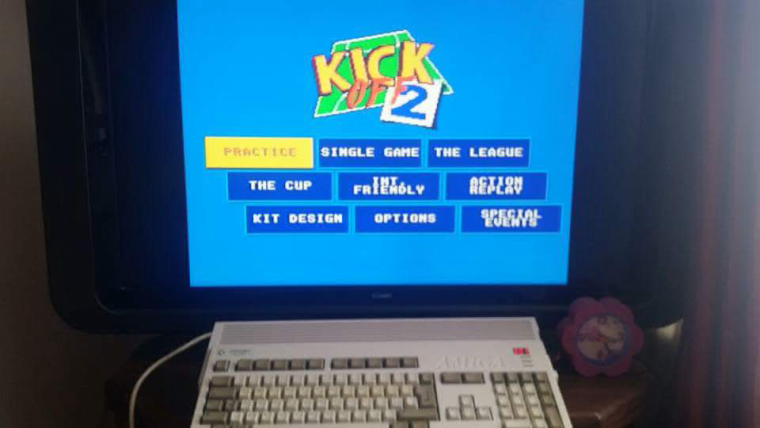
It's what I used on my Amiga with Vanish stain remover, had it looking good as new, left it for a couple of days when we actually had sunshine.
The two mice where quite discoloured, I gave the one on the left a second bath after that pic
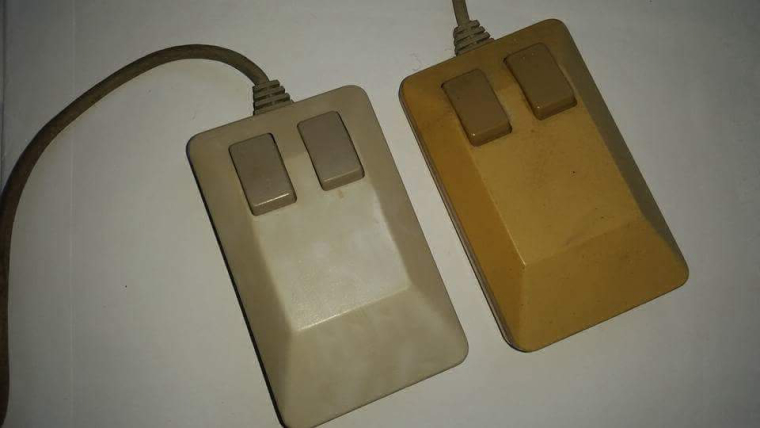
Not the greatest pic, but the 1200 was a lot lot darker than this originally, didn't get a before, but, came out like new, especially the keys, made adding the Compact Flash hard drive and USB 'Floppy' Drive a joy.
-
It's not hair bleach.
If you copy and paste these words into google you'll find sites with pics of people that have bleached their Famicoms and other stuff.レトロブライト ファミコン
98% of people used clothing bleach named
ワイドハイターEX
That contains something that is suitable for projects like this.
I bought a new box with cover and 1760ml of that magic liquid that should work according to those that have succeeded.


Now I can leave it outside 24/7 no matter the weather condition. I didn't use water this time, 100% ワイドハイターEX . Also didn't remove that red front plate. I want to see how aggressive that stuff is.
-
Got my Pi Zero W and Zero4U.
I assume the Zero4U needs a separate power supply is that correct?
Has anyone tried to use one on a Pi Zero W yet?Update: never mind the power supply question.
The USB hub will take power directly from your Pi Zero, so you don’t need to power the USB hub separately.
-
This was the formula I used, although it was before they made a recipe for the Gel, my mix was along the lines of laundry stain remover, mix with water and dissolve it, add peroxide, dilute in water bath and submerge.
-
Connected the Zero4U to my old Pi Zero 1.3
Man what a fantastic feeling to be able to access it via Network now using the WiFi dongle and controller plugged in at the same time.Can I charge controllers via the Zero4U hub?
-
@FlyingTomahawk It looks like the power pogo pins connect to the test pads that come right off the Micro USB power input to the Pi, so as long as your power supply is strong enough, you should be able to, but just know that USB 2.0 will only output 500mA, max.
-
Ok I see...
I was just thinking ahead and wondering where I should pull the power to be able to charge the 8bitdo controllers.
They have a 480mA battery inside so I think 500mA should be good enough to charge them in a decent time.
Unless you have an other idea? I want to pull 2 cables out of the Famicom were the original controller cables came out and be able to plug them into the controllers to charge, even if the RPi is shutdown. Is that even possible? Or do I have to look for a different power source? -
@FlyingTomahawk How are you controlling power to the Pi itself? I'm not familiar with the Zero4U. Is that the setup you intend to run? A Zero and a Zero4U inside the case?
Since you want those controller charging ports "hot" all the time, my first inclination is something like this 4-port charger that can do up to 2.4A per USB port, but you'd want something that has a cord on it, or something with a detachable cable, because while that one is nice and compact, the flip out wall plug wouldn't work with the Famicom around it.
-
To be honest I am not sure yet. Now that I have a Zero4U I can use my WiFi dongle and a Bluetooth dongle and I will have 2 free USB ports which I thought I can use to charge the 8Bitdos.
With the Zero W I have only 1 USB port unless I can connect this Zero4U device to it then I have 4 free USB ports since it contains already WiFi and Bluetooth.
The Zero4U as it is connected (no solder solution) now takes power from the Pi Zero.Here the Zero4U manual
Another problem would be the size (height) of the Pi Zero with that hub attached to it. Not sure that goes in without trouble. But I'll test that tomorrow.
-
@FlyingTomahawk I've not seen a Famicom in person, but they don't look that small inside.
I'm trying to map components out: You want
- A Pi Zero (possibly Pi Zero W) inside
- on the back you want full-size HDMI and a power in
- Where the controllers used to come out you want Micro USB cables to charge the controllers.
Am I missing anything? Any regular USB ports? On the back? In front where the 15-pin connector used to be?
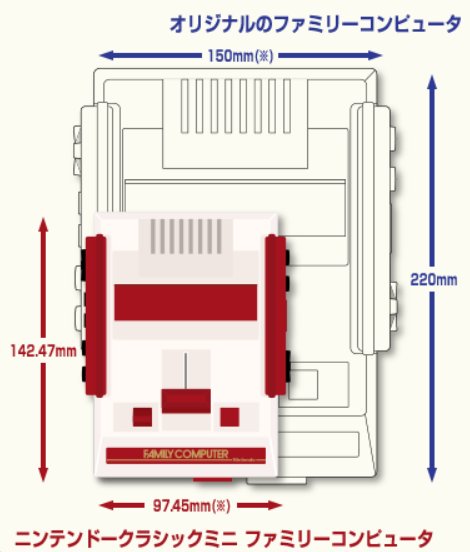
I'll try using these dimensions found online to mock something up with GIMP
-
You got it right. No additional USB ports needed.
HDMI and microUSB are sufficient.Regarding the Pi Zero W and Zero4U, good news, they are compatible! But you need to use a Ferrite ring. Read more here
So I definitely will be using the Pi Zero W for this build. If no other issues arise.
-
@FlyingTomahawk Interesting that the wifi actually interrupts the data transmission, but I guess that's the tradeoff for using pogo pins.
-
I apologize for my not so artistic drawing but I hope it is easy to understand.

What possibilities do I have if I want to charge the controllers, even if the Pi is shutdown? Where should those 2 question mark cables go?
Should I split the power source (red arrow)and connect some sort of small hub which is under constant power while it is connected to the wall?Other question I have is about the Mausberry issue.
As mentioned in many reviews they don't answer any mails and they don't update the order status so I have no clue if it was shipped and if they did when it will arrive.
So just in case looking for alternatives. One alternative would be to install a different button and use the power switch feature that ETAPrime explains in his youtube video the same ruckage used for his Cardboard NES.
Or what about the Powerblock? Any infos on that besides the official stuff? From what I read it works same (similar? ) like the Mausberry and can be used with a regular slide switch. -
@obsidianspider said in Famicom (not Mini) build (WIP):
@FlyingTomahawk I've not seen a Famicom in person, but they don't look that small inside.
I'm trying to map components out: You want
- A Pi Zero (possibly Pi Zero W) inside
- on the back you want full-size HDMI and a power in
- Where the controllers used to come out you want Micro USB cables to charge the controllers.
Am I missing anything? Any regular USB ports? On the back? In front where the 15-pin connector used to be?
I'll try using these dimensions found online to mock something up with GIMP
Those measurements are out a fair bit (Unless you do some cutting) , the recess for the controllers is inside as well from top to bottom, and the depth of the cartridge slot.
Is handy that there are the grooves down either side as the original controllers go in the back , but plugged in to the front of the mother board, so wires can be lost along there.
I'm still waiting on some longer wire to get mine in, useless electrics shop didn't have any.
Contributions to the project are always appreciated, so if you would like to support us with a donation you can do so here.
Hosting provided by Mythic-Beasts. See the Hosting Information page for more information.