Famicom (not Mini) build (WIP)
-
@obsidianspider said in Famicom (not Mini) build (WIP):
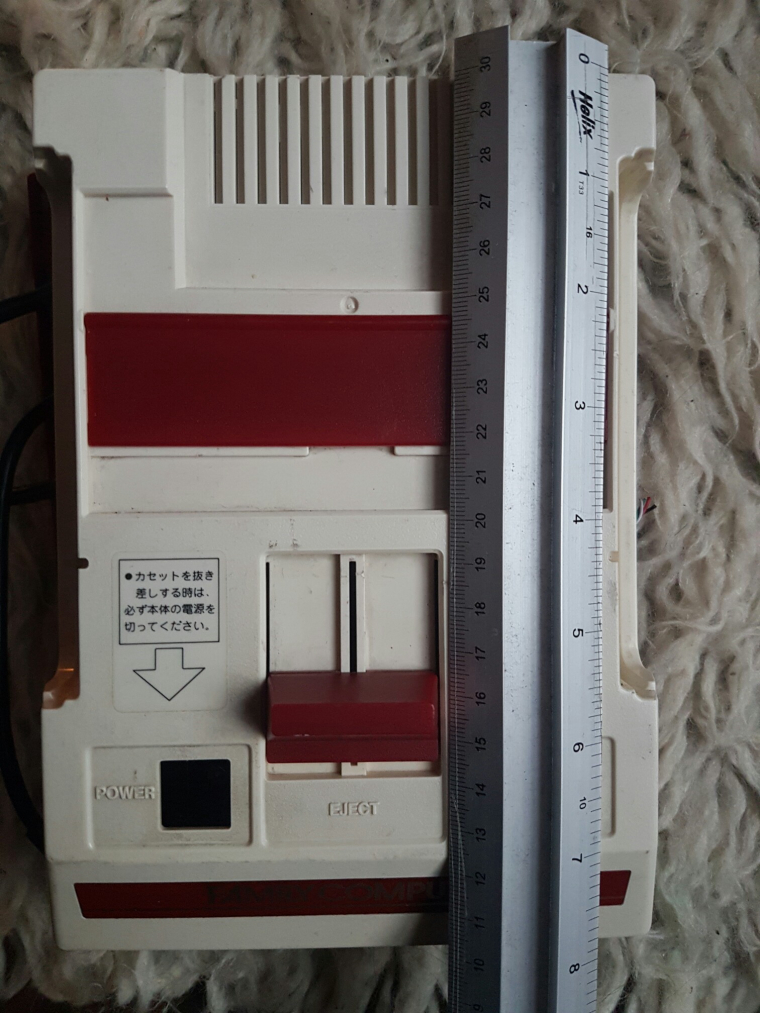
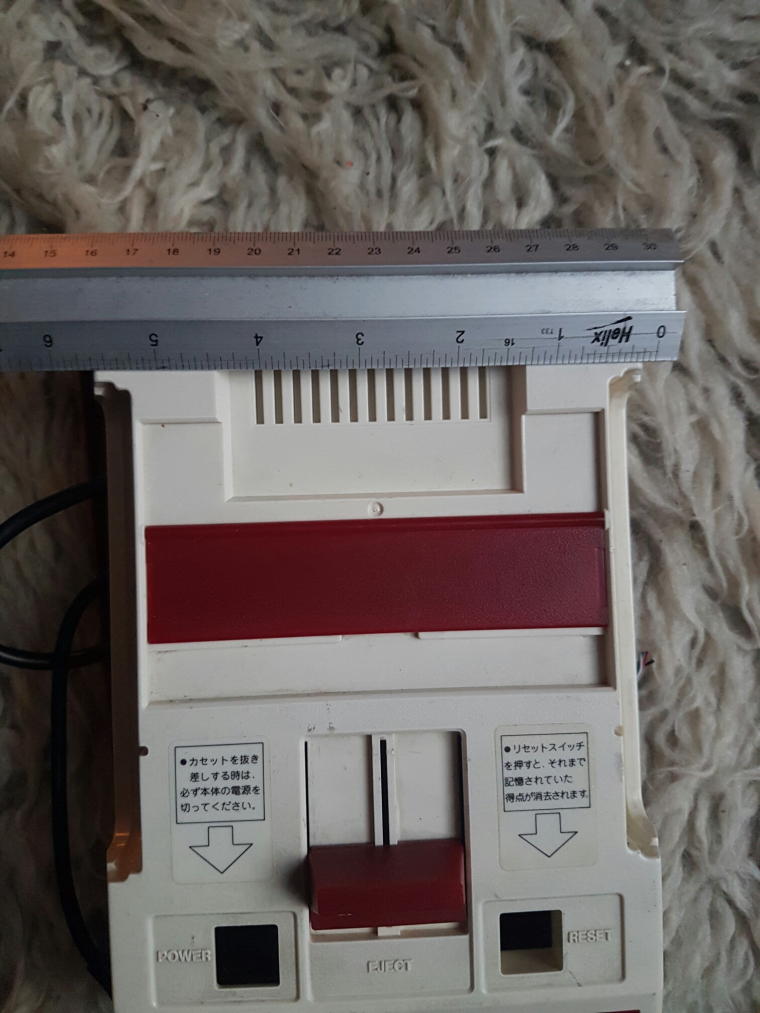
@MadRikXIV Fair enough on all of the bits that stick out on the inside, but are the overall dimensions in that image right? 150x220? I have no way to measure one in real life, but if that's right I can use that for a sense of scale for what's going on inside.
I would say they are correct, it is still fairly tiny even compared to that Mini pic, let alone an XBone
-
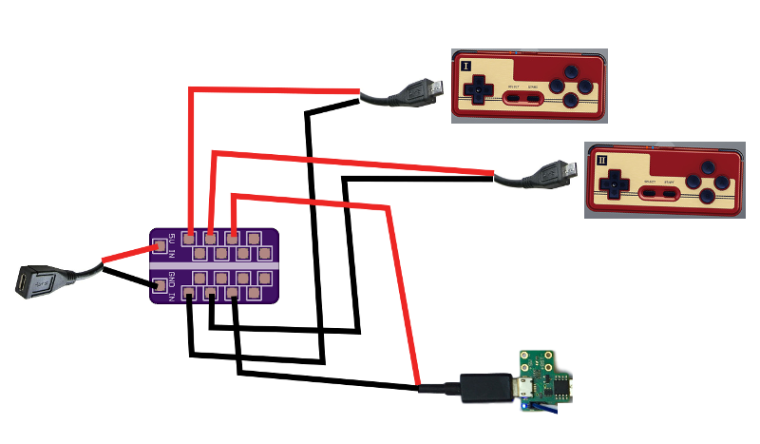
Since you're going to be using a Pi Zero W, and those don't use a lot of power, if you used at 2 or 2.5A phone charger for power, I think you'd be ok with making a power rail inside the case. To do what I'm proposing you'd need three Micro USB cables. Male on one end, female on the other, and if they have fairly heavy power wires, that'd be better than not.
Ideally you'd want a female Micro USB socket exposed on the back panel of the case, this is how you'd be powering everything, so take one of your Micro USB cables, and cut it in half-ish, with enough wire still attached to the female end so that you can route it to wherever you choose to put the power distribution rail. You could make the rail from perfboard (the kind with copper pads would work best), or you can buy some premade ones. I got a 3-pack from OSH Park, but it took a few weeks, and that was within the US.
At this point, I would the other end of that cable that you just cut the female end from, and then connect the male end to the rail. That will be used to go to the Mausberry.
I would then take your other two Micro USB cables and just cut the female ends off, you only want the male ends, as those will plug into the controllers, and then connect that up to the rail.
Red and black are USUALLY the power and ground wires in a USB cable, but be sure to use a multimeter to test to make sure you have the correct wires. Don't smoke your components by not testing before plugging things in!
This is a really crude mockup, but I think it gets the point across.
If I recall correctly Mausberry are on Long Island (just East of New York City) and when I ordered my two circuits each order took about a week. (They were ordered a few months apart.) If I drove there by car it would take me about three hours. They're that close to me geographically. When I ordered my Super Famicom from Japan it took about three weeks to arrive. When I send mail back and forth with a friend who lives in Australia it takes around three weeks in either direction. Most of the time if I order things from China on eBay it takes around four weeks, but I had one package that took eight weeks. With international shipping, it's tough, and I know I get impatient with waiting and wondering if something will arrive.
The Powerblock seems to power the Pi through GPIO and covers the 5V pins that I needed for my screen, so I ruled it out. It was also more expensive than the Mausberry boards I looked at. I'm not sure about powering a Pi directly by GPIO. Some say it's safe, others say that there's a protection circuit that's bypassed if you do it that way. Then again, I'm the guy who cut the heck out of a Pi 3 in my attempt to make a Gameboy Advance Pi. ;)
One other alternative to the Mausberry that I considered was ATXRaspi. At the time it only worked with a momentary switch, so I ruled it out, but as of board revision 2.7 they say it can now work with a latching switch like the Famicom or Super Famicom use. I've not messed with those "plug some wires into the GPIO and add a button" options because they keep power fed to the Pi all the time and when it's "off" it's really just in a low power state. While I'm sure it's usable, it wasn't a solution that I preferred. I like that the Mausberry or ATXRaspi actually cut the power to the Pi completely when they are off. There may be other options out there that do the same thing (soft poweroff, totally cut the power to the Pi) but I'm not aware of them. I'll see if I can find any more, and if I do, I'll post back.
-
@FlyingTomahawk said in Famicom (not Mini) build (WIP):
No additional USB ports needed.
HDMI and microUSB are sufficient.If that's the case, then you don't need the Zero4U for this build once everything is set up.
-
Yeah, if I decide to go with the Zero W then no Zero4U is needed. I got WiFi and Bluetooth on it already and I can pull the power for the controllers from an other source, like you displayed above. That plate is a neat thing and definitely a good option. Gotta do some research about it.
-
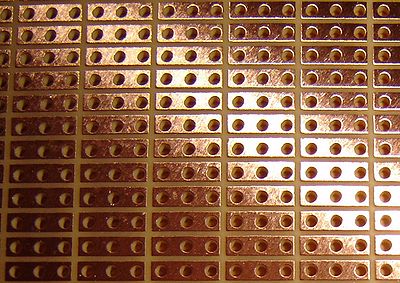
@FlyingTomahawk You can easily make one from some perfboard, which I'm sure is available at an electronics hobby store.
The kind with copper pads would just require linking them together.
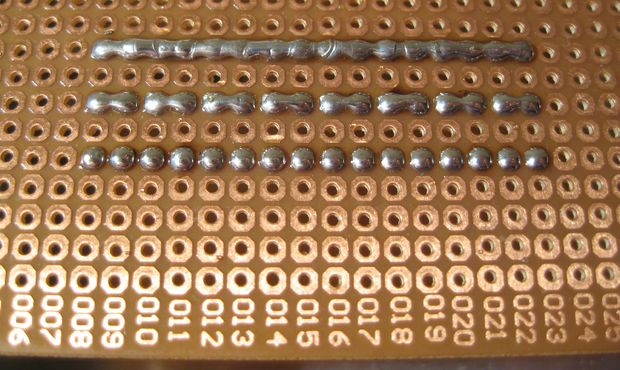
They also make a type where there is already copper between the holes, linking them together.
-
@FlyingTomahawk said in Famicom (not Mini) build (WIP):
Today I took the Famicoms out of the buckets and washed them off.
Mine is good enough for me, not 100% white but good enough.
This gave me the chance to finally see if the 8bitdos would fit and....they do.
I think edmaul69s Famicom got a bit better but not good enough. So I changed the setup.
Previously I used a 1:8 ratio this time I used a smaller tray, just enough to fit the Famicom inside and used a 1:2 ratio maybe even more.@edmaul69 I apologize if I should mess up the Famicom. I will look for an equal replacement if that should happen, so no worries.
I don't know what's gonna happen with so much bleach inside it. I also gonna look for a UV llight to speed things up a bit. Weather forecast says rain for the next 2-3 days.Controller fitting


Too much scrubbing with the special sponge :(

@edmaul69 Famicom 2nd try

This is shaping up to be an excellent build! It made me immediately start ebay-ing for broken famicoms....
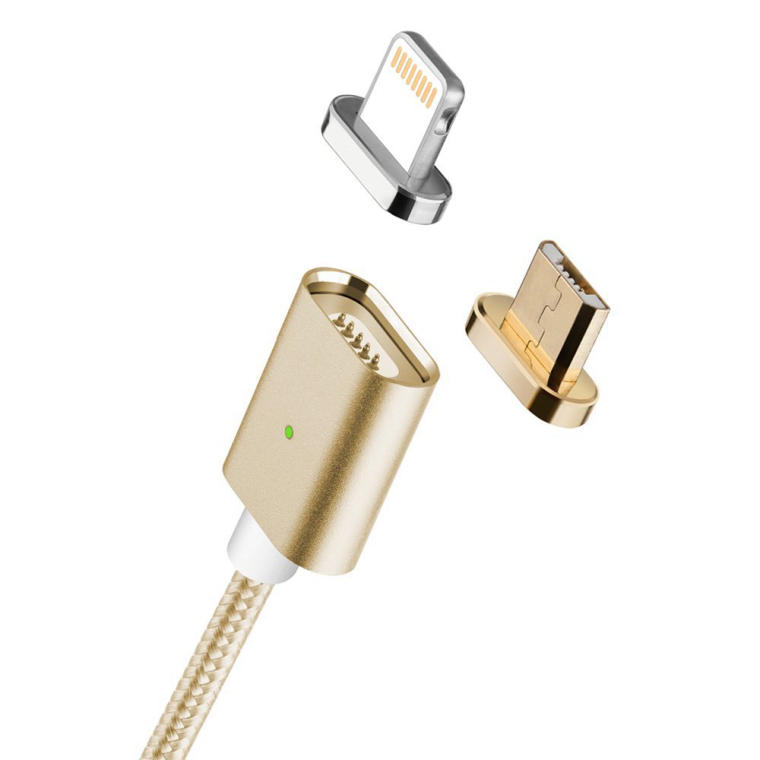
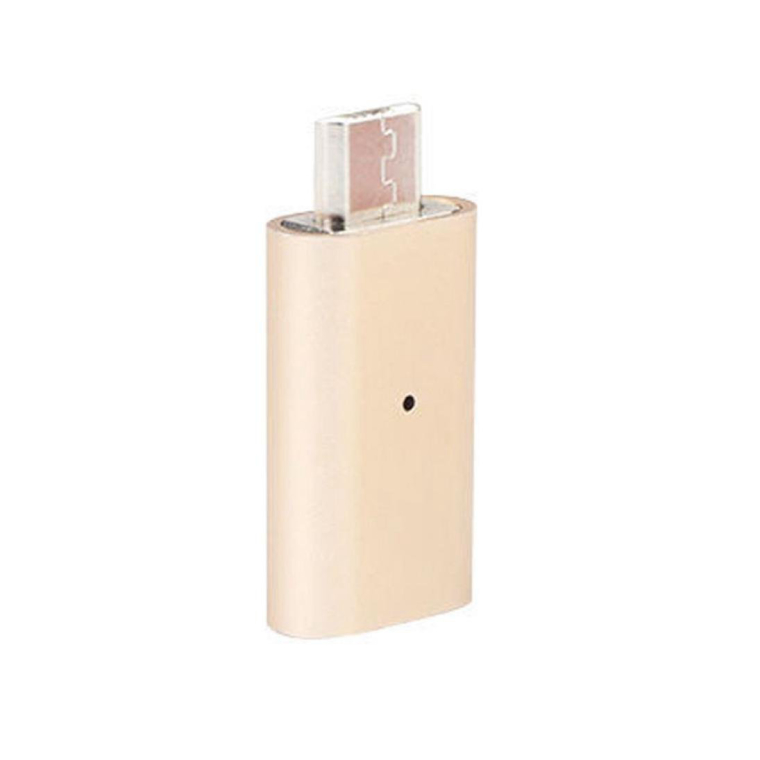
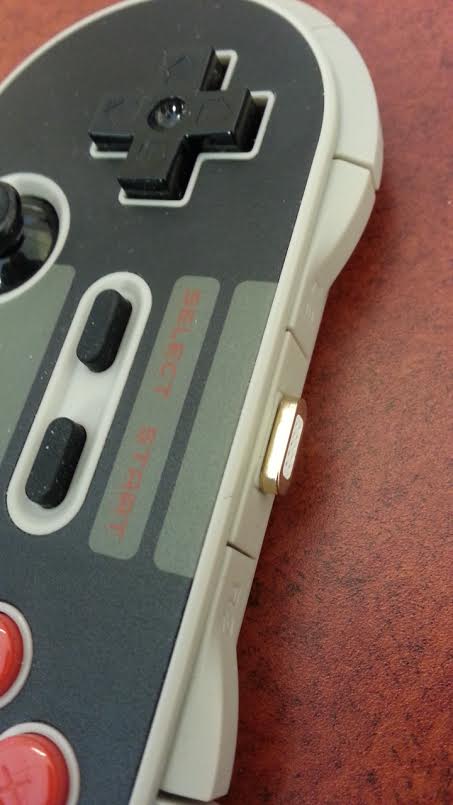
It is awesome that the 8Bitdo controllers fit so perfectly. I wonder do they fit just as well if you rotate them 180 with the charging port pointed down? If so perhaps you might consider using a magnetic micro usb charging cord or adapter like one of these?
or
Having the charging connection situated in the cradles so the remotes can be more easily charged. Plus the gold color would accent the famicom really well.
I've been using them on my 8Bitdo controllers and they fit/work really well:
-
@obsidianspider said in Famicom (not Mini) build (WIP):
@FlyingTomahawk I've not seen a Famicom in person, but they don't look that small inside.
I'm trying to map components out: You want
- A Pi Zero (possibly Pi Zero W) inside
- on the back you want full-size HDMI and a power in
- Where the controllers used to come out you want Micro USB cables to charge the controllers.
Am I missing anything? Any regular USB ports? On the back? In front where the 15-pin connector used to be?
I'll try using these dimensions found online to mock something up with GIMP
@obsidianspider Do these help grabbed them quickly
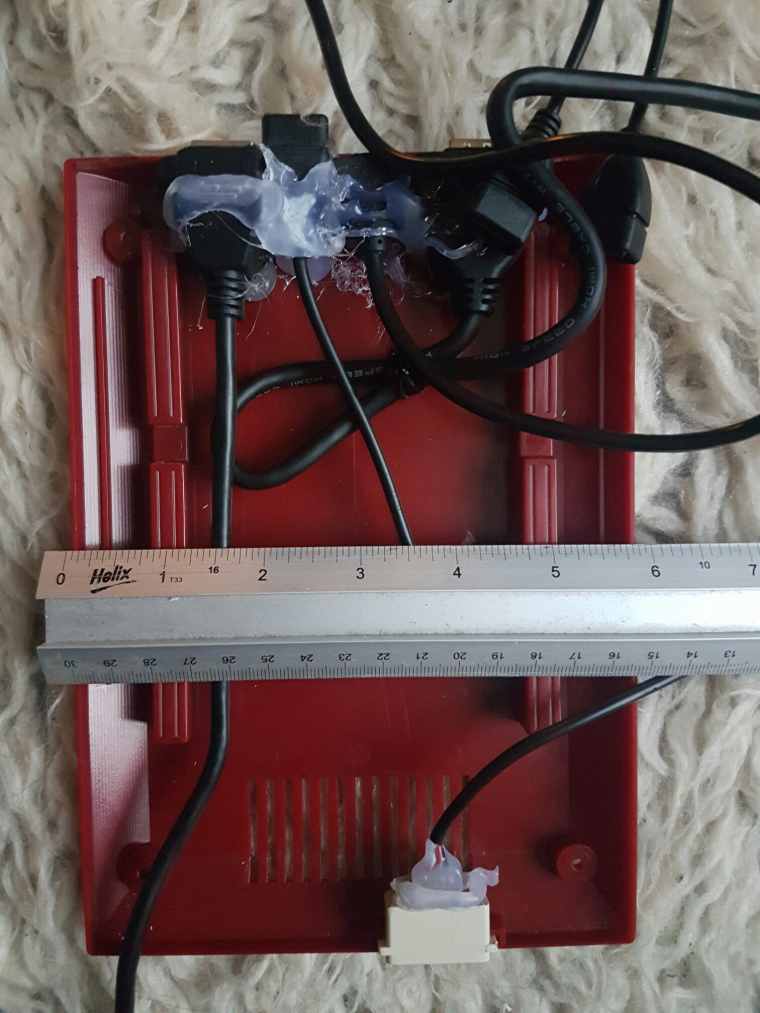
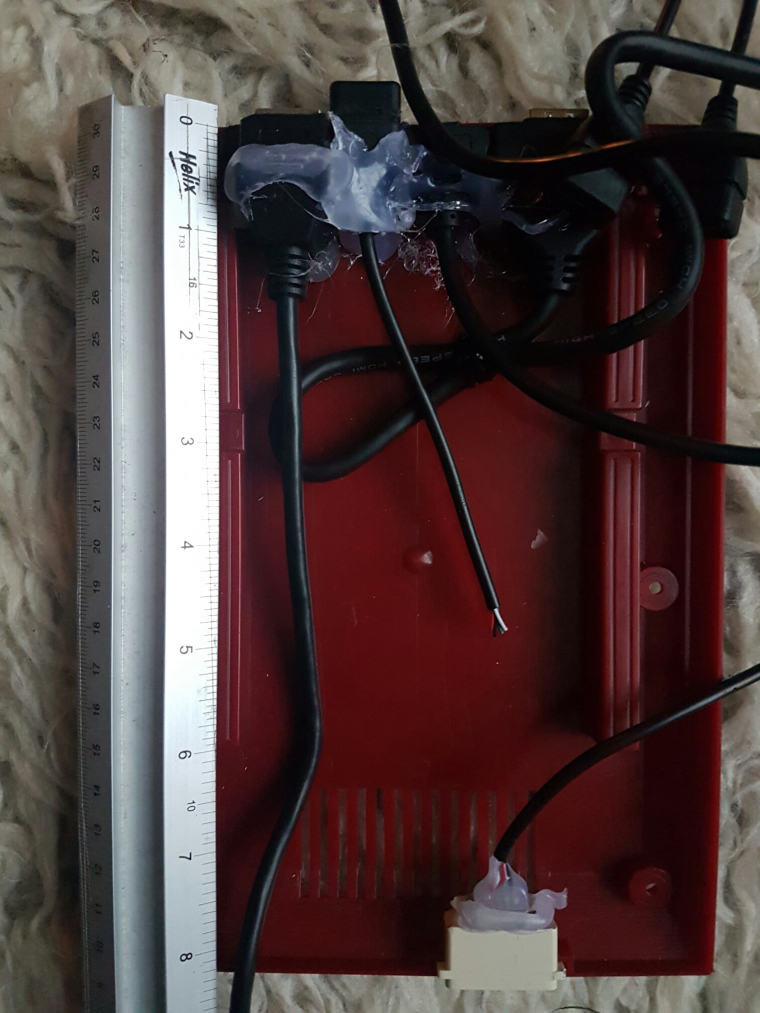
-
@MadRikXIV Wow! Those really do! Thanks!
-
@FlyingTomahawk how's the bleach working?
-
Morning!
Nothing new. 2.5 days and counting....
Maybe it's just me or maybe I stared at it too long but I think it got a tiny bit whiter.
I expect to see clear results after 5-6 days though.
Some keep the stuff for almost 1 month in there. -
@FlyingTomahawk keep it in there as long as you like. I am now curious about how well it will work.
-
Thanks for your patience.
Me too, looking forward to the final result.
If that works I'll get me a pub-yellow SNES for $3-4 bucks, bleach it and put my second Pi Zero in there. -
Guys hold on to something.
Remember the co-worker of mine which is the ultimate Hard-off guide? Well he knows that I am looking for Famicoms. This is the picture he send me.
Yes! 4 Famicoms coming my way! More than enough for builds or scientific purposes.
He bought all 4 em. -
@FlyingTomahawk you really are going to make a sofa out of Famicoms…
They're all quite "pub yellow", I hope they were cheap.
-
Yup, cheap. They're junk.
You don't like pub-yellow? It's part of their history. :-))
If the current bleach experiment works I'll have 4 "white" Famicoms. ;-) -
@FlyingTomahawk pub yellow may be for some, but not me. I'm very eager to see how the bleach experiment works out.
-
3rd day.
Did it get any better? You guys tell me.

Here one the first picture.

I know the light is different so hard to really tell.
I would have to take it out or take it to the exact same place and re take the picture.
But I think the pub-yellow has faded a bit, right? -
@FlyingTomahawk It looks whiter to me. How are the stickers and red plastic holding up?
-
They look good thus far.
Red plastics seem to be unaffected by it.
The red Famicom logo on the front also looks undamaged or same as it was at the very beginning.
Let's see how that looks after 1 week.
Worst case, stickers I can print and reapply. -
Definitely working. I'm going to do the same with my brown nes case ; )
Contributions to the project are always appreciated, so if you would like to support us with a donation you can do so here.
Hosting provided by Mythic-Beasts. See the Hosting Information page for more information.
