Retroflag NESPi Case - Soft Power & Reset Hack
-
@md500_driver
as @Iggy said, it sounds like ytou did not fully cut the traces on the power /reset switch PCB. I saw someone else have the same issue and he did not fully cut the traces. -
-
One other quick question. There has been talk of ES not saving metadata unless you shutdown via the ES scripts. In the case of nespi.py, it looks like you are calling shutdown. Does this cause problems with the metadata?
Thanks
-
@md500_driver Not if you use @meleu shutdown service.
https://retropie.org.uk/forum/post/107139 -
Thanks. I followed that to a T and yet I still lose favorites and recently played :-(
-
@yahmez I did it again from scratch and there in front of me there was my mistake It works so good Thanks and i appreciate your time on doing this and sharing it
-
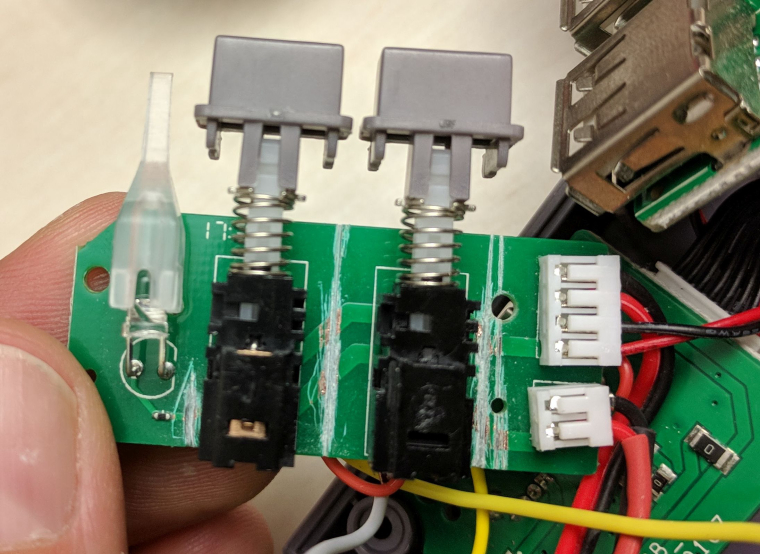
Why does the reset and power switch have three rows of leads? for the power you connect to all three and on reset just the middle and bottom. Do you know the pinout for these switches? for the original reset mod the guy actually solders the top to middle lead on the reset switch.
@cyperghost @Yahmez - either of you know?
-
@cyperghost:
Sorry, if that is a "noob question" but do I have just to follow the instructions of meleu and create the killes.sh and killes.service files "beside" the script of yahmez (leaving the script of yahmez "untouched") or do I have to modify the script of yahmez, too (and if yes in which way)?Regards!
-
@snarc No....
The shutdown service is intended to work without any modification to the shutdown/button scripts. That's the big advantage here ...Of course you can modify the python script to call a specific shutdown script. That would also work.
-
THX, tried it out and it works perfect! YES! :D
-
@cyperghost any chance this will be rolled into an update? I am reluctant to add a service that might conflict with future features. Why does the current shutdown not save the meta data.
-
@foldedpencil No this won't be integrated. This shutdown issues are not origin from Emulations Station or RetroPie themselves.
It's rather a problem of the external hardware like the Mausberry, ATXRaspi, Powerblock.....And still there is an issue with the shutdown script itself as it doesn't decide of a Reboot or a shutdown if you want to perform a shutdown triggered by an GPIO together with a mausberry power switch.
The script is really the best in use here but has one or two very small caveeats ;)
-
@yahmez I got it all setup last night. Works great, thank you so much for posting this! I missed one wire from step six because I had a resistor and I skipped the entire step, rather than just the part about using the resistor on the board. I did struggle with the soldering since I don't have a "helping hands" or any good way to keep the parts together when soldering. Any tips for future projects, or do I just need to order a set of helping hands?
-
@foldedpencil You are quite welcome. I am glad you got it going! As far as helping hands, I have a set but seldom use them. For me personally, it's usually easier to hold parts in place by hand although I will admit, I have calloused fingers and don't tend to get burnt easily. If you do get a set, avoid the ones that use wires as the 'arms'. They tend to have a memory to the wire and will spring out of shape easily. Look for the ones with solid metal arms and wing nuts at the joints for more precision when positioning.
-
@yahmez Thanks again! I don't mind the heat, I just don't seem to have enough hands to hold the components, the iron, and apply the solder. I feel bad detracting from the thread by asking for soldering advice. Maybe I just need to watch some more youtube videos.
-
@foldedpencil Nah, you're fine. One thing I do is unroll a short length of solder so it's sticking up and hold the board in one hand and the iron the other. Then I can heat the component and board and move them up to the solder when hot. Describing it makes me feel like maybe I'm a weirdo though lol.
-
@Yahmez - Thank you so much for putting together this wonderful tutorial, it was extremely helpful. I followed your instructions to the letter and was able to complete this hack successfully! There is one change that should be made to the PDF instructions. Since I followed your instructions exactly, I ordered the exact part numbers from Arrow. Please note, on the parts line item that reads "(3) 6” [150mm] long female dupont jumper wire" <~~ the quantity should be one, not three as this particular part number includes (20) jumper wires. I realized this when ordering, so I ordered quantity one and received a pack of 20 jumper wires from Arrow -- so I can confirm.
To all the soldering noobs out there thinking about doing this hack -- this was my first time soldering. After watching a few youtube videos on soldering techniques and taking my time following the directions exactly, I was able to pull this off correctly on my first boot-up. Take your time, order the right tools and you should be fine (a "helping hand" really was handy).
-
Hello everyone
Thank you Yahmez for the great guide and the effort you put into it.
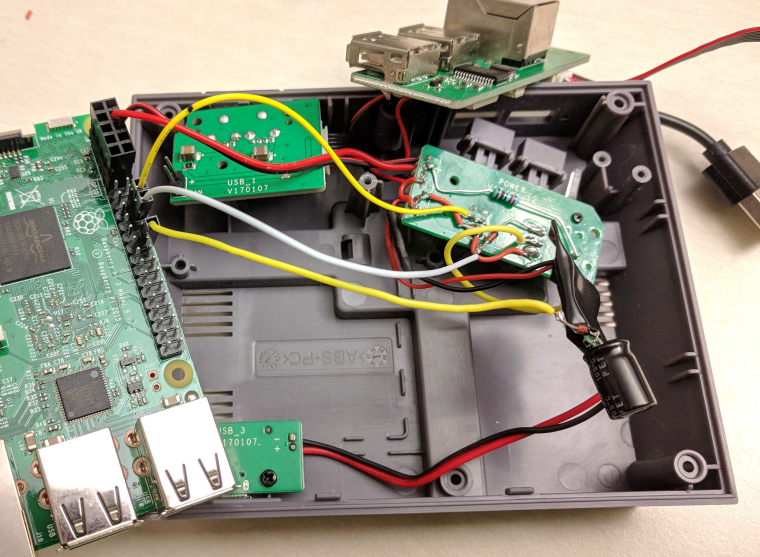
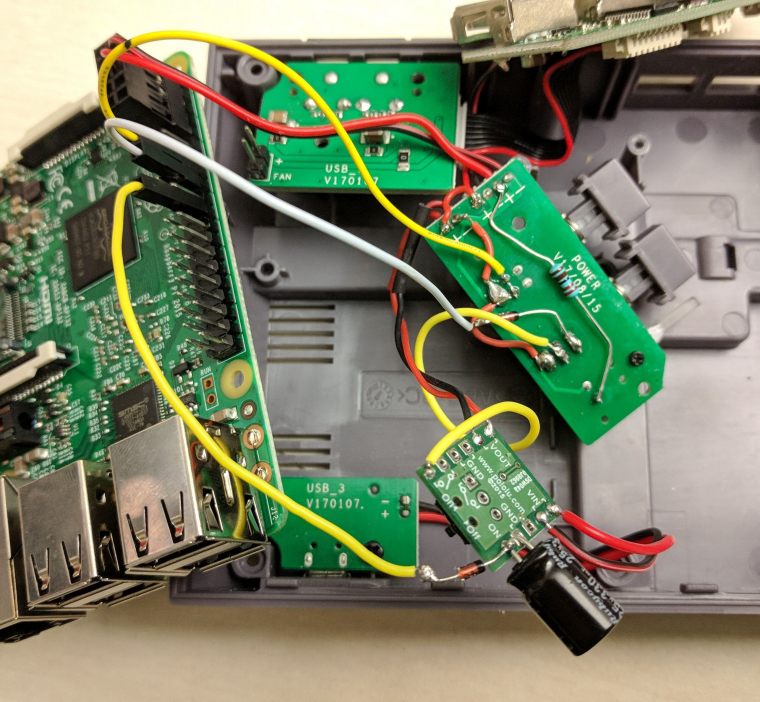
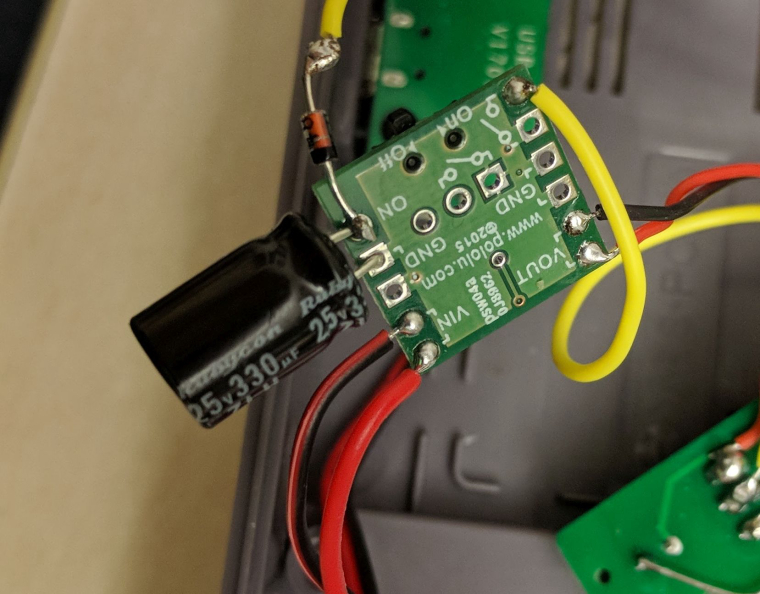
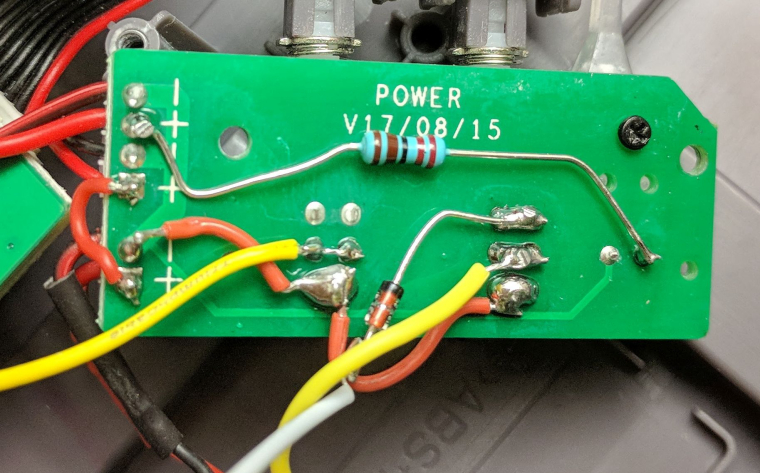
I built the thing yesterday and sadly it didn't start. The RPi didn't get any power at all.I followed your instructions exactly, apart from using another capacitor that I had lying around. I used one rated for 330uF 25V. Could this be the reason or do I have to start troubleshooting?
-
@schnautz Would you be able to take picture of all your solder connections, etc? The sizing of the cap is fine although you need to observe polarity when soldering on the mosfet board.
-
@iggy Thanks for your swift reply.
I checked the polarity of the capacitor, but thanks for the tip.
I realize my severed connections look pretty messy. But for quite some time they were still connected when I checked them for continuity.
Contributions to the project are always appreciated, so if you would like to support us with a donation you can do so here.
Hosting provided by Mythic-Beasts. See the Hosting Information page for more information.