Newest Clear Acrylic Build...
-
Just wrapping up another build.. This one I wanted to make a bit bigger box to house a trackball and higher quality buttons.
I think it turned out pretty well.
Cabinet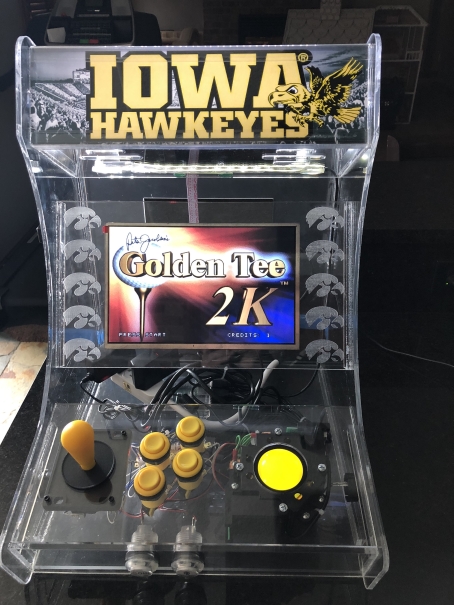
-
@dunginhawk very tidy. I couldn't do that myself, the inside of my projects tend to be messier than I intend and the case hides those imperfections for me.
-
@dunginhawk beautiful cab!
-
thank you.. its been a bit of a process to redesign the entire thing to fit the different sized monitor. the trickiest thing is to make the mount for it :)
-
@dunginhawk Yeah, another beauty! The open/airy design is nice, espcially the lighting, etched imagery, and as mentioned, clean clean clean.
A flush mounted trackball is no small feat. What are you using? Backlit besides? This is very polished. Well done.
-
the open airy design on this one was an error :) the display is mounted too far forward (first iteration) and doesnt allow for a 1/8" acrylic cover, which my next one does.. I slide the display back and put that in for the 2nd round. It just keeps the display cleaner. However its optional if you wanna use it or not.
On the new one I also etched in to the side panels which looks cool. Im considering etching the button layout on the side or under/side of each button as well. I think on the side, with a graphical representation may be enough, and kinda cool.
The backlit trackball is interesting. The company (twisted quarter) that sells me the trackballs sells them illuminated, with a light, but it needs to be powered. Well, i hate wiring etc, so I just used a 3$ LED strip, cut it down to everything except 1 LED and glued it in place. works like a charm. That can easily be powered by the PI. In fact I run a usb splitter and run the top led strip (marquee) on the same PI usb port. Not much draw there.
The flush mount isnt 100% flush. It is sunk in a little bit, but doesnt affect gameplay at all. THe screws however are sunk as well. So your hands wont get caught brushing across. That was achieved by just etching with the laser halfway through the acrylic, so the screws set down in there.
Every time I make a new one of these I make changes. Ive already made a couple more changes since my latest (which isnt even this one).
Id love to sell these things, but 2 things hold me back.
- Cost. You can get a wooden kit so much cheaper (well not so much, but cheaper) than this
- Labor. The time it takes me to weld the cabinet together is pretty crazy. Its not easy :)
thanks for the compliments.
-
@dunginhawk Thanks for all of that detail. I have done a little bit of acrylic welding and I always manage to goof up a spot. Are you using the needle application of solvent method (capillary action) or are you using a thicker product? I have only used the thin solvent and I suck at it. Seems like the thicker product would be more forgiving, but maybe it does not look as nice.
-
im using the thin liquid . its not perfect... there are bubbles here and there, but a little imperfection here and there is fine... not a big deal :) i could try the thicker stuff , probably should.
Contributions to the project are always appreciated, so if you would like to support us with a donation you can do so here.
Hosting provided by Mythic-Beasts. See the Hosting Information page for more information.