Overclocking discussion
-
@Alturis I have mine at 1500 MHz right now, but i can push it a bit further. I'm, however, keeping my over volt locked at 2 to avoid producing too much heat and consuming more power. Like others, I have no proof, but I'm not sure why anyone would make it up really.
It seems quite feasible that a good chip could get close to 1.6 GHz with a little luck and proper cooling.I'm currently using the Flirc gen 2 and can't make it throttle under any conditions, so it's providing plenty of cooling.
-
@alturis said in Overclocking discussion:
Well at 35 bucks for an entirely new Pi3B+ I am not overly concerned. ;)
Sorry to clarify I meant actual PC video cards like a GTX 980 Ti that gets you into that upper midrange around $400 or so for the video card only. I figure a quick bake is worth a few minutes. The TV was completely dead and it was a known issue with LG TV's so I ripped it apart pulled the board and sure enough that was the issue. Also a standoff was missing so I went to the local hardware store and bough a threaded nylon standoff, cut it down to size and it set the board rock solid. The TV works well again. Surprisingly (or not) poor manufacturing techniques are more and more common. My main stay has always been PC computers that I build from scratch. It's nice as it allows you to choose the exact parts you want.
I'm currently using the Flirc gen 2 and can't make it throttle under any conditions, so it's providing plenty of cooling.
@dirthurts So you have your
overvoltageset to 2 and your able to get yourarm_freqto 1500? What are your other settings? Have you modified the Flirc 2 case at all? I have a Flirc 2 here next to me and under load I was in the 70s Celcius with and ambient of about 75F/24C and my arm was only at 1260. It did not cool well at all. You must be in that 5% on top of the bell curve of production variance. I have 4 Pi 3's and all of them are average. Three from Element 14 and one from Adafruit. -
@riverstorm I think he is referring to a pi 3b+
-
I posted this in the other thread but wanted to post it here as well for posterity (nobody will see it over there):
I have found that quake 3 is a good resource for testing overclocks. I run all the automated tests that are recommended first like memtester and stress and if I get a passing grade then I test with quake 3 . Often times clock speeds that pass the automated tests fail miserably when put to a real world test like quake 3. Quake 3 works the GPU/CPU and RAM pretty hard. I found it to be more stressful than the individual tests and in most cases if your overclock is unstable the game will crash within a few minutes. However to verify my overclocks stability I will usually let the game run in first person spectator mode for 4-5 hrs at least. I have had quake 3 freeze after 1-2 hours if the overclock is unstable. So thorough testing is definitely needed when overclocking. I doubt most people test thoroughly enough and are running around with unstable overclocks.
the freeware version of quake 3 should work fine. I believe it's listed as quake3 under optional packages. Easiest way to test is to load a skirmish, load a bunch of bots (8 seems a good number). Set kill count and time limit to 0. Once you get into the game press ~ key to open the console. Type /team spectator
Then press enter. Press ~ again to close the console. You are now spectating. Press the fire button and it will place you in a first person view of one of the bots. Now the game will run until you stop it or it crashes. Make sure you have good cooling because it will (as you noted) get your pi very warm. I am using a kintaro 9k case that has an awesome heatsink. For me the temp will climb to 69C and hover there indefinitely. Before i had that case I had a small heatsink and my pi would overheat within about 15 mins of quake 3.
-
@quicksilver said in Overclocking discussion:
iverstorm I think he is referring to a pi 3b+
Ah, ok. So the 3b+ does fit in the Flirc 2? I was wondering if the IHS (making a bit higher) would fit under the heatsink column in the case.
Thanks for the post with the Q3 instructions. Having multiple bots seemed key. With 1 I had no issues so I bumped it up to the recommended 8 and there's so much graphical activity on the screen I see why it's taxing all components. It's been years since I played Q3 I swear it was slower back then, must be getting old.
-
@riverstorm I think I heard that a pi 3b+ will fit in a flirc 2 case, although I have no personal experience with it.
-
Just watched a video ETA Prime put out, looks like he got his Pi 3b+ to run Conker's Bad Fur Day . Looks like a very playable framerate too. His overclock settings are a bit wonky though.
-
@quicksilver said in Overclocking discussion:
Just watched a video ETA Prime put out, looks like he got his Pi 3b+ to run Conker's Bad Fur Day .
I am not quite as up on consoles games. I do have the classics mainly. One of the challenges for me on the N64 is trying to get the d-pad (hat) working. I tried using lr-mupen64plus. Everything seems to work fine except making changes for saving/loading. For incrementing/deincrementing my save slot I can press hotkey+right (or left) which is defined in all/retroarch.cfg and that works fine. To save/load I have hotkey+up (or down) defined in all/retroarch.cfg but that doesn't work. What works is defined in the mupen64plus.cfg.
It has in that config file "J0B8/B4" which works fine but I wanted to change it to "J0B8H0V4". Looking at the docs on mupen64plus. It's Joystick 0 button 8+button 4. So that longer string with the H is Joystick 0 button 8+hat 0 direction down (V is value and 4 is down). It's pretty straight forward but the emulator doesn't seem to recognize the H variable defined on the mupen64 docs page.
On topic before doing any testing I have the Cana Kit power supply it's black (US plug) but on their site I see they have a white one (universal plug) that says official are they the same? I can't really find the answer/difference between the two but they both show as certified working with all Pi versions.
-
@riverstorm What controller are you using?
I have the canakit black plug too. I would assume its the same as the white one, if the specs are the same.
-
It looks to be the same specs https://www.canakit.com/official-raspberry-pi-power-supply.html
-
@quicksilver said in Overclocking discussion:
What controller are you using?
Missed that they are XBOX 360s with wireless dongle. I have wired also.
-
@riverstorm In reference to your issue with the dpad and N64, I'm not sure that lr-mupen64 looks at the mupen64 config file your referred to. I'm fairly certain that config only influences settings for stand-alone mupen64.
-
@quicksilver said in Overclocking discussion:
@riverstorm In reference to your issue with the dpad and N64, I'm not sure that lr-mupen64 looks at the mupen64 config file your referred to. I'm fairly certain that config only influences settings for stand-alone mupen64.
That's the strange thing but I am not real familiar with the N64 emulator as there's a lot going on it seems. Here's what is in my
/opt/retropie/configs/all/retroarch.cfg# Saves state. input_save_state = "up" # Loads state. input_load_state = "down" # State slots. With slot set to 0, save state name is *.state (or whatever defined on commandline). # When slot is != 0, path will be $path%d, where %d is slot number. input_state_slot_increase = "right" input_state_slot_decrease = "left"Here's what's in my
/opt/retropie/configs/n64/mupen64plus.cfg# Joystick event string for saving the emulator state Joy Mapping Save State = "J0B8/B4" # Joystick event string for loading the emulator state Joy Mapping Load State = "J0B8/B5" # Joystick event string for advancing the save state slot Joy Mapping Increment Slot = ""I can increment my save slot with select+dpad right or left as shown in retroarch.cfg but I can not save with select+dpad up or down.
What I can do is save with select+button 4 and 5 (the shoulder buttons). If I remove the J0B8/B4 and J0B8/B5 I can't save.
It's like retroarch is working for incrementing save slot 0, 1, 2, etc. but using the mupen64plus.cfg for save games.
I hope that makes sense.
-
@riverstorm Which emulator specifically are your trying get this to work in? Lr-mupen64 or stand alone mupen64? Because each of those configs are for completely separate emulators. Are you testing using the same game and emulator each time?
-
@quicksilver said in Overclocking discussion:
Are you testing using the same game and emulator each time?
I know that's the weird part and I thought maybe I am missing something obvious because there's a lot in N64 I just don't know. I am using lr-mupen64plus. I set it as the default when booting a game and pressing any key for the Quick selection menu. I was hoping to use the unified input from Retroarch. The game is Castlevania 64 and it yields consistent results every time.
-
@riverstorm Ok so the correct settings for lr-mupen64 should be found in /opt/retropie/configs/all/retroarch.cfg
settings in /opt/retropie/configs/n64/mupen64plus.cfg only applies to the standalone mupen64.
When I get home I will mess with this a bit and see if I can get it working. So if I understand correctly you want to make hotkey+up or down on the dpad save and load state?
-
@quicksilver said in Overclocking discussion:
So if I understand correctly you want to make hotkey+up or down on the dpad save and load state?
Yes that's exactly it. Here's the docs on the Mupen64Plus Core Parameters settings which explains it well just in case you don't have it. It explains it well. Like you said though it shouldn't be needed and only a quick modify to all/retroarch.cfg should work. The settings I have a pasted above directly from my retroarch.cfg and mupen64plus.cfg.
A quick note I did test stable with a stock image and only Q3 loaded using a Cana Kit power supply and a SanDisk SD Card. You recommend next overvolting to 6 and then what's a good starting arm_freq? It does 1200 at stock. I use a small program with 'watch' in a putty window to measure temps.
-
@riverstorm said in Overclocking discussion:
Yes that's exactly it. Here's the docs on the Mupen64Plus Core Parameters settings which explains it well just in case you don't have it. It explains it well. Like you said though it shouldn't be needed and only a quick modify to all/retroarch.cfg should work. The settings I have a pasted above directly from my retroarch.cfg and mupen64plus.cfg.
When you change the settings in the all/retroarch.cfg, do your changes work in other libretro emulators (like for snes, sega genesis etc.)? Is it only lr-mupen64 that the changes dont work?
A quick note I did test stable with a stock image and only Q3 loaded using a Cana Kit power supply and a SanDisk SD Card. You recommend next overvolting to 6 and then what's a good starting arm_freq? It does 1200 at stock. I use a small program with 'watch' in a putty window to measure temps.
I would try 1300mhz first. It seems most pi3s are stable at that speed. If it crashes after a few hours then you know yours cant hit 1300. Dont change anything else though otherwise you will never figure out what setting is causing the crashing. Which emulators are you trying to improve?
-
@quicksilver said in Overclocking discussion:
Is it only lr-mupen64 that the changes dont work?
Thanks for asking I just tested and save/load doesn't work. Shoot something else is wrong. I did a rebuild from scratch image 4.3 and updated RetroPie to 4.1.6, updated Retroarch (current from yesterday), Emulationstation (2.7.5RP) & lr-mame2003. I left everything else the same. I am sure it was working prior. I will test at lunch with an old build I have. My test emulators are lr-mame2003 & lr-fbalpha running under the Arcade folder. Save doesn't seem to be working. I have no idea what to look at but that's copied and pasted directory from my all/retorarch.cfg. The arcade/retroarch.cfg is blank except for 2 shader lines.
# Saves state.
input_save_state = "up"
# Loads state.
input_load_state = "down"
EDIT: Player controls from all/retroarch.cfg
input_player1_up = "up" input_player1_down = "down" -
@quicksilver I spent some time last weekend doing some overclock testing and came up with some interesting results. It took several hours of reboots through out the weekend but last Saturday afternoon I hit my magic numbers finally.
I had no crashes for about 9 to 10 hours straight. The frag count on all 8 characters (9 including my character which was zero frags ;) was around 2000 to 2200 each. They are surprisingly evenly matched. :)
It seems there's some wiggle room. If I lowered the sdram freq low enough I could get a bit more from the arm freq or vice versa but with Quake 3 there was no wiggle room on the gpu freq. Q3 beats the hell out of the GPU. It was somewhere between 500 to 525 but I haven't nailed down the exact number yet. It's not exact science but a lot of playing with high/low numbers, different voltages, etc. really changed things up.
Also of note I have a good quality HP 2.0A 5.3V power supply that tested perfect with Q3 for about 4 to 5 hours. It's uses a standard USB detachable cable on the power supply side.
Another interesting thing is I also tested a 10 foot/3 meter USB cable and it wasn't stable. Even at stock clocks I was getting low voltage warnings. The longer the cable the bigger the vdroop.
I used a Pi 3, Cana-Kit 2.5A power supply and G. Skill 64GB Class 10 micro SD card.
100% stable overclock settings running Quake 3:
# CPU Overclock
arm_freq=1325
over_voltage=6

# GPU Overclock
gpu_freq=500

# RAM Overclock
#over_voltage_sdram = 6
sdram_freq=550
sdram_schmoo=0x02000020
over_voltage_sdram_p=6
over_voltage_sdram_i=4
over_voltage_sdram_c=4

# SD Card Overclock
#dtparam=sd_overclock=100
After that I tested 3 cases on Sunday idle and under load. The standard open case (posted below), BIQU and Flirc 2. The BIQU and Flirc 2 are easy to look up online but I wanted to post the open case pics so you can see exactly which one. It has a fan and also heatsinks on the SoC, ethernet and underside memory chip.
The ambient was roughly 69F/20.6C. The "burn in" for idle and load were about 30 minutes each. Also I did not have original thermal tape for the Flirc 2 and used a 3M piece I had on hand. This is worth noting in case the original tape had potential to perform better.
Air is more resistant then metal so the open Pi case never really got hot due to the fan but does run slightly warmer under load then the BIQU case. I tried to read the temp of the BIQU case with an ear thermometer but it the read only 'HIGH' on the display and not the actual number.
I wish I had an IR infrared thermometer to read the actual temp. For all it's heat it was the coolest running case and the next day after the 9 to 10 hour burn in it was a full 2C cooler under load. My guess is the thermal grease was settled in and curing as the ambient was the same and in the same location.
You have to hit that sweet spot of not to much grease but enough as some of it oozes around the very thin columns of the BIQU case and covers more of the chip surface. Like a beveled edge up the column. I am not sure how to explain it but application is another topic entirely.
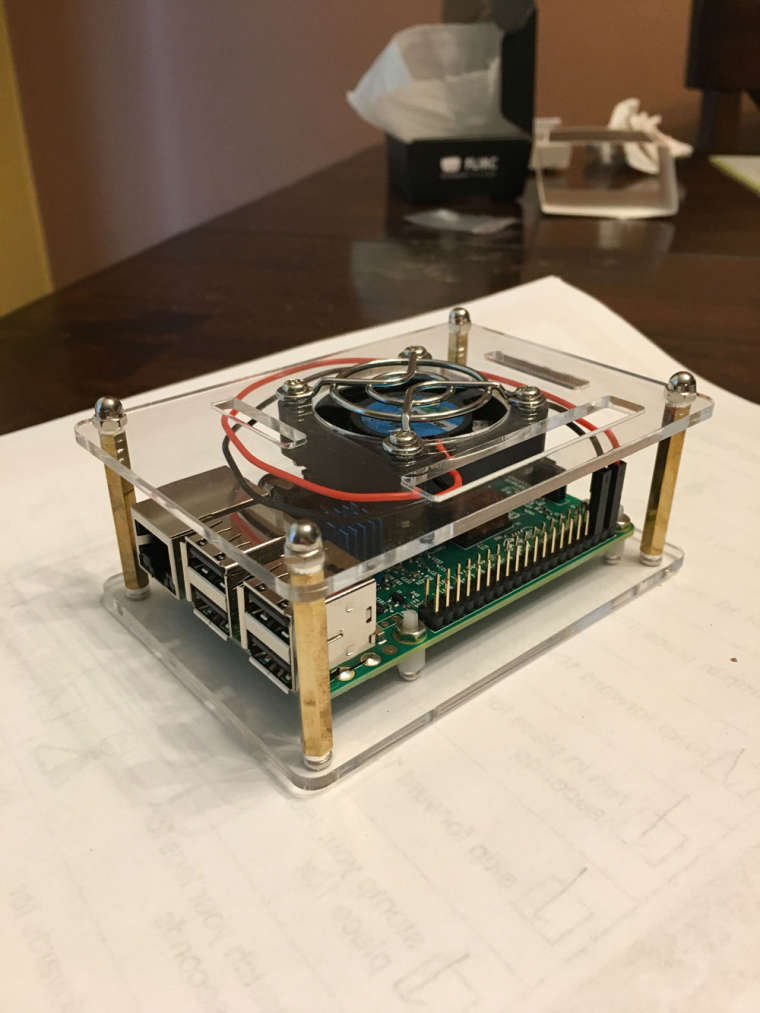
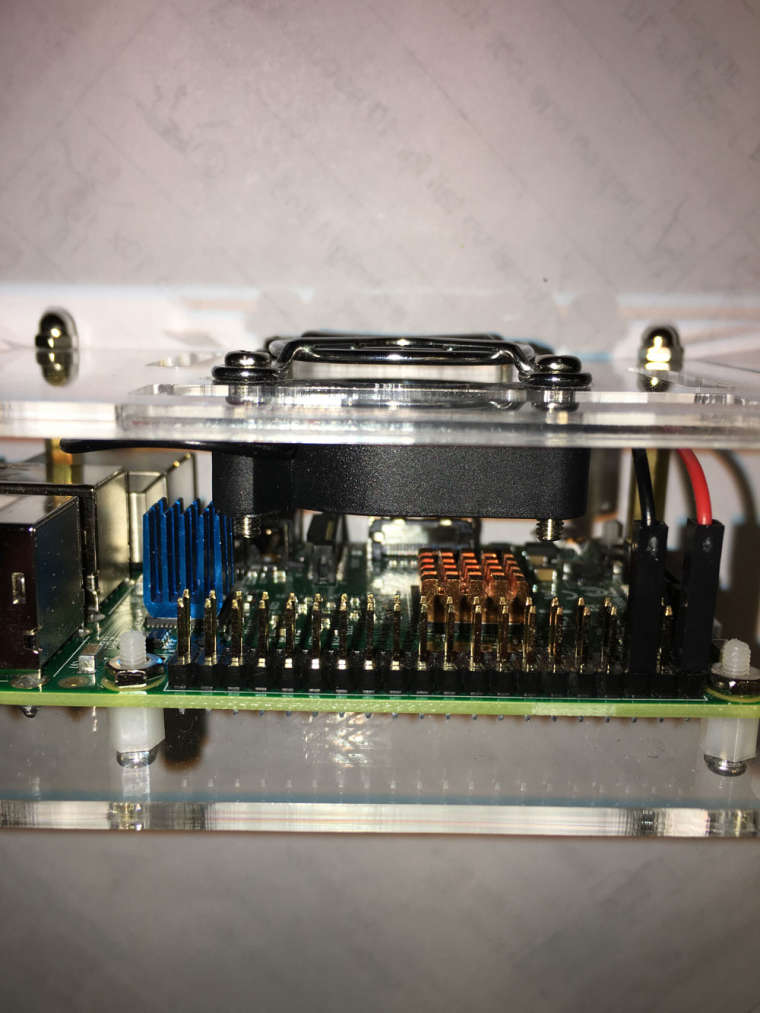
Idle was sitting at the Emulationstation selection screen.
Load was running Q3 with 8 players (9 total including my character). The main (first) map and selecting 1 of each character plus a few duplicates.BIQU Case:
- Idle - 37-38C
- Load - 62-63C
Open Case:
- Idle - 39-41C
- Load - 67-68C
Flirc 2 Case (tape):
- Idle - 45-46C
- Load - 80-82C
Flirc 2 Case (grease):
- Idle - 39-40C
- Load - 70-71C
Screwdriver:
- Idle - N/A (not tested)
- Load - 81-84C
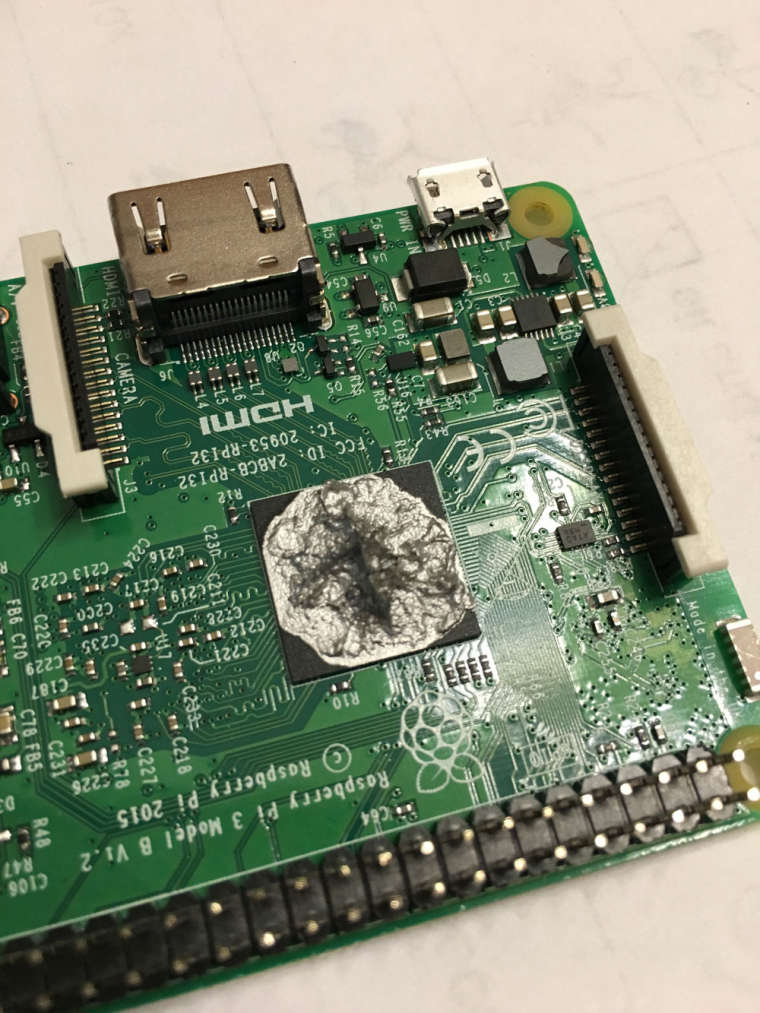
After that I decided to have a little fun and found some surprising results. What I did was remove the tape from the Flirc 2 and replaced it with thermal grease, a lot! It's the only way to bridge the monster gap between the column and SoC. I am sure the PC guys will have a coronary looking at the pic.
The numbers actually surprised me both idle and under load. A pic of how much grease I used is posted below. Both the Pi and case had equals amount but only the Pi is shown below. If you look close you can see where it heated up and ran to the edges of the chip. It's smooth around the edge of the pile of thermal grease.
Looking at the numbers I think there's a design flaw with the Flirc 2. The gap needs narrowed to utilize thinner tape or grease. It's idle temps with grease were as good as the BIQU and open case and a bit higher under load than the open case. It still performed the worst but way closer to the other two with grease vs. tape.
The other note on the Flirc 2 was I figured it would run a few degrees cooler with the top off and uncover the hollow heatsink column but surprisingly it was only about 1 maybe 2 degrees Celsius cooler that way.
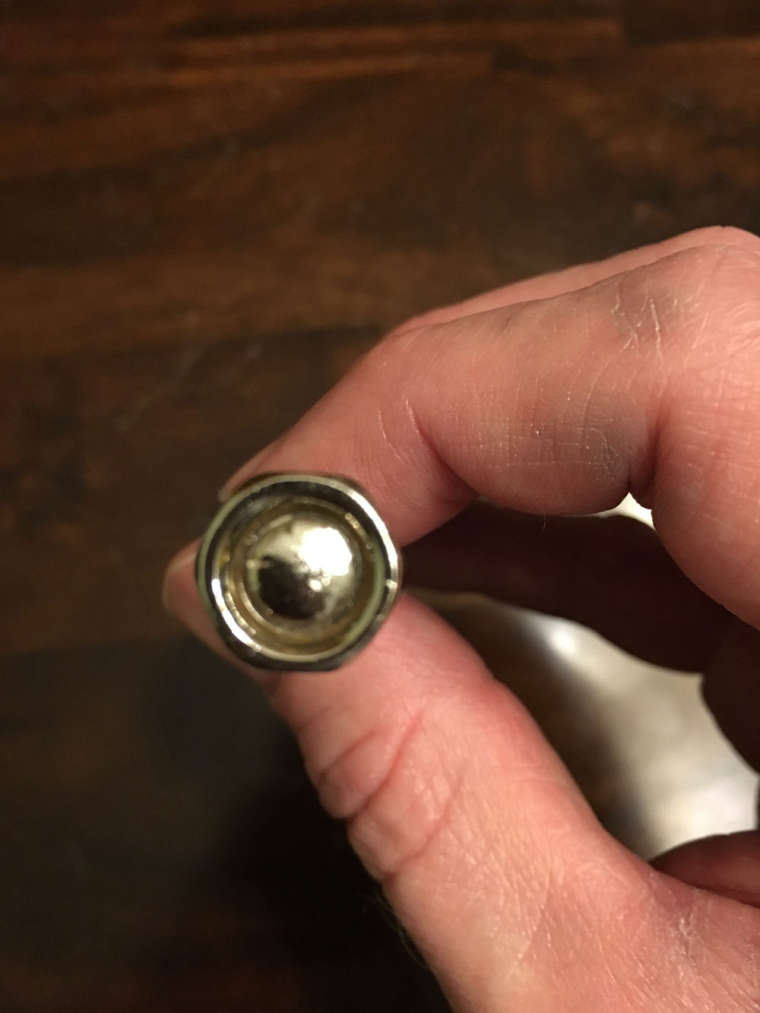
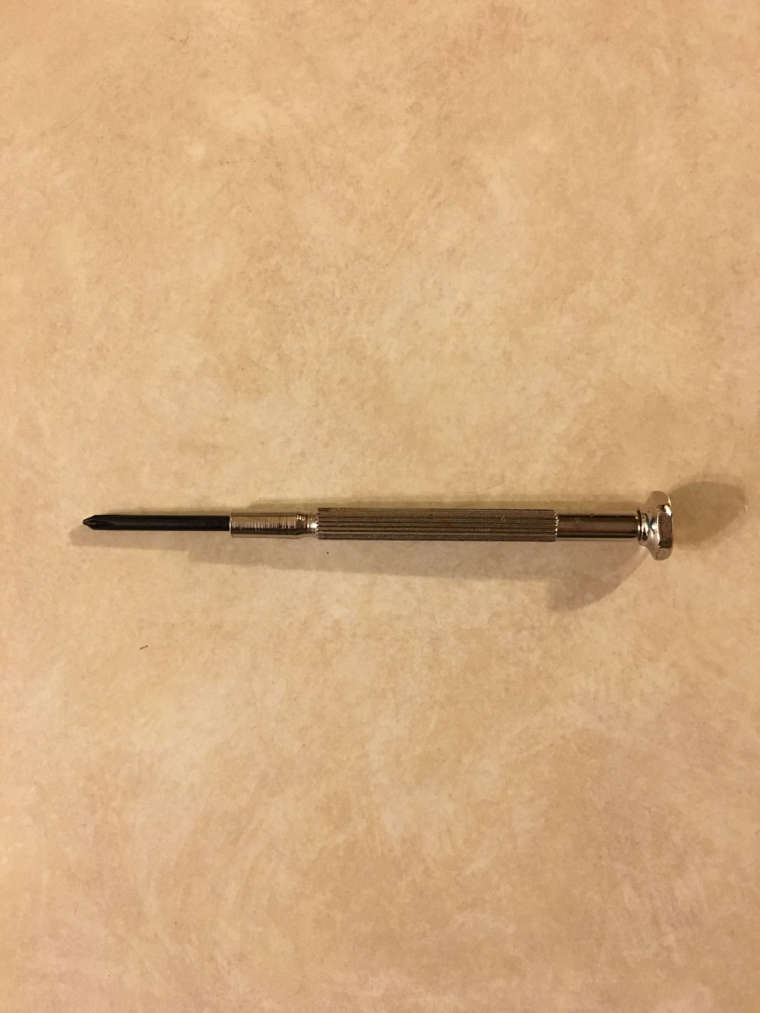
My final test was a completely open Pi, no case, no heatsinks and no fan. Just a screwdriver! Pictures of the scredriver are below. I wasn't sure if I would overheat and throttle in seconds but it turned out ok.
I only did the test for about 25 minutes just to see if I could pull off the Q3 test on a bare Pi and a screwdriver. All I did was hold the screwdriver end cap on the chip. I felt the heat slowly rise up the screwdriver and heat my hand up. As you can see from the pics the end of the screwdriver only makes partial contact around the edge and in the dead center. I think it would have run much cooler with a flatter screwdriver that has more direct contact on the chip.
I started the Q3 test under load and leveled off somewhere between 81-84C. It didn't overheat & downclock. Surprisingly the screwdriver does remove a lot of heat and you fingers in turn dissipate it from the screwdriver which allowed the Pi to run Q3 at very high temps. I think some grease, a flatter head, removing the chrome plating or all would have driven down well below the Flirc 2 with tape. Maybe even close to the top. I think the take away is the single most important thing is good contact with the SoC to dissipate the heat.
I will still use tape in certain scenarios but grease gets the nod on this one.
Of the 3 cases the BIQU performed the best but I prefer the look of the Flirc 2. The open case was the first one I owned and I don't know if there's much improvement. It's biggest drawback is it's loud which doesn't bother me except when it sits just right it vibrates and "rattles" but it's also the most affordable at around $10 US.
The Flirc 2 needs improvement, possible columns that contact the ethernet and memory chip. Also making them solid metal would help but it's a really nice looking case. It performed the worst and also was the most expensive at around $16 US.
The BIQU needs to improve the mounting holes/bracket so screws don't ground out on the bottom of the board. They could also widen the heatsink columns to cover more of the chip (it would run even cooler) and lastly add some external indicator lights would be great. With a few improvements it would be a perfect case and came around $12 US. It's cheap, cool and quiet.
Contributions to the project are always appreciated, so if you would like to support us with a donation you can do so here.
Hosting provided by Mythic-Beasts. See the Hosting Information page for more information.