• Recent
  • Tags
  • Popular
  • Home
  • Docs
  • Register
  • Login
RetroPie forum home
  • Recent
  • Tags
  • Popular
  • Home
  • Docs
  • Register
  • Login

My Upright Arcade Cabinet Build

Scheduled Pinned Locked Moved Projects and Themes
arcade cabinetretropie retrocabinet build
14 Posts 7 Posters 11.4k Views
Loading More Posts
  • Oldest to Newest
  • Newest to Oldest
  • Most Votes
Reply
  • Reply as topic
Log in to reply
This topic has been deleted. Only users with topic management privileges can see it.
  • U
    UP4IT
    last edited by 30 Apr 2017, 23:18

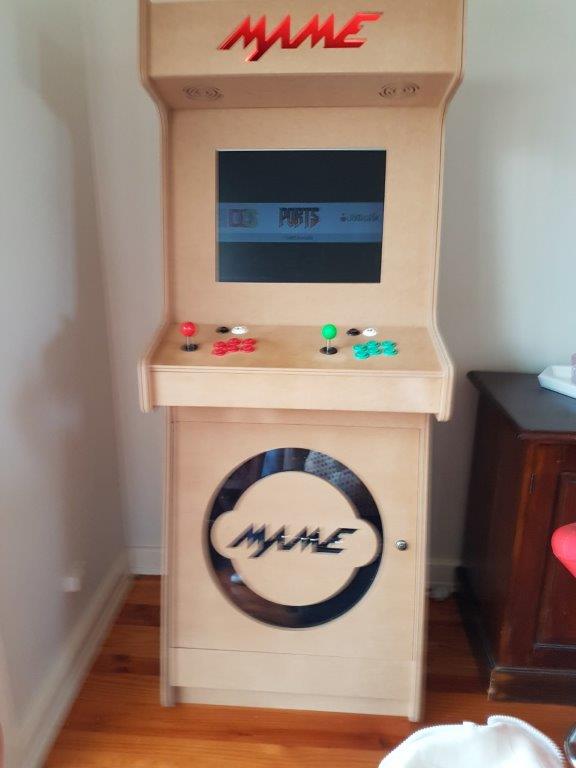
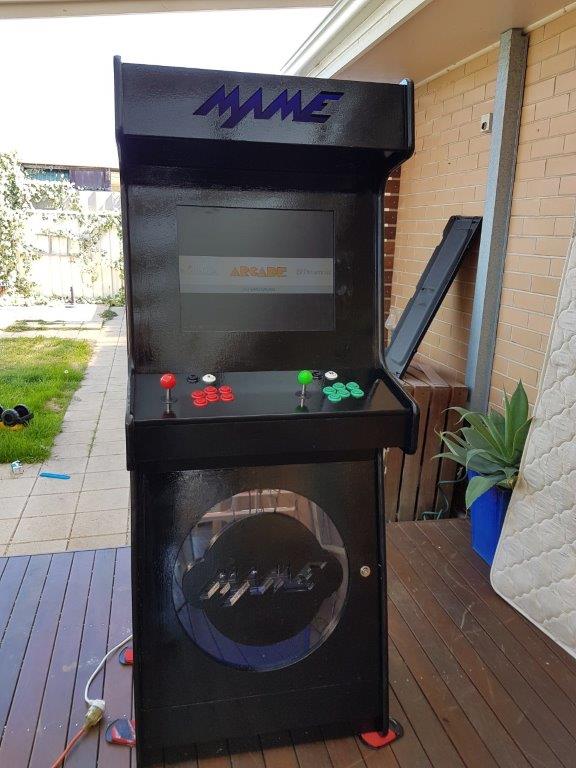
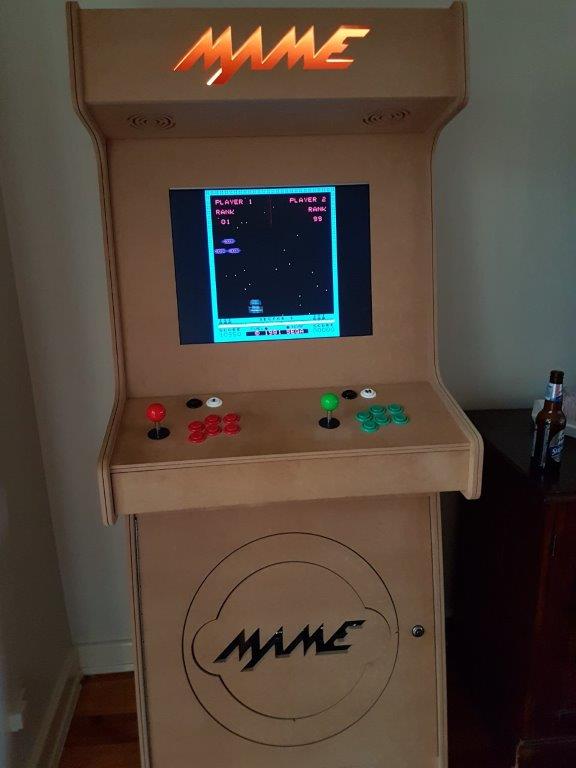
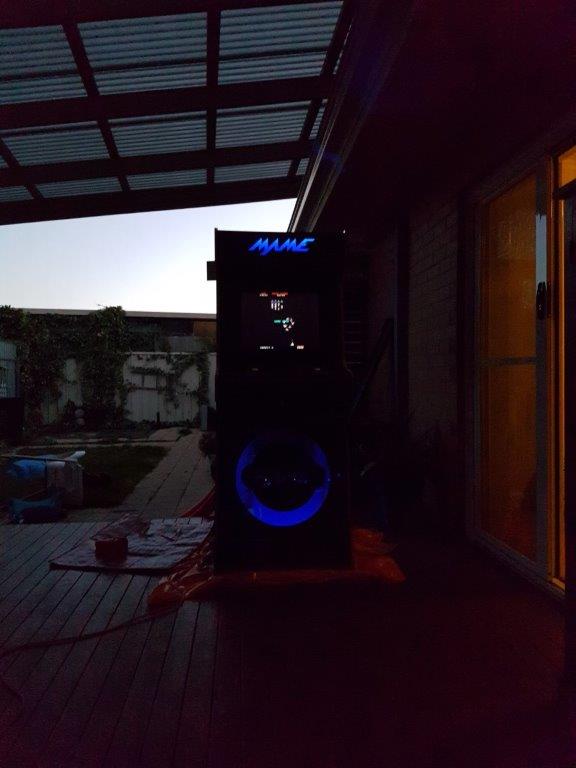
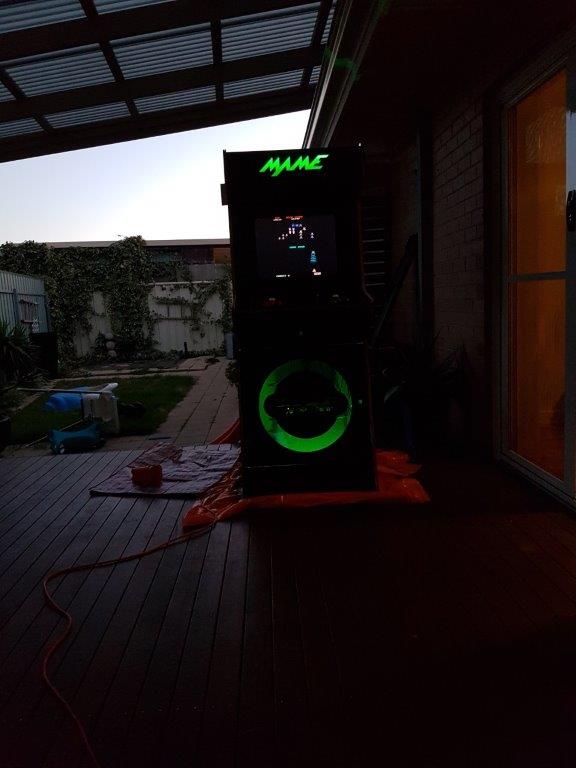
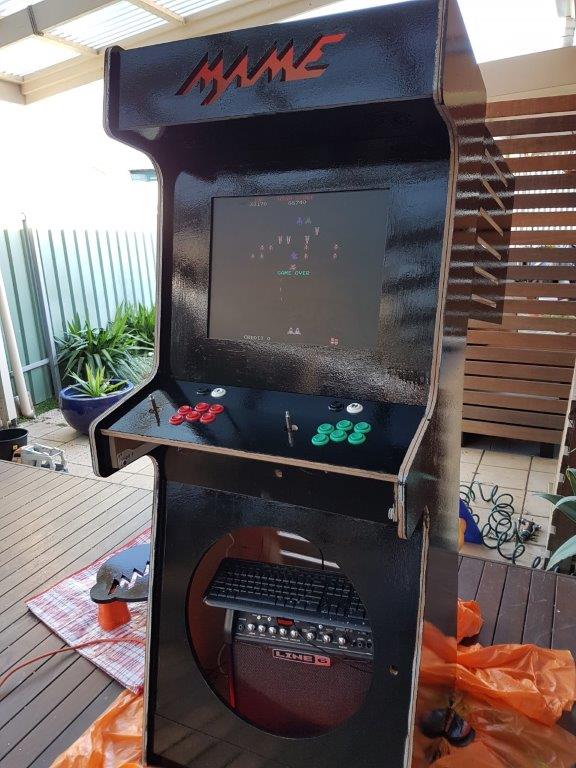
    It has probably taken 6-8 months to find the time! I still have to attach the blue vinyls to the front and tidy up around the monitor. Still, I am pretty pleased with it.
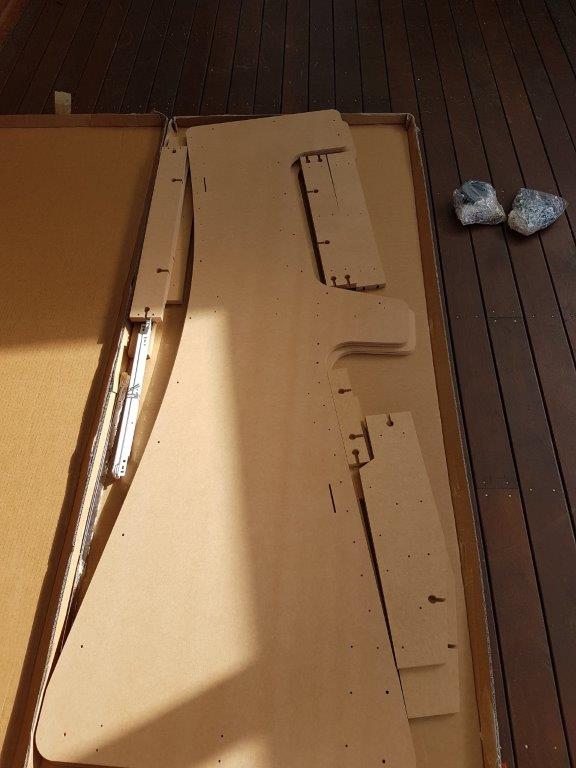
    0_1493594086706_20160927_203252.jpg
    0_1493594120018_20161002_121248.jpg
    0_1493594145333_20161026_123315.jpg
    0_1493594162767_20161101_121408.jpg
    0_1493594174276_20161102_134746.jpg
    0_1493594188563_20161103_160620.jpg
    0_1493594196809_20170312_165139.jpg
    0_1493594211563_20170312_165217.jpg
    0_1493594226933_20170312_165832.jpg

    M C M 3 Replies Last reply 1 May 2017, 01:14 Reply Quote 5
    • M
      mediamogul Global Moderator @UP4IT
      last edited by 1 May 2017, 01:14

      @UP4IT

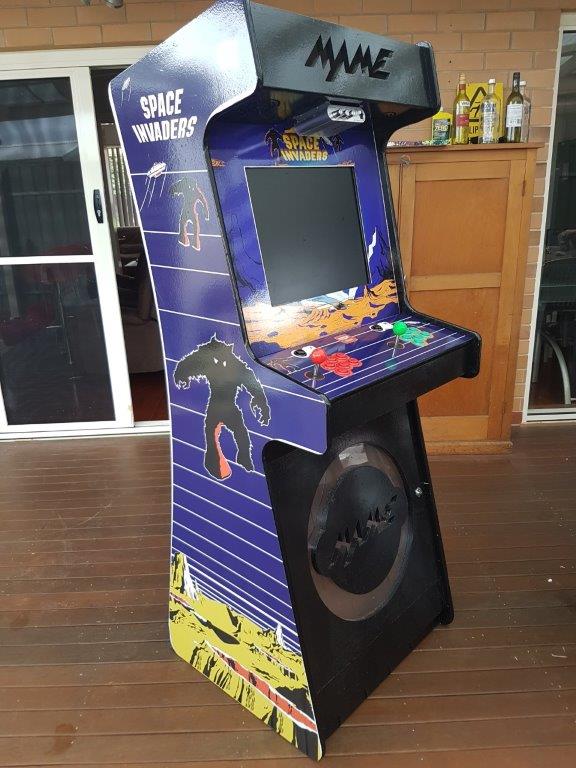
      I like how the back arches. Very stylized. Nice work!

      RetroPie v4.5 • RPi3 Model B • 5.1V 2.5A PSU • 16GB SanDisk microSD • 512GB External Drive

      U 1 Reply Last reply 1 May 2017, 01:53 Reply Quote 0
      • U
        UP4IT @mediamogul
        last edited by 1 May 2017, 01:53

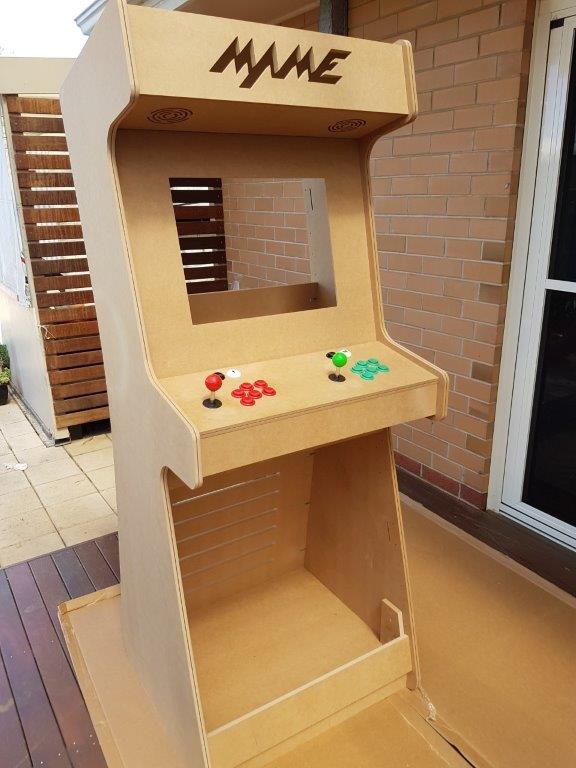
        @mediamogul Thanks. The MDF was laser cut by Arcadeworx in Perth, Western Australia. It is a custom build with a drawer for keyboard and mouse.
        The vinyls were donated by an old friend of mine in Glasgow at Hybrid Signs Glasgow :-)

        1 Reply Last reply Reply Quote 0
        • C
          caver01 @UP4IT
          last edited by 1 May 2017, 03:37

          @UP4IT Nicely done! Thanks for sharing the inspiring images too.

          My 4-player cocktail style cabinet built as a custom "roadcase"

          1 Reply Last reply Reply Quote 0
          • U
            UP4IT
            last edited by 1 May 2017, 06:58

            I added some more pictures :-)
            Re: My Upright Arcade Cabinet Build0_1493621595167_20160927_203252.jpg

            0_1493621651275_20161002_090818.jpg
            0_1493621692240_20161025_182805.jpg
            0_1493621735499_20161102_200628.jpg
            0_1493621749101_20161102_200645_011.jpg

            0_1493621763320_20161102_184045.jpg

            1 Reply Last reply Reply Quote 1
            • M
              moosepr
              last edited by 1 May 2017, 08:20

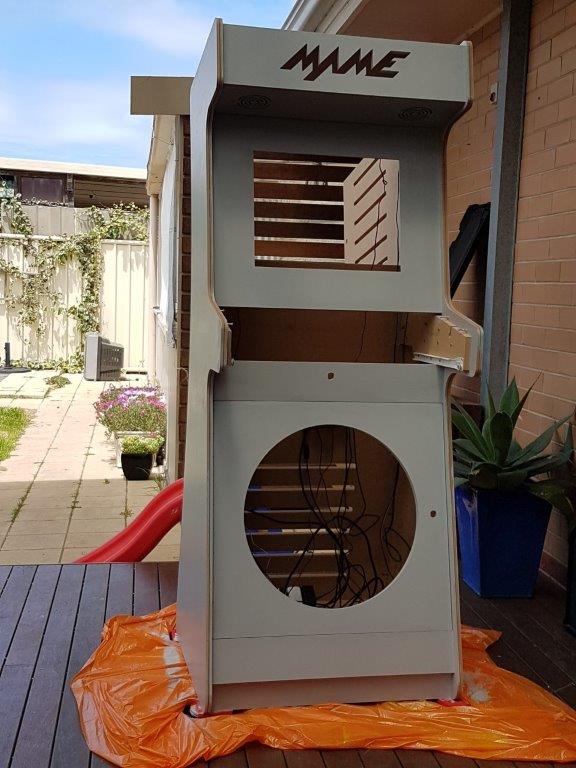
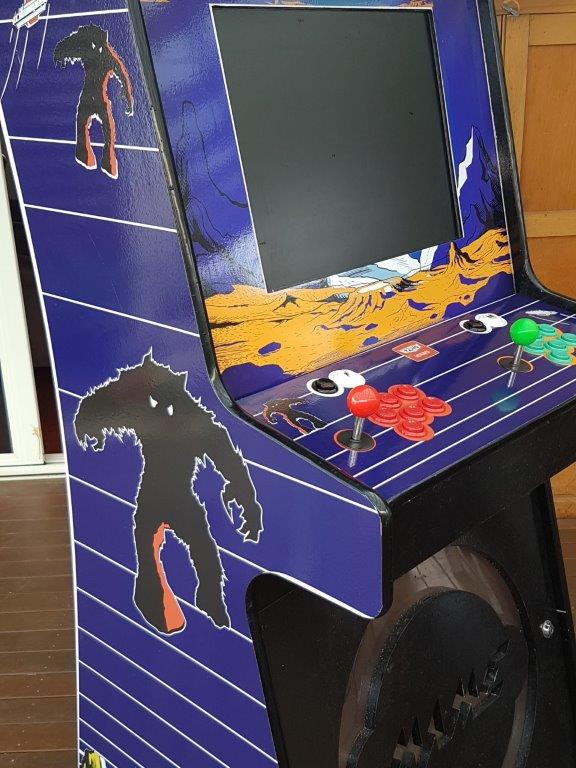
              Love the cutout bits! Super kool!

              Is that a guitar amp in the bottom?

              want to get a tft into your project, look no further than here https://retropie.org.uk/forum/topic/7464/ili9341-tft-screen-guide

              U 1 Reply Last reply 1 May 2017, 08:36 Reply Quote 0
              • U
                UP4IT @moosepr
                last edited by 1 May 2017, 08:36

                @moosepr lol yes, its is a Line6 amp for my Strat, it was temporary. I now have some old PC Speakers above the screen with a mini amp which works well. Astoblaster did sound good with the guitar amp though :-D

                1 Reply Last reply Reply Quote 0
                • U
                  UP4IT
                  last edited by UP4IT 5 Jan 2017, 10:05 1 May 2017, 08:40

                  all up this was sub $AUD1000. The biggest cost would be the laser cut cabinet, which if I had skills I would have done myself. That would have cost around $AUD800 inc shipping from WA to SA, but I would personally knock off $200 for the personal service and help I got from them

                  T 1 Reply Last reply 8 May 2017, 05:18 Reply Quote 0
                  • T
                    TheStrayMongrel @UP4IT
                    last edited by 8 May 2017, 05:18

                    @UP4IT Ha fellow South Aussie, nice. Build looks great... and those lazer cut edges, oh so sweet. Got to get me one of those machines.

                    Raspberry Pi 2 B+

                    U 1 Reply Last reply 8 May 2017, 22:58 Reply Quote 0
                    • U
                      UP4IT @TheStrayMongrel
                      last edited by 8 May 2017, 22:58

                      @TheStrayMongrel Hey there! Thanks. It does look great. It's not perfect. Maybe the next one will be :-)

                      1 Reply Last reply Reply Quote 0
                      • J
                        jlazore2
                        last edited by 9 May 2017, 14:51

                        How do you have your player one and player two buttons setup? Are they just player one and player two start and the buttons next to them are player one coin and player two coin? How do you have the system configured to exit out of a mame game and to go back to emulation station screen? I am having a little trouble getting this working with my setup.

                        U 1 Reply Last reply 10 May 2017, 23:22 Reply Quote 0
                        • U
                          UP4IT @jlazore2
                          last edited by 10 May 2017, 23:22

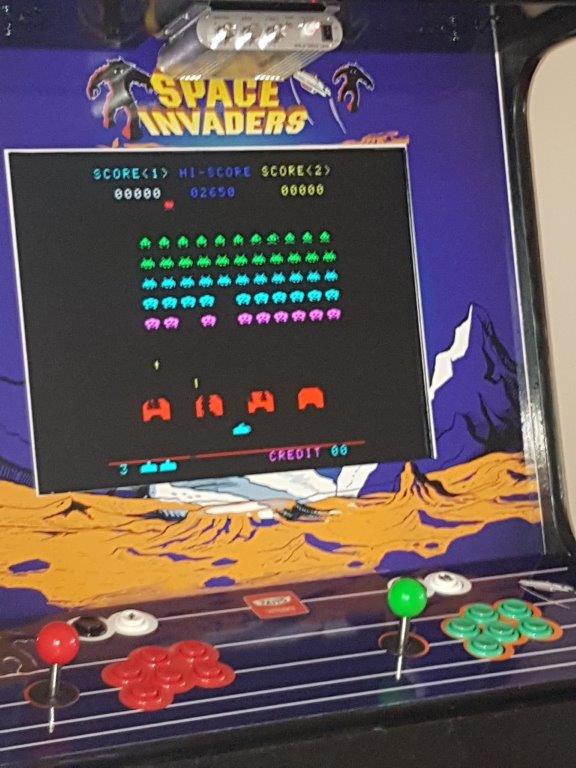
                          @jlazore2 The Black buttons are Player 1 and 2 insert coin, and the white ones are player 1 and 2 Start, to exit the game I use the standard hot keys of pressing player 1 insert coin and player 1 start at the same time. I am sure it is the default on the nes controller, I just mapped the buttons to be the same when in the config buttons tool

                          J 1 Reply Last reply 11 May 2017, 11:57 Reply Quote 0
                          • J
                            jlazore2 @UP4IT
                            last edited by 11 May 2017, 11:57

                            @UP4IT Cool. That is what I think I will do with mine too. I notice some people put buttons on the side of the cabinet. I guess for pinball games?

                            1 Reply Last reply Reply Quote 0
                            • M
                              markyh444 @UP4IT
                              last edited by 11 May 2017, 16:16

                              @UP4IT awesome work dude

                              Retropie in a NES - Pi 3 with Mausberry circuit shutdown switch wired to buttons and 8bitdo NesPro30 controller
                              Retropie in a Saturn Controller - Pi Zero, GPIO controls using DB9 driver
                              Retropie in a PSX - Pi3
                              https://markyh444.wordpress.com

                              1 Reply Last reply Reply Quote 0
                              14 out of 14
                              • First post
                                14/14
                                Last post

                              Contributions to the project are always appreciated, so if you would like to support us with a donation you can do so here.

                              Hosting provided by Mythic-Beasts. See the Hosting Information page for more information.

                                This community forum collects and processes your personal information.
                                consent.not_received