Another PiStation-project
-
Well, I already have 50 mm fan installed and that's enough for now. If I would install bigger fan to it, I would need to rethink the whole system and take a step back in functionality of it, so I'll let it be like it is right now. Even the 50 mm fan blows just enough of the air out, temps reach to around 60 C, which are still well within the limits.
But about that BIOS, that's a good tip, I'll try that out, thanks.
Edit: SCPH-101 bios fixed at least one glitch at the menu transition from car setup menu to the race beginning on CMR 2.0.
-
Always play around with each kind of bios for the system and also you could try PSX2PSP which turns the bin/cue/iso into a PBP file instead which does compress the game to be smaller and could help with making the game look better.
-
@ecks said in Another PiStation-project:
Always play around with each kind of bios for the system and also you could try PSX2PSP which turns the bin/cue/iso into a PBP file instead which does compress the game to be smaller and could help with making the game look better.
Well with current setup I have, I don't use any shaders for PS1 games, since they're not working as I would want to and slows down the games way too much. But, one thing that could help with the looks of the game is 3x resolution, which is apparrently not possible yet. The double resolution does wonders indeed, but triple resolution would look even better. Only things PS1 games would need is 2D filters for static stuff and 2-3x resolution for 3D rendered stuff to make them look great. That compression could help with the performance a bit, I'll examine that thing later on.
-
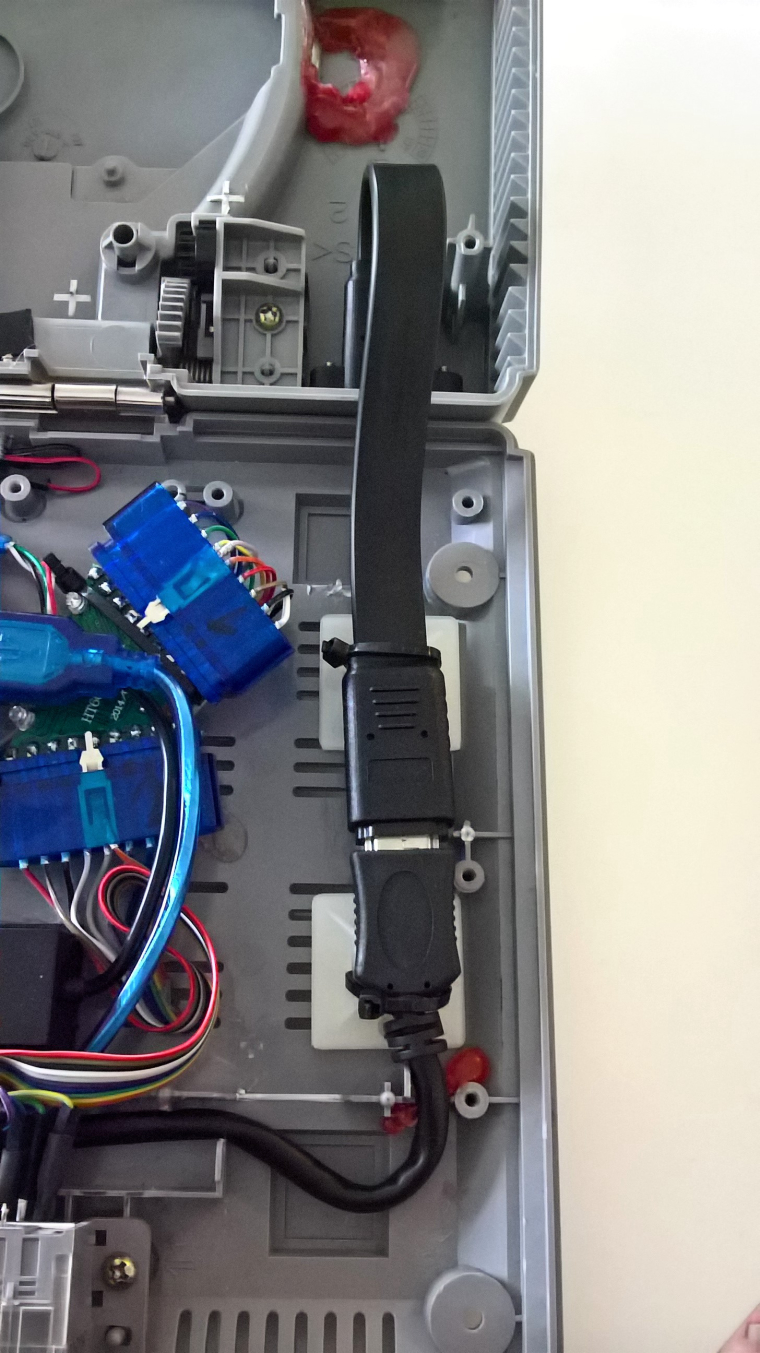
Okay, I've now finished the build as those shorter HDMI-cables arrived today. Attached them to the case with cable anchors:

But now, I'm needing help regarding the performance. I noticed, that GT2 slows down on certain places, so overclocking is definitely needed. Could someone help and write the proper instructions of how to do that ? I already searched information about it and wrote couple lines into the boot config, but it didn't work.
Also, I'm having issues with splashscreens. They start to play on the boot, but then suddenly cuts off after some seconds. I already wrote those couple lines, that should prevent it from happening, but it didn't help. So I would need help with them as well.
-
Update: I found one topic, where the overclocking guide was clear enough and worked straight away:
https://www.instructables.com/id/RetroPie-Overclocked-Raspberry-Pi-3-for-Video-Game/
-
Deleted
-
After couple months of playing, I started to notice, that my design is not good enough in terms of cooling. The machine runs really hot after multiple hours of playing and starts to smell a bit. I decided, that I need to upgrade the heatsinks and the fan as well. Propably those laptop radial fans would be the best solution in terms of space and they're pretty cheap as well. I'll update some information over here, once I've done those changes.
-
deleted
-
@dd-indeed No, keep it up. People can look back at what happened here.
-
Well, okay. Maybe I'll update this more, when I do that redesign.
-
I managed to ''brick'' my external USB memory stick on my PC, so I decided to start all over with the system again. Also, I acquired new SCPH-9002 case, so I will be redesigning the whole system with brand new intact case. Current case I have is so busted out from multiple different designs and tweaks so that I can't anymore do new configs with it. So basically, the new case will work as 2.0 version of this project and hopefully it would be the final one.
Btw, if someone would guide how to create EBOOT's easily, I would really appreciate that.
-
deleted
-
Might as well to delete that comment of yours.
-
@dd-indeed deleted. Not sury why. All i did was tell you how to find out how to make psx .pbp files
-
Okay, this project won't go any further, as I've finalized the build. Sadly, I don't have any new pictures to show, but I got a new SCPH-9002 case, that I sacrificed for the job. Repositioned the Raspberry on the case, so that it sits pretty much in the middle of the case, installed cooler with a 40 mm fan, using the 5V line from the GPIO pins, and the cooler is attached to the board with blue tac and thermal grease and used these small copper plates to lift it up from the board components. Changed the internal HDMI-extension cable to flat-type one, so it fits inside the case easily. Last but not least, got myself a Class 2 64 Gb Sandisk SD-card, that I use to store the games internally as well. The USB hub is still there to transfer games and for kb/mouse to do services.
Keeping it pretty much as simple as possible, it was a fun project to work with and has been working flawlessly from day one. I might do something else someday, as I have one spare Raspberry, maybe a retro PC-type of thing. :)
Contributions to the project are always appreciated, so if you would like to support us with a donation you can do so here.
Hosting provided by Mythic-Beasts. See the Hosting Information page for more information.