[SCRIPT] Batch convert YUV 4:4:4 videos to YUV 4:2:0 in Retropie/Linux
-
@Clyde no, it doesn't change anything. I tried to switch this option off in ES Menu, and the video have sound but do not display at all + I also tried to restart ES. Nothing seems to have an effect on these videos.
Here is such a video: https://mega.nz/file/DhRyGYiJ#O_HlRb3Dptb-NW-ZyW9GQPdVl8I_VRhlwI0bPx2KkJs -
Yeah well, this video is in the aforementioned
yuv444format, and as I learned recently, VLC now shares some limitations of OMX because its now also hardware accelerated.So on a Pi, you may only have the option to convert the videos to yuv420.
-
Thank you for this, Clyde. I've been pulling my hair out for days trying to figure out what I have done wrong scraping video snaps from the ArcadeItalia DB. It seems insane that the video player in ES can't be updated to play 4:4:4 video by default, or that there's no 'official' documentation for this at least.
-
Update 4:
- Removed "-video" suffix to support videos without it, e.g. those scraped with Skyscraper.
- Added quotation marks to the variable
$fto support file names with spaces and special characters. - Added a simple progress indicator by showing the currently checked file's path and name in the console.
- Moved the update history here to declutter the opening post.
Update 3: Changed avprobe to ffprobe and avconv to ffmpeg for compatibility with Debian Buster and above, which doesn't have the transitional package
libav-toolsanymore . See Update #1.Update 2: Deleted some outdated lines and edit: remarks.
Update 1: From Retropie 4.4 on, avprobe was replaced by ffprobe, and avconv was replaced by ffmpeg. But at least in RP 4.4, the old designations are still usable, and so is the script.
-
@clyde hello, I hate to do this but I’m completely new to this. Is there a way to summarize the steps to follow in a way that a kid would understand it? I’m reading all the posts and I get the idea but not sure how to implement it. I am working with a keyboard connected to my raspberry pi 3B and I can hear the sound of my videos but there is no picture. Can I fix them directly on raspberry pi or do I need to connect to a terminal? Can I fix them all at once or I have to fix one by one? Thank you and sorry for so many questions.
-
@colombia20102018 Well, my opening post already includes a summary of the few steps you have to take:
Just save the script into a text file (e.g. 444p-to-420p.sh), make it executable with the command chmod u+x 444p-to-420p.sh, and run it from within your videos directory.
You can do that either a) directly on your Pi with a keyboard attached or b) via network using SSH (see the Docs about that).
- a) Press
F4in Emulation Station, or b) connect via SSH. - Create the directory
binto store the conversion script with this command:mkdir -p ~/bin - Create the script file with
nano ~/bin/444p-to-420p.sh, enter or paste the script's text, and exit nano by pressingCtrl+x,y, andEnterone after another. - Back in the command line, make the script executable with
chmod u+x ~/bin/444p-to-420p.sh - Navigate to your videos directory, e.g. RetroPie/roms/arcade/images:
cd ~/RetroPie/roms/arcade/images - Run the script:
444p-to-420p.sh
Steps 2-4 only have to be done once.
After that, you'll find any converted videos in RetroPie/roms/arcade/images/converted. Continue as stated in my opening post:
After the conversion, you should test the videos in converted before finally moving them up one directory level to replace their 444p originals.
In my example, you would do the latter with this command:
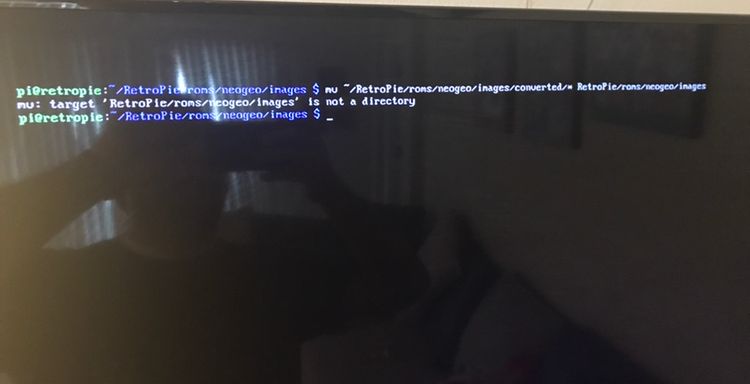
mv ~/RetroPie/roms/arcade/images/converted/* RetroPie/roms/arcade/imagesBe careful though, as this command will overwrite the originals irrevocably without asking for confirmation. Always make backups before doing anything potentially harmful to your files. ⚠️
Feel free to ask away if you encounter any problems.
- a) Press
-
Update 5:
- Added a link to this post with step-by-step instructions. Thanks to @Colombia20102018 for the suggestion.
Update 4:
- Removed "-video" suffix to support videos without it, e.g. those scraped with Skyscraper.
- Added quotation marks to the variable
$fto support file names with spaces and special characters. - Added a simple progress indicator by showing the currently checked file's path and name in the console.
- Moved the update history here to declutter the opening post.
Update 3: Changed avprobe to ffprobe and avconv to ffmpeg for compatibility with Debian Buster and above, which doesn't have the transitional package
libav-toolsanymore . See Update #1.Update 2: Deleted some outdated lines and edit: remarks.
Update 1: From Retropie 4.4 on, avprobe was replaced by ffprobe, and avconv was replaced by ffmpeg. But at least in RP 4.4, the old designations are still usable, and so is the script.
-
@clyde thank you for the quick and detailed response. I completed steps 1 to 4 without any issues. I get confused with steps 5 and 6. Do I have to exit the GNU nano 3.2 to navigate to my videos directory or I do it right there? How do I exit the nano? I typed the cd command as instructed hit enter. Then I typed 444p-to-420p.sh and hit enter but nothing happened. Is that how I run the command? After done I guess I have to follow steps 5 to 6 for each emulator?
Sorry I am a complete newbie on this. -
@colombia20102018 Sorry, I forgot to mention: You can exit nano with
Ctrl+X,yandEnter.What do you mean by "nothing happened"? Was there any output?
-
@clyde do I need to do steps 5 and 6 inside nano? How do I run the script? What do I type before the 444?
Thank you for explaining how to exit nano -
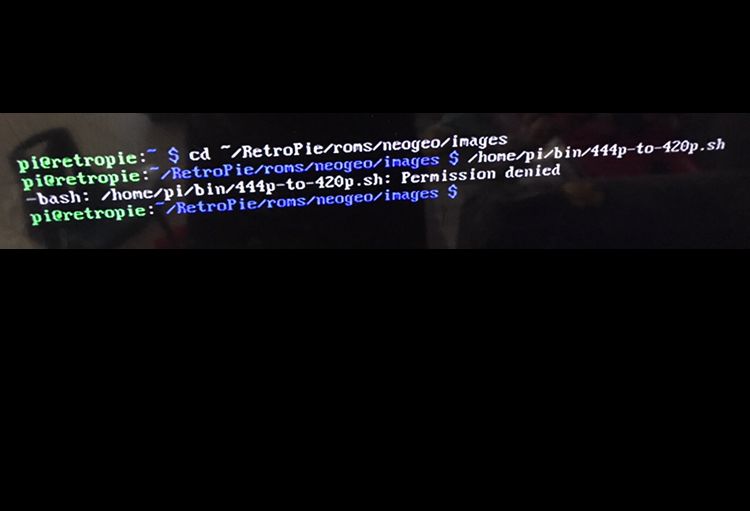
@clyde so I exited nano with control X, Y, enter and brought me back to this screen (attached). Typed the commands and got a permission denied message. What am I doing wrong? Thanks![alt text]
-
@clyde when do I exit nano? After step 4? Could please go into more detail? Where do I run the script and how do I run it? Sorry for so many questions and posts but I just don’t know.
-
@colombia20102018 The steps are sequential, so you exit nano as the conclusion of step three. And you shouldn't enter the command of step 4 until you leave nano.
Just to be sure: You'll have to enter or copy & paste the text of my script into the file in nano.
As for the permission error, I guess the
chmodcommand didn't work (maybe because you entered it in nano), and thus, the file isn't executable yet. Try to enter it after leaving nano.If that doesn't fix the problem, please tell me every step you took and every command you entered. Also, please show me the output of this command:
ls -l /home/pi/bin/444p-to-420p.shBesides, you don't have to use the full path to invoke the script if it is located in
/home/pi/bin, as this directory is one of the directories the system is looking for entered commands and scripts. A simple444p-to-420p.shfrom any directory should suffice. But that also doesn't explain the permission error.Thanks for pointing out the missing details in my instructions. I elaborated step 3 + 4 in my post above accordingly:
- Create the script file with
nano ~/bin/444p-to-420p.sh, enter or paste the script's text, and exit nano by pressingCtrl+x,y, andEnterone after another. - Back in the command line, make the script executable with
chmod u+x ~/bin/444p-to-420p.sh
- Create the script file with
-
@clyde no luck.
I got a command not found message
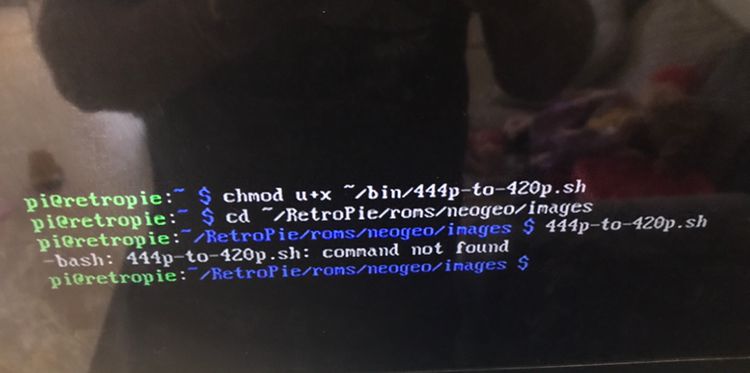
What am I doing wrong? Maybe am I missing other steps not listed? Thanks and sorry for so many questions -
@clyde this is the script
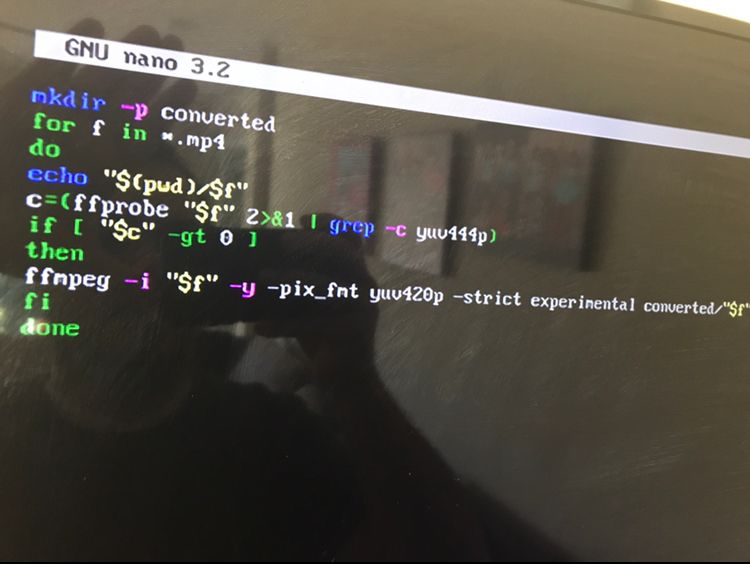
-
@clyde not working. I checked that ffmpeg is installed. In step 3 I typed the following:
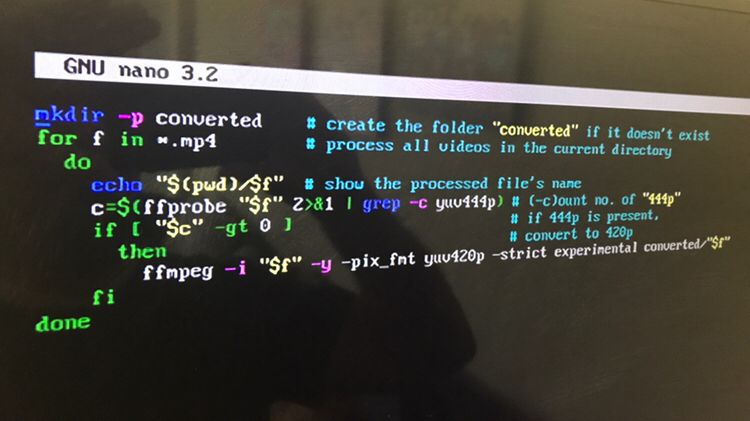
Then I typed the following:
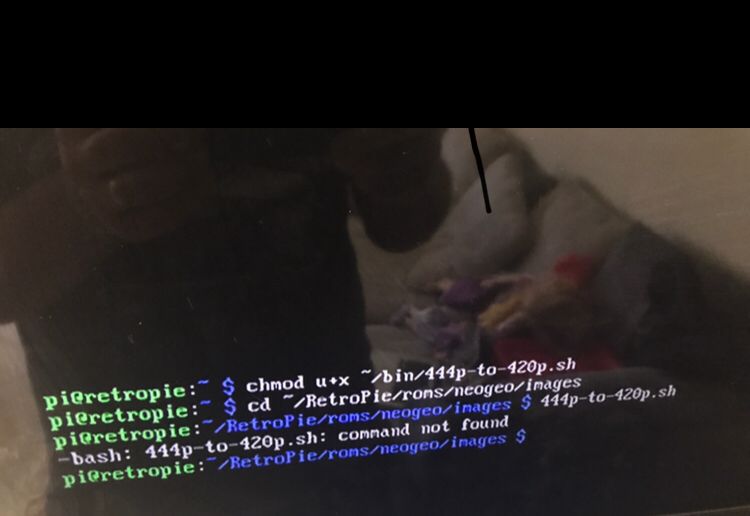
I checked the file manager and the bin folder and the 444 file are there but there is no converted folder.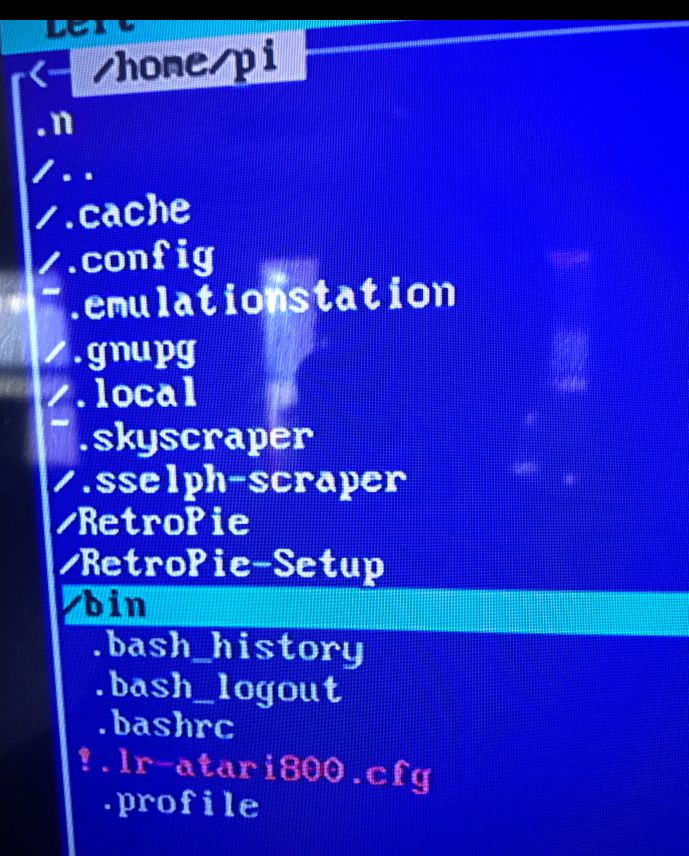
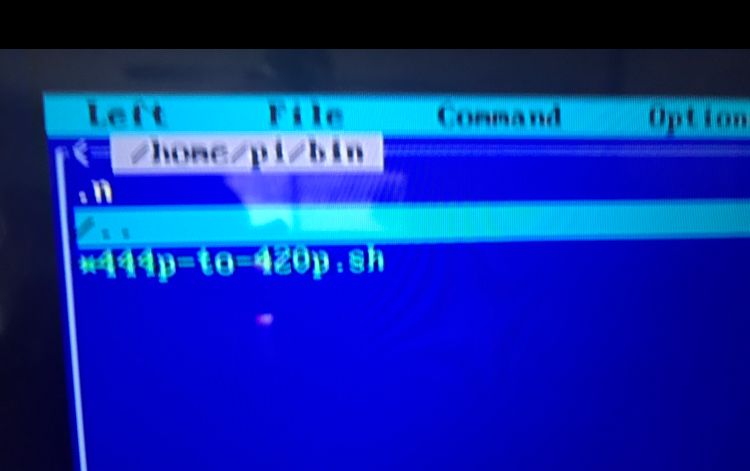
Am I doing something wrong?
Thanks again -
@colombia20102018 said in [SCRIPT] Batch convert YUV 4:4:4 videos to YUV 4:2:0 in Retropie/Linux:
Am I doing something wrong?
Is
/home/pi/binin your$PATH? If not, then run the script using the full path:/home/pi/bin/444p-to-420p.sh <other_arguments_here> -
@mitu Good point. On my RetroPie 4.7 that I originally installed from the 4.6 image this spring,
~/binis added to the path by the user's~/.profileat every login if the directory exists, so I automatically expected that it will do so in every RetroPie installation. Do you know if this is still part of the current RetroPie image?@Colombia20102018 As implied above, you may have to either relogin or enter the command
source ~/.profileto let~/binbe included in the system's $PATH variable with the list of directories to look at for entered commands. If it still doesn't work with just the name of the script, just follow @mitu's advice and invoke it with its path:/home/pi/bin/444p-to-420p.shor
~/bin/444p-to-420p.shor even
$HOME/bin/444p-to-420p.shas $HOME is another system variable. It contains the path to the current user's home directory. You see, there are many ways to get home in Linux. 😉
-
-
Contributions to the project are always appreciated, so if you would like to support us with a donation you can do so here.
Hosting provided by Mythic-Beasts. See the Hosting Information page for more information.
