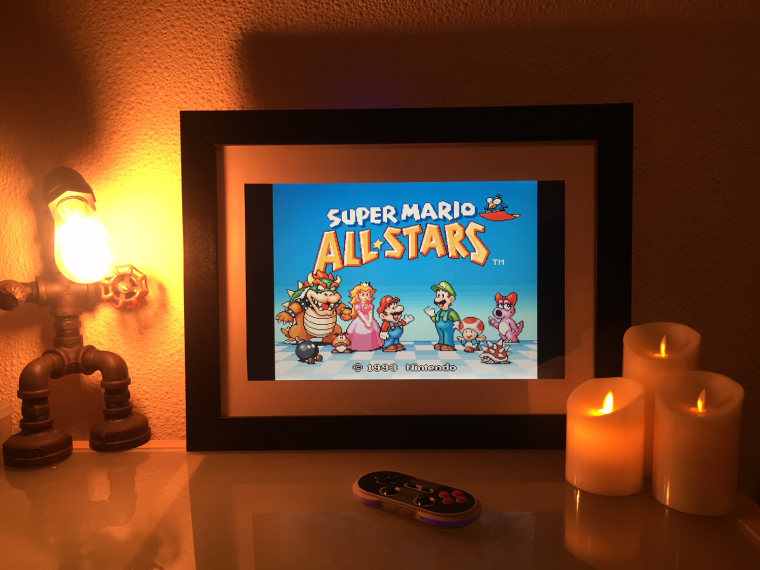
Project - Picture Frame Arcade
-
Hi All,
I'm brand new to the forum so firstly hello! I thought I'd share my project with you..
Many years ago I gave my mum my 17" laptop, this Christmas she got a new laptop, so I thought rather than throw the whole thing away, I'll strip out the screen and make a digital picture frame.. And this post is of my project and the things I have learnt and the things I still want to do..
Parts list:
- Dell 17" Screen (1440 x 900)
- LCD Controller - Found easily on eBay by searching the number off the back of the screen..
- 12V PSU
- 12V to 5V USB Step down PSU
- IR HDMI Switch
- Raspberry Pi (Running RetroPie)
- Chromecast
- 2 inch Deep 3D Shadow Box Picture Frame
- 8Bitdo N30 Pro Wireless Bluetooth Controller
- JST-PH2.0 Stereo Enclosed Speakers @ 3 W
- 64GB microSD card
- A few cables and connectors
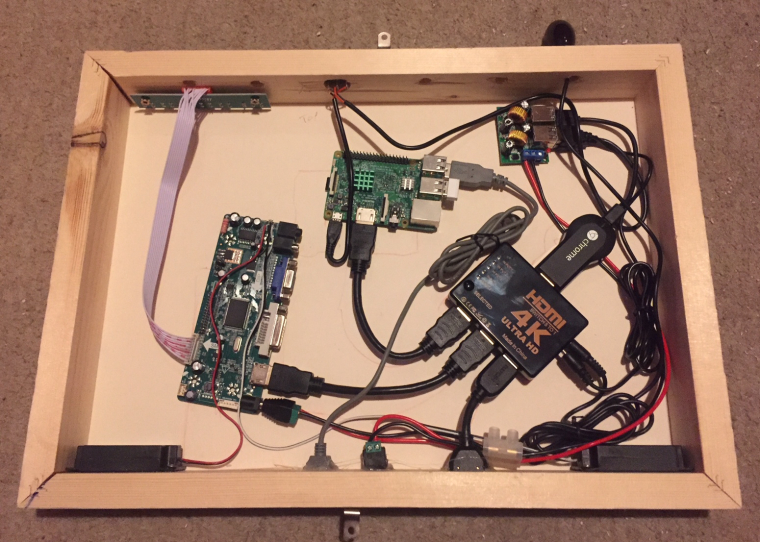
Overview:
So the picture frame itself helped greatly, it already had the depth to contain everything and was about the right size for the screen, I purchased some thick white card so I could cut to fit the screen, this was then layered to 3 layers thick, the first is the front layer, cut this to the size of the visible screen first, if you make a mistake you can then use it for one of the layers behind, the second layer was cut to fit the outside of the screen to hold it in place, the third layer was then extra padding so it would fit firmly between the front surround and the back box.
Then I put in all of the parts and worked out where they fitted best.. and once placed cut holes in the frame for the screen controls, power switch for the Pi, ventilation, USB (to charge the controller and connect keyboard and mouse to the pi) and HDMI. I then used Velcro to hold each item in place, so I can remove if needed.
What it can do:
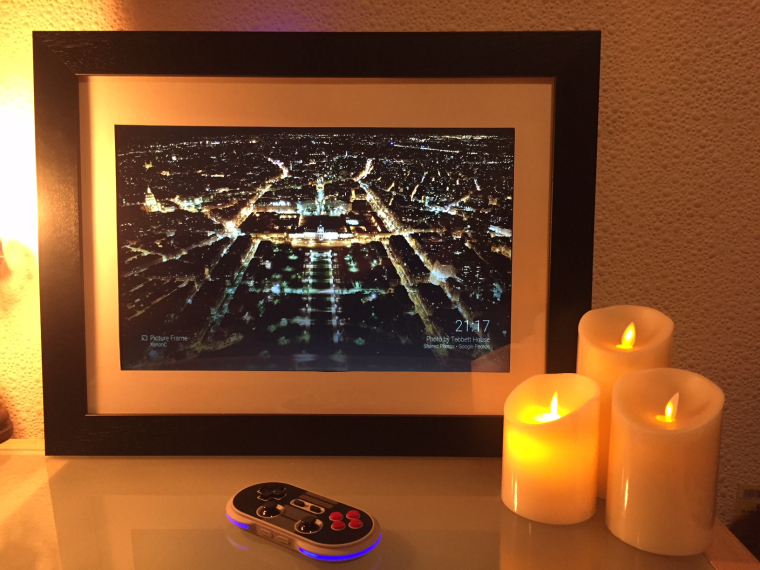
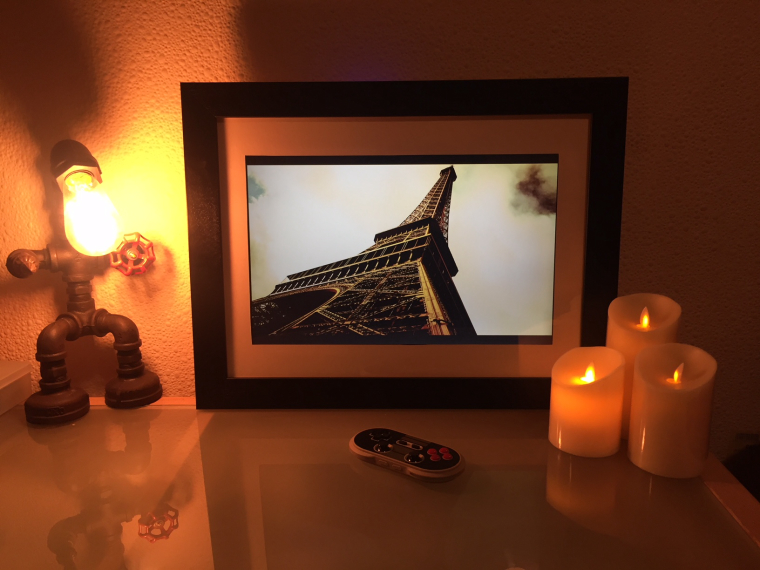
It loads in to the ChromeCast by default, this is set to play photos from a shared Google Photos album, so my partner can upload photos too.. Ass it's a chrome cast I can also cast photos and videos to it, even ask Google Home to cast to it..
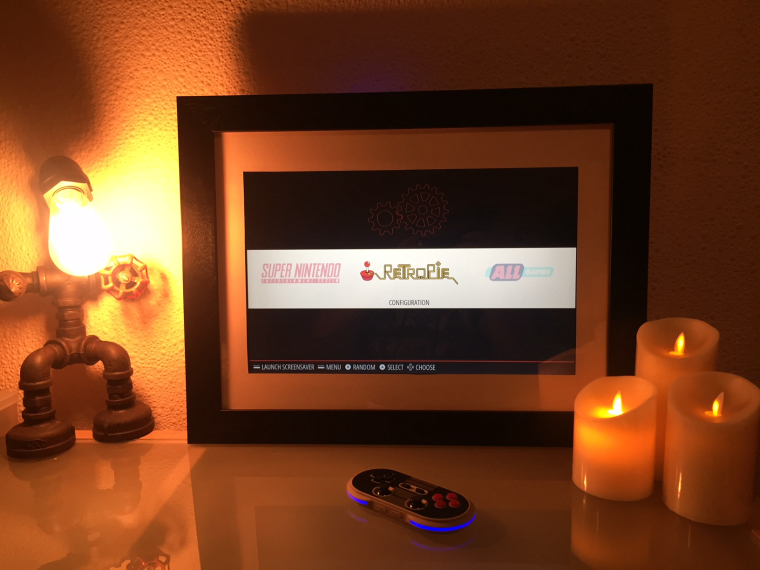
The Raspberry Pi is running RetroPie and has a power switch to turn it on, this isn't needed, but just means the Pi wont load every time the picture frame turns on and use power unnecessarily.
I can switch between the 3 HDMI ports using the IR remote (Pi, ChromeCast, external socket), the remote is also stuck to the top of the frame with Velcro for safe keeping.
Obviously you can forego some of the things I added, the HDMI switcher and USB power supply is not necessary if you don't plan to connect a ChomeCast or additional HDMI connector..
I have also set the screen saver and boot screen to randomly pick photos from a folder.. so after it's been idle it goes back to a picture frame! I've also added a script to automatically trigger the screen saver after the boot in to emulation station, updated in the post below.
What I Learnt and Things to Consider:
- Some laptop monitors have poor angle of view, this will limit the height I can mount this.
- ChromeCast is setup for 1080p and doesn't play nice with other resolutions, on my screen everything is stretched making everyone look thin
- The Pi will not output to HDMI as default if no screen detected (if using a switch), you need to update config.txt to hdmi_force_hotplug=1 you will also need to set hdmi_drive & hdmi_mode depending on the screen you are connecting to. If you set the refresh rate too high but using the wrong mode, you will need to edit via SSH or put the card in to another computer to edit - yeah I learnt the hard way!
- Enable SSH before doing anything! (For the above reason)
What I would like to do
The aspect ratio on the ChromeCast bugs me, I may replace the screen later for a 1080 screen.. however I'm tempted to forgo the benefits of the ChromeCast and just store the photos locally, not sure if anyone has any ideas?..
- Anyone have any ideas how to integrate a Google photo album in to the screen saver, I think I may need to sort out a script to pull new photos in to the local folder, although I'd prefer to stream directly..
- Graceful shutdown... I'd like to add a mini UPS, so when the power is turned off the Pi shuts down properly (Been ordered)
- Put in buttons for the screen controls (just need to put a bolt through the hole)
Pictures:
-
Love this! I was just showing it to my wife. She is now questioning how many thing do I really need need to build a pi into...
-
@newellj79 said in Project - Picture Frame Arcade:
Love this! I was just showing it to my wife. She is now questioning how many thing do I really need need to build a pi into...
Haha, I'm sure my other half wonders the same thing.. here's my Christmas Tree!
And I've already prepped an SD card, just need to sort out the 2 way mirror and screen to run this:
-
@jebbett said in Project - Picture Frame Arcade:
Graceful shutdown...
i use one of these, works like a charm:
you could solder the IR eye of the PCB, solder wires on and put it somewhere more convenient
-
Unfortunately not quite what I need.. basically I have my whole house automated, so when I walk in to the living room the lights come on along with this picture frame, after no activity for 5 minutes everything turns back off... (If I only cut the Pi then power would still be fed to the Chromecast and screen etc)
So essentially I need a UPS to give it time to shutdown.. I'm thinking probably something like this:
By the way.. anyone else considering this.. just with the PI, you could just hook up a PIR like the below and leave the Pi Running, but send the screen to sleep..
-
UPDATE: 27/01/18 - Script to trigger screen saver almost immediately after loading emulationstation
1. Install Python uintput
sudo pip install python-uinput
2. Create a script called simkeypress.py to simulate screen saver button (Enter in my case)
import uinput
import time
device = uinput.Device([
uinput.KEY_ENTER,
])
time.sleep(8)
device.emit_click(uinput.KEY_ENTER)3. Update autostart.sh to trigger the above script in the background
sudo python /opt/retropie/configs/all/simkeypress.py &
emulationstation --no-splash #auto -
You did a wonderful thing, an invention if I could say so. Your idea of reusing an old laptop would not have even crossed my mind. Now that I've seen this, I'm thinking about how many things I could have reused, and I'd like to try something similar. How many days did it take you to conceive and put everything together? By the way, I saw on the website https://www.frameshop.com.au/acrylic-prints some accessories that would help you, and some frames would fit well with your digital images. You can do a small business out of it.
Contributions to the project are always appreciated, so if you would like to support us with a donation you can do so here.
Hosting provided by Mythic-Beasts. See the Hosting Information page for more information.