Mausberry Shutdown Circuit NES Build Help?
-
No problem, good luck!
-
Hello, first post and I'm getting ready to complete my nes pi. My question involves the maurberry circuit. Does it matter the order of the brown / red wire connection on the sw? Haza
-
@space-cadet I don't believe so. The switch is just detecting if the circuit is closed. Mausberry has a diagram on their website for NES power connections.
-
I'm about to start my own RetroPie/NES build. I've not quite bought everything I need yet, but I'm working on it. I'm in the process of working out all the details. I have a couple of questions:
-
Is the current model that is available on the Mausberry website different than what they have pictured? Looking at the pictures of their "Use your own switch" model, it looks different than that of the one you have. I'm just curious because if it's different, I'm not going to be able to use your guide, and will have to figure it out for myself (or ask officially in my own thread).
-
Are there any special scripts or programs or anything you need to do to make it all work? I mean, I see you have to connect the 2 wires to the GPIO. Does the Pi need a script or something to initiate the power down, or does it just know via the pins that a signal on them means to power off?
-
Are there any advantages to wiring up the reset button? I was thinking of maybe wiring mine to the "pair" button on a wireless dongle for an Xbox 360 controller. It might be more work than it's worth, so I'm looking for somebody to talk me out of trying it. :) Is it helpful having a reset button?
-
-
Well to answer your questions.
-
The models look different but are fundamentally the same. I'ts pretty much a layout change and made them more compact. It also included a pad for a 3V LED. You can use the guide.
-
There is script to install but it's so easy to do. the instructions on how to install it are on the Mausberry site. It takes like 5 minutes and even someone like my self who is not very well versed in Linux based systems managed to do it.
-
I'm not sure how you would wire that the way want. But the reset button is pretty helpful especially in situation where the Pi has frozen for what ever reason and you can not use the interface to restart safely. Quite simply what you want to do sounds like more trouble than it's worth.
Hope this helps dude
-
-
Thanks for answering my questions. This is my first venture into all this, and I just signed up yesterday to post that question. And thanks for helping as far as what to use the reset switch for. I really was thinking it was good idea at first, but like you said it is probably more trouble than it's worth.
-
Since 1 and 2 have been addressed, if you don't want to hook up the Reset button to do a hard reset you could also connect it to GPIO and use it to control some function on the Pi. I'm not sure what that would be on a NES, but on my Super Famicom build I'm controlling what gets displayed on a secondary TFT. Just something to think about.
-
Sounds like everything was answered but to clarify the shutdown circuit I got is fairly recent so as far as I know the one you order should be the same as what you see installed on mine.
I'm not completely clear why you would want to switch the wires around but gather it should still work.
Follow this for the setup script.
http://mausberry-circuits.myshopify.com/pages/setup
Cheers!
-
@obsidianspider Yes, I was reading through your build progress. You have a lot more skill than I do. Even if you're just hacking it, I'm a total hack at hacking it. :) Your's looks awesome. As for the reset button, I'm just not sure what I want to do with it. Doing a hard reset sounds like defeating the purpose of having the mausberry at all. All you're basically doing is resetting it. If it's doing it "warmly", without doing a complete power off but just restarting the Pi, that might be something. I also like the idea you suggested in your thread of doing a reset button as a way to return to the RetroPie menus. Using an Xbox controller, I've got it automatically configured to use the "GUIDE" button to bring up RetroArch. I have to manually go in and close out of RetroArch using that. Surprisingly, once I set up the controller, the ability to use START+SELECT as a method of returning directly no longer works. Maybe it's because I configured RetroArch with the controller prior to actually launching a game through RetroPie? In any case, using the reset button on the NES to return to RetroArch sounds like a better possibility than using it for something else. Still tossing around ideas, haven't even received my console yet.
@qwaven Thanks for that link. I had seen that before, but just glanced at it and never read it. I saw that diagram of the GPIO pins on the right, and though maybe I clicked on the wrong thing. I actually read through it this time, and it seems simple enough to do. I just have to be in the console, run the download, run the setup, and reboot. Piece of cake. :)
-
Sorry for bringing this back up... but I can't seem to find the instructions on how to wire up the RESET switch. I've seen examples through Google and Youtube where people have wired up the RESET switch to act as an "Exit Emulator" button. I think this would be really helpful for my build, where some controllers don't have the necessary buttons to do that (like an Atari Joystick with only 1 button). Does anybody know of a link to instructions on how to do this, or maybe just explain it to me? Thanks!
-
@hansolo77 Mausberry has instructions for wiring the Reset button but if you want to have the reset button "do something" you're going to need to connect it to GPIO instead of to the Mausberry, then have the Pi do something when it detects the GPIO was triggered (Assuming you'd want it to emulate a keypress).
I'd start with connecting the button to GPIO and create a script to display something when the key has been pressed. Then go from there.
-
Thanks for the reply @obsidianspider ... I got my Mausberry Circuit in the mail today. I'm really pissed though. The connection on the USB-IN (the side waiting for the power from the wall) was loose when I got it. Then when I connected my power to it, the thing snapped off. :( I'm hoping Mausberry can replace it, have to wait for a reply from them. I guess in the meanwhile I can always play around with getting a "keypress" function working.
-
@hansolo77 I had exactly the same problem with my last Mausberry circuit. I had problems with intermittent power, thought I'd done something wrong until I figured the micro usb port was loose. I ended up just pulling it off and soldering directly to the board - worked out better for me as it saves space, but it should never have been loose in the first place.
-
I contacted them and asked if it would be possible to get a replacement. The rep (or THE guy, don't know if he has a staff) said it would be no problem. So now I'm just waiting for a replacement. I asked if he wants the broken back but he never replied. I also asked if he could attach some jumper posts to the holes since my soldering sucks, and he said that would be no problem too. So he seems like a nice guy, and not purposely selling rip-off circuits.
-
Thanks everyone for your help on my NES-Pi project. Just wanted to share a few pics of how it turned out...
Especially what to thank JSAWHITE. Thanks Buddy...-Front "NES" ports are rewired to USB and USB game controllers rewired to NES.
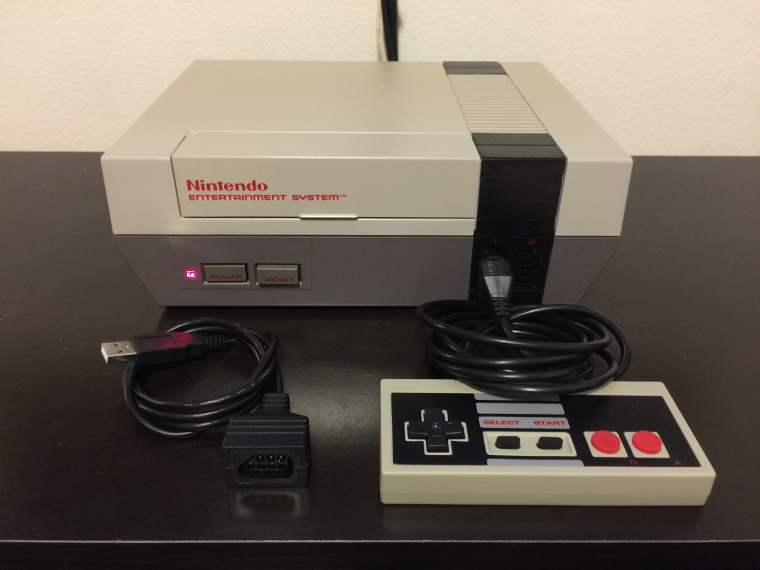
-Cartridge bay will house a Bluetooth Mini keyboard imbedded in a CART...
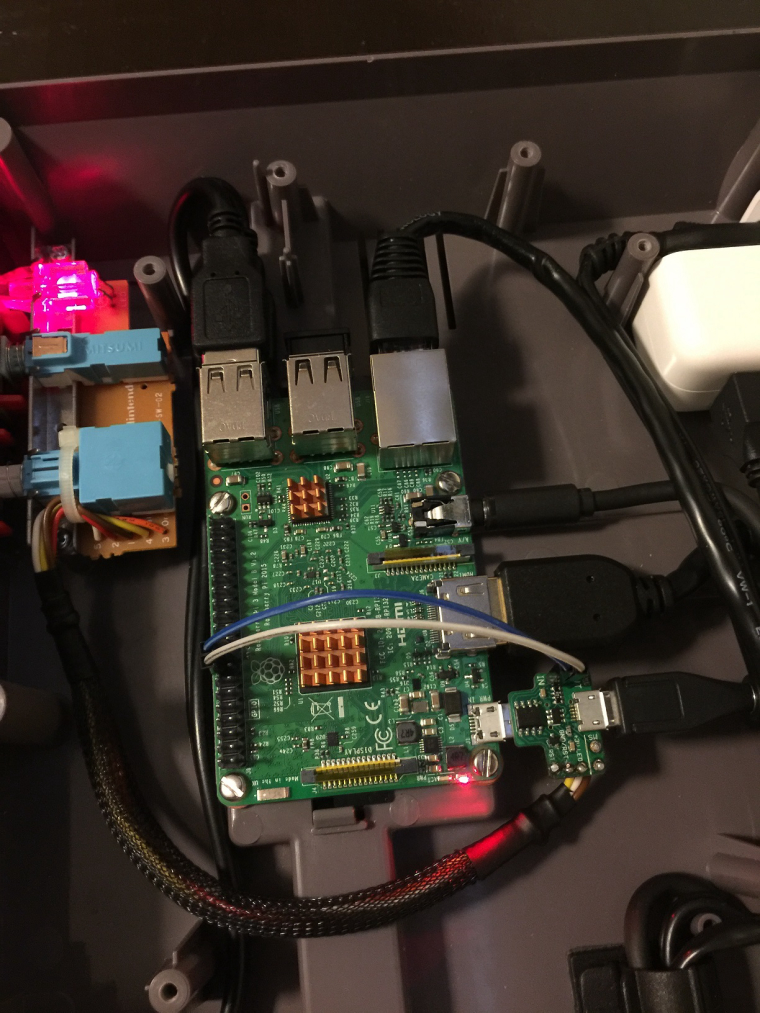
-LED ( thx to JASAWHITE ), POWER and RESET buttons work via Mausberry shutdown circuit.
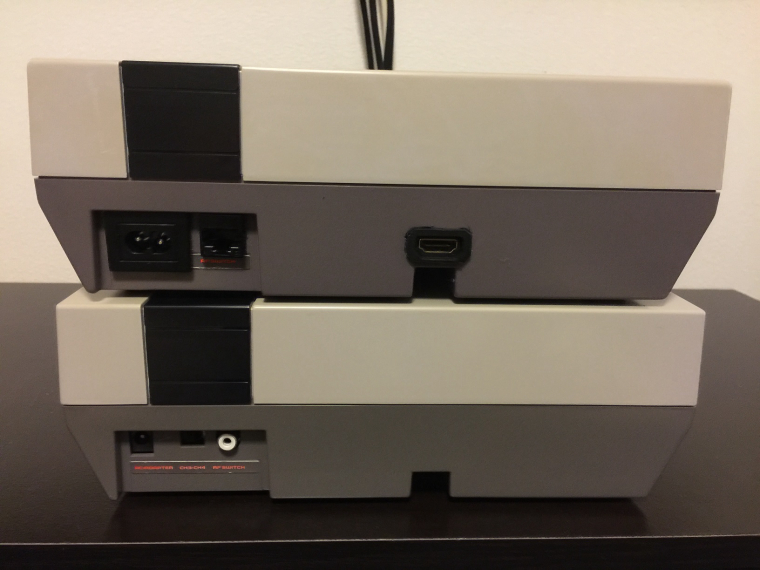
-HDMI, Ethernet, and Power at the back.
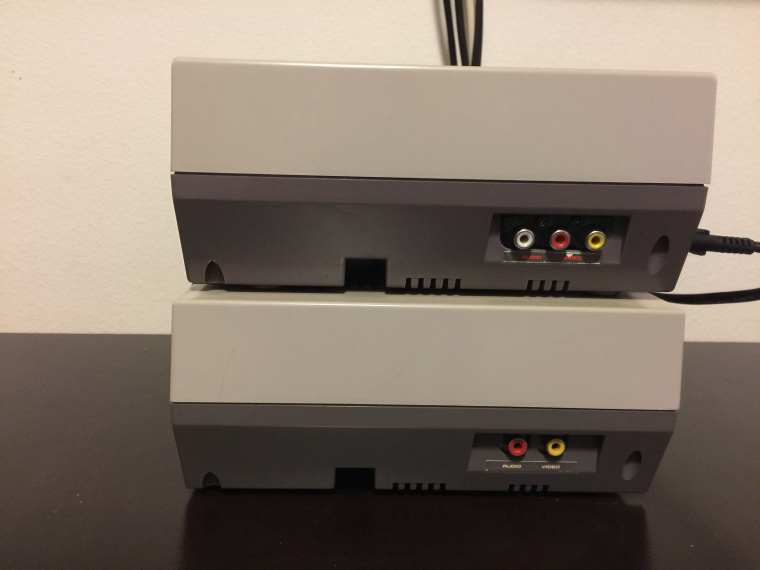
-Working RCA jacks ( video with stereo )
-Bluetooth 8Bitdo NES30 Pro and Mini Keyboard capable
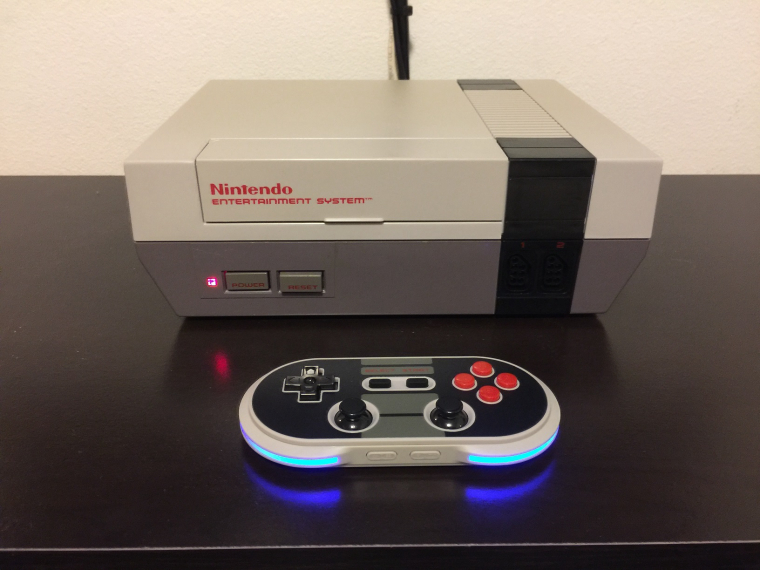
-lastly power supplied by an iPad wall wart...
-Inter workings and wire management.. ( not an easy task )
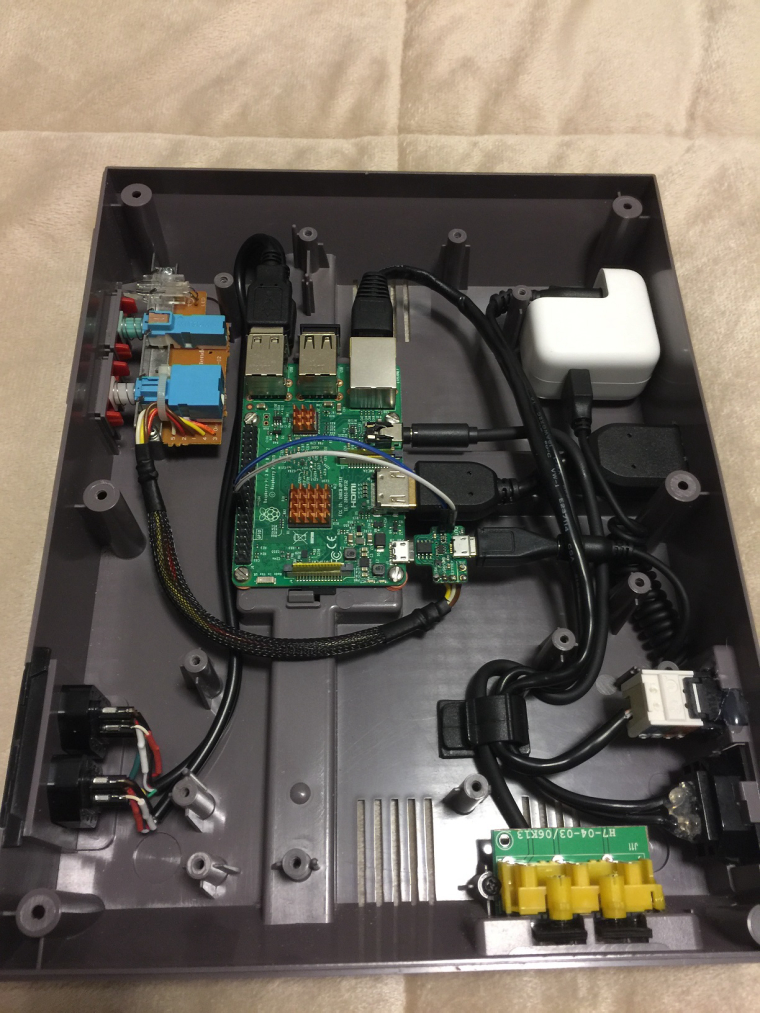
-
@Wi1s0n that's some tidy wires! Looking good man!
-
@Wi1s0n VERY nicely done! :)
-
Thanks guys.. took a lot of planning and searching for the right parts.
-
Nice work! :)
-
Very impressive, love how clean and professional it all looks!! Care to share some of the parts and details. I'm curious on what parts you used for the "NES" ports, bluetooth mini-keyboard, and how/why you used iPad wall supply.
Again great job, would love to follow your steps/guide!
Contributions to the project are always appreciated, so if you would like to support us with a donation you can do so here.
Hosting provided by Mythic-Beasts. See the Hosting Information page for more information.