GZU - a Pi 3 handheld (work in progress)
-
Hey all

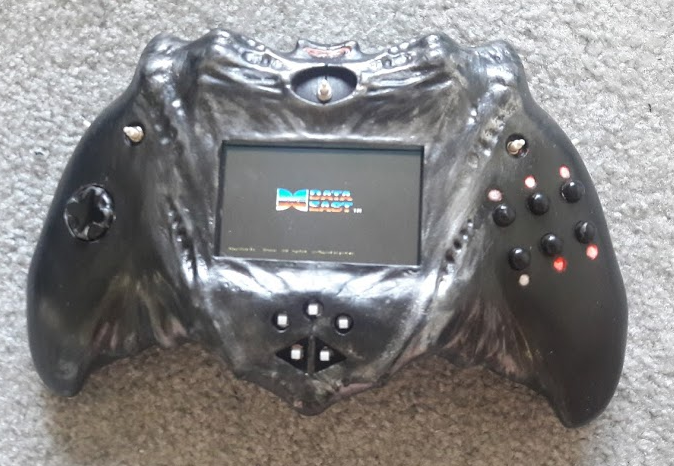
This project is almost done so I figured I'd start showing, and maybe get some suggestions on how to solve the remaining problem. It's an rpi3 handheld with retropoie (obviously). You can see more pictures and a video in this google album: https://goo.gl/photos/mN4adPikoCM613TL6
The cover is designed, modeled and 3d printed by myself (something I'm not sure I will ever do again! oh, the hassle). Knowing I was going to 3d print it, and it's hard to make it look smooth and sleek, I went for an organic/alien look for it. I wanted it to look as if H.R. Giger designed himself, after having a stroke that took most of his genius out of him.
Initially I wanted to play some N64 games and some more advanced consoles; that's why I used an rpi3, after all. But I realized it still needs overclocking to run that generation and, this being a handheld, overclocking is a challenge I'm not ready to tackle. So I removed the analog sticks and chose to only have a d-pad, 6 main buttons, start, select and left and right triggers. This was achieved using an USB N64 controller and rewiring its board to buttons attached to the cover.
I also took advantage of the shortcuts retropie has for saving, loading, changing save state and quitting a game, and installed a set of DPST buttons (double pole single throw, basically a button that closes two circuits simultaneously) to perform these actions.
It has 6 LED lights that show the user which buttons are used for the emulator he just opened.
Basically, what is left to do is reprint the button caps for L,R, start, select, on/off and system buttons. These are taking some time because I got their sizes wrong, so it requires some trial and error.
The main problem with this thing, and I don't know if I'll ever come around to fixing it, is the power source. If I knew that from the beginning I would have used a pi 2 or even 1! The thing is that pi3 has more power demans, and most solutions out there will not work on the pi 3. Powerboost 1000c by adafruit is one of the most popular solutions, but it will not work. What I ended up using is a power bank by ravpower. It's an excellent product! but these power banks are not made to be the main power source of anything, so I can't really blame it for its shortcomings on my project. The system runs fine, with the occasional rainbow square that doesn't influence the performance.So what's the problem? I set up the on\off button on GPIO 3, so I can turn off the system with some code listening to this button, and this particular pin has the advantage of booting the system up. The problem is that the battery stops feeding the pi after a few minutes of turning it off, so closing gpio 3 doesn't turn it back on. I have to plug it on an outlet just for a second.
edit: forgot to mention that whenever you start or stop charging the battery, the system reboots.
So it's perfectly usable already, but I would like to make it a little more convenient. I even finished Contra yesterday on it :D
-
Nice. I do like how organic it looks and can definitely see your Giger influence.
-
Thanks, Marky :)
-
This looks really good, it has a 80's toy vibe to it.
Just wondering, what is the screen? Is it composite, HDMI or does it attach to the GPIO pins? -
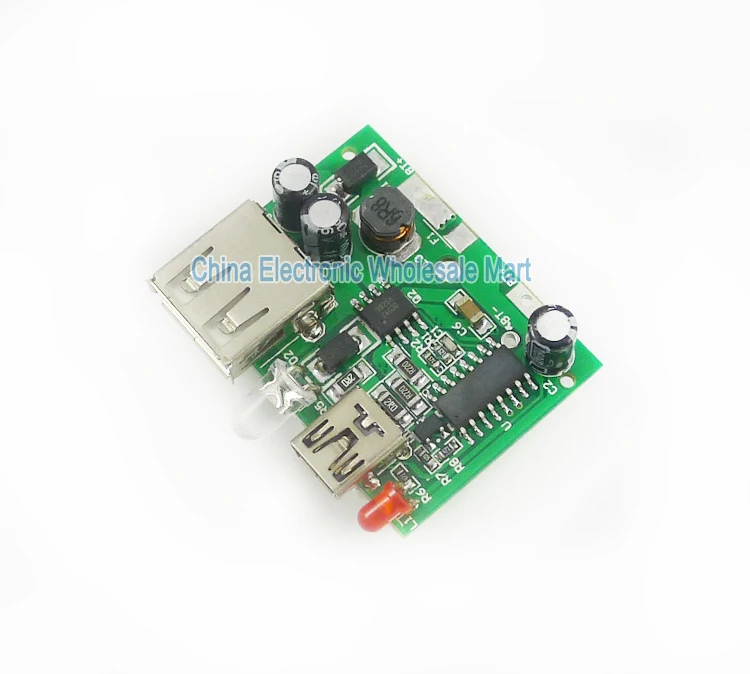
You can get step up + charger cirtcuits similar to the adafruit one but rated for 2A online. They would suit your needs.
-
@jb32647 It uses a cheap composite screen. One of those chinese screens for cars. Luckily it already works at 5V, as some need tweaking. I can get you the amazon link I used if you want it!
@Joso Yeah, I'm looking into it. I was trying to fix the issue with the things I already had in place but I don't think that's going to work. I think I can still use the actual battery from my ravpower and just replace the circuit with another one. I just need to figure out what is the natural voltage of these batteries. I don't know if it's the usual 3.7.
-
Love it! Truly original.
Can't wait to see it competed.
-
That's a really awesome build! Nice work!
-
@diegzumillo said in GZU - a Pi 3 handheld (work in progress):
I can get you the amazon link I used if you want it!
Yes, please!
Impressive little build. Would love to see the internals on it!
-
Thanks, y'all :D I still haven't gotten around on finishing this. Too busy with other stuff. Besides, when this became playable I suddenly became even more lazy about finishing it :P
Schneider and jb32...
Here's the screen: https://www.amazon.com/gp/product/B006MPRFJQ/ref=oh_aui_detailpage_o02_s00?ie=UTF8&psc=1
It's not an amazing product. The description is deceptive, it's not 4.3'' as it says in the title but 3.2. Maybe they meant with the borders, but I don't know. That really bummed me out as I wanted a larger screen. But it works. And best of all, it works out of the box! no need to go messing with its board to make it work with 5V. Because most of these screens are made for cars, they usually only work with 12V. -
@Joso Hi Jose. Could you point me in the direction of such a circuit? I'm in need of exactly that for my new project. I would really appreciate it!
-
@stahl80 im sorry I am unable to find or remember the store I bought it (it was some time ago) but the board looked like this one:

-
I did a google search on that image and found it on aliexpress
https://www.aliexpress.com/item/DIY-3V-Turn-5V-2A-18650-Battery-Mobile-Step-Up-Power-Supply-Module-Circuit-Board/1875091517.html?spm=2114.40010708.4.38.BgYyKlDid you use it on your pi 3 successfully? Might be interesting to get this one from China instead of the closer alternatives if someone tested it.
-
Tried it on mi rpi2 with no issues. I haven't tested it with a rp3, sorry.
Contributions to the project are always appreciated, so if you would like to support us with a donation you can do so here.
Hosting provided by Mythic-Beasts. See the Hosting Information page for more information.