Making a bartop arcade and need some help!
-
Ya, that monitor looks like the type that has mounting holes on the back so fixing that into your cabinet is pretty straight forward.
I use a joystick/button set similar to your link in my last build. Two things to note:
- The button AND the side trim on those buttons light up. It does not effect functionality in anyway, but some people want just the center button , or just the trim to light up and not both. Like I said, not a problem but something to be aware of.
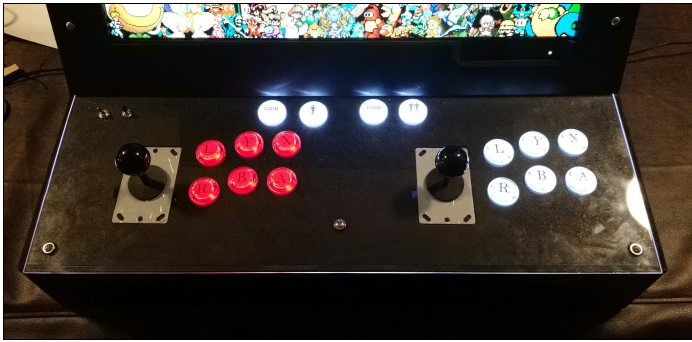
Also you can, if careful, get the button cover off and put labels under the cover, you just have to be delicate as the tabs that hold the top down can break if pushed to hard.
If you choose to use a clear or mostly clear acrylic on the deck you will get an added bonus of the edge of the acrylic lighting up from the button light shining through.
- You will want to make sure the solts you connect the buttons to are the same on both usb encoders. if button "A" for player 1 is in button slot 7, then player 2's "A" button should be in button slot 7 on the second encoder. I didn't do that at first and every time I tried to configure player 2 things would get all squirrely. The reason I mention it is the cable lengths they give you for the buttons are not long and where you place the encoder board can limit what slot a button can reach and you want to make sure the same button on the other player can reach that same slot on its board.
(disclaimer: advanced retropie users may have a better solutions for using buttons in different slots. I am not advanced in that area and went with the solution that was easiest for me reach)
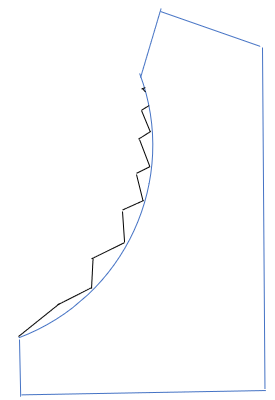
For the curved edges. If you do not have a jig saw and want something like:
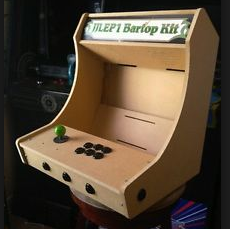 (Not mine. Screen shot from google search)
Draw your curve and then take multiple straight cuts up to the curve to get most of the material away and then sand down the remaining to the curve you want. Definitely sandwich the left and right pieces together when you do this so the result is the same on both sides. The symmetry will make it harder to notice if the curve is not quiet a smooth curve as long as it matches on both sides.
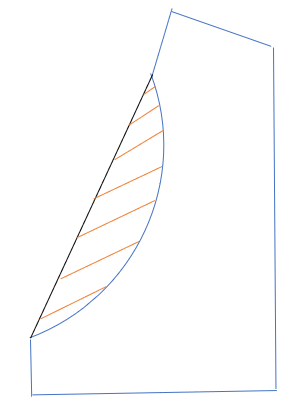
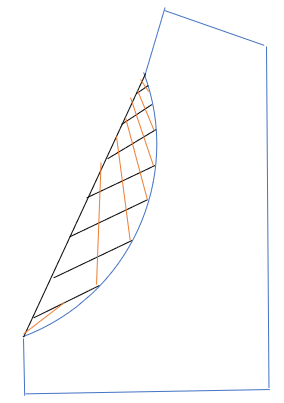
Etc. Etc. etc. - The button AND the side trim on those buttons light up. It does not effect functionality in anyway, but some people want just the center button , or just the trim to light up and not both. Like I said, not a problem but something to be aware of.
-
thanks mate, that is very helpful for my build, also my arcade will be 2 players
-
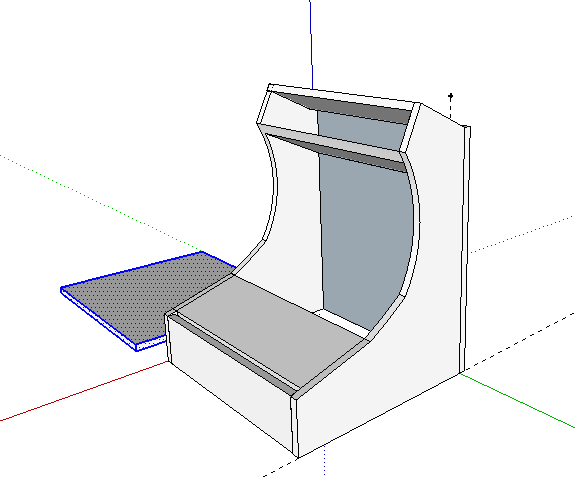
here is a design I have drawn:
-
-
@rbaker thanks for the post
-
should I get buttons and all the tech before starting of my case? and can I use a U mold instead of a T mold?
-
@retroprogrammer I did. It's important to build the internal workings and prove it all works then you can build a case that you know will house your innards. I have seen many a case with components rammed in with all sorts of stresses on cables. Here is my take on the above instructable. No idea about U moulding.
-
I would recommend getting the "innards" first. You can set up a functional test way before the cabinet is finished.
I used a cardboard box to make a quick controller to test out the buttons and make sure the wires are all okay and then started setting up the retropie image, theme, rom set etc. all before the cabinet was even close to finished. Doing this also allowed me to think on and decide how I wanted certain features like the master power switch and a hinging controller deck.
U molding will work but there are a couple of things to watch out for. Some U molding has ...fins? ...teeth? ...what ever you want to call it.
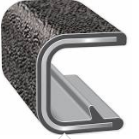
And you have to compensate for that or the U molding will curve out.A similar issue is that some U molding has thick walls and so the edge to grip needs to be thinner then the rest of the side material for the U mold to sit mostly flush. This can be solved with a router. Or you could make a channel with your dremel for the, I'm going to say fin until someone gives me a better name.
Last complication U molding has is that it does not like drastic angle changes. you will have to cut the side walls to go around 90 deg outside angles and 90 inside angles and for the inside angles the separation will be visible. With T molding you do the same thing but you cut the leg of the T and it goes in the track so you can't see it.
If you are using MDF you can just sand the edges round of the same effect. T-molding was used originally to both hide the particleboard edge and provide padding against damage from bumps and kicks and such.
Question for you. Are you planning on using just the joysticks or usb controllers too? I ask because If you want USB game pads, then I would definitely recommend adding a USB flush mount connector to the project. Way better than trying to get into the back of the thing every time.
Also IF you are going to have USB game pads I have found the Marque space at the top makes very good storage. Just add a hinge to the marque face and a magnet latch to keep it from flopping around.
-
@lurker said in Making a bartop arcade and need some help!:
Question for you. Are you planning on using just the joysticks or usb controllers too?
Yes I am going to have USB controllers just in case, some one come for a visit and they have more then 2 kids to keep them entertained
-
@retroprogrammer said in Making a bartop arcade and need some help!:
I am going to have USB controllers just in case, some one come for a visit and they have more then 2 kids to keep them entertained
I have two wireless Wii U Pro gamepads in addition to the built-in joysticks of my cab for the same reasons, yet more for grown-up visitors rather than for kids. Most of my friends in their forties to fifties are still kids inside anyway. ;)
-
That reminds me of when my parents come around, they love retrogames
Contributions to the project are always appreciated, so if you would like to support us with a donation you can do so here.
Hosting provided by Mythic-Beasts. See the Hosting Information page for more information.