[TUTORIAL]Adding A Dedicated On/off Switch
-
Hey guys here is a quick and easy tutorial on installing a dedicated shutdown button for your RaspberryPi for Retropie :)
Parts list:
. Momentary switch
. 2 Male to female wires
. RaspberryPi 3 with Retropie installed
. Necessary connections for RaspberryPi (keyboard, mouse, etc.)Lets start:
So first solder your male to female wires to your momentary switch, like so: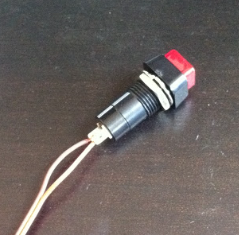
And then connect to GPIO pins 5 and 6 with your wires with this diagram:
Now go to the terminal by pressing and F4 on your keyboard and type the following:
1)
sudo apt-get install update
2)sudo apt-get install python-dev
3)sudo apt-get install python3-dev
4)sudo apt-get install gcc
5)sudo apt-get install python-pipNext you need to get RPi.GPIO:
6)
wget https://pypi.python.org/packages/source/R/RPi.GPIO/RPi.GPIO-0.5.11.tar.gzUncompress the packages:
7)
sudo tar -zxvf RPi.GPIO-0.5.11.tar.gzMove into the newly created directory:
8)
cd RPi.GPIO-0.5.11Now install the module by doing:
9)
sudo python setup.py install
10)sudo python3 setup.py installNext we create a directory to hold the scripts:
11)
mkdir /home/pi/scriptscall our script shutdown.py (it is written in python). Create and edit the script by doing:
12)
sudo nano /home/pi/scripts/shutdown.pyThis is the script, paste it in the blank area:
#!/usr/bin/python
import RPi.GPIO as GPIO
import time
import subprocess

# we will use the pin numbering to match the pins on the Pi, instead of the
# GPIO pin outs (makes it easier to keep track of things)

GPIO.setmode(GPIO.BOARD)

# use the same pin that is used for the reset button (one button to rule them all!)
GPIO.setup(5, GPIO.IN, pull_up_down = GPIO.PUD_UP)

oldButtonState1 = True

while True:
    #grab the current button state
    buttonState1 = GPIO.input(5)
Press CRTL X Then Y and restart the pi
Now we configure our script to run at startup,
14)
sudo nano /etc/rc.localAnd add the following to the file by typing :
sudo python /home/pi/scripts/shutdown.py &Press CRTL X Then Y
Now the button should work after a reboot, thanks for using this tutorial and make sure to comment :)
@Retroprogrammer -
A few observation to your instructions:
- You don't need to install both Python3 and Python2 modules (steps 9 - 10), it's enough to install the modul for the default Python on the system
- I think the RPi.GPIO library is available as a package (python-rpi.gpio) so it should be installable with a simple
apt-get install python-rpi.gpioon a Raspbian system. - The
sudoin step 14, for running the script on startup, is not needed, since the commands there are executed asrootanyway on start. - The script you posted seems incomplete, there is no shutdown command attached to the GPIO toggle, so your script will loop ad infinitum and not do anything.
- The script will also consume 1 CPU core 100%, since it will run in a tight loop forever. I find the approach described in http://raspi.tv/2013/how-to-use-interrupts-with-python-on-the-raspberry-pi-and-rpi-gpio-part-3 to be the best, since it's using almost no CPU.
- Most importantly, there is no provisioning for shutting down EmulationStation cleanly, there have been numerous posts here with solutions for how to safely shutdown a RetroPie system, maybe you should incorporate that.
-
@mitu Thanks for the observations, I did this with what I knew I will add dome provisions for safer shutdown thanks :)
-
-
@retroprogrammer
sudo apt-get update
not
sudo apt-get install update
Contributions to the project are always appreciated, so if you would like to support us with a donation you can do so here.
Hosting provided by Mythic-Beasts. See the Hosting Information page for more information.