Cocktail Cab Project
-
Ya, I toyed w/ that idea for a little bit, but I think it'd be too much work, at least in this style. Was thinking it'd be cool to do a build with a battleship-style piece in the middle and monitors back to back. Probably going to be a while before (re: if) I ever do another cab. Still have a Boba Fett costume I'm working on in my dad free time as well. =D
Cocktail Cab Project - https://retropie.org.uk/forum/topic/23763/cocktail-cab-project?_=1592408967951
-
A battleship-style build would be cool! Maybe have it were the 2 monitors can lay down flat like __ but you can fold them up in the middle like /\ for competitions so you don't have any screen watching.
-
@theissdev Thanks for sharing the pictures and the schematics. I also have two Mag-Stiks Plus in my DIY upright cabinet and I like them very much. 😊
-
@Clyde Very nice!
-
@theissdev Back to back? You mean like the old Nintendo "red tent" cabinets? Those are cool.
- 5 Favorite Arcade Games in MAME
- Cocktail Cabinet Games
- Check out the MAME RoW
-
@IanDaemon For everyone who doesn't know them:
-
Whoaaaaaa. Talk about a throwback. I haven't seen one of those in forever!
-
Nice build!
I wonder if you have explored true cocktail settings in MAME for the vertical games. This would eliminate mirroring and no longer supply room for bezels, but it is how these were meant to be played and why the cocktail cabinet exists. The game dominates the screen, and when it is player 2’s turn, the video auto-rotates. Just an idea. I have all of my classic vertical games setup this way and it works great, provided the game was designed to use that feature (MAME DIP switches).
-
Sir, your really impressed me!!, excellent work!!!, let me know (msg me to the FB page) when you are ready to set LEDSpicer, so I can give you a hand with the configuration, I wrote some documentation on the sourceforge wiki page that may be helpful, but anyway you can ask me anything.
-
@caver01 Ya, I still have to wire the controls (dad time). was definitely planning on exploring throwing games that support cocktail mode into cocktail mode. Hopefully I'll have this thing completely done before a year has elapsed this December! =D
@MeduZaPaT Thanks! I really appreciate it. I've got it installed, but obviously can't do anything until the LED controller is wired. Quick reading on your documentation seems pretty straightforward. Will definitely reach out if I run into issues.
-
@MeduZaPaT I've gotten the bottom of the control panels built w/ hinges and locks and am now ready to finish up the rest of this - the wiring. I'm about done w/ the controls themselves and have a question about the LED wiring for LEDSpicer support:
I've got a PacLED64 (https://www.ultimarc.com/output/led-and-output-controllers/pacled64/) that I'm planning on using. I was going to use a couple of spare ground chains on a few of the + terminals of the PacLED64. All of my button LEDs are single-color.
It feels like everything's in sets of (+, R, G, B). Will LEDSpicer support a configuration of using all of the RGB pins for individual LEDs (Button 1 - 1R, Button 2 - 1G, Button 3 - 1B, Button 4 - 2R, Button 5 - 2G, etc.) or do I need to wire each button to a common pin, (like all buttons are wired to 1R, 2R, 3R, etc.). Is doing either way easier in config later?
Whether I end up soldering the wiring directly to the PacLED64 pins or using some of the leftover contact pins to plug into the plastic harness pieces, reverting may not be so easy, so thought I'd ask b4 I get to that point. Thanks for your help!
Cocktail Cab Project - https://retropie.org.uk/forum/topic/23763/cocktail-cab-project?_=1592408967951
-
@theissdev said in Cocktail Cab Project:
@MeduZaPaT I've gotten the bottom of the control panels built w/ hinges and locks and am now ready to finish up the rest of this - the wiring. I'm about done w/ the controls themselves and have a question about the LED wiring for LEDSpicer support:
I've got a PacLED64 (https://www.ultimarc.com/output/led-and-output-controllers/pacled64/) that I'm planning on using. I was going to use a couple of spare ground chains on a few of the + terminals of the PacLED64. All of my button LEDs are single-color.
It feels like everything's in sets of (+, R, G, B). Will LEDSpicer support a configuration of using all of the RGB pins for individual LEDs (Button 1 - 1R, Button 2 - 1G, Button 3 - 1B, Button 4 - 2R, Button 5 - 2G, etc.) or do I need to wire each button to a common pin, (like all buttons are wired to 1R, 2R, 3R, etc.). Is doing either way easier in config later?
Whether I end up soldering the wiring directly to the PacLED64 pins or using some of the leftover contact pins to plug into the plastic harness pieces, reverting may not be so easy, so thought I'd ask b4 I get to that point. Thanks for your help!
Yes, LEDSpicer can handle RGB or single color elements, when creating the elements instead of using red/green/blue, use led like this:
<element
	name="ELEMENT NAME"
	led="PIN NUMBER"
/>
For more details read this section of the wiki
On my cab, I have RGB and Single LED elements, I just wire 1 pin to the LED and that works perfect.
-
@MeduZaPaT Sweet. Thank you sir!
Cocktail Cab Project - https://retropie.org.uk/forum/topic/23763/cocktail-cab-project?_=1592408967951
-
@theissdev I very recommend you to don't solder the pins to the pac64 directly, get a cheap Crimping Tool and some pins, is really easy to do, and in no time you will get a really good interface that is easy to maintain.
I used something like this:
Crimping tool
Jumper connectors -
@MeduZaPaT You expect a wise man to come around this time of year. =D
-
@MeduZaPaT So, I've got all the lights wired up - used your connectors and the molex connectors that came w/ the pacled64. I've got button groups mapped and profiles for all the system combos. Everything is working great (and looks sooooo cool) for all the roms that don't have parentheses in their names. The ones that do (which is unfortunately most of them) throw an error and return to emulationStation on running the runcommand intermediary:
sh: 1: Syntax error: "(" unexpectedIt's definitely related to the parentheses in the rom names (there are none in the paths). It's all the '(U)' etc. stuff.
I've tried wrapping all instances of the rom names in double quotes in the es_system.cfg command as well as the refs in the intermediary .sh that lights the buttons then calls runcommand.
runcommand.sh doesn't have any issues w/ the parentheses b4 hijack. I went in and copied the clean_name function from there and wrapped the $ROM in that and still having the error.
My runEmulator.sh (for the non-arcade systems):
#!/bin/bash
EMU=$1
ROM=$2
RAW=$3
SYS=$4
emitter LoadProfile $EMU > /dev/null 2>&1
/opt/retropie/supplementary/runcommand/runcommand.sh 0 _SYS_ $EMU "$ROM"
I split the finish call to a new runcommand-onend.sh:
#!/bin/bash
emitter FinishLastProfile > /dev/null 2>&1
Sample from my es_systems.cfg:
  <system>
    <name>atari2600</name>
    <fullname>Atari 2600</fullname>
    <path>/home/pi/RetroPie/roms/atari2600</path>
    <extension>.7z .a26 .bin .rom .zip .gz .7Z .A26 .BIN .ROM .ZIP .GZ</extension>
    <command>/opt/retropie/supplementary/runcommand/runEmulator.sh atari2600 %ROM% %BASENAME% atari2600</command>
    <platform>atari2600</platform>
    <theme>atari2600</theme>
  </system>
Again, everything is great if there's no parentheses in the rom name. Just can't seem to figure out how to work around that and I shudder at the thought of having to strip those from all the configs and the filenames...
Any suggestions? Thanks and sorry my bash is weak. =(
Cocktail Cab Project - https://retropie.org.uk/forum/topic/23763/cocktail-cab-project?_=1592408967951
-
@theissdev In the bash, you either need to "escape" special characters with a leading backslash
\(example\)or put the whole command in either single or double quotation marks. See https://stackoverflow.com/questions/6697753/difference-between-single-and-double-quotes-in-bash for the difference between them.I have not much practical experience in Bash-Fu, but for a start, I'd try to put your command in quotes:
<command>"/opt/retropie/supplementary/runcommand/runEmulator.sh atari2600 %ROM% %BASENAME% atari2600"</command> -
@Clyde Ah. I'd tried wrapping the %ROM% in quotes, but didn't the %BASENAME% which would have the parentheses as well. Good idea for just wrapping the whole command. I'll give that a shot. Thanks!
edit: Bah. Still the same. Only place it could appear in the runEmulator.sh is already wrapped in double quotes. I may dig into how to do something like a string.replace('(', '(') in bash on that path and leave the command wrapped in quotes. Since the command is actually a param being parsed and then called, not 100% sure those quotes are being honored either...
Wrapping the %ROM% and %BASENAME% in quotes individually didn't work either. Since the original runcommand call in es_systems didn't seem to have any issue with parentheses and all the hijack script is doing is calling emitter and firing off that original runcommand, i may try just making the command in es_systems the emitter call && runcommand call and bypass the intermediate script. Since i'm not really getting a valid line number in the error, def. think the issue is w/ the argument passing.
-
@Clyde Woot! So this works:
<command>emitter LoadProfile atari2600 && /opt/retropie/supplementary/runcommand/runcommand.sh 0 _SYS_ atari2600 %ROM%</command>Thanks for the help and inspiration!
Cocktail Cab Project - https://retropie.org.uk/forum/topic/23763/cocktail-cab-project?_=1592408967951
-
I just wanted to post a quick update. There's been some changes to the cab and wanted to report them here in case someone needs it. Saw a thread about cocktail cabinets this week and thought having some more info here would be helpful for others.
For the cocktail split, I started using the cocktail shader here https://github.com/RetroPie/common-shaders/tree/master/misc but I realized it didn't cover everything. I started down the rabbit hole trying to create shaders for all the bazillion variants of aspect ratios, then realized I could come up w/ just a few that gets everything "close enough", leaving a small amt of black space here or there, but nothing really noticeable.
I ended up with 4 shaders. 2 for vert, 2 for horizontal. The vert and horizontal shaders also needed flipped variants as some of the games would show up upside down. Keep in mind I'm running all retroarch engines w/ rotation set to 1.
Here's those shaders if anyone's interested:
http://metalmutts.com/cab/cocktail-cab-portrait-flipped.glsl
http://metalmutts.com/cab/cocktail-cab-portrait-vert-flipped.glsl
http://metalmutts.com/cab/cocktail-cab-portrait-vert.glsl
http://metalmutts.com/cab/cocktail-cab-portrait.glsl
These should live somewhere in your /opt/retropie/configs/all/retroarch/shaders dir.These of course are only useful for games that have 2p simultaneous play. If the game is vert, there's a small amount of space to the left and right of the game. If it's running in lr-mame2003plus, I can run artwork. So I change the custom aspect ratio from 0,0,1920,1080 to 0,-230,1920,1540 and use this artwork (for ikari warriors in this case) which seems to look and work nice:
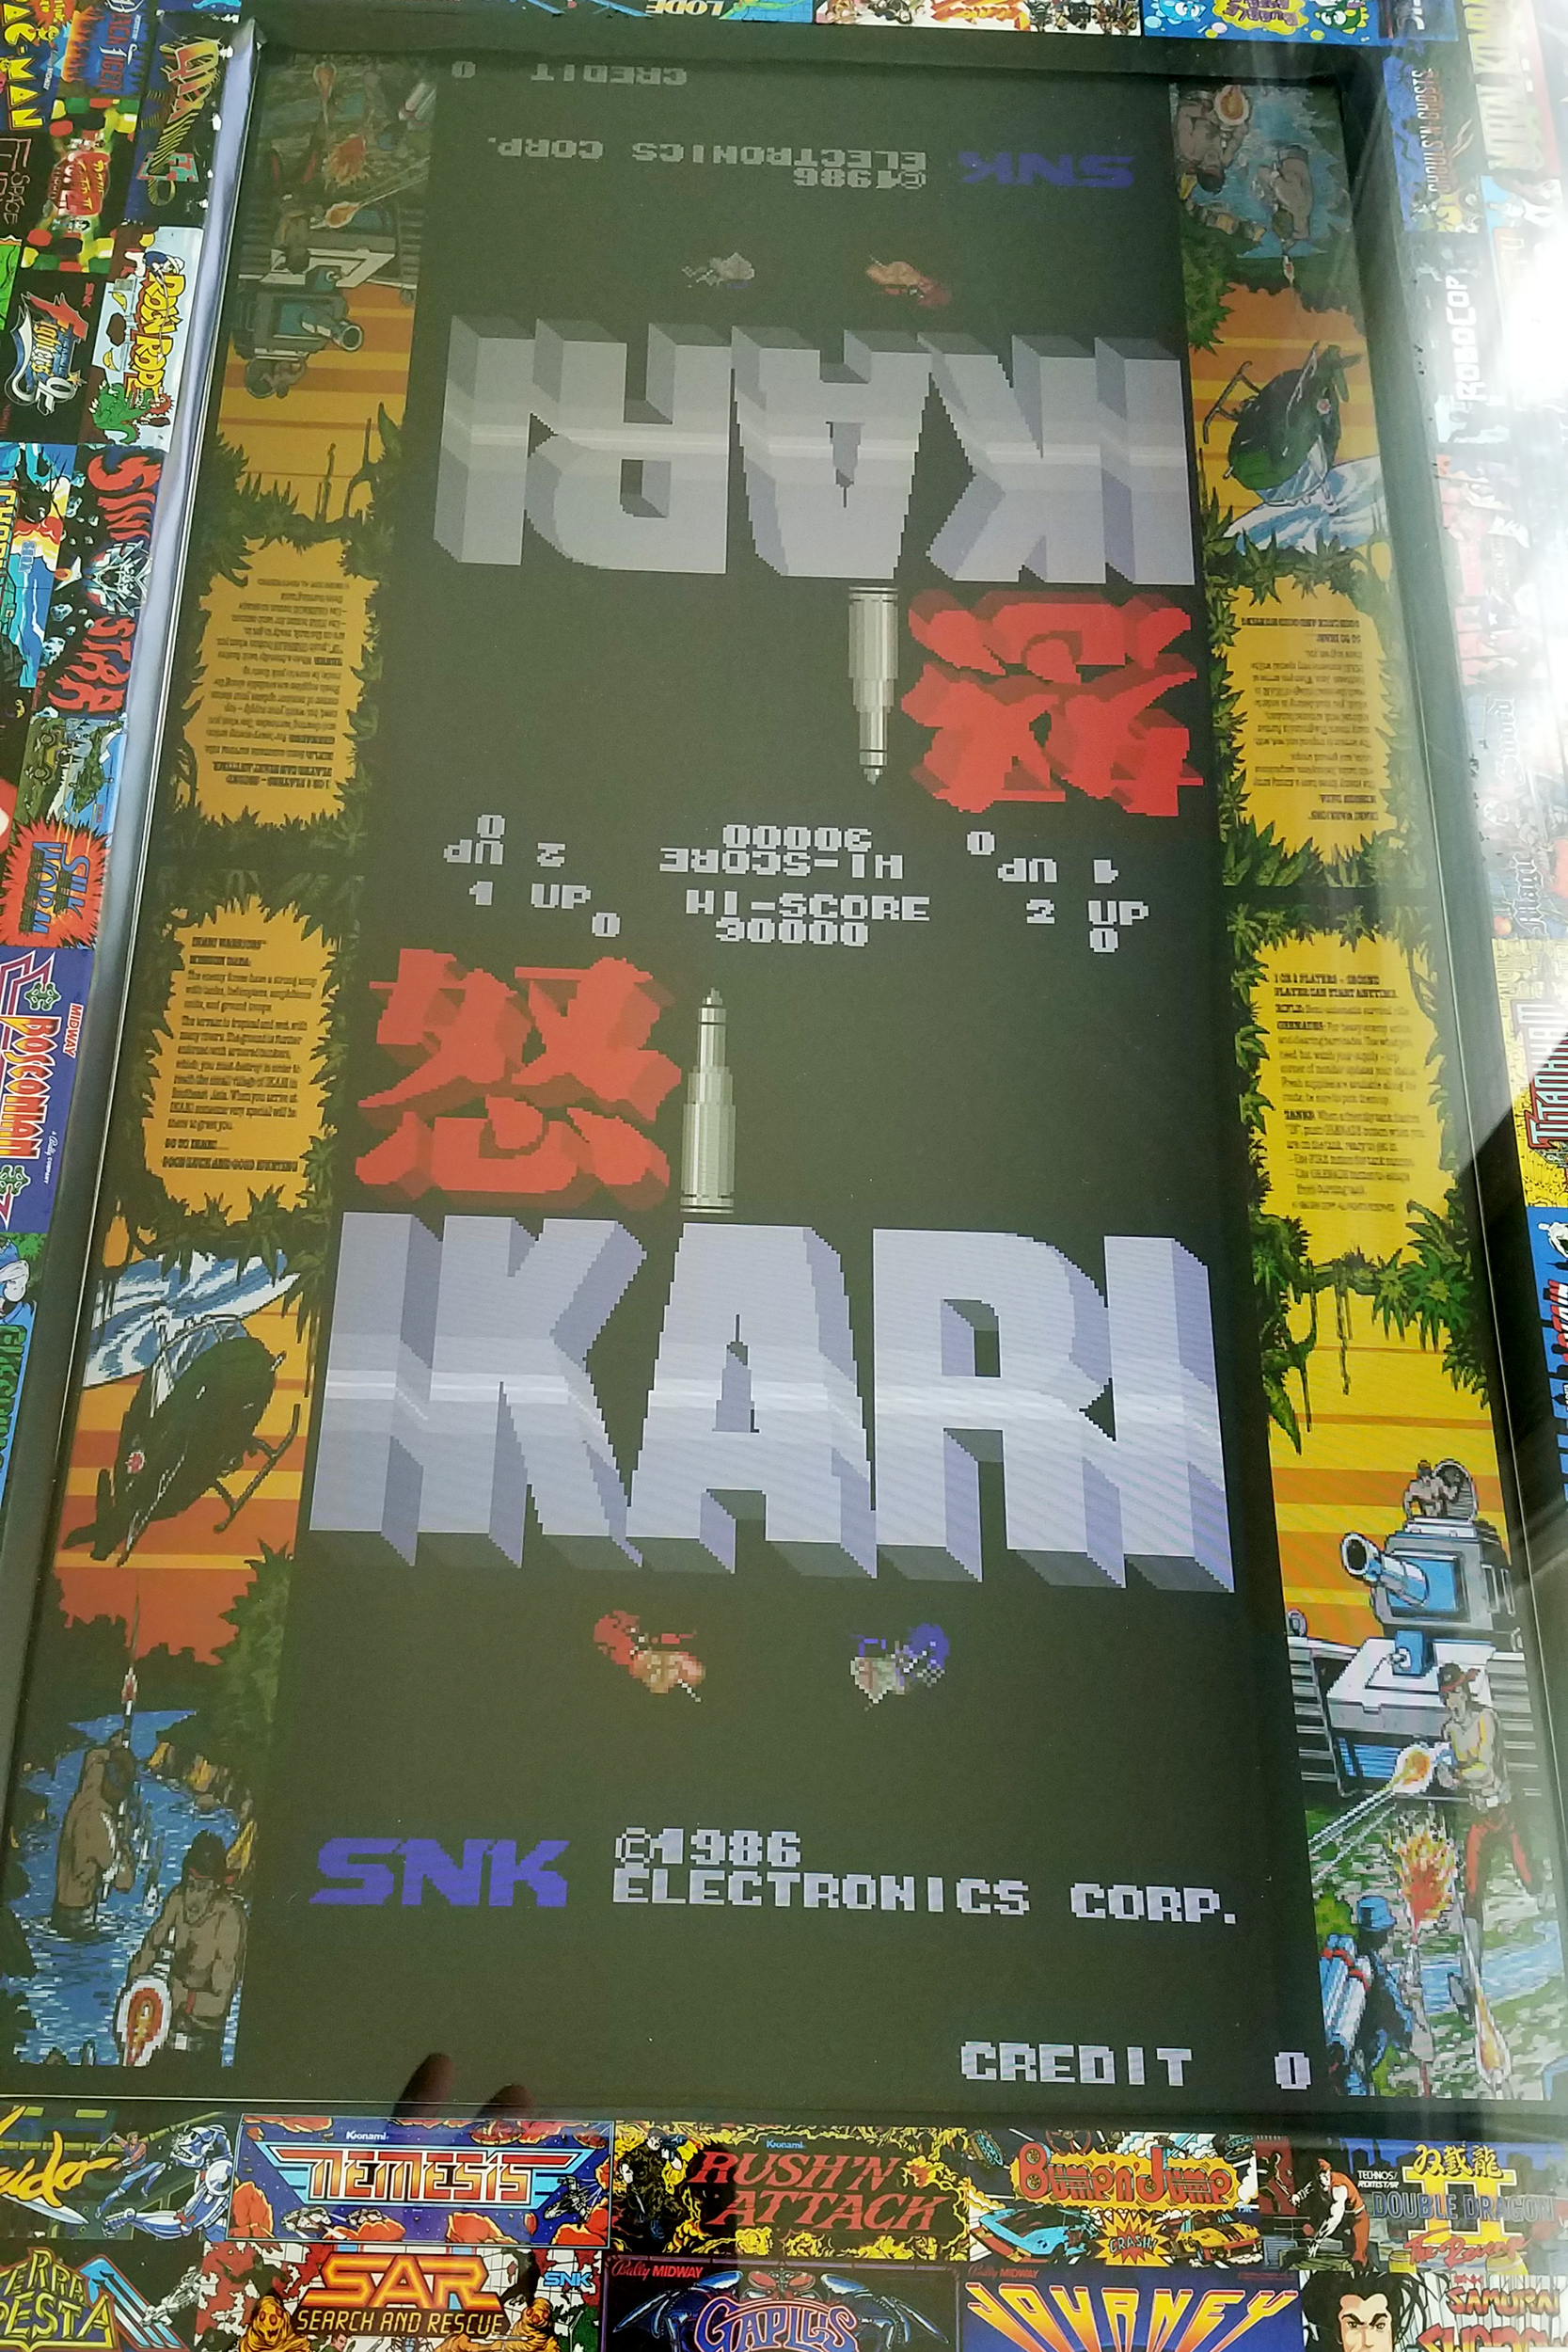
It's daytime, so sorry for the glare. If you want to use this artwork as a template, it's here: http://metalmutts.com/cab/ikari.zip
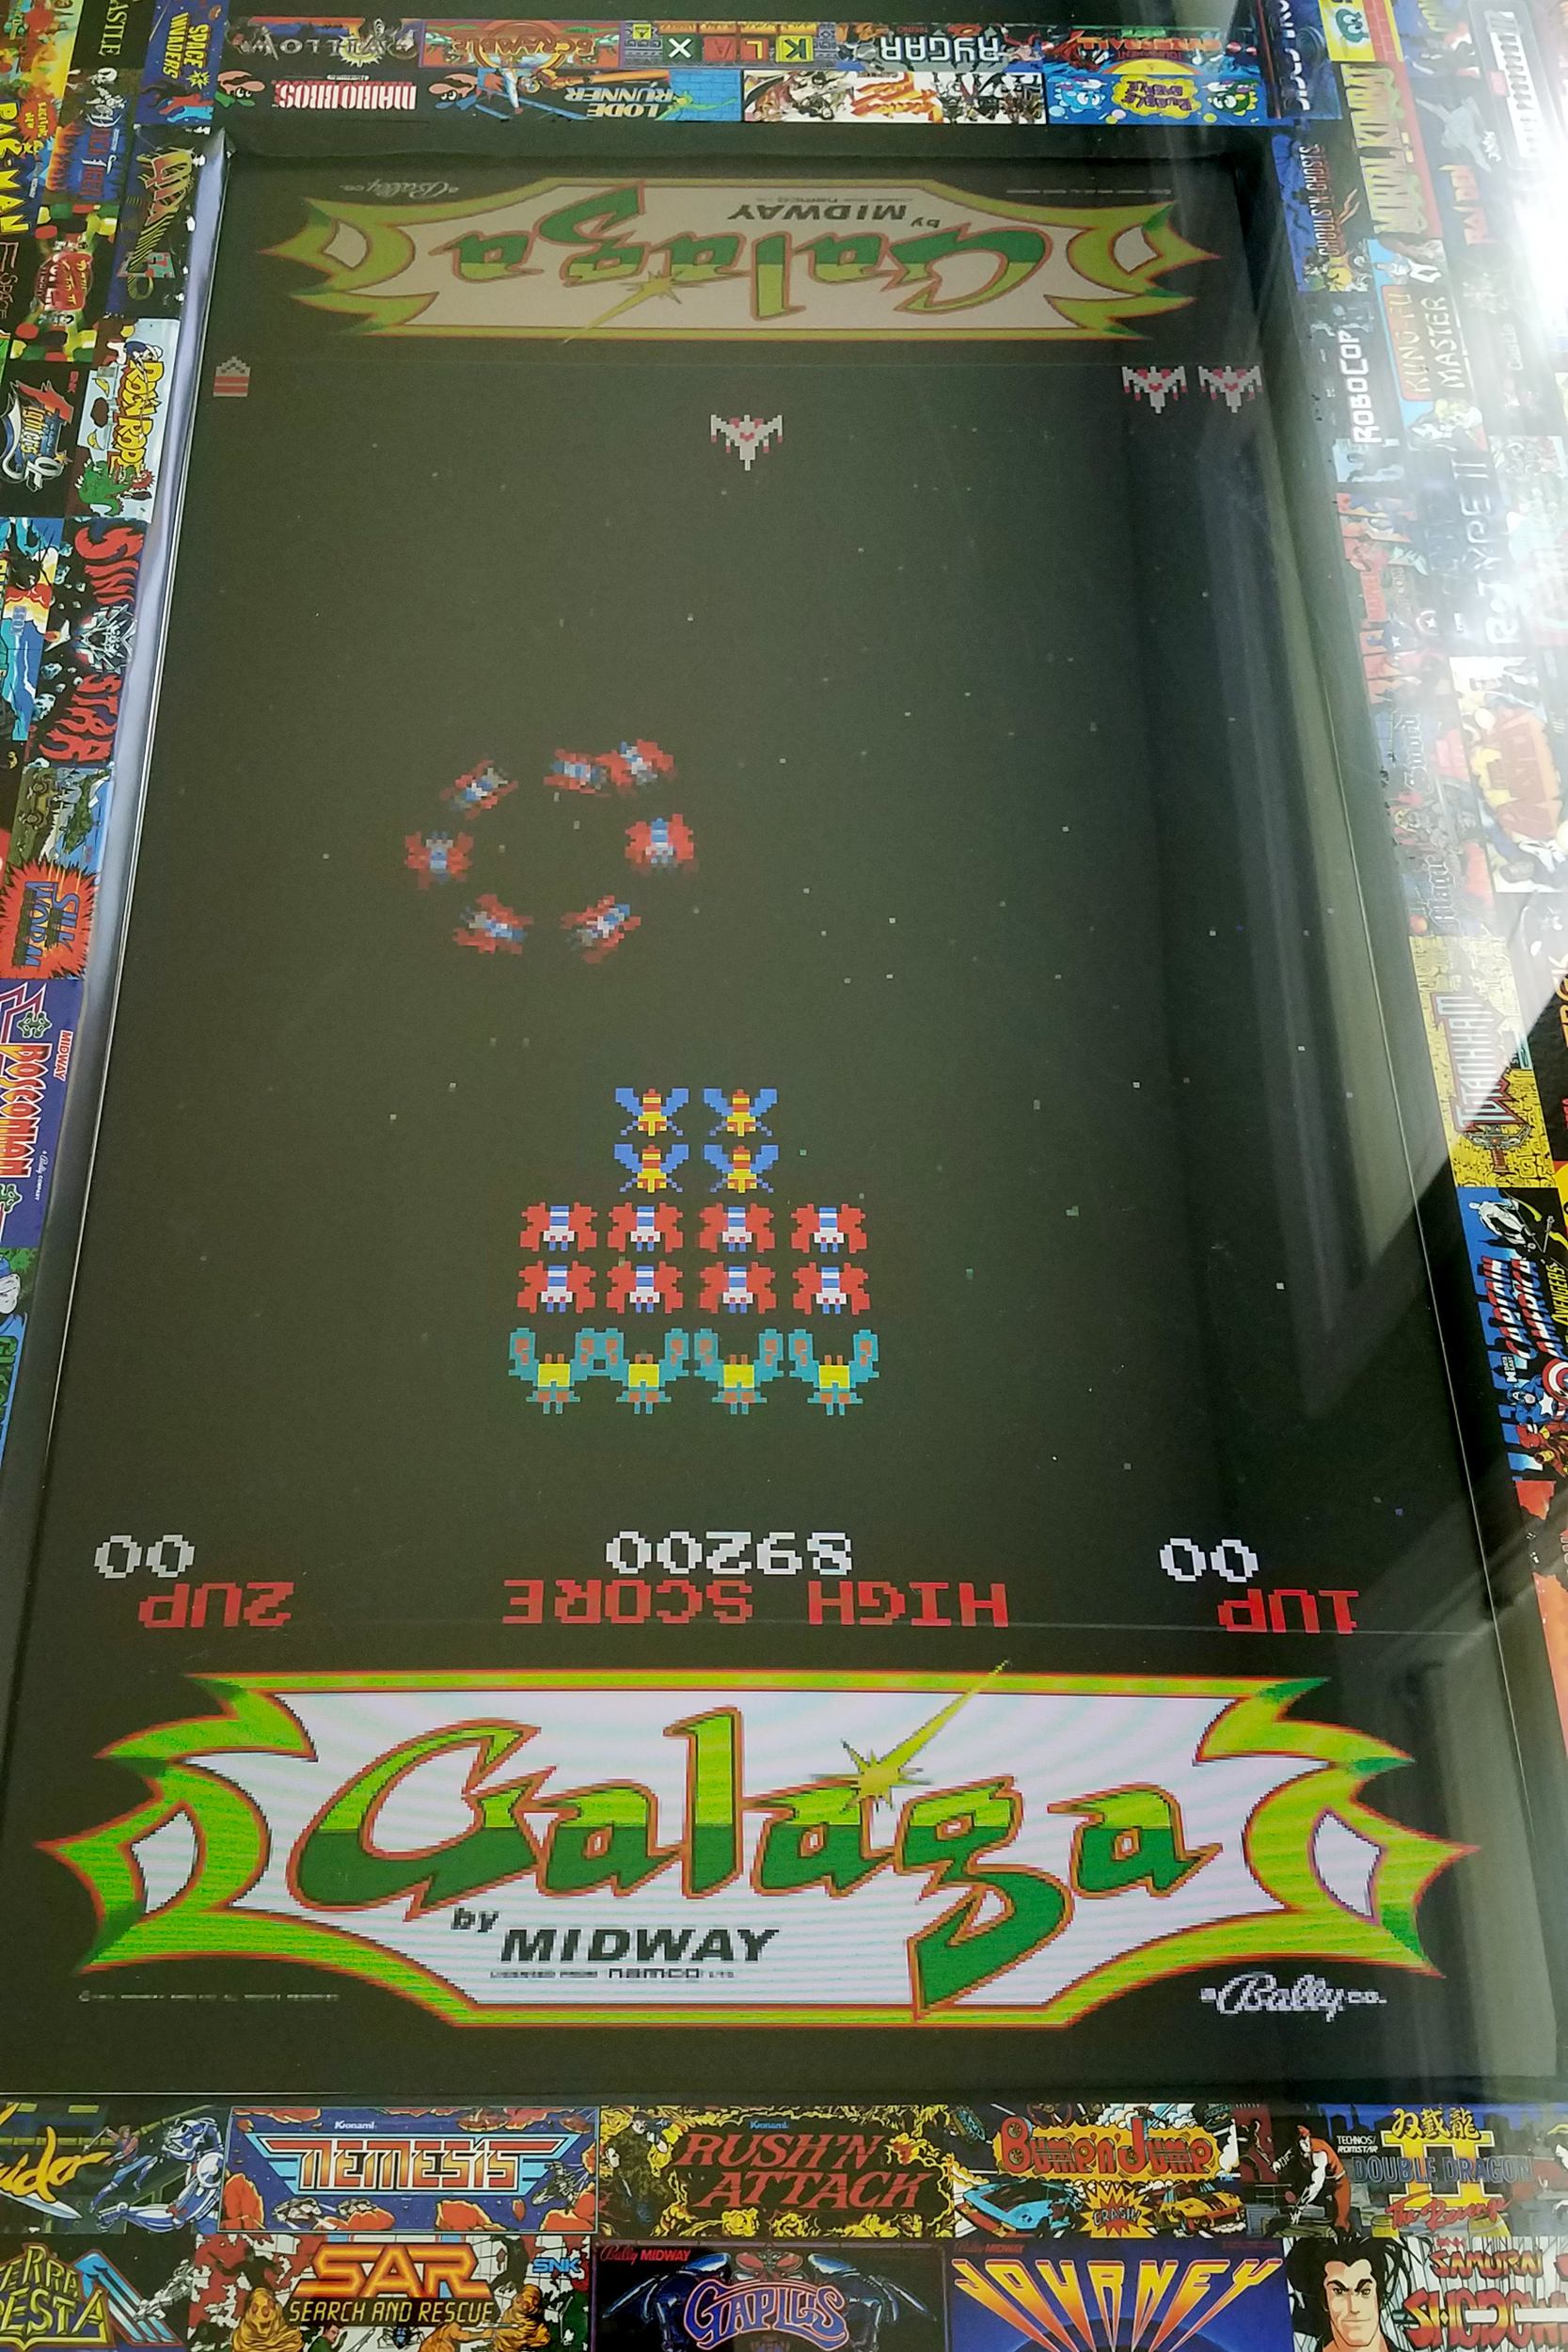
Note that this artwork needs to be in ~/Retropie/BIOS/mame2003-plus/artwork.For 1p games or 2p alternating, I went with full screen. Full screen works well, with the game centered in the view. If cocktail mode is available, I flipped that on and that works great. There's a lot of dead space when you do that though. Since this cab is artwork-forward, I decided to fill that space where I could (lr-mame2003plus engine, 1p or 2p alternating):
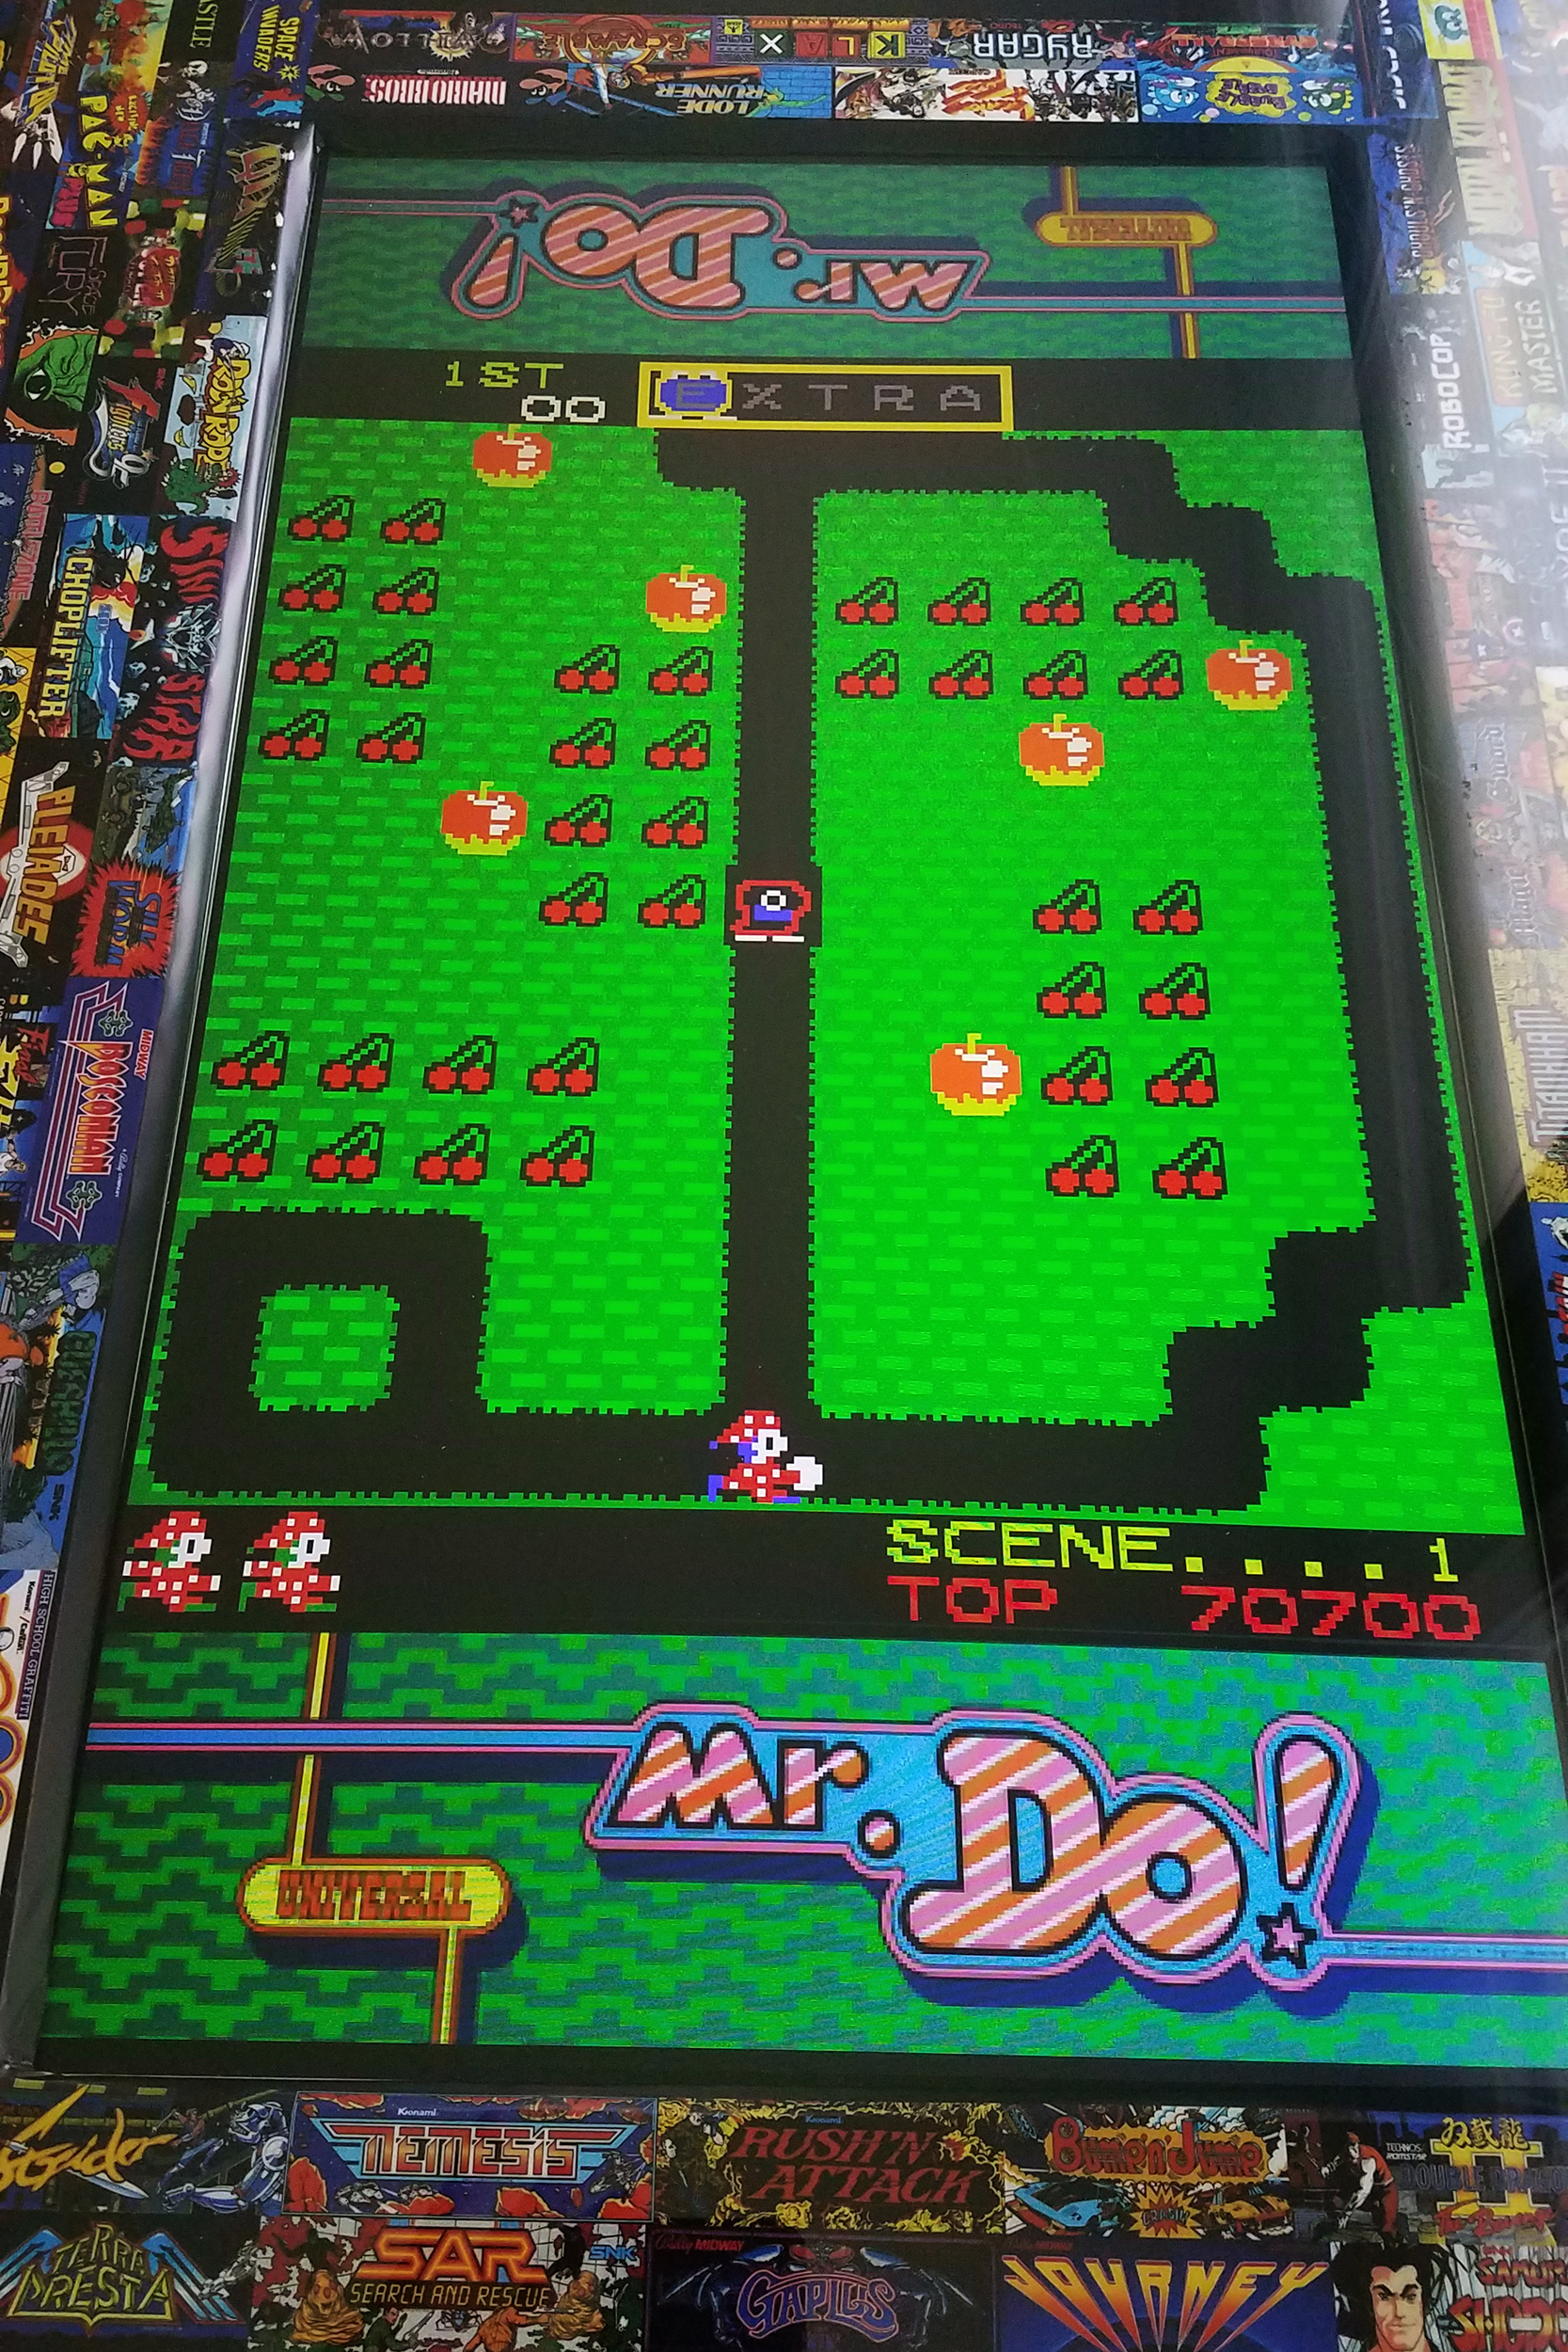
The artwork file is slightly different if the game is vertical or horizontal aspect.
The artwork for vertical (for a template) is here: http://metalmutts.com/cab/galaga.zip and for horizontal: http://metalmutts.com/cab/gtg2.zip
Note that if you previously changed the aspect, these overlays require the full aspect (0,0,1920,1080).
Since the cocktail versions of these have the marquees mirrored, you don't notice anything when the cocktail mode flips the screen. For 1p games, the artwork obviously doesn't flip, but it's also semi-random which orientation you get (you may need to adjust the artwork as needed). I've also seen cases where the artwork is actually reversed (not sure how that works, but you can reverse it in the artwork file and retry it).
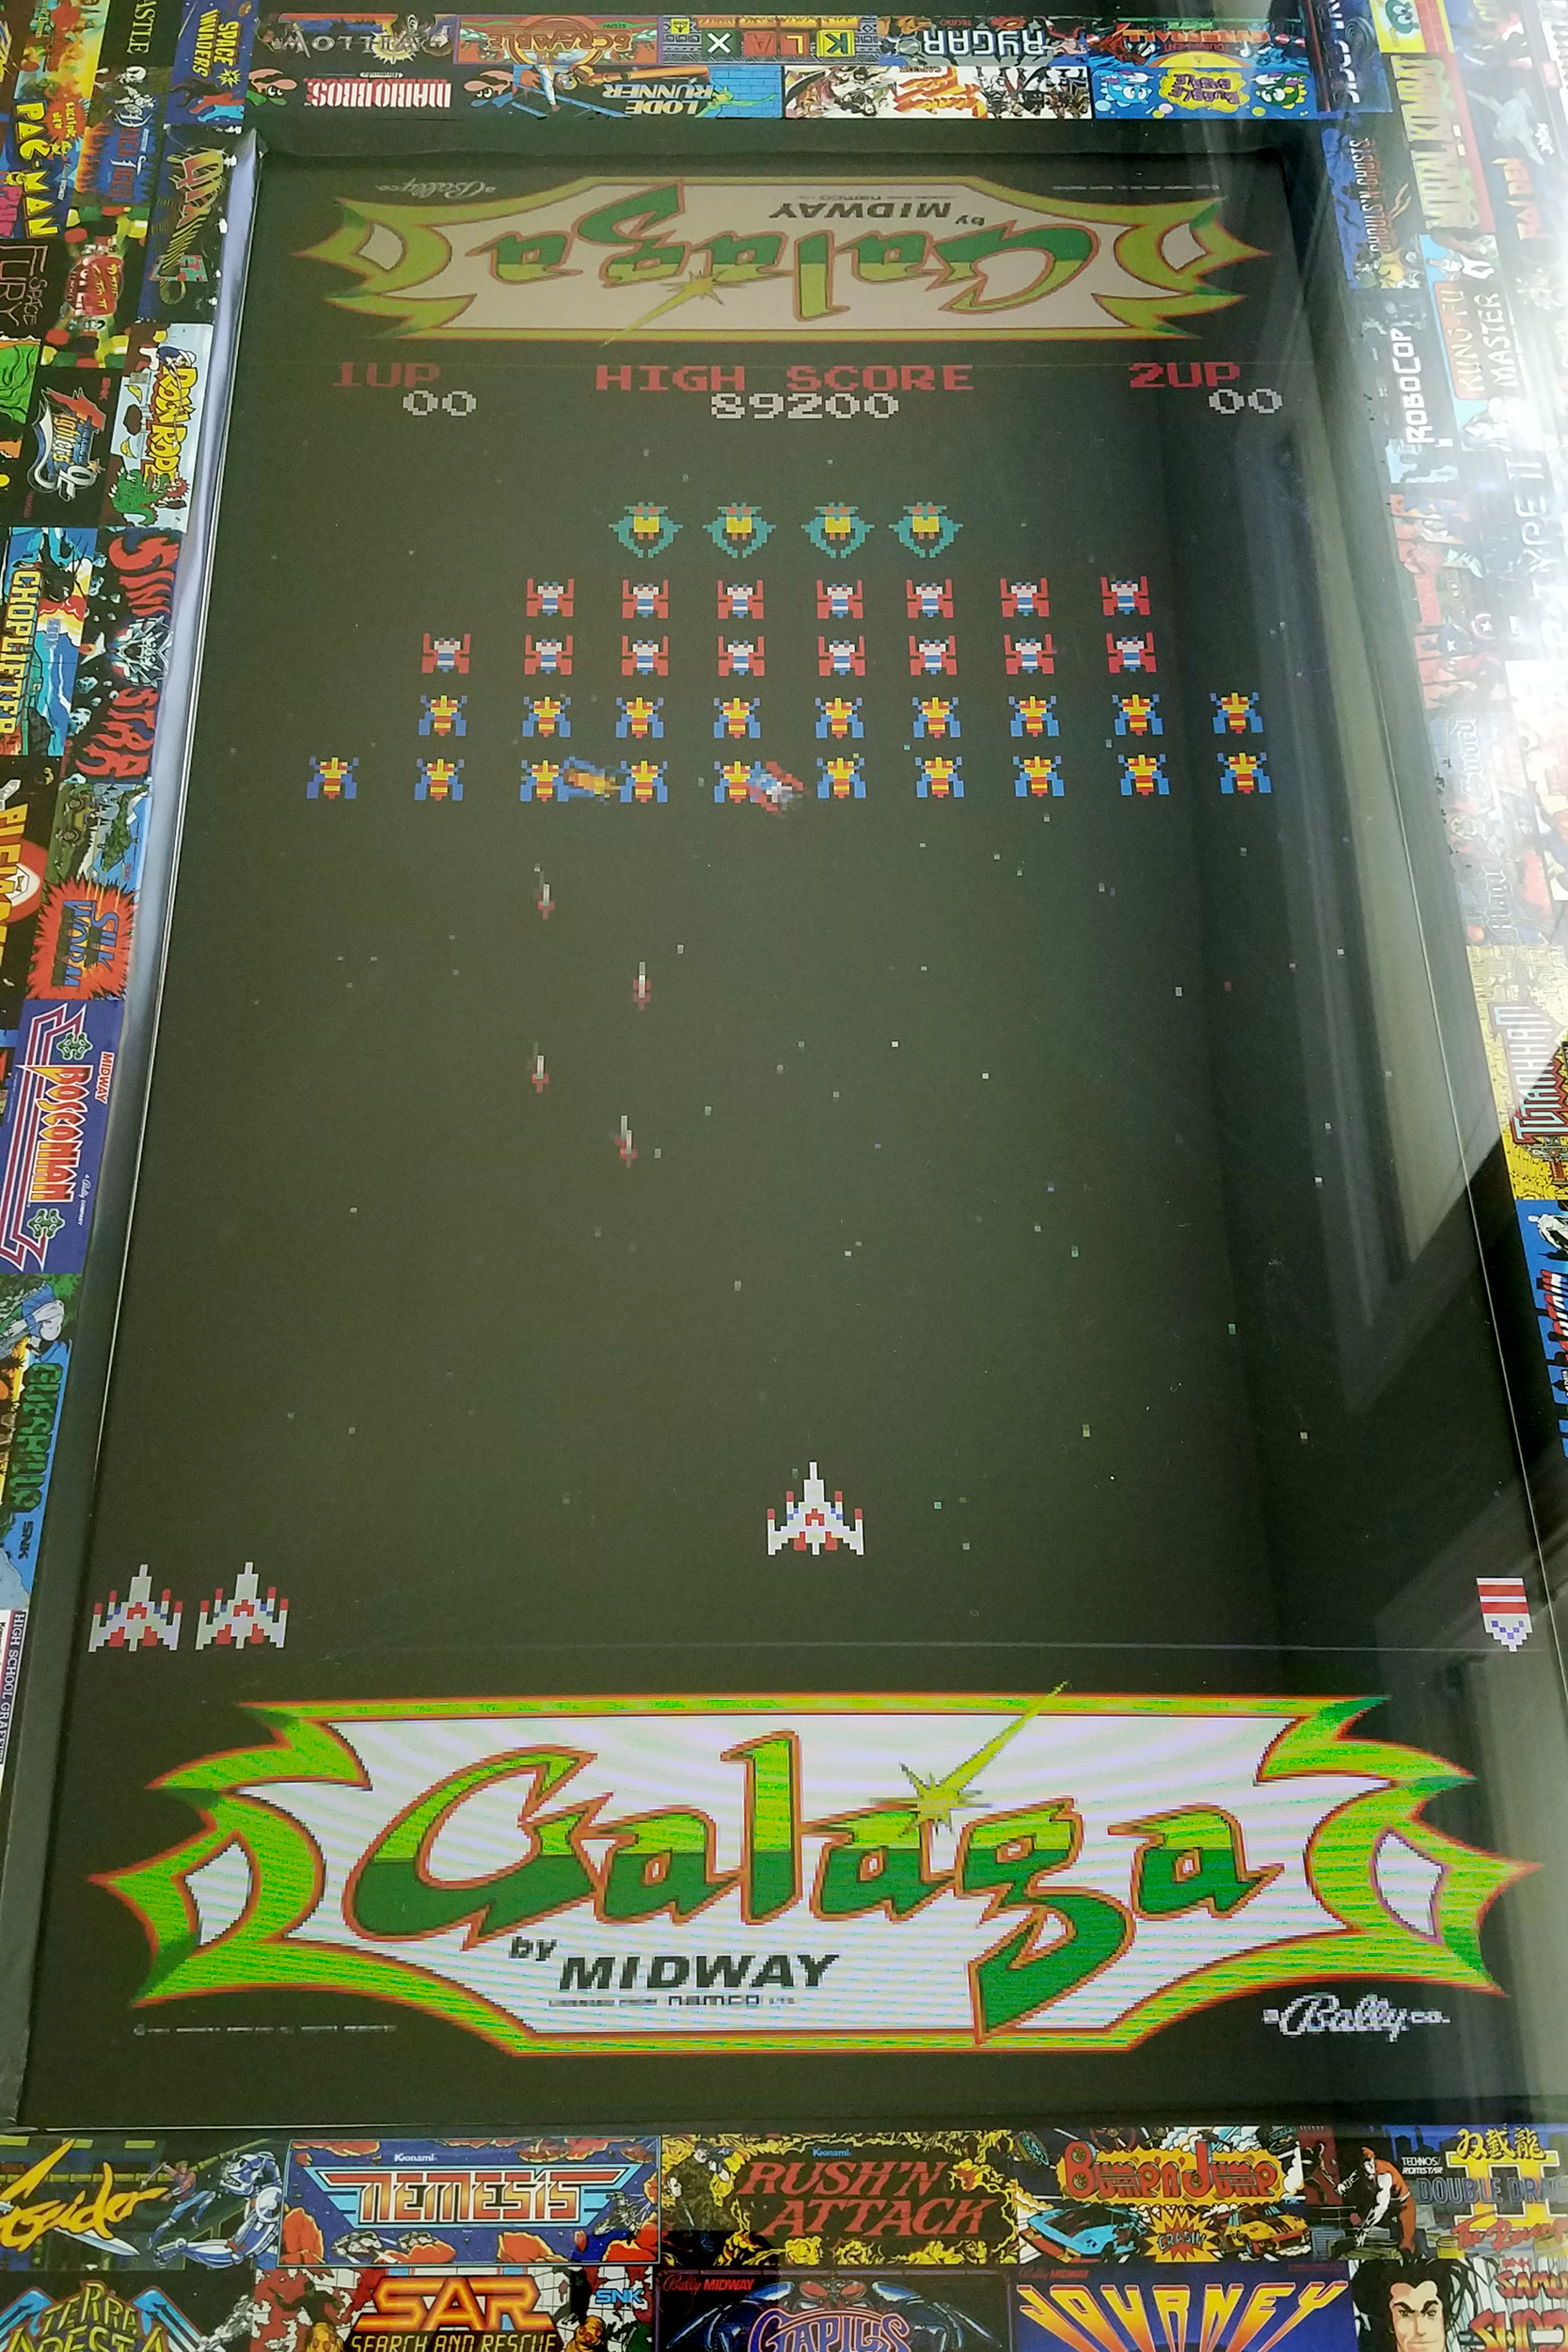
Also, keep in mind that since we're running the libretro cores rotated, the artwork wants to be rotated as well (at least for me). So when you're working on an overlay to fill out the top and bottom of a vertical game, the artwork file is offset 90° as well (if you look at the image in that galaga artwork file, you'll see the marquees are on the left and right). Just something to be aware of. Running rotated can create some... challenges. =D
Now this worked great for a while, but I hated having to select games w/ the menu not rotated (remember I'm running the libretro cores w/ rotation 1 (90°). I started w/ a slightly tweaked version @alphatoanant 's gorgeous artbook theme (again, this cab is all about the art). Eventually I decided trying to set emulationstation to run 90° and thus I needed a vertical version of the theme. I came up with this:
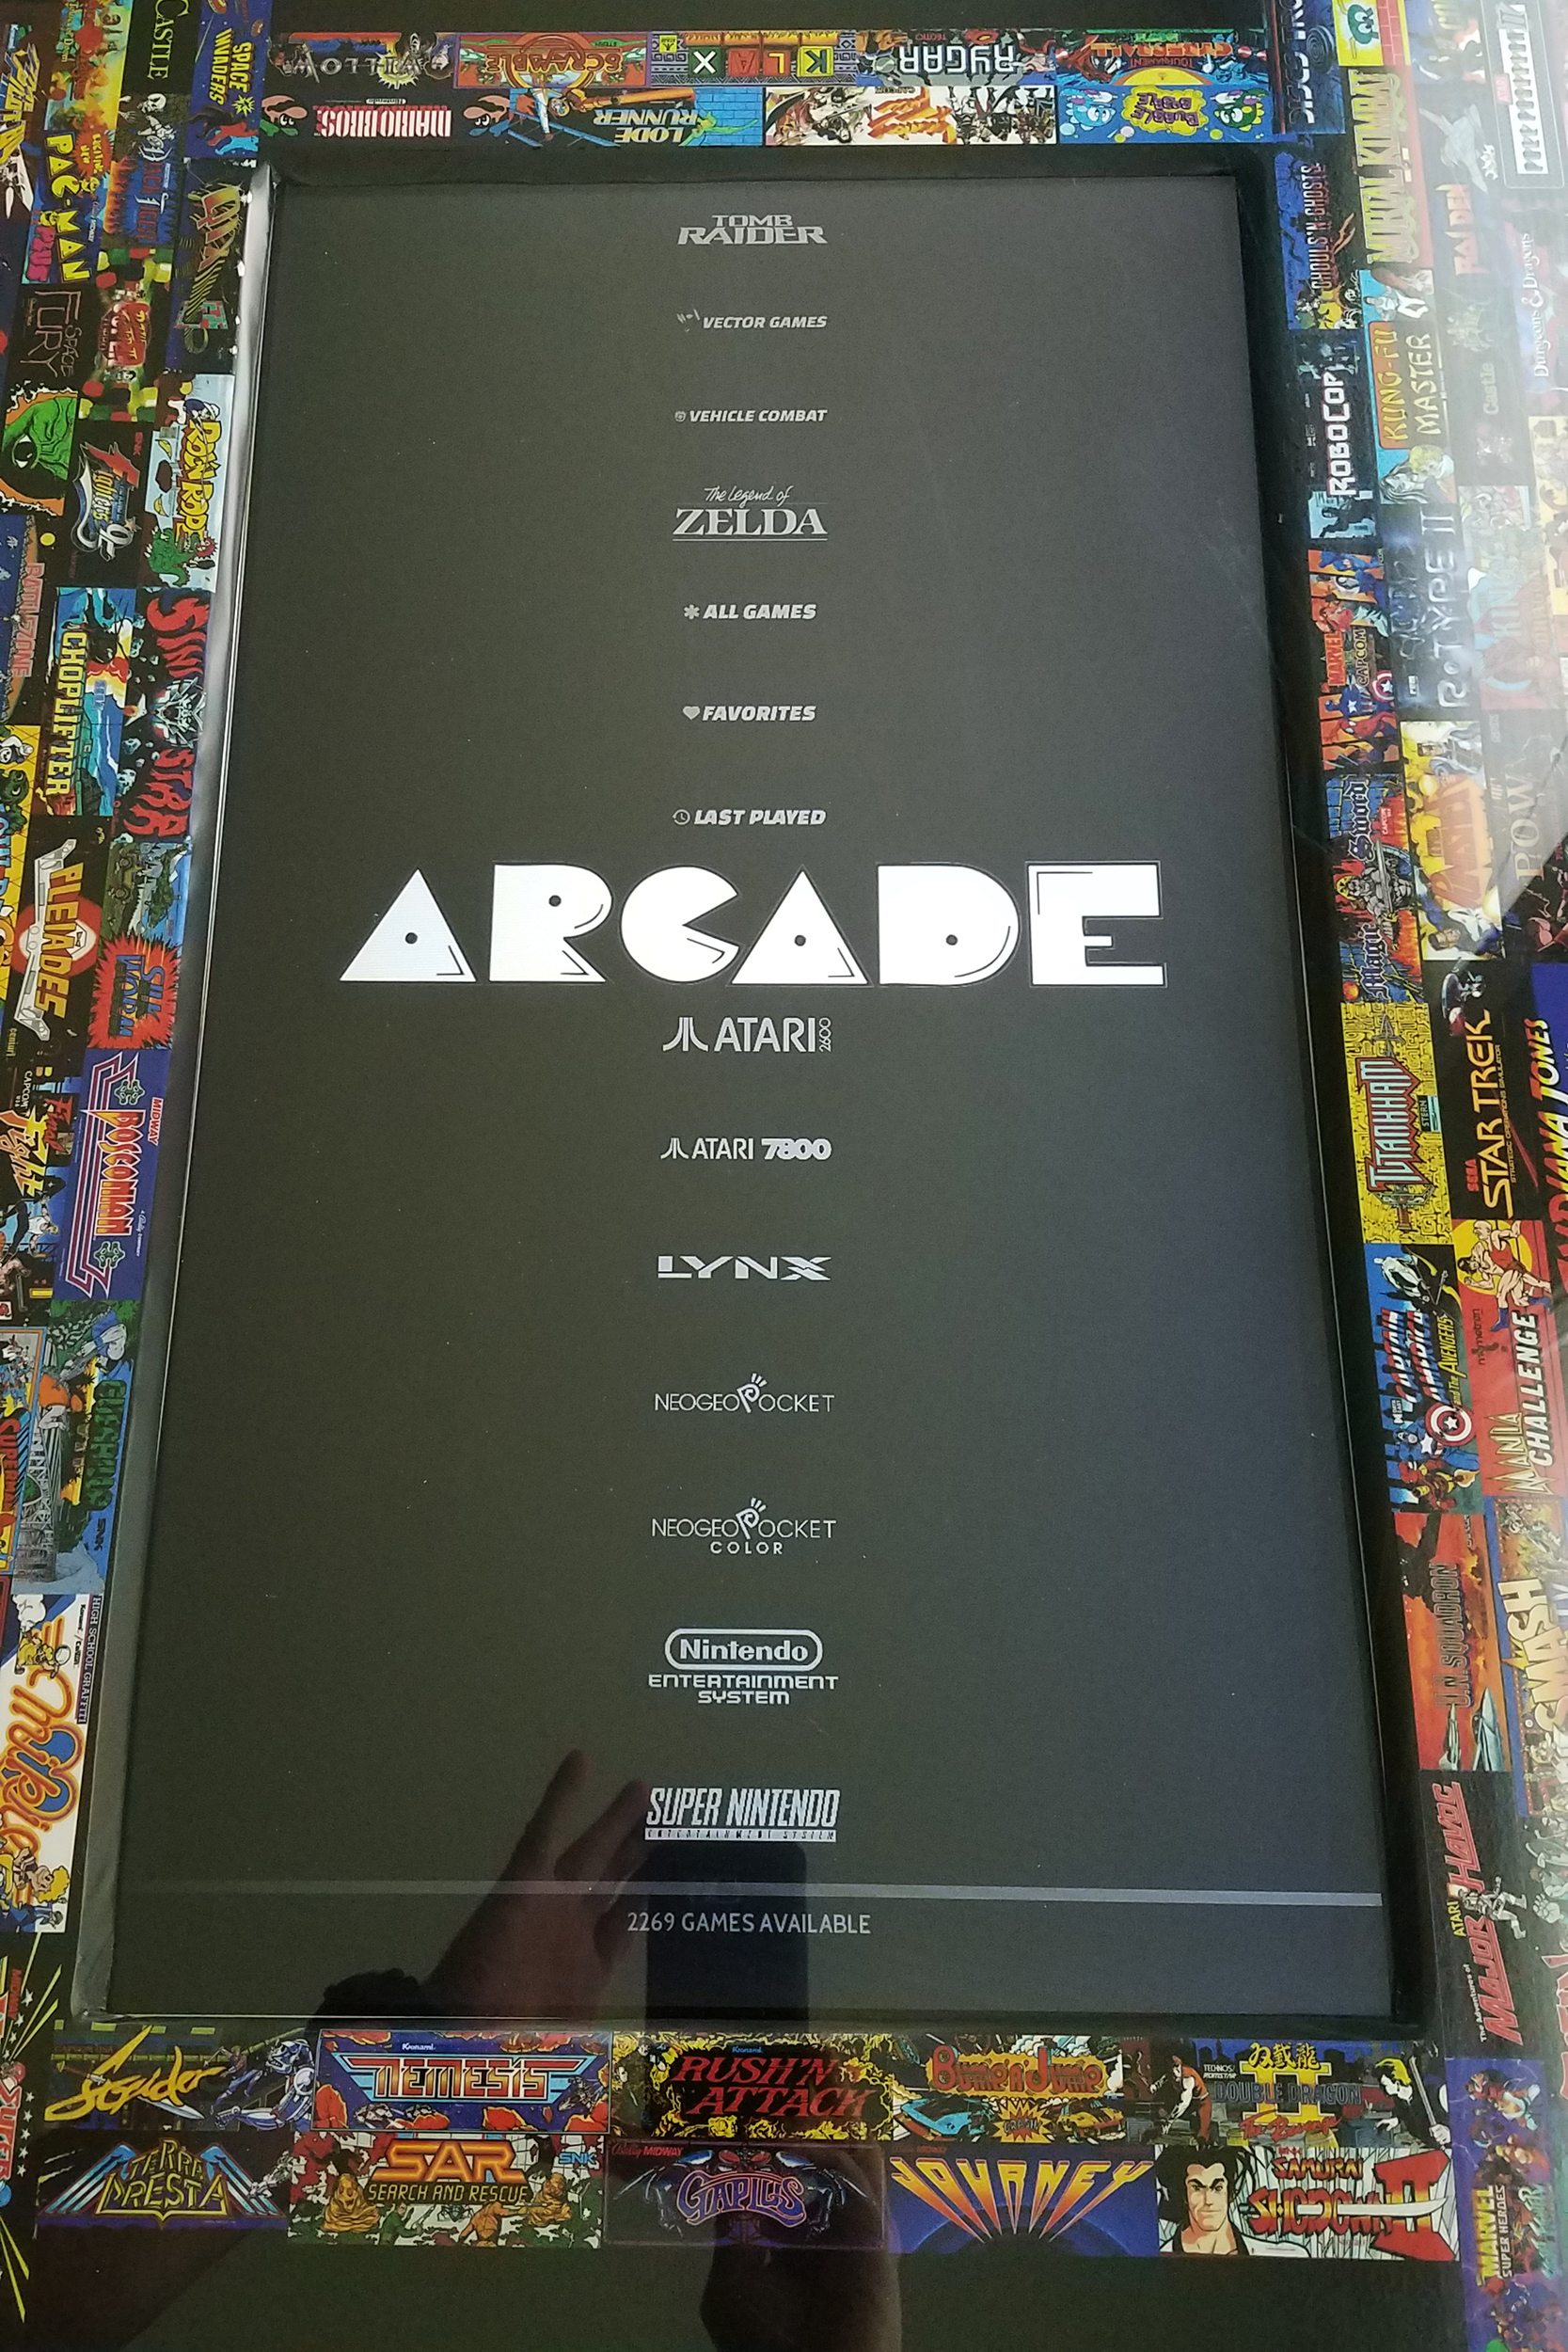
and
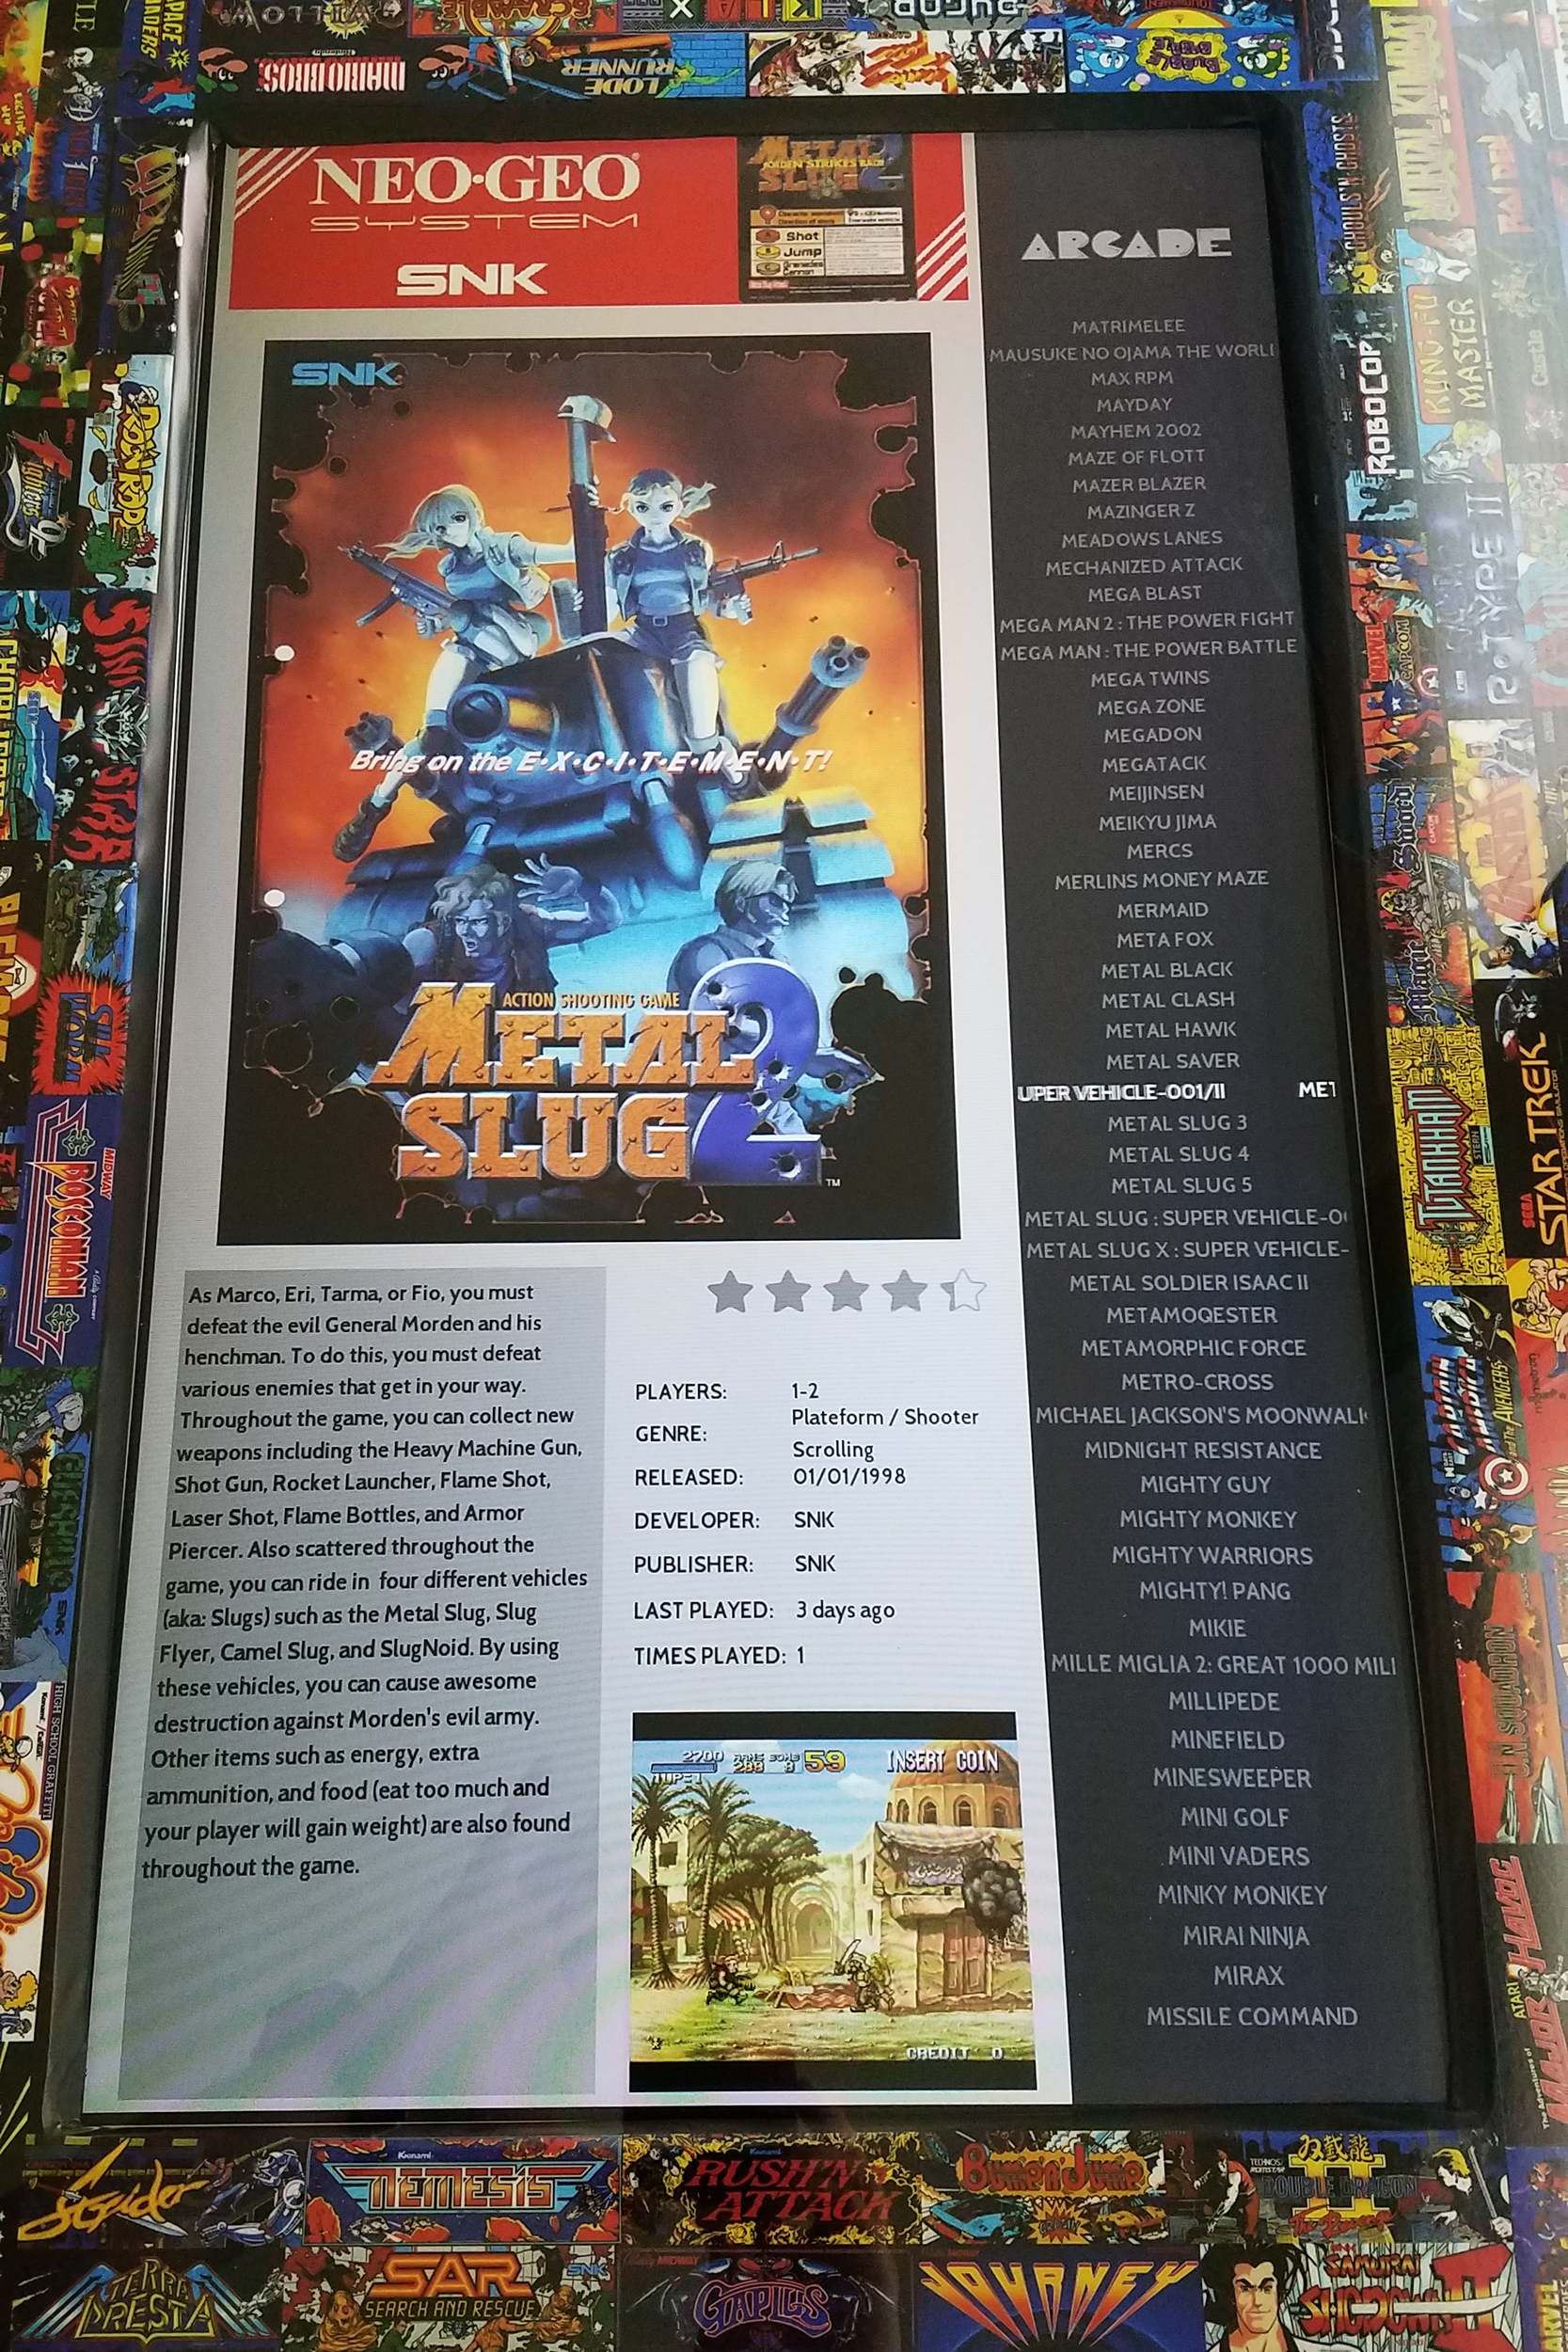
I think it worked out great, giving max space to artwork where available. Marquee and fliers on arcade, box art on consoles. Plenty of space for description, vid and game data w/o sacrificing art space.I've heard differing takes on whether or not it's better to run the whole pi rotated or individually here (libretro cores and emulationstation). Individually seems to work great w/ no noticeable slowdown. Unfortunately, for non-mame2003 arcade cores, I just have black space wherever that appears, but I've tried to focus mostly on lr-mame2003plus and use lr-fbn or lr-2010 when I'm not able to have 2003 (glitches or whatnot).
Anywhoo.... This was my first retropie cab. It's sitting here waiting for the RP4 upgrade. Hoping the majority of these files will transfer cleanly. Again, just wanted to document my experience and share files I ended up with in case it helps anyone. Another big shout out to this community. There's no way I would've figured some of this stuff out w/o you guys! <3
Contributions to the project are always appreciated, so if you would like to support us with a donation you can do so here.
Hosting provided by Mythic-Beasts. See the Hosting Information page for more information.