The Hardwood Build
-
I’ll start by saying a big thank you to the guys who put together Retropie. I had no idea such a thing existed a few months ago when I decided I’d finally buy a Raspberry PI and see if I could get MAME running with an old monitor and joypad. I’m totally blown away. Can’t believe I can even play the point and click games I enjoyed on my first 286 PC (or was it the 386sx?).
After a long and undistinguished career in investment banking IT (IBM mainframe MVS, yawn), I took voluntary redundancy a year ago (best thing I ever did) and immediately took up woodworking (after a short 40 year break since my O’level ) and built up a pretty decent workshop. I learned my chops on birch plywood and then early this year discovered the wonderful “Wood Yard” in Brentwood, Essex, which knocks out hardwood offcuts from their furniture business at discount prices. Sorry, this is not meant to be an advert for them, more of an excuse as to why I ended up building my bartop arcade out of hardwoods.
So anyway, I had all of this rough cut 3 inch thick English Walnut and 2 inch think Canadian Cherry and thought, “if my arcade machine looked a little more like a piece of wooden furniture, maybe the Mrs would let me keep it in the house… hell, maybe even in the lounge!”
So, after a lot of re-sawing, planing, thicknessing, edge jointing, rounding over and more sanding than I thought possible, it finally got assembled..
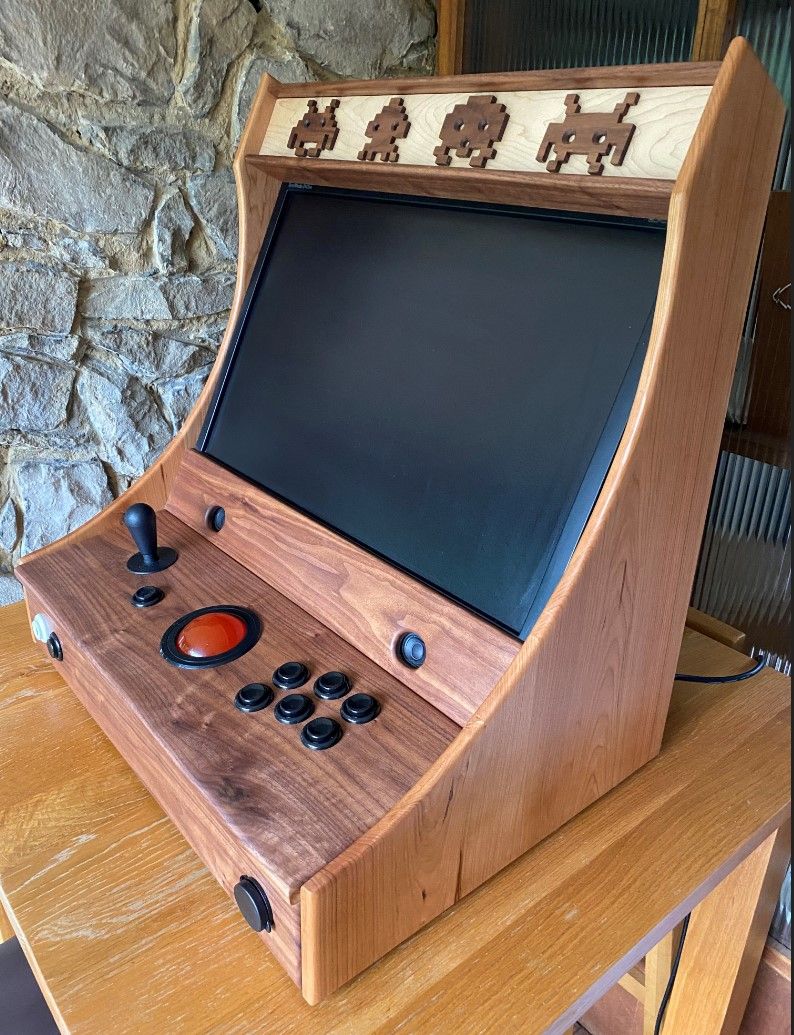
..the side panels are Cherry, the control panels, speaker panel, marquee top and base are Walnut
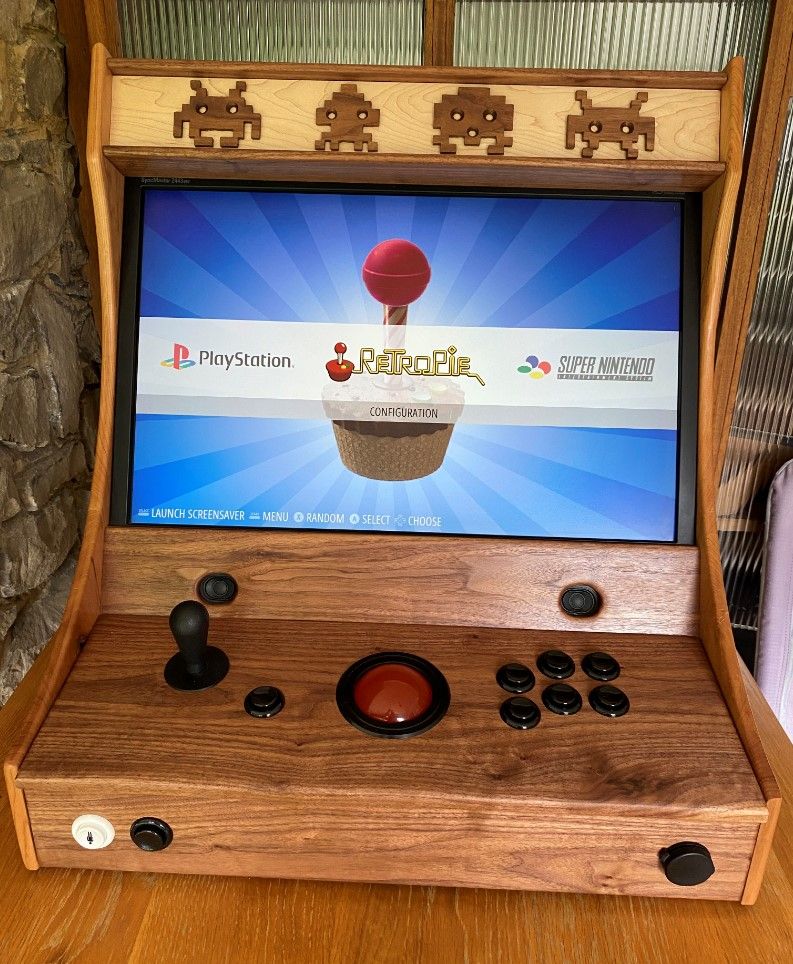
..for the marquee, I cut the space invader characters from Walnut on the bandsaw, countersunk their wee eyes and mounted them on a piece of nicely figured Canadian Maple

The back is painted Birch ply with a vent for the monitor, a power inlet with a rocker switch and an access door.

The control panel joystick and buttons are Industrias Lorenzo and the trackball is Ultimarc.
The speakers are just small enclosures powered by a very cheap Adafruit I2S 3W Stereo Speaker Bonnet sitting on the PI, which I must say gives a very detailed stereo sound and is quite loud enough.
There’s also a covered 2 port USB 3 inlet bottom right plugged into the 2 USB 3 ports on the PI a joypad and keyboard (and perhaps USB boot once officially released for the PI 4)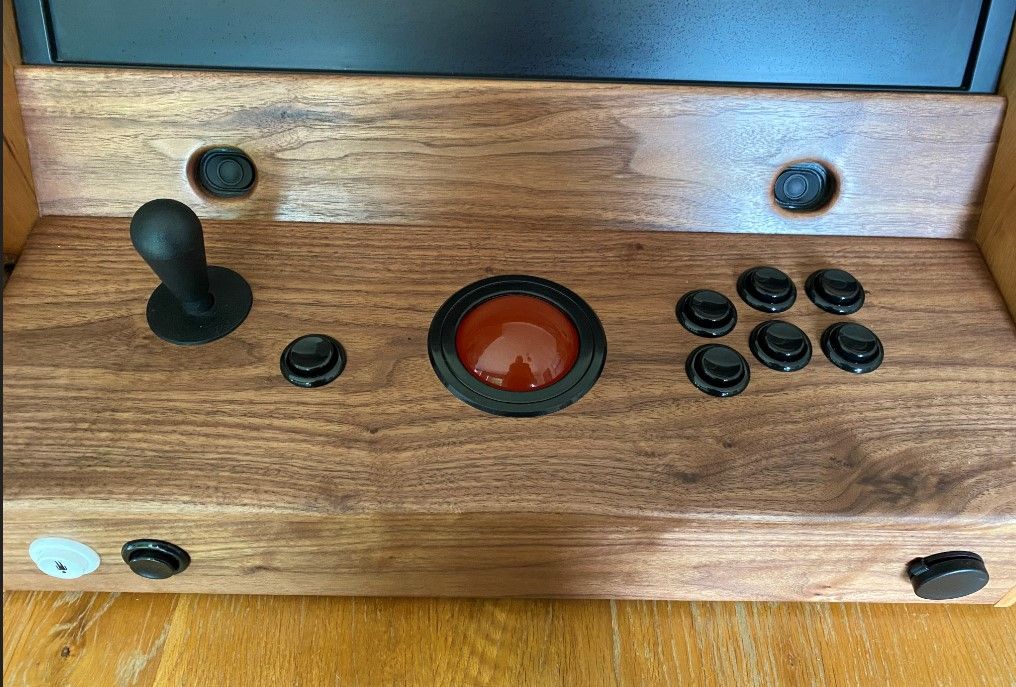
You might notice that the wee man on the white select button is upside down. I have an excuse..
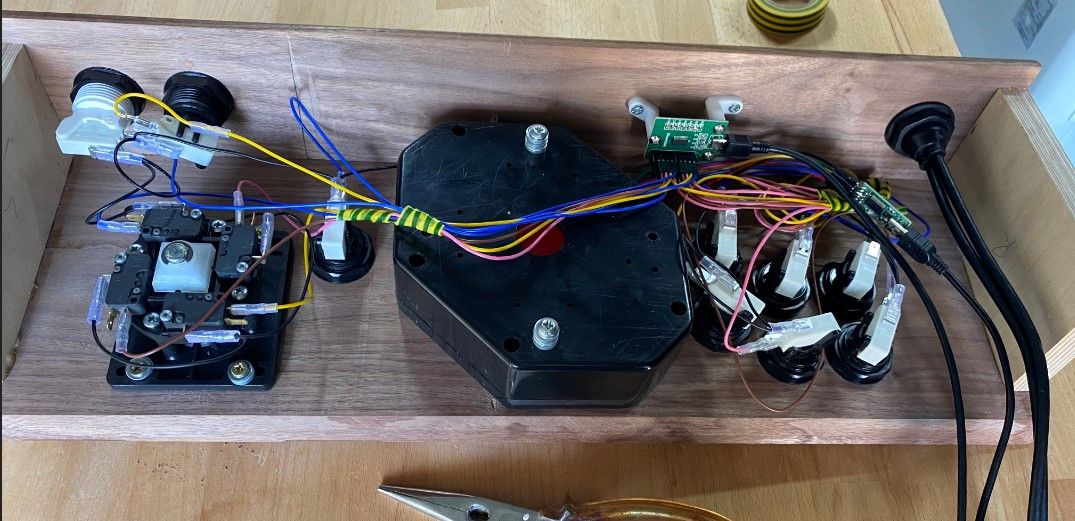
.. When wiring up, I managed to attach the PCB just too far to the right, such that I could only stretch the yellow wire spade into the select button microswitch if it was oriented that way up. I’m somewhat ham-fisted and the wiring up took me about 3 hours and very nearly drove me mad (I initially wired every single microswitch to its “normally closed” terminal instead of “normally open” !) and honestly couldn’t face any more rewiring so the wee man will remain inverted for the foreseeable.
You may have also noticed that I’ve included a Defender reverse button next to the joystick. I’m not sure if it’ll get used for any other game so you might say it’s somewhat of a luxury. However, in 1980 I couldn’t afford to feed enough coins in to master the game on my meagre student grant and would watch in envy over the shoulder of the local Defender wizard who at the time I thought was super-cool. Well, he won’t look so cool when I rock up to Newcastle University student’s union bar in a couple of months and blow him away ! .. Hmm, he’s probably moved on by now right ? .. bet he flunked his degree with all the hours he lost playing arcade games.. I’m not bitter at all… Ok, so I flunked my degree too, but at least it wasn’t because of arcade addiction. I did it the proper way with alcohol and drugs ;)
Anyway, I’ve thoroughly enjoyed the project and managed to install the machine in the lounge with the permission of the Mrs. (Even got her playing Monkey Island last night!). Just a few months of configuration to go now and it’ll be perfect 😉
-
Love this, it is so neat and tidy, spinner in perfect place, and buttons match the wood so well. Going to be a while before i can get to do my bartop project as have been furloughed since May 1st. But would be really happy if it turned out like this. I really like the space invader characters in place of a li up marquee, it really gives it that unique feel, which i think everyone aspires to in their own builds.
-
What a beauty! Like @Impman66, I am particularly fond of the four wooden invaders. 🤩
-
Simply amazing! :cheers:
-
one of my all-time favourites. excellent work!
-
@shaun57 looks stunning. Great work.
-
Hi there, nice build, especially like the hardwood, a departure from the norm and it makes your build individual. As for your start button, you can pop out the actual button and turn it 180 and the legend will be the right way up. I had a similar situation on my build, the legend on the illuminated credit buttons would be upside down for the switches to fit in the space allotted so I had to dismantle the buttons and flip the inserts. Give it a try next time you have the panel off.
-
Son of a birch, that is a good looking cabinet!!! Love me some woodgrain, so this is glorious all around.
Contributions to the project are always appreciated, so if you would like to support us with a donation you can do so here.
Hosting provided by Mythic-Beasts. See the Hosting Information page for more information.