{Guide} How To Setup Nespi 4
-
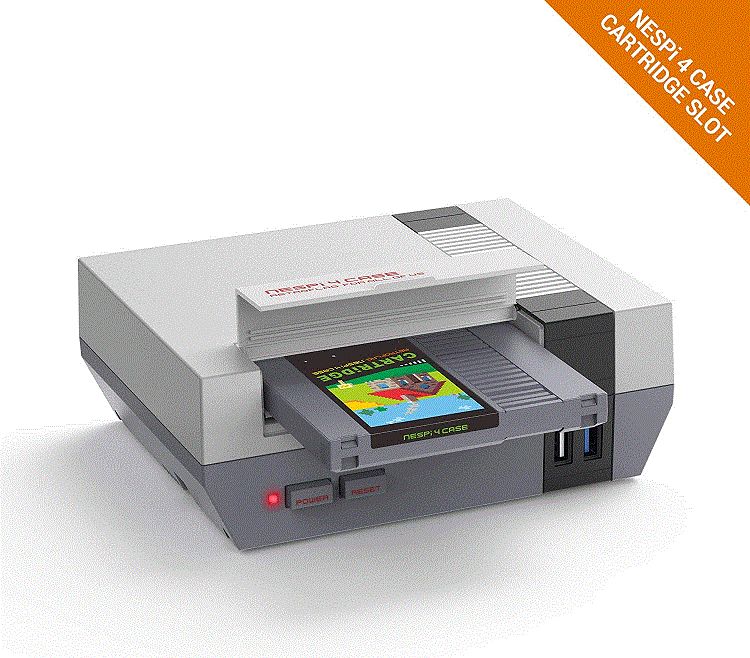
i no expert with linux or retropie but i wanted to put a guide together as i had headaches setting it up .. and figured id make a tutorial how to set this up for anyone getting a Nespi 4 case with the Raspberry Pi 4first thing is DO NOT assemble the case.. what i mean is dont screw it together as it poses an issue (Yet)
Im currently using Retropi 4.7.1
so
Step 1..
Obtain the Raspberry Pi launcher.. and choose your SD Card, choose the OS Retropie, and then click Write and it will burn the OS to the SD cardStep 2..
install the SD card abd boot up the Raspberry Pi... make sure you have a controller plugged in and set it up..Step 3..
Once you get get to the Console.. you will see RetroPie enter it.. and goto
Raspi-config
and once loaded up
goto 3... Interface Options
Choose P2 SSH and enable it
and now exit out..Step 4
goto Retropie Setup
goto C Configuration
and scroll down to Samba shares and enable it (install it)
and then exitStep 5..
i use windows so i went to the command prompt
and
"ssh pi@retropie"
and the password is "raspberry"
so now we are in the console..Step 6
Have your SSD your going to use Already formated... perferable Fat32.. now i have used a 250gb and a 1TB WD SSD.. i used my Unraid Server to format it to Fat32 since windows format doesnt let you.. there are other formaters out there just google or in raspberry pi i guess you can too.. i dont know how...type in
pi@retropie:~ $ ls -l /dev/disk/by-uuid/
total 0
lrwxrwxrwx 1 root root 10 Dec 16 02:17 9290-791F -> ../../sda1
lrwxrwxrwx 1 root root 15 Dec 16 00:15 AC15-4763 -> ../../mmcblk0p1
lrwxrwxrwx 1 root root 15 Dec 16 00:15 f1351d7a-72a6-4d65-b1e2-62653795df48 -> ../../mmcblk0p2
pi@retropie:~ $
you will see the sda1 that be the SSD , other 2 are the microSD card
to see the info on the SSD type
pi@retropie:~ $ sudo fdisk -l /dev/sda1
Disk /dev/sda1: 232.9 GiB, 250058113024 bytes, 488394752 sectors
Units: sectors of 1 * 512 = 512 bytes
Sector size (logical/physical): 512 bytes / 512 bytes
I/O size (minimum/optimal): 512 bytes / 512 bytes
Disklabel type: dos
Disk identifier: 0x00000000
So the Nespi 4 has an automount issue it seems to loose its mount during an emulation reboot or a regular reboot. or hitting the reset button... so you need to change it to manual mode
Step 7..
remember i said Nespi 4 has an issue and you cant put together the case.. since it looses it.. and Raspberry pi doesnt detect hard drive sliding in and out.. but we need to know what kinda adapter it uses... so far its the same number least for 2 of the Nespi 4s i have setup..
but what you do is
"unplug the USB to the top cover that holds the SSD
then typepi@retropie:~ $ sudo dmesg -C pi@retropie:~ $then re plug the USB cable back into the Raspberry Pi
and type inpi@retropie:~ $ sudo dmesg [ 2823.093693] usb 2-1: new SuperSpeed Gen 1 USB device number 4 using xhci_hcd [ 2823.124997] usb 2-1: New USB device found, idVendor=152d, idProduct=0562, bcdDevice= 2.14 [ 2823.125017] usb 2-1: New USB device strings: Mfr=1, Product=2, SerialNumber=3 [ 2823.125034] usb 2-1: Product: External [ 2823.125050] usb 2-1: Manufacturer: JMicron [ 2823.125065] usb 2-1: SerialNumber: DD56419883890 [ 2823.128391] usb 2-1: UAS is blacklisted for this device, using usb-storage instead [ 2823.128545] usb 2-1: UAS is blacklisted for this device, using usb-storage instead [ 2823.128563] usb-storage 2-1:1.0: USB Mass Storage device detected [ 2823.129442] usb-storage 2-1:1.0: Quirks match for vid 152d pid 0562: 800000 [ 2823.129601] scsi host0: usb-storage 2-1:1.0 [ 2824.154034] scsi 0:0:0:0: Direct-Access JMicron Tech 0214 PQ: 0 ANSI: 6 [ 2824.154706] sd 0:0:0:0: Attached scsi generic sg0 type 0 [ 2824.656419] sd 0:0:0:0: [sda] 488397168 512-byte logical blocks: (250 GB/233 GiB) [ 2824.657258] sd 0:0:0:0: [sda] Write Protect is off [ 2824.657278] sd 0:0:0:0: [sda] Mode Sense: 47 00 00 08 [ 2824.658119] sd 0:0:0:0: [sda] Write cache: enabled, read cache: enabled, doesn't support DPO or FUA [ 2824.866139] sda: sda1 [ 2824.869501] sd 0:0:0:0: [sda] Attached SCSI disknow see that line
[ 2823.129442] usb-storage 2-1:1.0: Quirks match for vid 152d pid 0562: 800000thats the USB to Sata adapter for the SSD. so we need to edit a file.. this is to help improve the Speed of the USB to SSD.. or you get poor speeds
pi@retropie:~$ cd /boot
pi@retropie:/boot $ sudo nano cmdline.txt
you will see
console=serial0,115200 console=tty1 root=PARTUUID=3c0d1f86-02 rootfstype=ext4 elevator=d$now add the numbers from the quirks line in front of the Console word so it looks like
usb-storage.quirks=152d:0562:u console=serial0,115200 console=tty1 root=PARTUUID=3c0d1f86-02 rootfstype=ext4 elevator=d$save and exit
doing that will make you have better speeds of 80meg/s and higher instead of 5 megs/sStep 8..
typepi@retropie:/boot $ cd /etc pi@retropie:/etc $ sudo nano fstabnow you need to add a line and remember the command above that i did to show the UUID where it says the sda1 you see 4 characters then a dash 4 characters..
well you want it to look like this.. and each space is a "TAB" not space bar so hit TAB button\proc /proc proc defaults 0 0 PARTUUID=3c0d1f86-01 /boot vfat defaults 0 2 PARTUUID=3c0d1f86-02 / ext4 defaults,noatime 0 1 # a swapfile is not a swap partition, no line here # use dphys-swapfile swap[on|off] for that UUID=9290-791F /home/pi/RetroPie/ vfat nofail,user,uid=pi,gid=pi 0 2once done Save and exit..
this is to Manually mount the SSD so retropi points to the SSD instead of the SD Card
now we need to turn off usb auto mount
type inpi@retropie:/etc $ sudo ~/RetroPie-Setup/retropie_setup.shgoto C Configuration
usbromservice - USB Rom Service
and disable it.
and now exitFinal Step setup the power button
pi@retropie:~ $ wget -O - "https://raw.githubusercontent.com/crcerror/retroflag-picase/master/install.sh" | sudo bashafter you run this it will install the code for your power light and power button.. it will then reboot... once rebooted.. your Pi is setup
you can now access your roms say from Windows File Explorer "\retropie"
copy your roms tfrom your computer to the Roms location... when your done... reboot your Retropie or reboot the emulation and your roms should be there..
you will also find that you see a usbmount@dev-sda.... and it will fail.. thats ok.. dont worry about it.hope this helps anyone with the Nespi 4... oh and now you can screw the case together.. and hopefully i didnt forget anything
-
C comet424 referenced this topic on
Contributions to the project are always appreciated, so if you would like to support us with a donation you can do so here.
Hosting provided by Mythic-Beasts. See the Hosting Information page for more information.