Pi in a Gameboy Advance Build - WIP
-
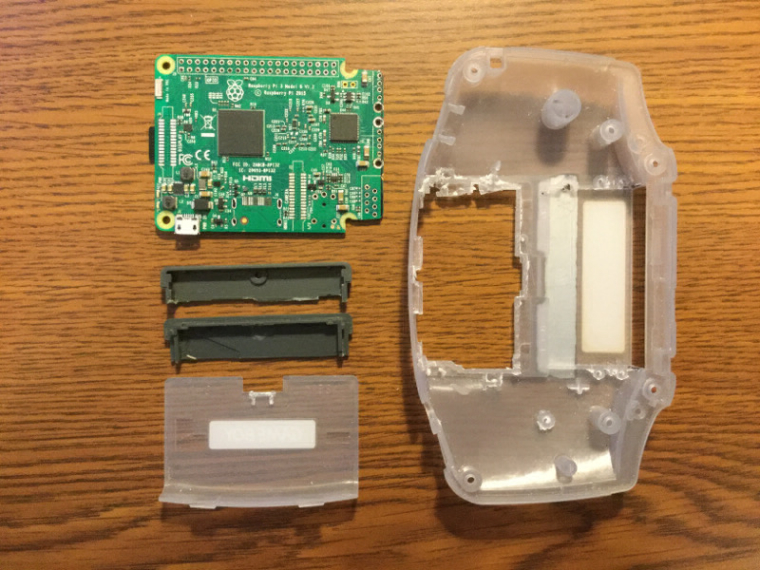
(Don't worry, I won't be boring you with a shot of the Pi as each component disappears.)
You should make an animated GIF of each component disappearing ;-)
-
@obsidianspider i found this and thought of you
want to get a tft into your project, look no further than here https://retropie.org.uk/forum/topic/7464/ili9341-tft-screen-guide
-
@moosepr Awesome! I've seen a few guides here and there and this will be helpful. I'm also trying to save the bits I cut from the inside of the case to use as a base for gluing things together.
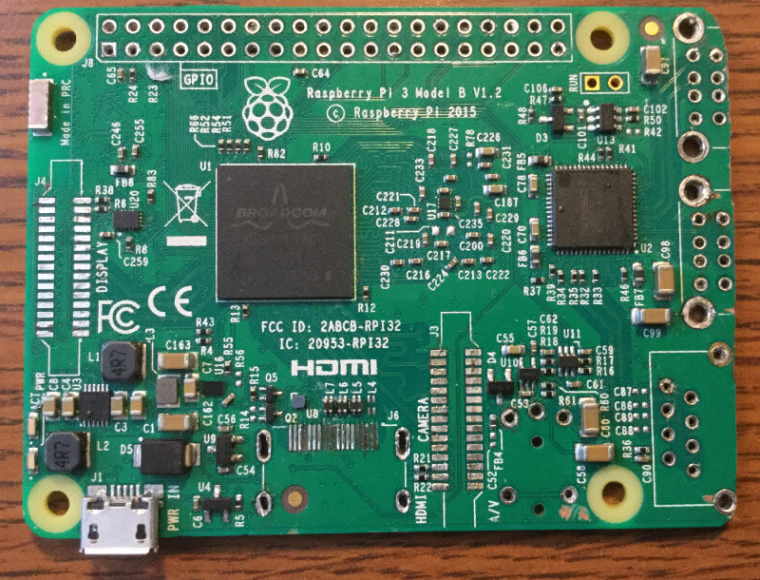
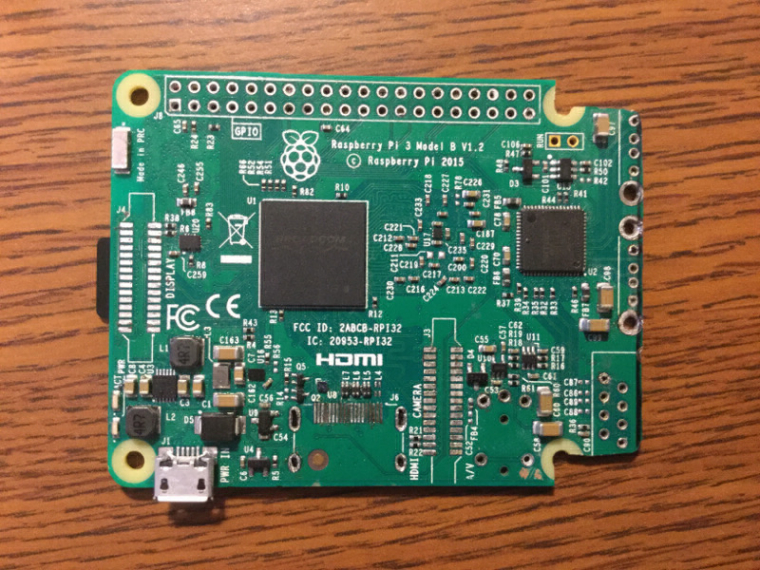
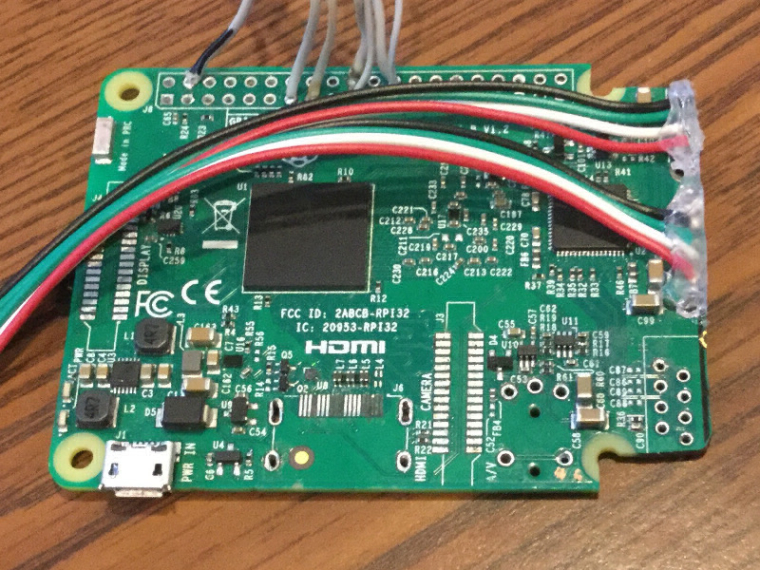
Also: Removing the HDMI port SUCKED. The surface mount plus through hole pegs were too much to heat at once, and I got impatient. I ended up tearing a bunch of traces, and actually melted the L4 resister into oblivion. Thankfully though, due to an X-Ray of a Pi 3 that I found, those resistors are just for HDMI, so it was OK to remove completely.
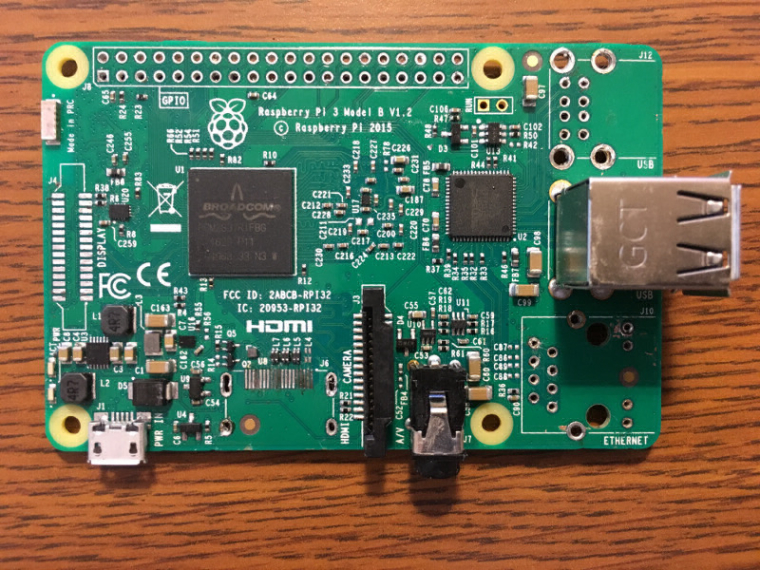
The good news is that the Pi still works. I left it run Street Fighter Alpha 3 and StarFox 2 for a few hours, plugged into a 1A iPhone charger (to test the theory that you can power it with a PowerBoost 1000C), with a 2500mAh LiPo sitting directly on the SOC and nothing got too hot, the battery or the chip.
Progress!
-
I think this is going to work.
This morning I removed the rest of the ports aside from the power port (I'm not sure if I'll need to remove it yet, it's not much higher than some of the capacitors near it, but it's at the edge, so we'll see.
I readily admit that I am a hack and that this could have been done more neatly, but this was my first time trying to strip down a board and keep it functional. And, it is!
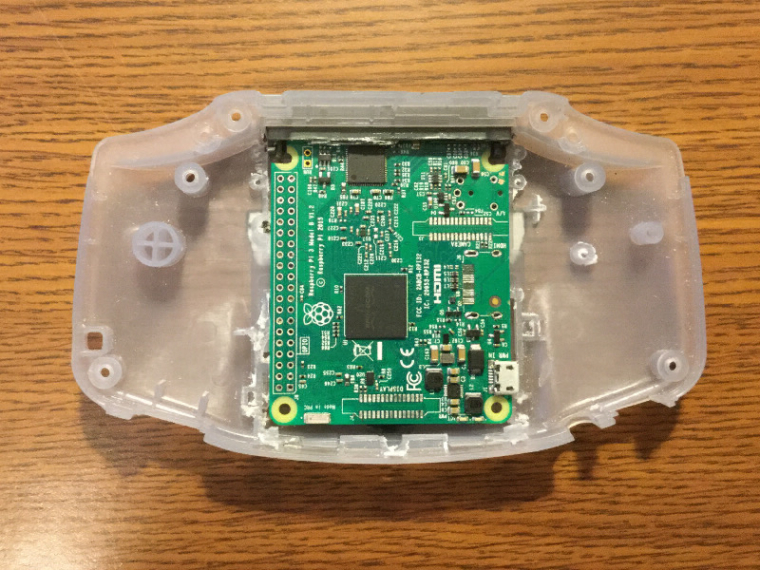
Why was I trying to do this? Well, based on my earlier mockups with some cardboard, I figured that if I could turn the pi sideways, trim the edge under the USB ports, and use a game cartridge to cover the sticky-outy bit, it'd fit.
A quick mockup with the screen, 2500mAh battery, and cut down Pi make it look like this will work. I should have more room inside once I redo the ribbon cable I soldered to the screen board.

And, as @backstander requested, a GIF of the components disappearing. ;)
-
@obsidianspider hahahaha love the gif! I bet you could cut a bit more off the end with the USB and ethernet ports
want to get a tft into your project, look no further than here https://retropie.org.uk/forum/topic/7464/ili9341-tft-screen-guide
-
@moosepr I want to keep all four USB port pads available, so that's about as close as I could get it. I'm not sure how the board will be oriented inside the case just yet, but this is really promising.
-
@obsidianspider yeah it's looking good! You will have the most powerful GBA in the world! 😀
-
@obsidianspider
Wow! Now that's progress!
I love the animated GIF haha! -
It's Friday night, so that means it's time to cut some stuff up in the garage.
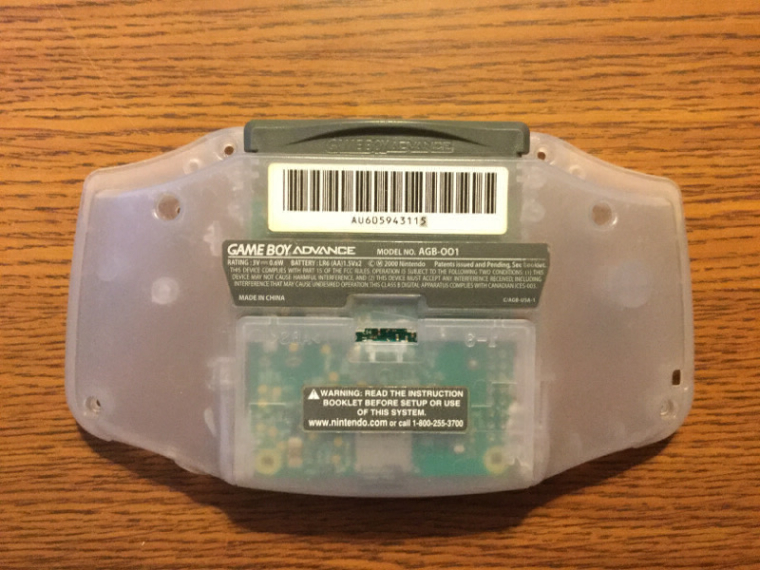
I was trying to fit the Pi 3 inside the Gameboy Advance game that I bought from eBay (Is Madagascar any good? I still have the PCB in good shape.) and I determined that I would need to make the Pi narrower, and also a bit shorter. I decided that I would only really at most need two USB ports (Maybe one for USB audio (I haven't determined if I can live with the on board audio from the Pi) and maybe one for a USB port for plugging in a keyboard or something.) so I could trim the end of the Pi down a bit more.
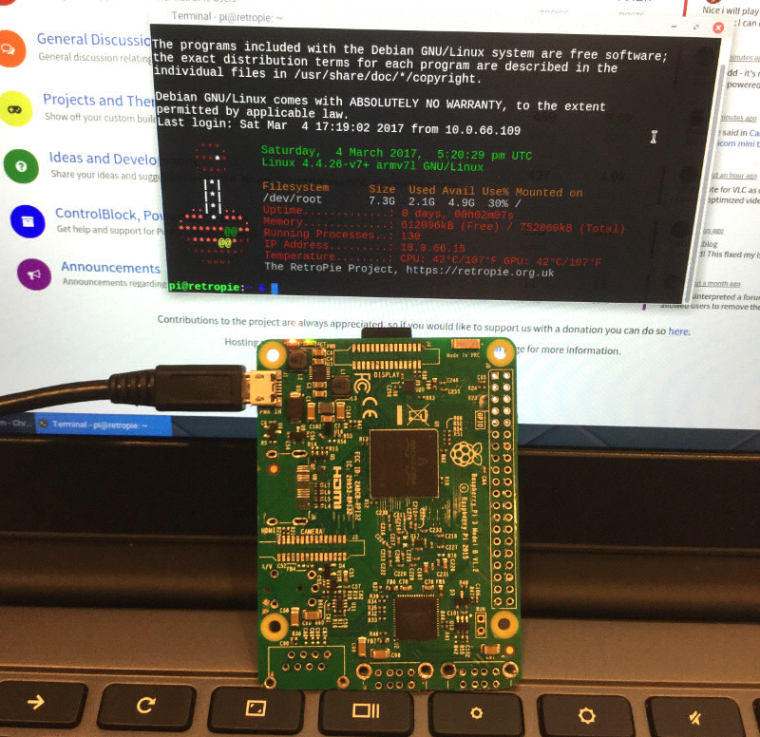
Yes, it still works. I think. It powers up, no funky red LED flashing and I can SSH to it.
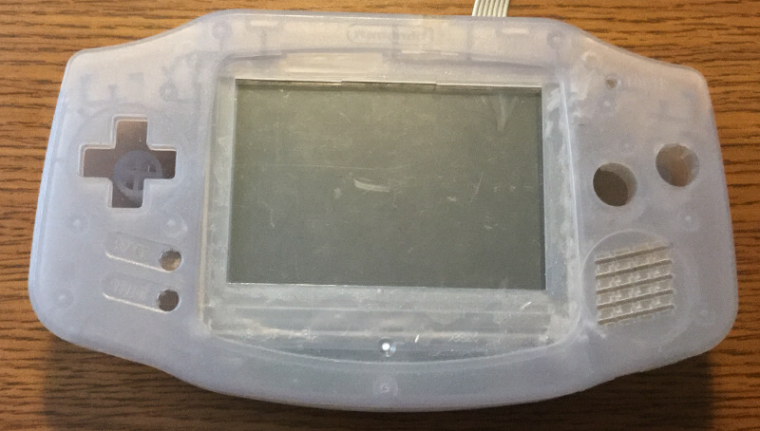
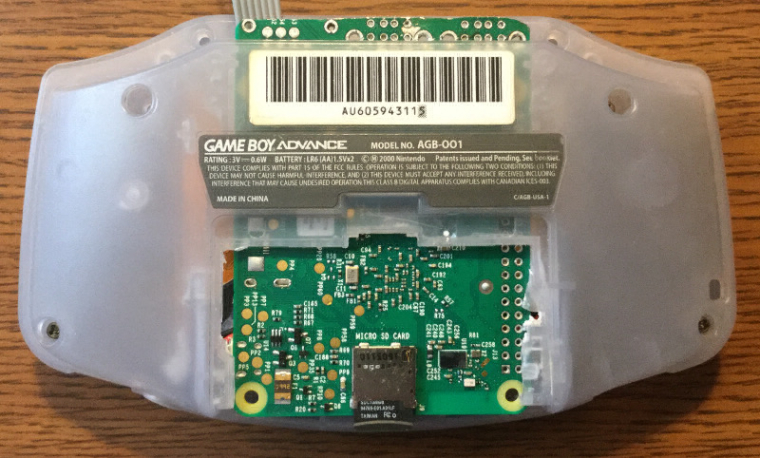
The Pi now fits inside the Gameboy Advance case with the end covered by a trimmed and gutted Gameboy Advance game.
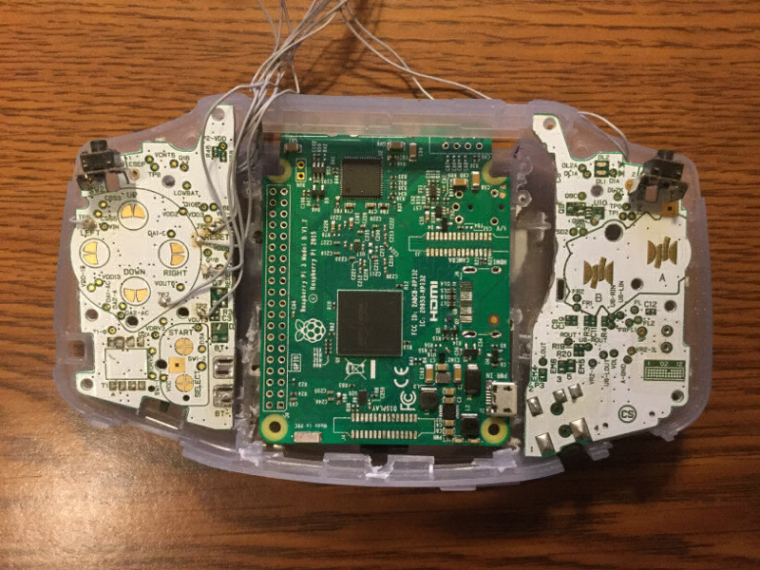
Its looking pretty good in the case with the control PCBs
Next up I'm going to try connecting some things to the Pi 3.
-
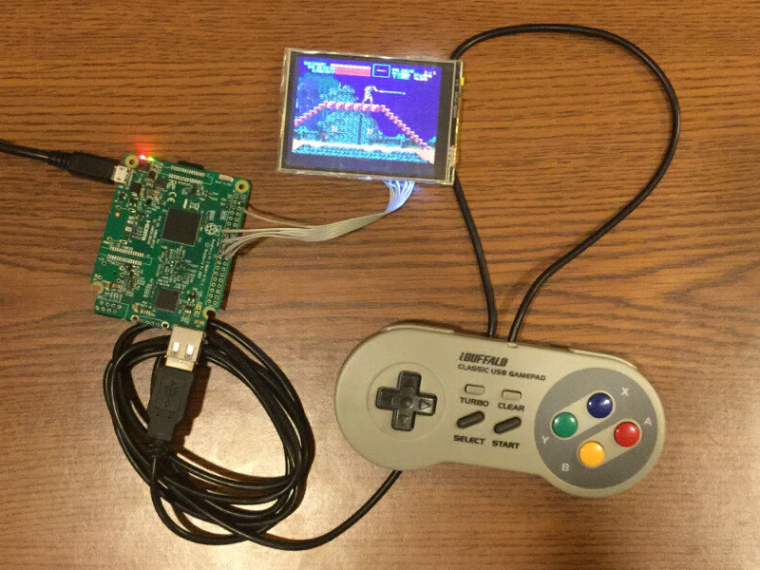
I got the TFT soldered to the Pi and things seem to work.

They seem to fit well in the case, but I don't have anything but the Pi and screen in the case in this mockup.

-
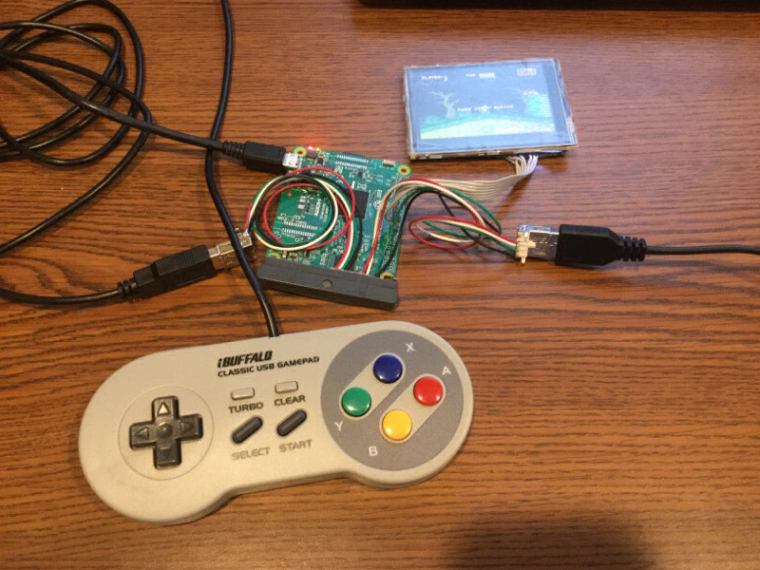
I don't care if it's almost 11 PM, I'm really encouraged, so I decided to try hooking up a USB port to the remnants of the board, and it works!
-
@obsidianspider awesome stuff! It's really coming together now!
want to get a tft into your project, look no further than here https://retropie.org.uk/forum/topic/7464/ili9341-tft-screen-guide
-
@moosepr It's definitely not a project for the weak willed. I'm still not sure where the heck I'm going to possibly put a USB port, but today I'm going to work on connecting leads to the USB pads and then will probably work on the audio circuit. I'm not sure about how I'm going to do the battery thing yet. I've seen posts in various places about a low voltage smart shutdown and things like that. Apparently if you over-discharge a LiPo you'll kill it.
First though I'm in a parade this afternoon so no time to fuss around in the garage where I tend to lose track of time. ;)
-
@obsidianspider yeah lithium batteries don't take too kindly to being really flat. I think the adafruit boost doodad has protection built in. If your not using that then there are other options. Some cells have built in protection, or you can add an extra protection board
-
Today I removed the USB port from the Pi and soldered up the appropriately colored wires. I applied some hot glue over the wires for strain relief. I sliced off the excess since I needed the board to fit inside the Gameboy Advance game.
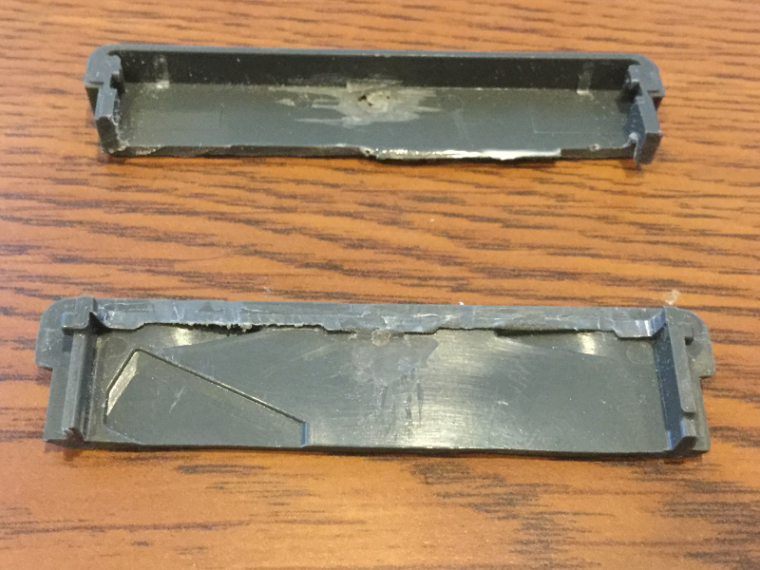
When I tried to fit the Pi inside the gutted cartridge I found that I still needed more room as the wires and glue made the Pi too thick. I removed the top of the "front" part of the game and I also shaved the area for the screw hole flat on the inside.
Then with that going well I soldered up the test USB port to the end of the wires, and that worked, so then I tried desoldering the plug from my USB sound card. That didn't go so well. When I was putting the board in my PCB vice I heard a crack, and sure enough, the capacitor for the headphone plug ground cracked off. I thought that maybe it wouldn't be a huge deal, so I soldered across the pads to make the connection to ground. I figured that headphones can't draw that much, so eliminating the capacitor may be ok. Well, it wasn't. After I soldered up the sound card to the Pi I was getting a blinking red light and the Pi would not boot.
Just in case it was my USB leads and not the sound card I tried connecting up a USB port and keyboard to the Pi along with a controller, and sure enough, everything booted just fine. That said, when I plug in a USB drive, the Pi won't detect it, and I'm not sure why. The drive does work in my Genesis hub Pi 3, so I don't think it's a Raspbian issue. I am thinking that there may not be enough power getting to the USB port, so I'm going to try an alternate power source like straight from GPIO and see what happens.
I put the GBA game on the end of the Pi and it runs just fine, so even smooshed in the cartridge, no bad contacts.
-
Well, I'm thinking maybe it isn't a power issue. I tried going to GPIO for power and then I started getting lightning bolts on the screen, so instead I used a breakout board to solder up the USB power directly to the 5V in that I'm using to power the Pi and my USB drive still isn't being recognized. The controller and keyboard both work just fine, but those also aren't using USB 2.0 speeds. (Per
lsusb -tthey communicate at 1.5 Mbit)I also tried plugging in a USB 2.0 hub. That's not recognizing, a USB Wifi adapter isn't recognizing, and no USB drives are recognizing. The USB drive has a steady blink once per second or so.
I'm not convinced I didn't mess something up with the USB ports when cutting things down, or maybe connecting up that damaged sound card fried something.
-
I tried going with the "nuclear option" to get the drive to read by adding
dwc_otg.speed=1to/boot/cmdline.txtand after booting the drive is recognizing, but then the controller wasn't. Thinking maybe I fried the controller with all of my power testing I tried plugging the controller into my laptop and it worked just fine, so lowering the USB speeds seemed to break the controller functionality.Removing the "nuclear option" and rebooting caused the drive to no longer be recognized, but my controller started working again.
I read somewhere that data lines for USB can be touchy and I saw somewhere that they should be twisted so you don't have issues. I'm not sure if something like that will help or not.
-
It looks like twisting the data wires worked. Some searching around online showed that in USB cables the data lines are usually a twisted pair in a USB 2.0 cable, so I tried it.
Plugging in two USB drives allows both of them to show up with no issues.
$ lsusb -t
/:  Bus 01.Port 1: Dev 1, Class=root_hub, Driver=dwc_otg/1p, 480M
    |__ Port 1: Dev 2, If 0, Class=Hub, Driver=hub/5p, 480M
        |__ Port 1: Dev 3, If 0, Class=Vendor Specific Class, Driver=smsc95xx, 480M
        |__ Port 2: Dev 10, If 0, Class=Mass Storage, Driver=usb-storage, 480M
        |__ Port 4: Dev 11, If 0, Class=Mass Storage, Driver=usb-storage, 480M
$ lsusb Bus 001 Device 011: ID 058f:6387 Alcor Micro Corp. Flash Drive Bus 001 Device 010: ID 0781:5406 SanDisk Corp. Cruzer Micro U3 Bus 001 Device 003: ID 0424:ec00 Standard Microsystems Corp. SMSC9512/9514 Fast Ethernet Adapter Bus 001 Device 002: ID 0424:9514 Standard Microsystems Corp. Bus 001 Device 001: ID 1d6b:0002 Linux Foundation 2.0 root hub$ df -h Filesystem Size Used Avail Use% Mounted on /dev/root 7.3G 2.1G 4.9G 31% / devtmpfs 364M 0 364M 0% /dev tmpfs 368M 0 368M 0% /dev/shm tmpfs 368M 5.2M 363M 2% /run tmpfs 5.0M 4.0K 5.0M 1% /run/lock tmpfs 368M 0 368M 0% /sys/fs/cgroup /dev/mmcblk0p1 57M 21M 37M 36% /boot /dev/sda1 2.0G 1.3M 2.0G 1% /media/usb0 /dev/sdb1 965M 514M 451M 54% /media/usb1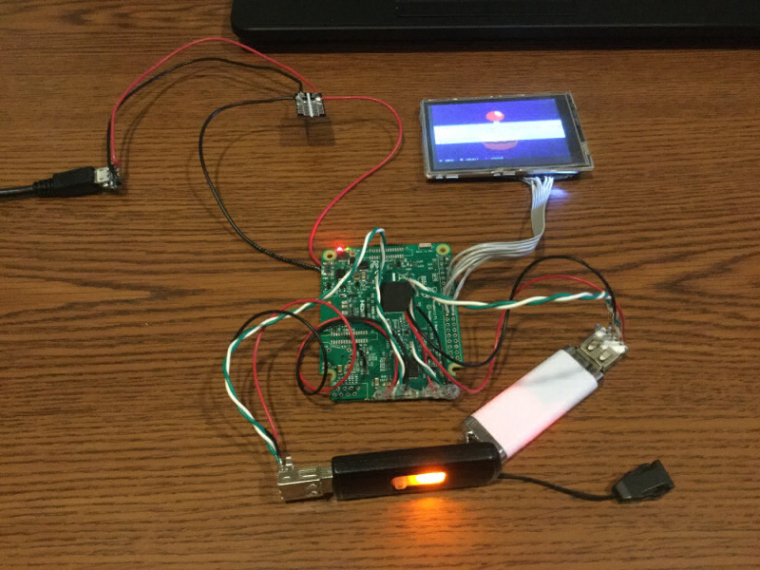
I also tried plugging and unplugging a number of times, and also trying to plug and unplug my USB controller and a drive in and out and things seem to be ok.
$ lsusb -t
/:  Bus 01.Port 1: Dev 1, Class=root_hub, Driver=dwc_otg/1p, 480M
    |__ Port 1: Dev 2, If 0, Class=Hub, Driver=hub/5p, 480M
        |__ Port 1: Dev 3, If 0, Class=Vendor Specific Class, Driver=smsc95xx, 480M
        |__ Port 2: Dev 16, If 0, Class=Mass Storage, Driver=usb-storage, 480M
        |__ Port 4: Dev 15, If 0, Class=Human Interface Device, Driver=usbhid, 1.5M
$ lsusb Bus 001 Device 015: ID 0583:2060 Padix Co., Ltd (Rockfire) Bus 001 Device 016: ID 0781:5406 SanDisk Corp. Cruzer Micro U3 Bus 001 Device 003: ID 0424:ec00 Standard Microsystems Corp. SMSC9512/9514 Fast Ethernet Adapter Bus 001 Device 002: ID 0424:9514 Standard Microsystems Corp. Bus 001 Device 001: ID 1d6b:0002 Linux Foundation 2.0 root hub$ df -h Filesystem Size Used Avail Use% Mounted on /dev/root 7.3G 2.1G 4.9G 31% / devtmpfs 364M 0 364M 0% /dev tmpfs 368M 0 368M 0% /dev/shm tmpfs 368M 5.2M 363M 2% /run tmpfs 5.0M 4.0K 5.0M 1% /run/lock tmpfs 368M 0 368M 0% /sys/fs/cgroup /dev/mmcblk0p1 57M 21M 37M 36% /boot /dev/sda1 2.0G 1.3M 2.0G 1% /media/usb0I'm really glad that it was an issue of the data wires needing to be twisted and not something I fried on the Pi.
While I was trying various things and moving power around I removed the micro USB port for power. I had the same problem as the HDMI port with the surface mount contacts and the through hole pads being too hard to heat up all at the same time. I ended up messing up some more traces down there. I really need to learn a better way to do that, but everything works.
That's enough for today.
Tomorrow I'll do some messing around with the onboard audio to see how crummy it is, or to see if I need to shop for another USB sound card and not crack a capacitor off.
-
@obsidianspider I was going to say try twisting the data lines but you beat me to the punch! I think is so that any interference hits both wires together and kind cancels itself out. Or maybe USB is just magic, and the twisting helps make the magic flow
want to get a tft into your project, look no further than here https://retropie.org.uk/forum/topic/7464/ili9341-tft-screen-guide
-
@moosepr From what I read online it's to reduce/eliminate crosstalk. Kind of like in an Ethernet cable.
Contributions to the project are always appreciated, so if you would like to support us with a donation you can do so here.
Hosting provided by Mythic-Beasts. See the Hosting Information page for more information.