Backdrops in mame2003-plus
-
@Riverstorm Did you install latest advmame 3.9 ?
Do you compile it from source?
Gonna try it when I have some time. -
@Riverstorm said in Backdrops in mame2003-plus:
seeing the original as memory is definitely nostalgic vs. the "truth".
Totally agree.
I had a chance to play some of these old vector classics, at the time when they were the most innovative technology. I remember Star Castle was presented at an exhibition intended for operators only, but somehow we were able to attend ;-)
And of course Asteroids and later on Star Wars: the cockpit version simply was a dream; you felt like flying your x-wing into the trench !! Unforgettable. -
I am actually still on 3.8. I haven't upgraded AdvMAME in quite some time. I do upgrade keep my RetroPie script upgraded and mainly Plus as that's where I've spent all my time lately.
I love hearing those type of stories, that's what makes the nostalgia so strong and it had such a powerful effect it keeps projects like this alive.
-
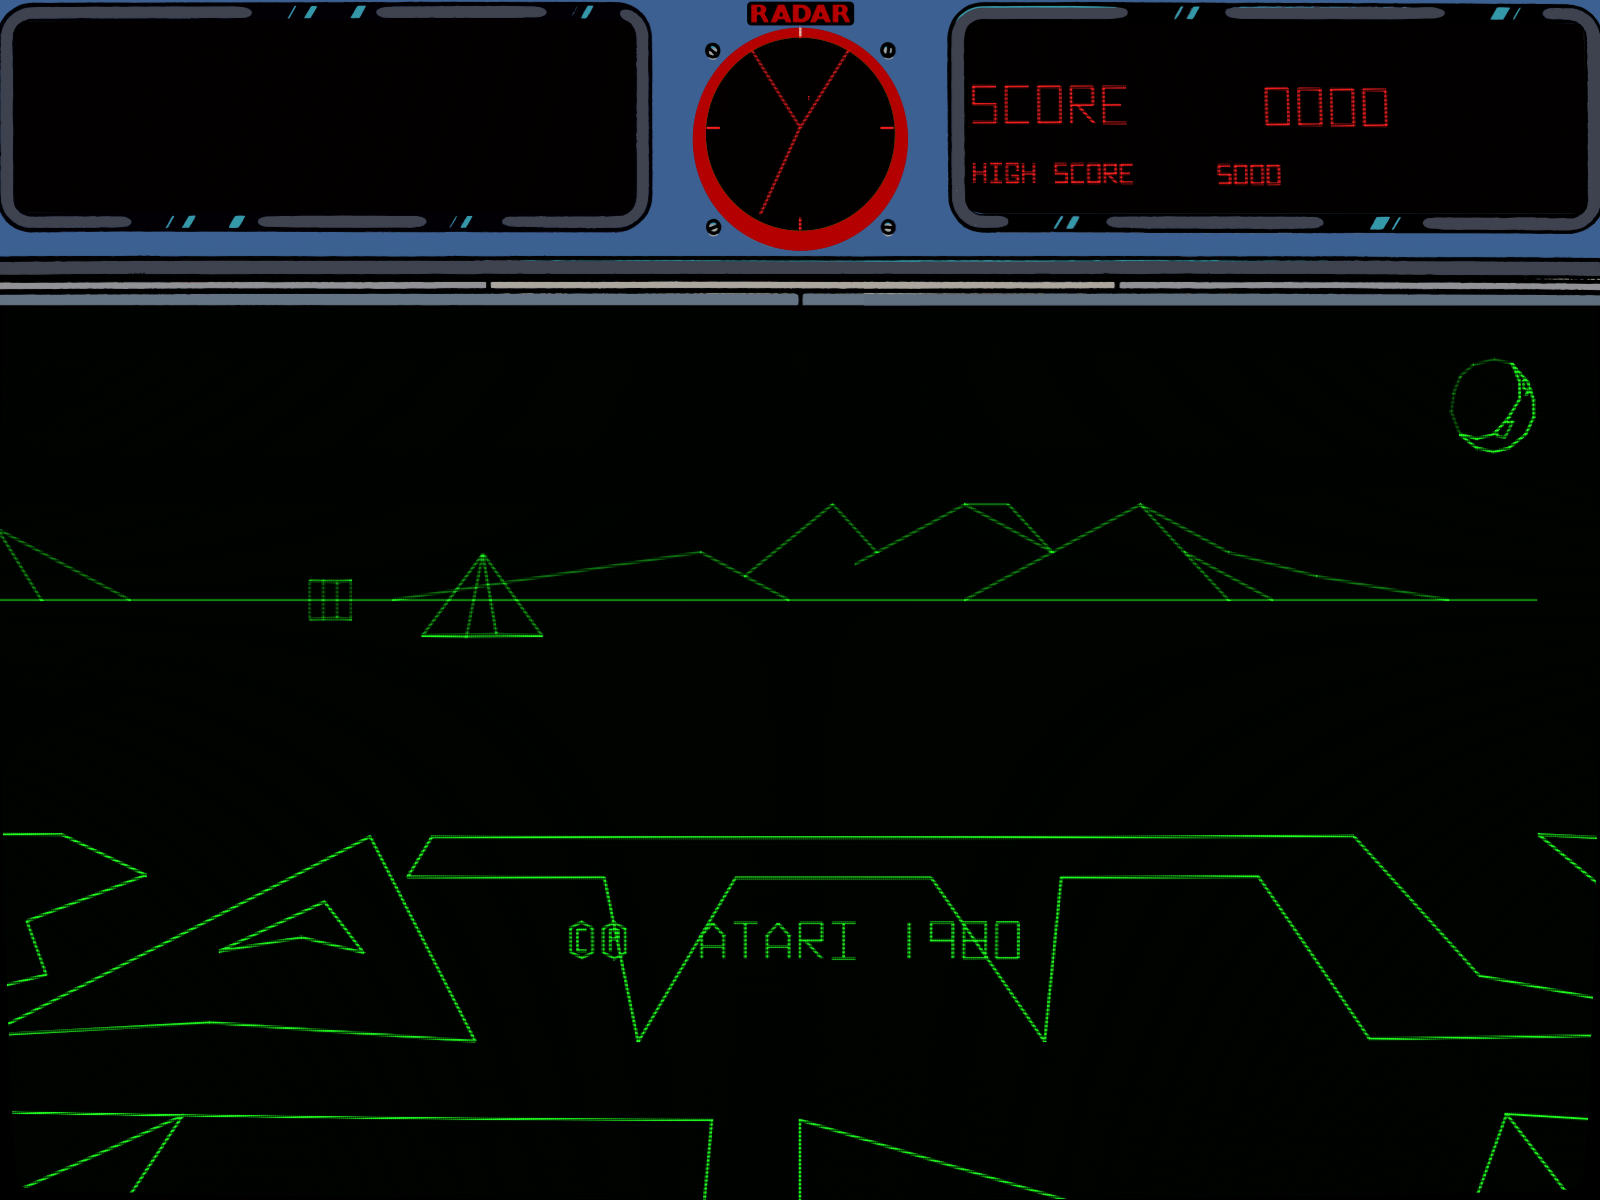
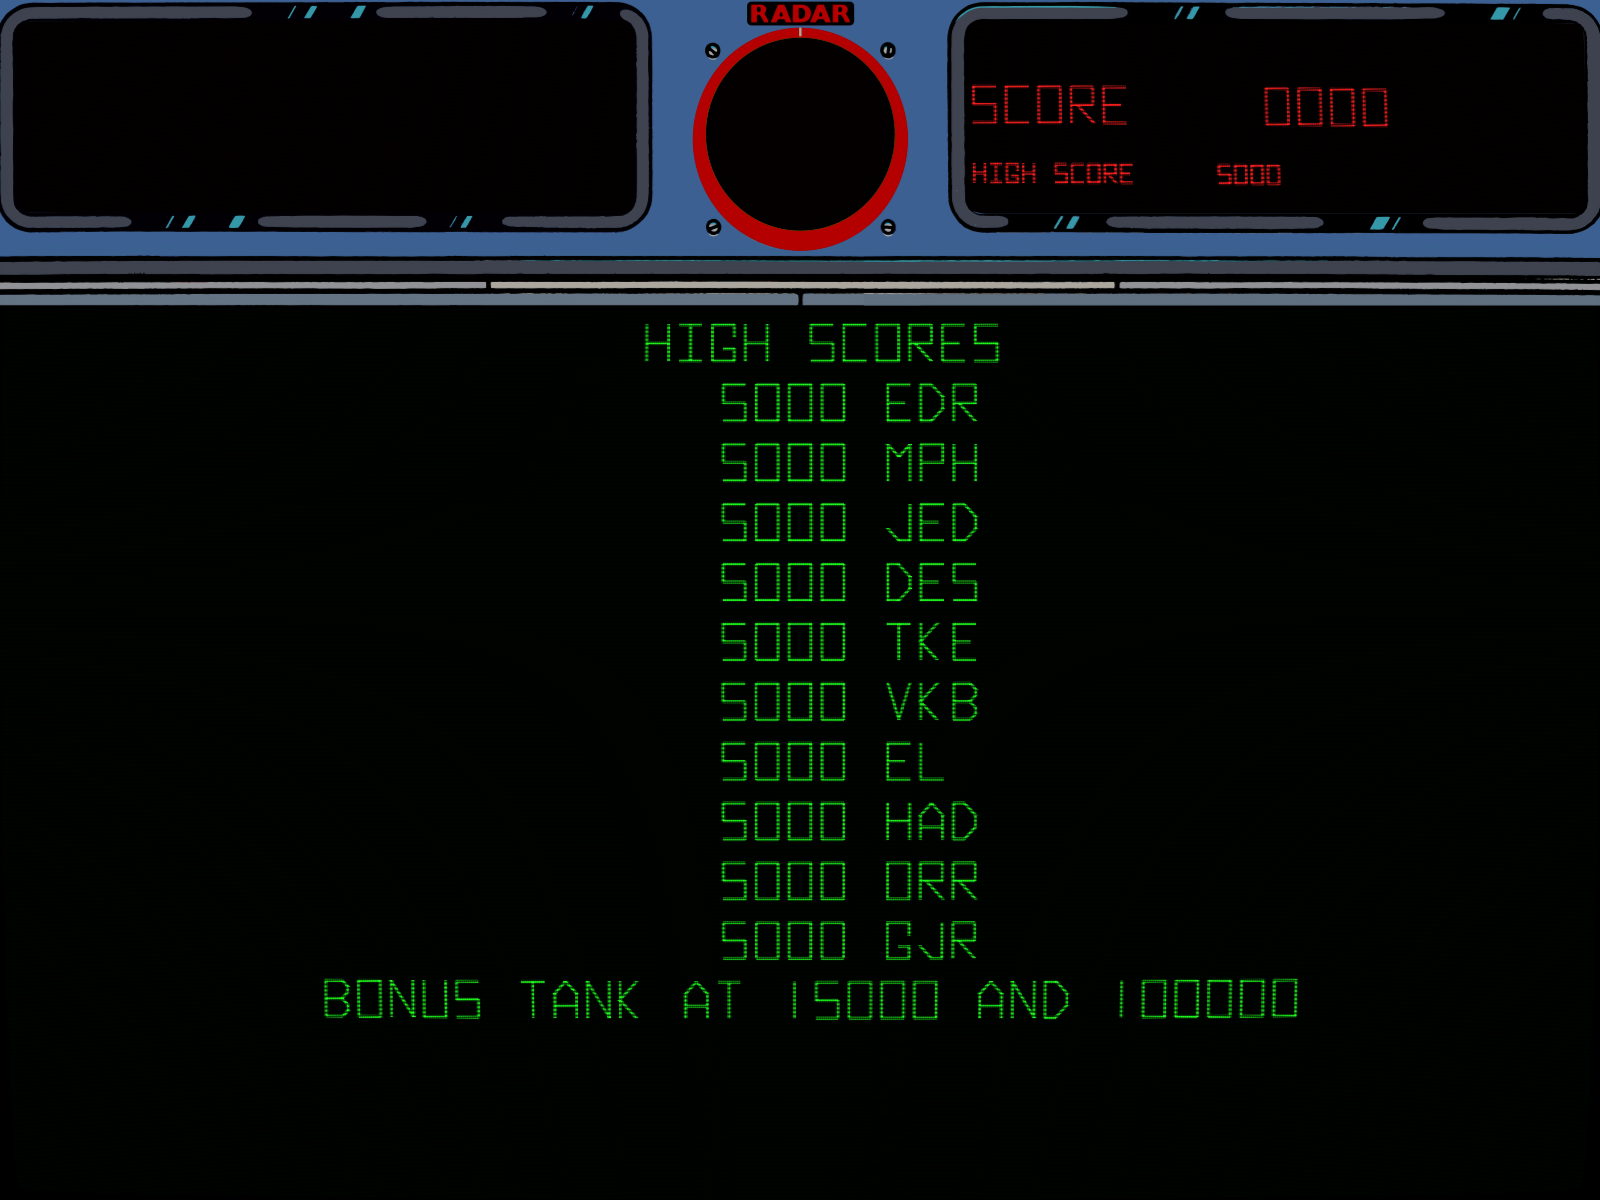
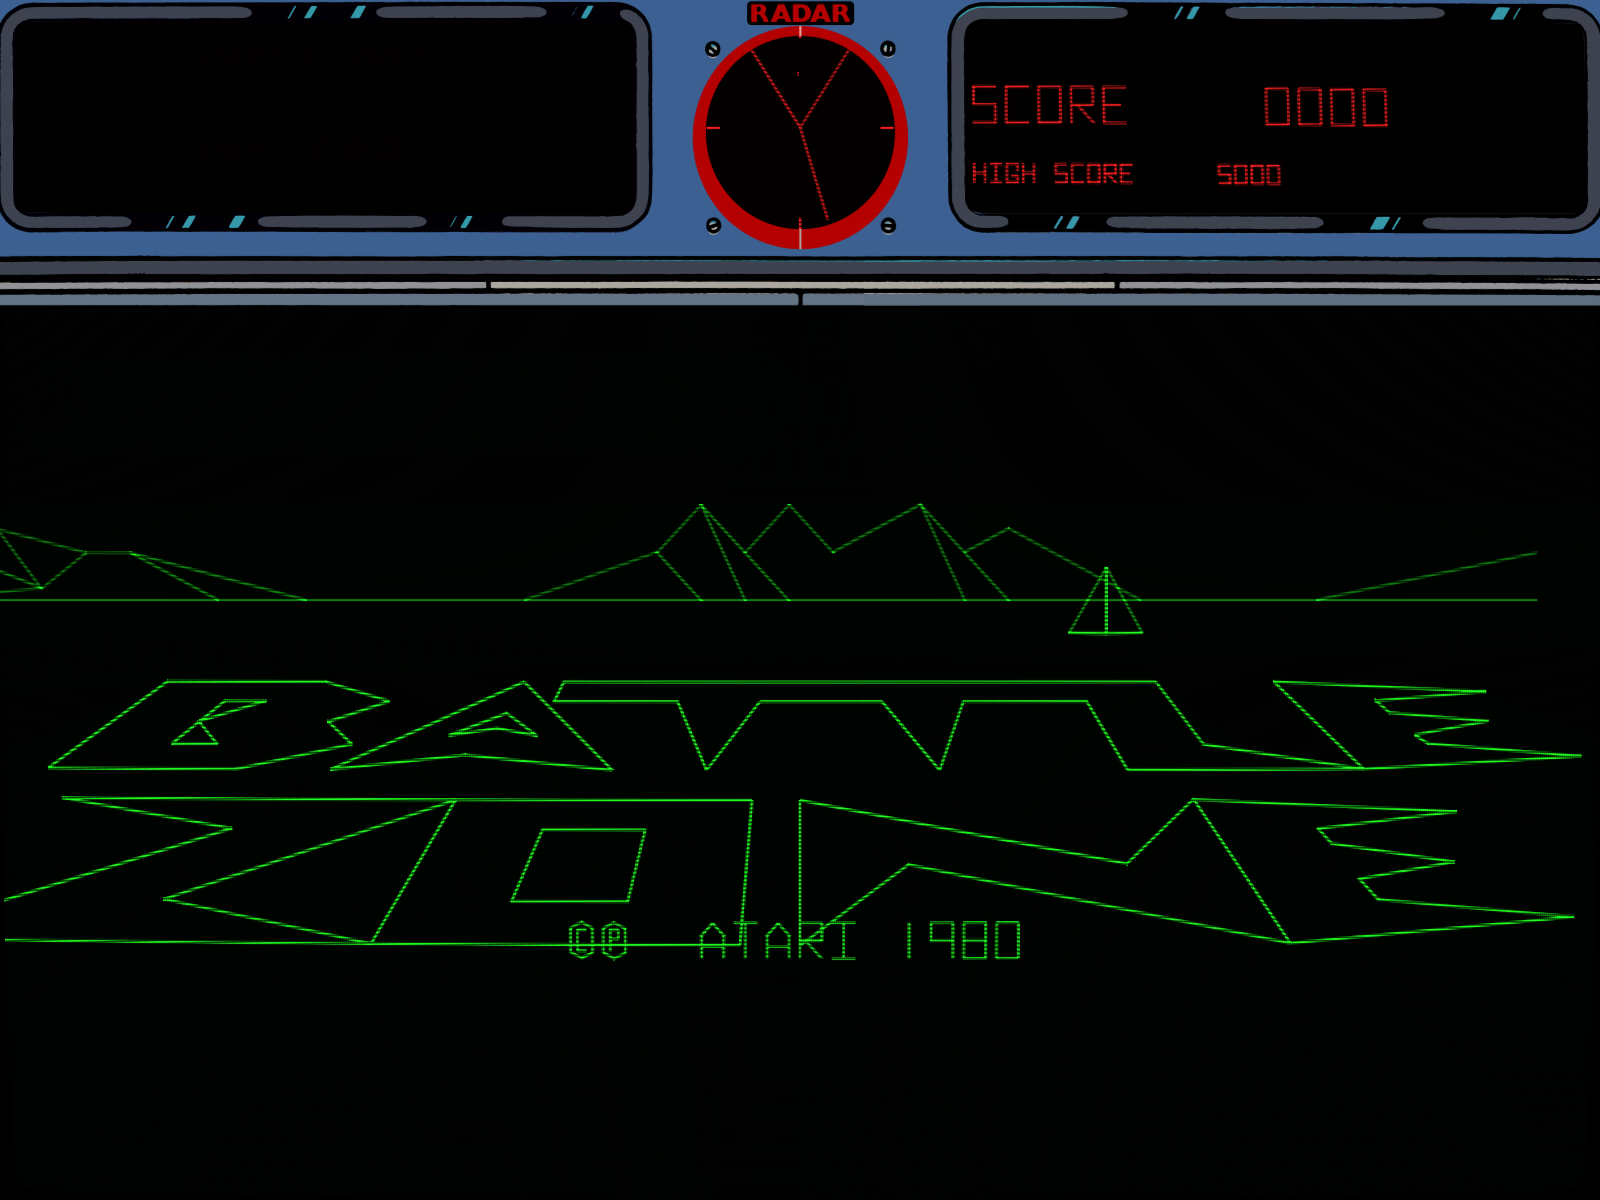
@UDb23 I tested the 4:3 bzone overlay. It works, but it's slightly off vertically (the radar's upper mark isn't in the cutout).
Alas, the Retroarch screenshot function doesn't include the overlay, so I can't show it to you at the moment (I'll have to leave for work soon). Can you suggest a screenshot software for the Pi that will include the overlay?
edit: If it helps, here's a screenshot in 1600x1200 without the overlay: https://i.imgur.com/9ZdFdkR.png
-
@Clyde Understood, no need for additional pics. Let me check.
-
@UDb23 I usually just take a photo of the tv with my smartphone. Not perfect but effective.
-
@UDb23 I am running AdvMAME 3.9 now, installed from binary on my recent rebuild.
By the way, thanks for the input about smoothing with the vectors. I know I messed up posting my question on the wrong thread, but wow did that smoothing ever make a difference. The vector system look perfect now.
-
@UDb23 Although I do have a smartphone, I only use it as a digital camera, not as a phone (I bought it from a coworker for 50€ for that reason alone).
Thus, it's a bit cumbersome to transfer the pictures to my PC afterwards. Motivated by the current problem, I may look into other screenshot software for the Pi that can also grab overlays, if only for future use.
-
@caver01 Glad it helped.
-
@Clyde - Here's a link to raspi2png. It's small and works well but you need to SSH into your Pi with PuTTY (or some other terminal emulator) while you play on another display or TV but it will capture the screen exactly as you see it with overlay and backdrop at the displays resolution.
You don't need to do step 2 if you're going to run it from the downloaded folder. It will create a folder named
raspi2pngin your home folder that works well but you will need to use./in front ofraspi2pngto run it (if you prefer not add to the bin folder). The only difference is the./in front specifies the current folder vs. the search path.Also snaps are named
snapshot.pngin the current folder and will overwrite on each run unless you use-pparameter shown in step 3 below. If you only need one snap at a time then you wouldn't need to specify a name. Other parameters listed below.Basic steps:
git clone https://github.com/AndrewFromMelbourne/raspi2png/sudo cp -a raspi2png/raspi2png /usr/local/binraspi2png -p "mysnapshot.png"
Usage: raspi2png [-p pngname] [-v] [-w ] [-h ] [-t ] [-d ]
-p - name of png file to create (default is snapshot.png)
-v - verbose
-h - image height (default is screen height)
-w - image width (default is screen width)
-t - type of image captured
     can be one of the following: RGB565 RGB888 RGBA16 RGBA32
-d - delay in seconds (default 0)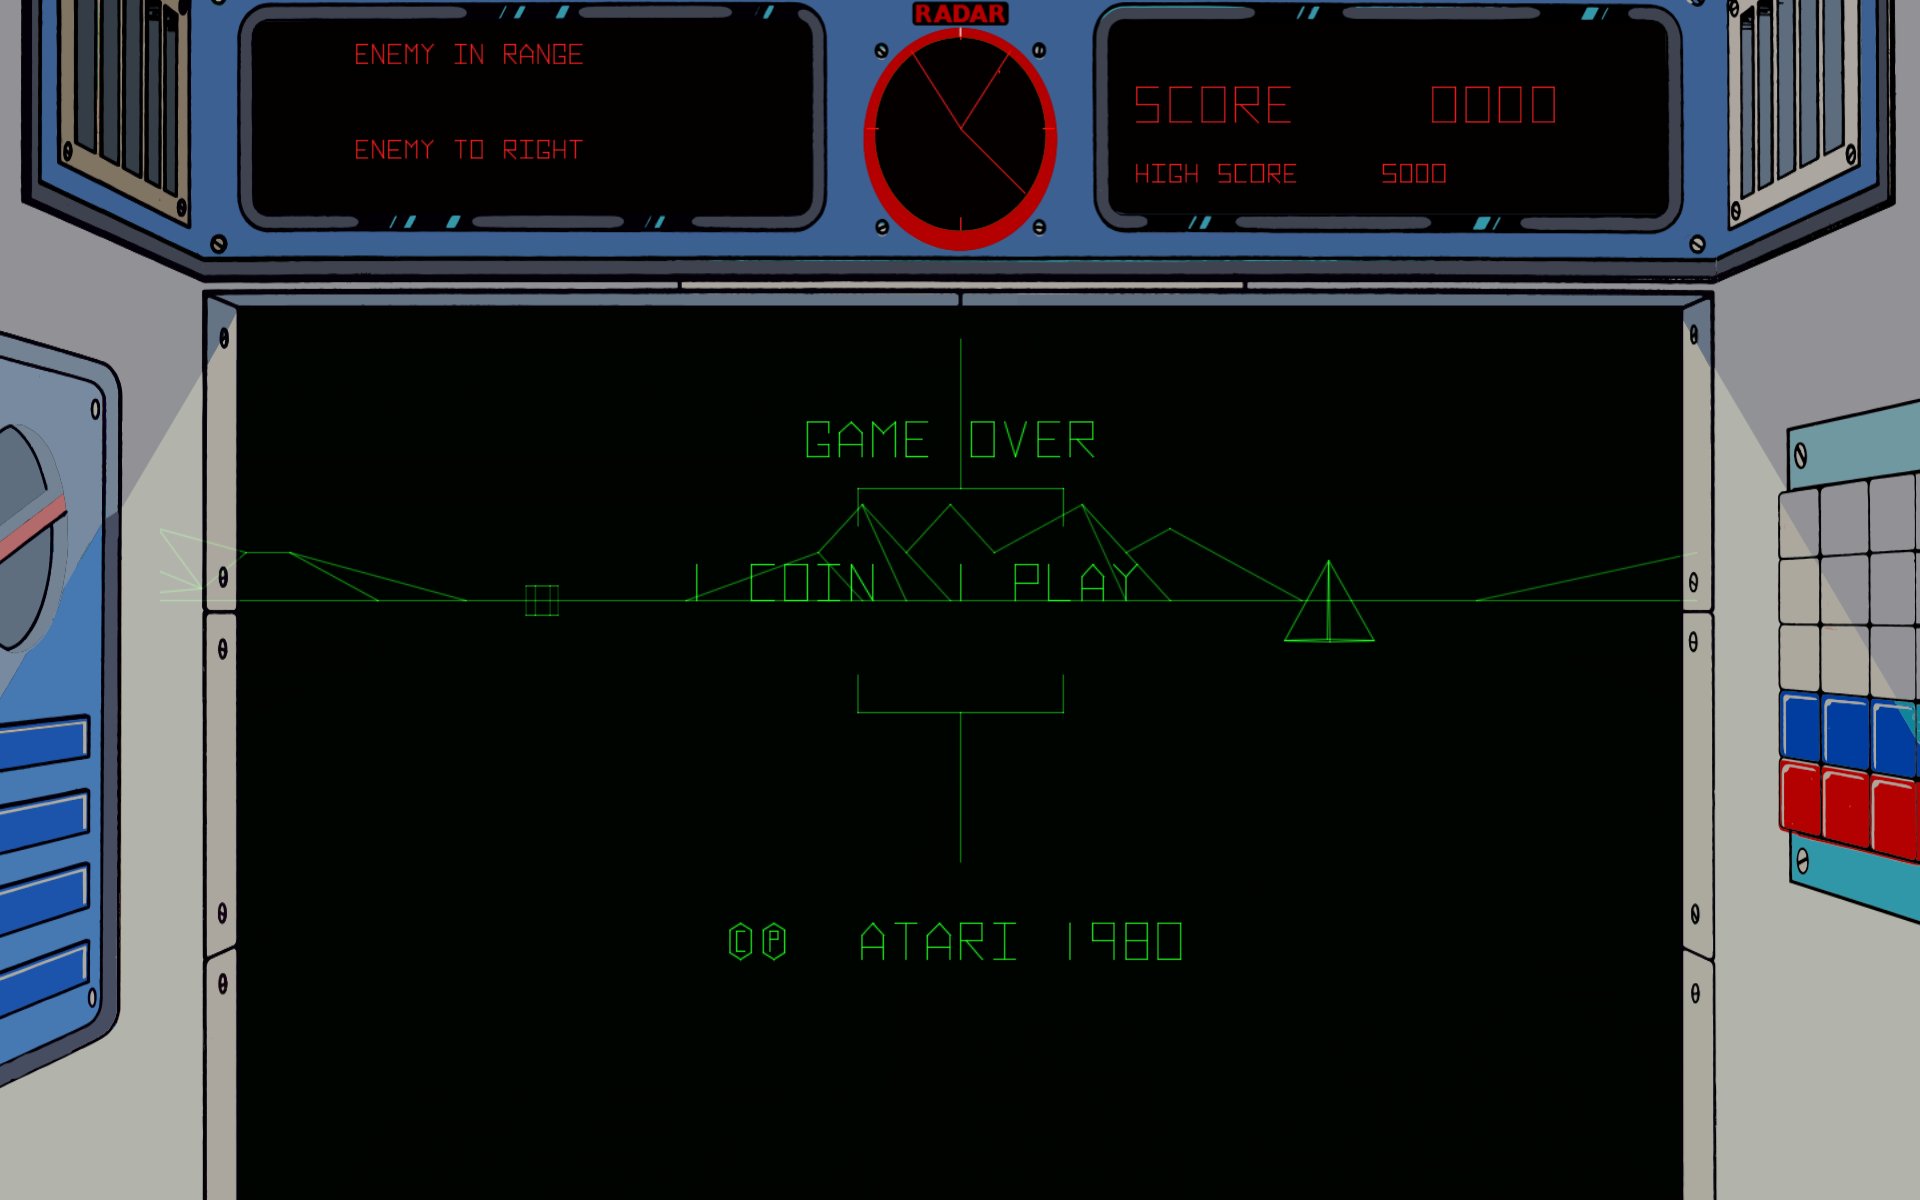
-
@Riverstorm Thanks very much. Although I'm using Linux which comes with terminals and ssh ootb, your very elaborate guide may be helpful to others. I added your post to my collection of forum links that may be useful in the future. 👍
I did one thing differently: Instead of copying
raspi2pngto/usr/local/bin, I hardlinked it to/home/pi/bin/with this command:ln /home/pi/git/raspi2png/raspi2png /home/pi/bin/raspi2pngSince most Retropie users will only use the standard user
pi, it shouldn't matter in everyday usage, but I prefer to keep software that isn't part of the official repos out of global system directories. Also, in contrast to a copy, by hardlinking the file it will stay up to date if you update the original in the git clone, and if you ever delete the git clone, the hardlink will still work like the original, since hardlinks are just additional references to the original data. Finally,$HOME/binis in the global shell path, so its contents can be used from any directory like the contents of/usr/local/bin. But I digress … (and I may've told you things you already know. 😉 )When I went to clone the raspi2png repo into my
~/gitdirectory where I store all the cloned repos, I noticed that I already got it in last September. 😳 😄Here are two pictures of my Battle Zone. The first one shows the deviation of the radar and score board, while the other is meant for showing the boundary between the overlay and the playing area. (Should the scoreboard be so close to the overlay?)
-
@Clyde Hey, just a quick observation of those screenshots— in the final config, you might consider disabling the scanline shader for Battlezone. The actual vectors would have been totally smooth like on an oscilloscope. Color vectors have the shadow mask, but here, colors are from the overlay, so no CRT effects. Just a thought.
-
@Clyde It seems that the 1600x1200 ovl is not aligned in your case, even if it's just the 4:3 game area taken from the 1080p ovl (!?)
Anyway I just updated both versions of the ovl with the radar "round border" being slightly higher positioned.
Can't make it further higher as I'd have to reduce the "radar" text even more; wouldn't look nice.As long as the radar area is basically fully visible I think it's ok. Even real arcade cardboards were not perfectly aligned if you look at the images and videos you can find on the web.
Unfortunately it would be really tough for me to precisely align the ovl image to your 1600x1200 by trial & error based on step by step screenshots you would take ... sorry.
-
@caver01 That's a definite point you're making. I plan to do that, like I did for Omega Race. I'm just used to do one step at a time to avoid issues that I can't pinpoint to a specific change if I'm making too many of them at a time.
@UDb23 Thank you very much. Alas, your new version just moves the radar cutout a miniscule amount that I can only spot if I view both screenshots in quick succession.
I think that the "RADAR" text would have to be removed completely to get a correct radar cutout. But I also think that it's not really worth the effort.
-
@Clyde - That actually makes good sense and I like your idea better. I will move and link it. I like raspi2png but it would be nice to have it work more like an old school TSR so we could capture full screen without using SSH.
I am definitely not a power user on any linux platform so any tips are welcome. I am mainly Windows focused with a bit of linux due to our switch fabric (our switches are linux based). I work on firewalls (Fortigate & Palo Alto) switches (Cisco & Extreme), routers (Cisco), virtualization (VMWare), storage (NetApp) and a whole lot of fiber connectivity. Our campus is several blocks so not huge but a good sized network with several hundred PC's. I can build you a solid, secure & redundant network. ;)
I can talk subnetting, routing, routing protocols, switching, firewalls, etc. all day long but I find firewalls the most interesting as they do so many functions nowadays and aren't just about security anymore. A close 2nd is virtualization. It's such incredible technology.
If you come across something better than raspi2png for a decent full screen capture you'll have to let me know.
-
@Riverstorm I looked around a bit on the web and didn't find a better solution than raspi2png that doesn't need an xserver. Interestingly, most raspi2png guides suggest putting it in
/usr/local/bin, but I still prefer my variant for said reasons. 😊I looked for a way to bind raspi2png to a key press, but without luck except for this post from @meleu (I'll have to leave for work soon, so I don't have the time for a thorough search), but I stumbled upon a way to name the screenshots by the date and time they're taken (source):
raspi2png -p $(date +snapshot-%Y%m%d-%H%M%S.png)It will name the screenshots
snapshot-20190207-072613.png,snapshot-20190207-072637.pngand so on. Maybe you or someone else will find this useful.I'm not done with the shortcut, though. I've just opened a thread asking for solutions.
edit: If I ever need advice on bigger networks and routing, I may get back to you about it. 😉 I'm not a Linux pro either, maybe a "power user" since I made Ubuntu my main system back in Dezember 2006 as the long-sought exit from Windows (I moved to Kubuntu years ago when Gnome 2 was discontinued). I keep a Windows 7 around for some Windows games and programs that don't run well in WINE, but I only start it very, very seldom. So, my Windows knowledge may correspond to your Linux knowledge. 😌
-
@clyde can you take a screenshot with Ra make sure gpu enable is on (if you dont know what this is its already on) and post here I just want to confirm you ra is outputting this res if it is all add this resolution to the current new ones ive set for vectors.
"Vector resolution (Restart core); 1024x768|640x480|1280x960|1440x1080|original");
this is what we have so far dont mind adding your resolution this means mame will render at that resolution it also means you dont need to turn bi linlear filtering on when you used your default res
-
@grant2258 I can do that after I get back from work, stay tuned.
-
@clyde i just put a pull request in to add it for you. Just keep an eye on it for being merged then just update.
https://github.com/libretro/mame2003-plus-libretro/pull/656
if you havent updated in a while please clear your mame2003-plus/cfg as updates to the input system (dual configs on for legacy and one for none legacy) where implemented so you can swap modes without messing the other one up.
suggested setting for you or anyone else using a monitor native resolution
mame2003-plus_vector_antialias = "enabled"
mame2003-plus_vector_beam_width = "1"
mame2003-plus_vector_flicker = "20"
mame2003-plus_vector_intensity = "1.5"
mame2003-plus_vector_translucency = "enabled"
and for you mame2003-plus_vector_resolution = "1600x1200"
-
@Clyde radar text: it’s not a matter of effort, if you prefer centered radar and no text I can remove the text and place the radar higher. Just let me know. For the 1080p version I prefer to keep the original cardboard ‘integrity’.
Contributions to the project are always appreciated, so if you would like to support us with a donation you can do so here.
Hosting provided by Mythic-Beasts. See the Hosting Information page for more information.