CP2020 - my DIY 2Player/Trackball Control Panel
-
Further Delays
My original thoughts where to "just clamp it on a regular shelf-board", but after a first impression of that view, I decided to go for a tailored mounting-plate. ..:
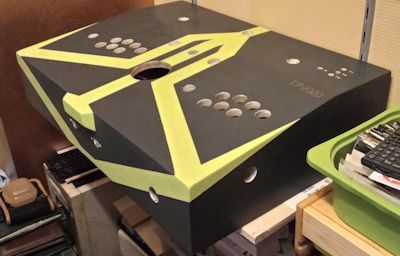
So, at the moment, I am again, in the loop of sanding/painting/waiting/<repeat>...
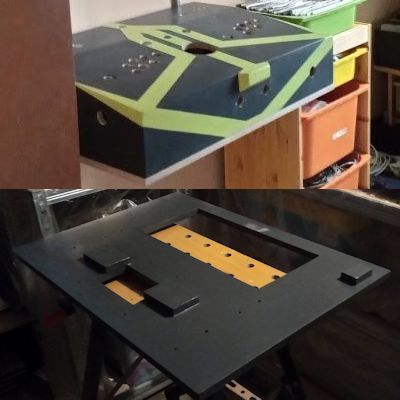
-
There and Back again
So, hopefully tomorrow (today), I'll get the final steps done to mount the panel to its base. Then, I am once again there, where I started with my first post :smirk:. I am really looking forward to the wiring/crimping stuff and then, the one thing that worries me a bit, the wallmount for the monitor - would be easy if I could do it with the help of at least two friends who understand what I want to achieve, but as the times are, I'll have to improvise there.
But for now, here we go:
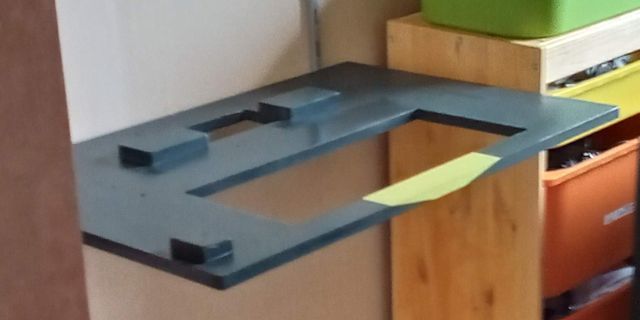
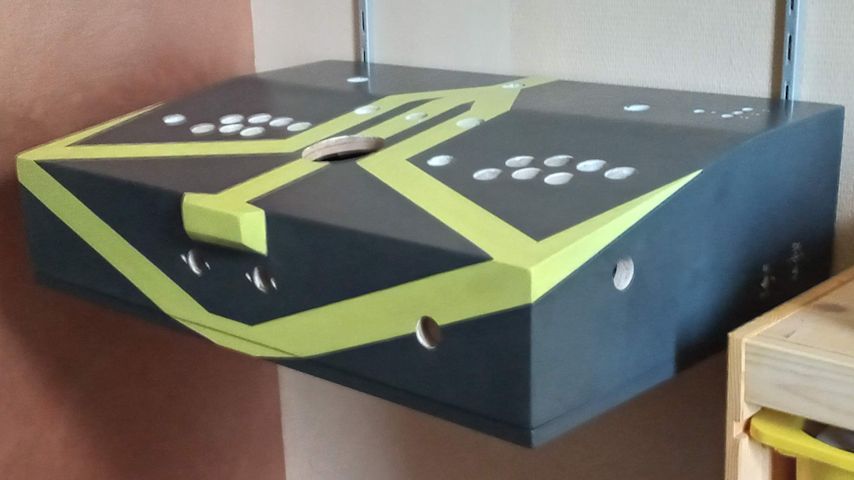
-
Another Preview
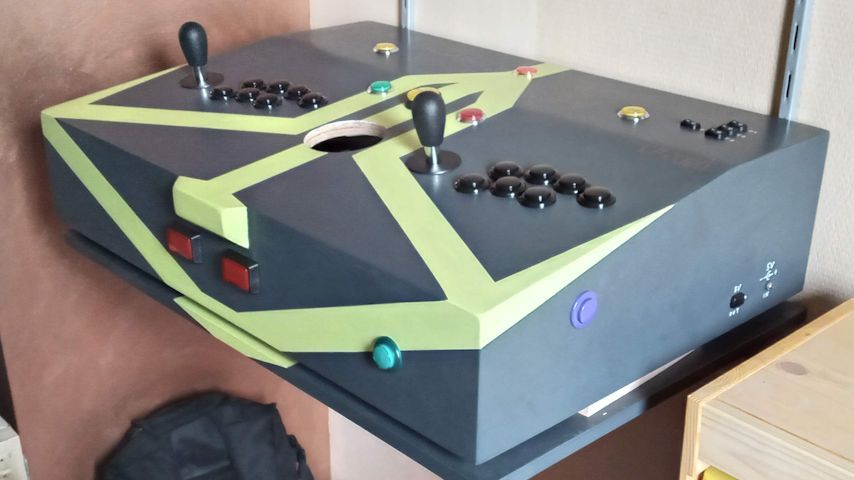
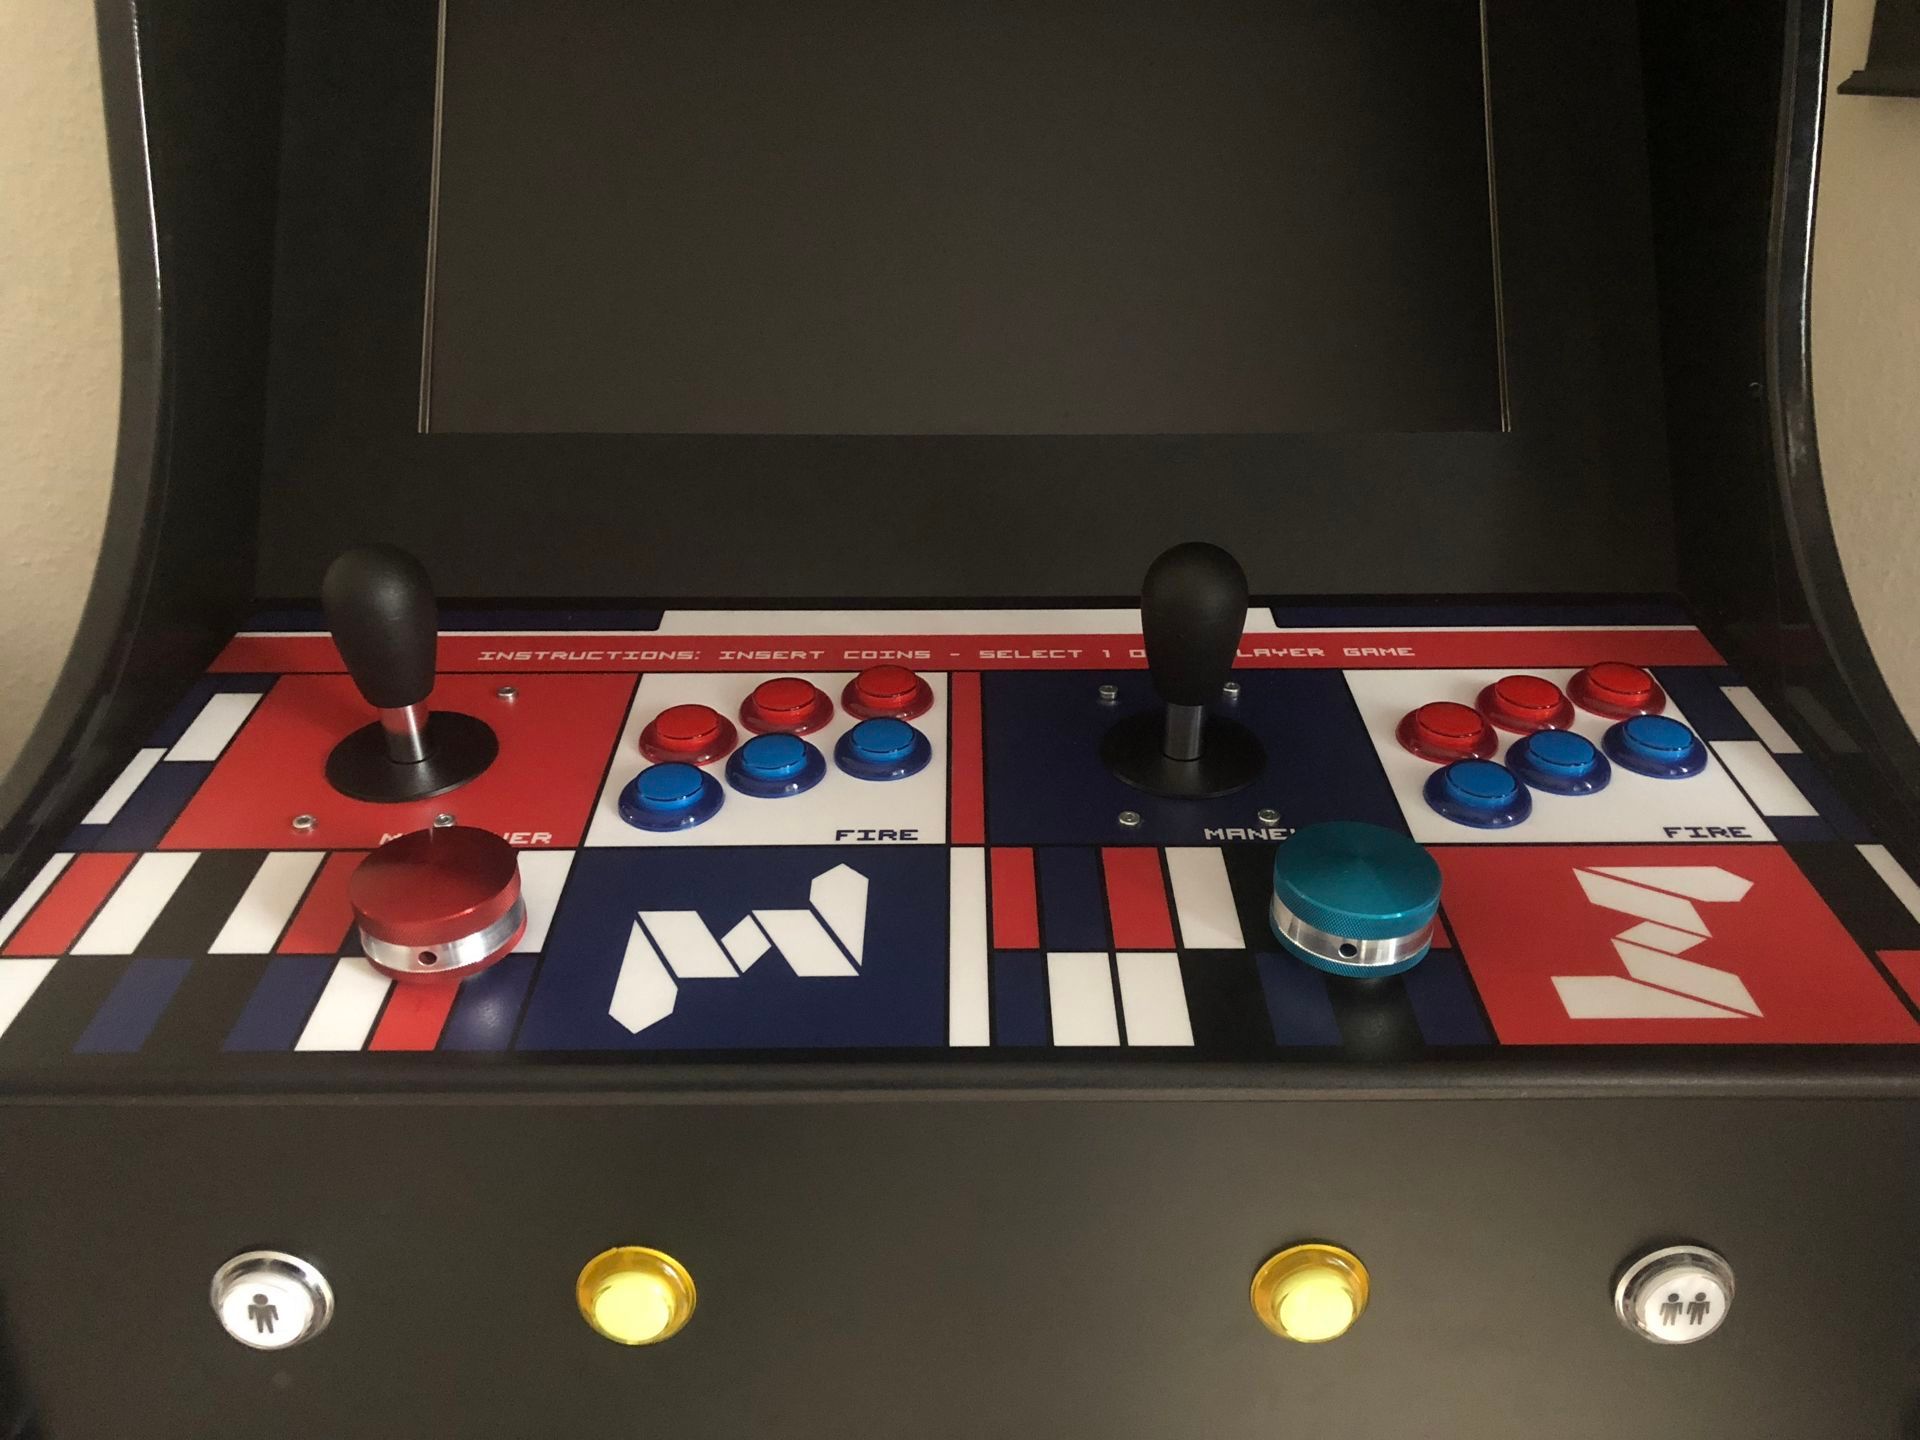
Wiring is still work in progress, so here is a quick impression of the Panel with Sticks and Buttons in place:
-
Nice! Do you have already decided what the buttons finally will be for? I can guess some of them (the quare ones being for either coin/select or start), but others are not so clear. Examples areis the cyan button on the left, the big yellow one in the middle, and the single red one in the back.
-
Looks the business. Love the way you've taken the artwork into the sides and front panels. You're very wise in not using the Ultimarc hammer in insert nuts. I used them for mine and having followed their instructions for hole diameter the third nut split my Walnut control board. I was absolutely livid. Thankfully I was able to glue and clamp it up and the split dissapeared. All that said the Ultimarc is a brilliant trackball and I found it worked perfectly plugged into a PI USB 2 port. I haven't had to configure it at all. It's recognised by all games that use one and even driving games like Pole Position where a good wheel spin is essential. If you're worried about the paintwork you might consider something like a clear satin spray laquer over the top
-
@shaun57
Thanks & good to hear that I won't have to face much trouble in configuring the Trackball ;) As protection for the paintwork i used around 5 layers of silk-matt clear parquet lacquer in the hope that something that is intented to be walked upon should provide an adequate protection. Though I am noticing now, that every touch shows with a fatty/oily shine. And glad to hear that you was able to fix the instert-nut-incident! [Edit: I searched for it within your The Hardwood Build, and must say "I have no idea where the split could have been"]@Clyde
I am still in the process of figuring it out and in the end it will be an ongoing process of playing/reconfiguring/playing/cursing&reconfiguring/&maybe_rewiring paired with changes within the environment (Retropie) and maybe Hardware (Well, nope - no RPi5 in sight). To my disapointment: I've flashed my I-Pac in 2018 with the 136 and later 139 Firmware (Gamepad Mode, FW 146/149 would be the corresponding Keyboard-one) to use Gamepad1/2 for the Stick+Firebuttons and all else as regular keystrokes (TAB for Mame, some essential keys for Amiga/C64 Emus/Games), as that seemed to be a convinient way of setting it up. As it appears now, that will not work in the way I thought about it (see below (1) [no spoiler function on this forum?]).But First, have a look at my "concept" so far:
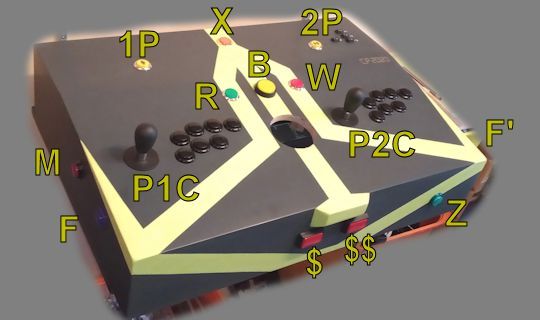
P1C/P2C.: Joystick + 7 Firebuttons Player1/2
F,F'....: Flippers (Duallinked Player 1 Fire1/2 (?))
1P,2P...: Start Player1/2
$,$$....: Select Player1/2
M.......: <TAB> (I-PAC Shift)
R.......: Load Savestate (shifted Prev. State)
W.......: Save Savestate (shifted Next. State)
B.......: Pause (shifted Libretro Menu)
X.......: Reset (shifted Exit)
Z.......: P1B8?Enter? Whatever is suited as the plunger for pinball games?
[1] Since my last visit, the Page for the I-Pac got a major overhaul and the new Firmware 1.55 is now called "Multi-Mode" and can be switched from keyboard to DInput/XInput Gamepad(s) (preconfigured or custom Profile), and the old "Gamepad enabled" FW139 is now called "Alternative Firmware (Mixed Mode)" (Same CRC as my Download from August 2018). What they haven't said (If I remember it right) on the old webpage was, what they are mentioning now:
"This is an alternative firmware version which enables the board to appear as a keyboard and dual standard game controller AT THE SAME TIME (both also with mouse). Note Retropie does not work with this configuration. The standard multiMode version (above) enables one device type at a time on the host (plus mouse) and this is required for Retropie. IMPORTANT: This version also requires a different version of WinIPAC for configuration. This version does not support Xinput."
Sadly, that was the Firmware I've build my concepts on (and had tested on a PC, never thought Retropie couldn't cope with it). [Edit: The WinIPAC version at that time supported the keyboard only and the gamepad enabled firmware, so I assume the different version of nowadayscycle is also just the one of older days]
[Edit(s): Spelling, Typos, etc.]
-
..post script.. I just remembered one config change I did make to the Ultimarc. Although it it recognised as the steering wheel automatically in Pole Position I & II, it's far too sensitive out of the box. I accessed the MAME menu, analog controls and dropped the dial sensitivity way down to 5%, and saved for current game only. Works perfectly now and allows the low gear left hand wheel spin on the hairpin ;)
Very jealous of your pinball flippers!
-
@shaun57 I did the same but for all spinner(-like) games listed in the BYOAC wiki and used their Turn Count Reference as a guidline for the initial values (e.g. Arkanoid: "120-130 deg = one traversal across the screen"), and adjusting them to my liking afterwards.
-
-
@Clyde Thanks, I hadn't seen the BYOAC list. Looks like I've got a few more ROMS to install and try ;)
-
Wire it Up
Just started today and I really love/enjoy the part now :D
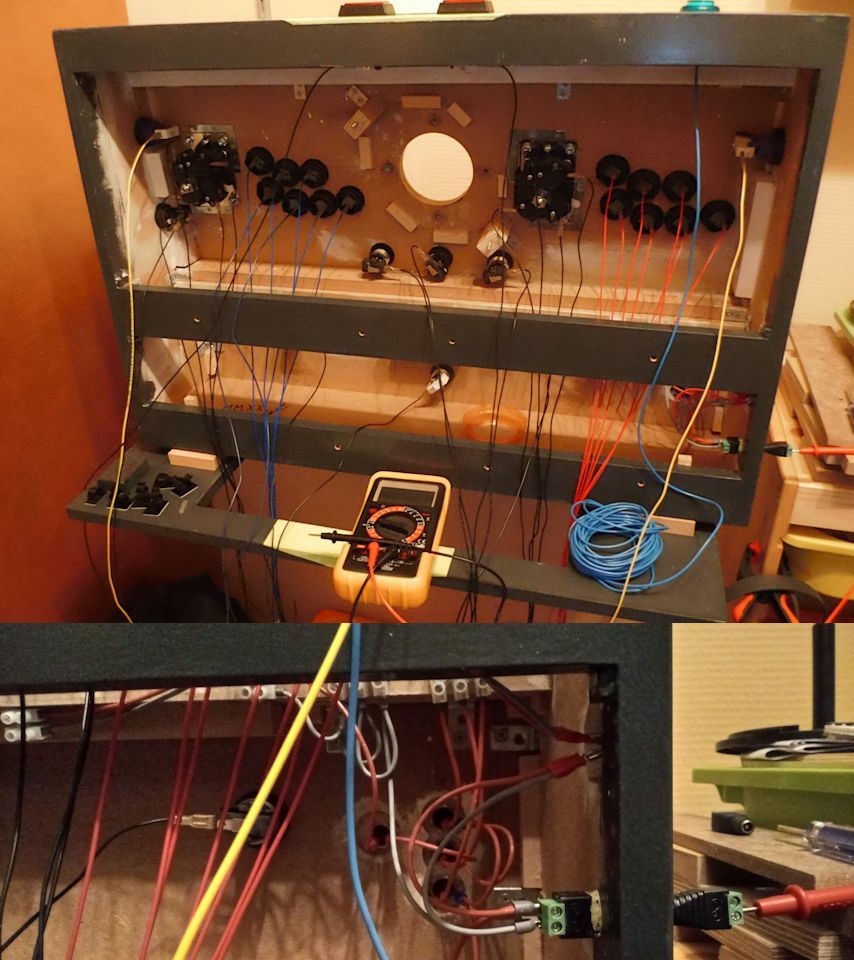
Over exaggerated and not in scientific terms: This is where Biology beats Thermodynamics: Let's build up entropy and then bring in order again (within a defined local sphere) ;PEdit: In the lower Frame, the red (+5V) and grey (GND) cable are going on one way (daisychained) from the DC 2.1 x 5.5 mm socket to a switch for both phases and are not, like it may seem within the picture, connected to a singular contact.
P.S.: Within the CP i am just using single phase switches, but that one is special in the way, that it will be used to supply the +5V to an external device (USB powered Speakers) and I really want to cut the current with that switch.
-
At last: Wiring Done
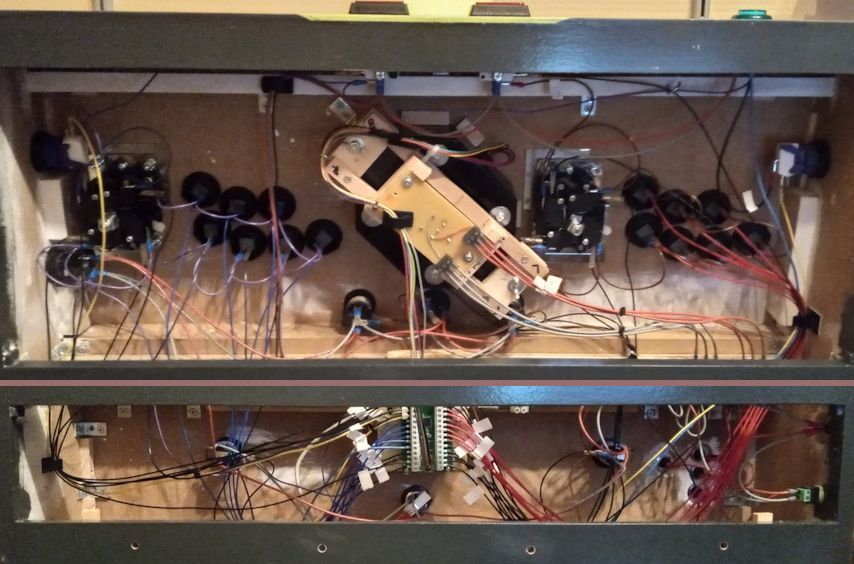
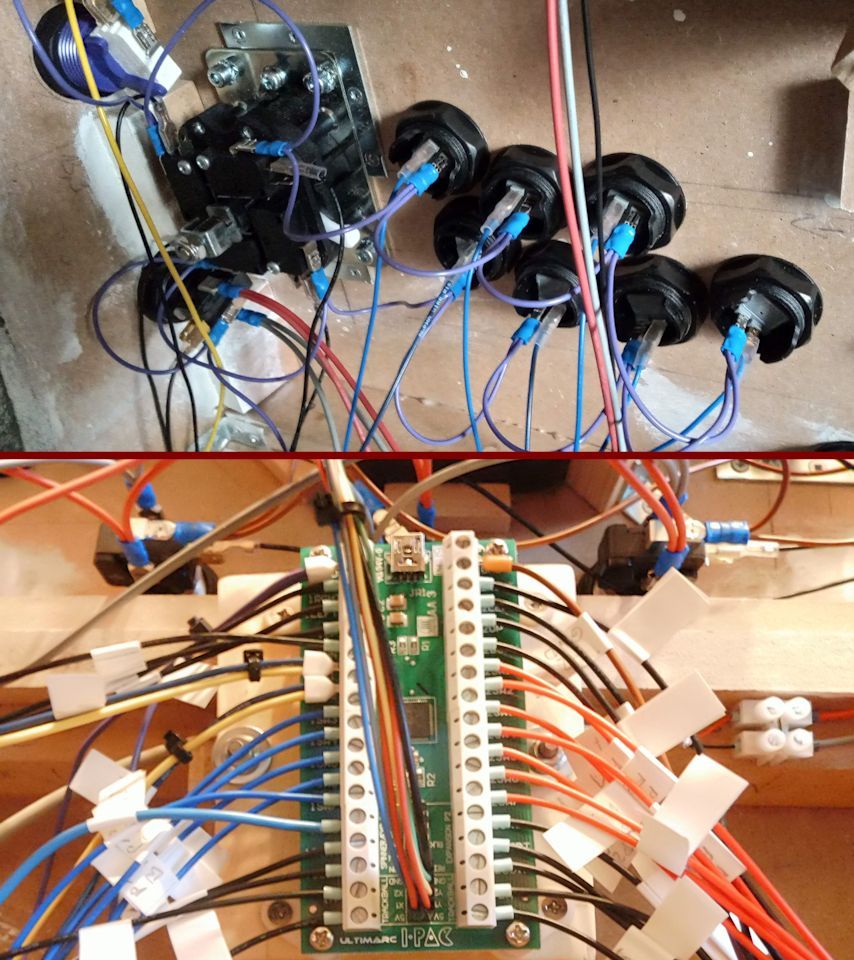
Some minor changes from my initial intends, but for now I am ready to test the buttons/sticks tomorrow on a PC (and the LEDs in the Evening), and if thats fine, the Monitor is next... then it is time to config/setup RetroPie ;D[Edit:] And the whole time I am thinking about a way to document/provide some form of (RTF)M for the Configs. I think that I need a kind of [printable] Template for each System/Core to be able to provide some quick reference sheet per ROM used, but that is another story to be told later ;]
-
Power On - & It didn't blow up :D
And all my cameras fail to capture the "real" view, but perhaps you may get the idea of how it may appear to the human eye :/
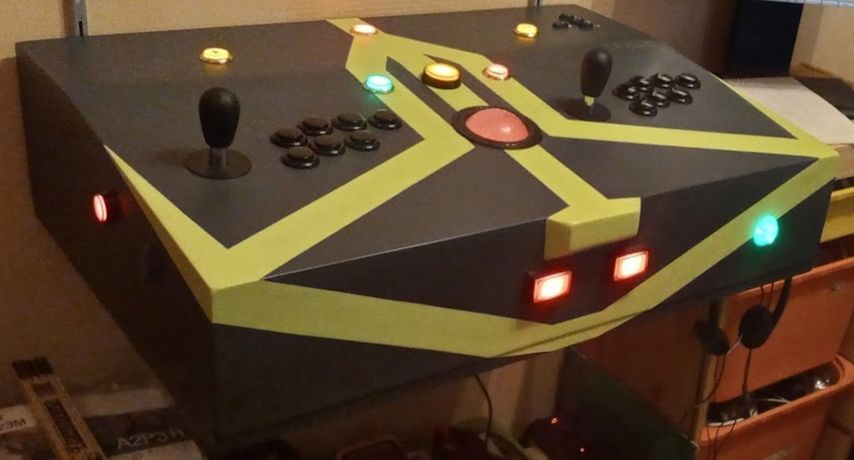
Buttons + Trackball Red under Warm White LED-Light (Room)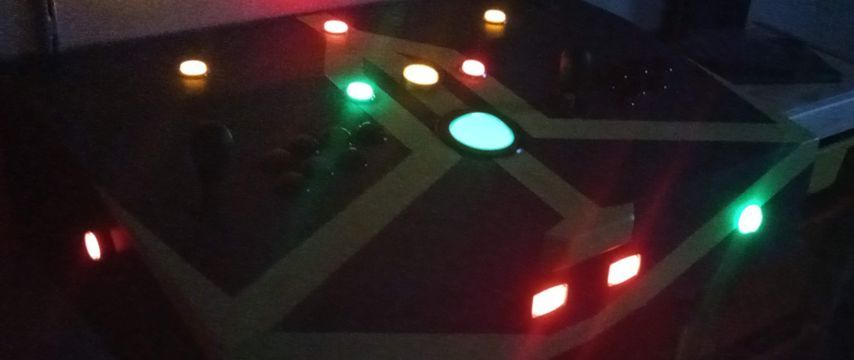
Buttons + Trackball Green (Ambient Light is from opposing PC Monitor(s))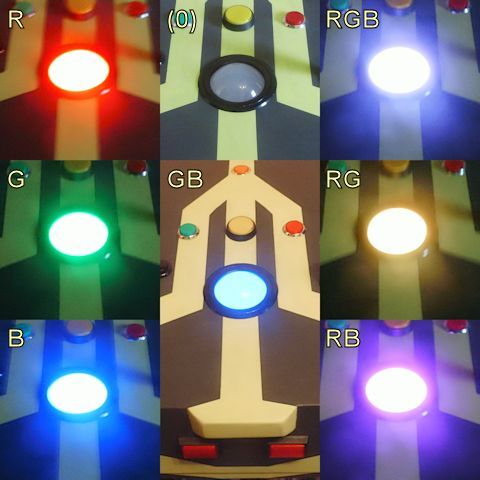
And the various possibilities for the Trackball LEDs[Edit ->]
P.S.: At the moment I am inclined to say that [Red] is my Daylight-, and [Green] my Low-Light-Favourite (with [GB] and [RB] being realy close candidates. And at least on Towel-/Wear_the_Lilac-Day [RB] is a must ;P) -
Sweet! Awesome job!
-
Looks really great, bravo! Care to share why you opted for non-illuminated controller buttons? (i.e. the seven black ones for either player)
With a programmable controller, you could've set them up in a way that only the buttons which are actually used by a core and/or game would light up.
That said, (and as @Ashpool already knows) I have illuminated controller buttons and a programmable LED controller, but didn't set them up other than permanently lit (yet?).
-
@Clyde said in CP2020 - my DIY 2Player/Trackball Control Panel:
Care to share why you opted for non-illuminated controller buttons? (i.e. the seven black ones for either player)
With a programmable controller, you could've set them up in a way that only the buttons which are actually used by a core and/or game would light up.First I didn't wanted too much light (christmas tree effect) on the panel, and to be honest, I simply haven't thought about that possibility with a programmable controller. So it may be, that someday I am going to "upgrade" the Buttons ;)
P.S.: In my first thoughts Fire Button one would had been a red one, but somehow that looked weird to me and could have led to some confusions which ones are to be used with 6 button fighting games.
-
@Ashpool said in CP2020 - my DIY 2Player/Trackball Control Panel:
P.S.: In my first thoughts Fire Button one would had been a red one, but somehow that looked weird to me and could have led to some confusions which ones are to be used with 6 button fighting games.
I remember the decision process for my own cabinet's button colours. I settled for the two-coloured rows mostly for aesthetic reasons, with the added bonus of proper support for Street Fighter games.
-
As mentioned in Post#1, we are now opening chapter: Curse of Configs
@Ashpool said in CP2020 - my DIY 2Player/Trackball Control Panel:
Since my last visit, the Page for the I-Pac got a major overhaul and the new Firmware 1.55 is now called "Multi-Mode" [... ...] the old "Gamepad enabled" FW139 is now called "Alternative Firmware (Mixed Mode)" [... ...] they are mentioning now:
"This is an alternative firmware version [... ...] Retropie does not work with this configuration. The standard multiMode version (above) enables one device type at a time on the host (plus mouse) and this is required for Retropie. [...]"
Sadly, that was the Firmware I've build my concepts on (and had tested on a PC, never thought Retropie couldn't cope with it).Well, I've tried on a fresh retropie-buster-4.6-rpi4.img install with my old IPac Configuration (Joy(1/2), Buttons(1/2)1-7 + Start and Select as Gamepad and (1/2)SW8, (1/2)A and (1/2)B as keys and it was working just fine (Quicktest on some 2 player games in lr-mame2003: Both Players Gamepad Functions where fine (upon start the messages detected I-PAC2 on Port 0 and detected I-PAC2 on Port 1 flashed up and the keyboard keys where accepted fine from mame (ie. 1A (Button M in Post #9) set to TAB opened the Mame Menu). ... What I hadn't considered (as I had not assigned any "shifts" so far) was: The assignment of a switch to act as Gamepad, Keyboard or Mousebutton is a general one, so it cannot act as Gamepad (unshifted) and as a keyboard (shifted) [though I bet that would only be a Firmware-thing] :/
This would have been my intended configuration:
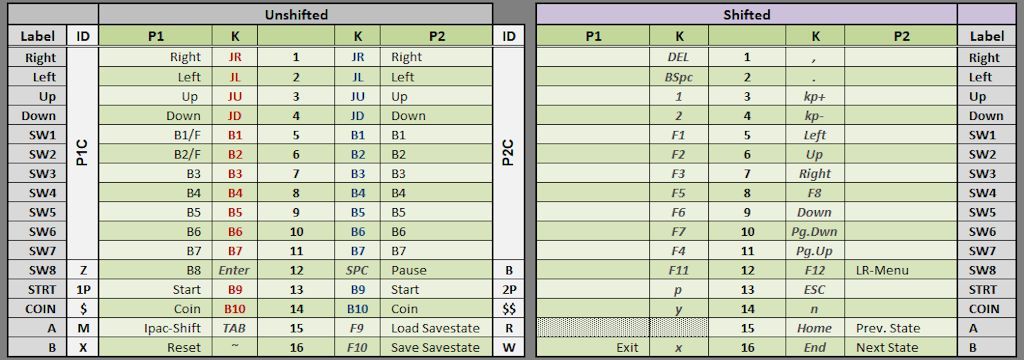
As using Hat-(UDLR) and Buttons 8,11+ (WinIPAC can assign Buttonnumbers 1-28) as shifted assigns ain't going to be of any use (i believe?), I think i heed the advice from @theink in his wonderfull guide to setting up the IPAC2 as a keyboard controller and stick to keyboard only (though his argument that the I-PAC is only recognized as one controller in gamepad-mode appears (to me) to be void nowadays [at least for the Retropie Install mentioned above with an I-PAC 2 (Firmware 1.39) configured in WinIPACV2 (V1.0.8.12)])
Edit: And I haven't tried wether it is possible to assign keyboard keys as hotkeys (no hotkey-enable button set) or not... so that could have been the next boobytrap laid out for me within this battle ;>
-
A Ashpool referenced this topic on
Contributions to the project are always appreciated, so if you would like to support us with a donation you can do so here.
Hosting provided by Mythic-Beasts. See the Hosting Information page for more information.