Pi in a Super Famicom Build
-
I did mine like a year ago. Never got around to making a dedicated thread.
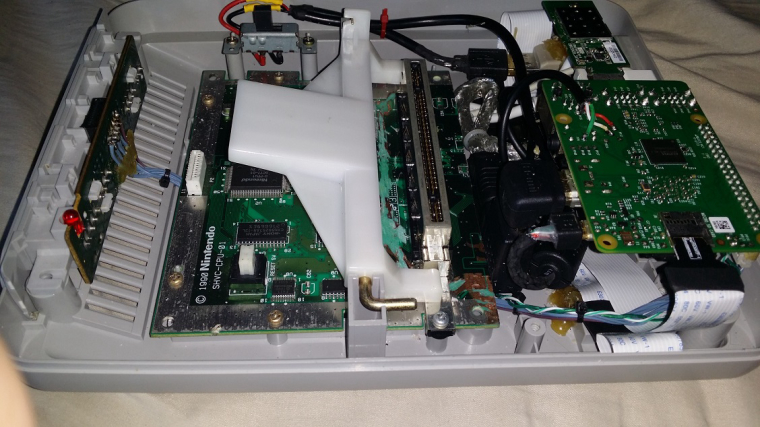
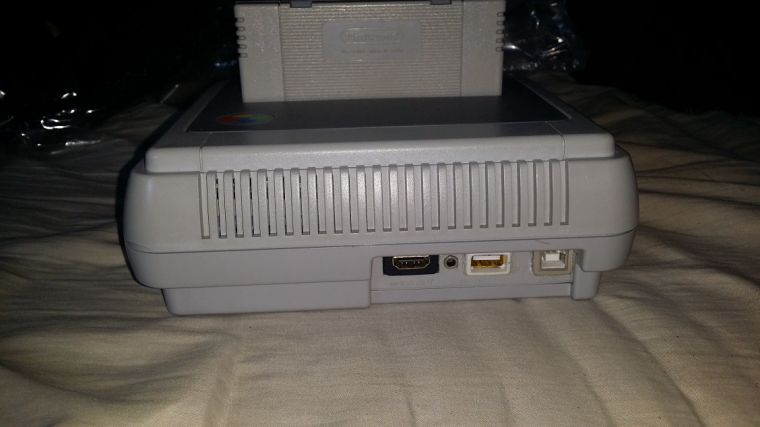
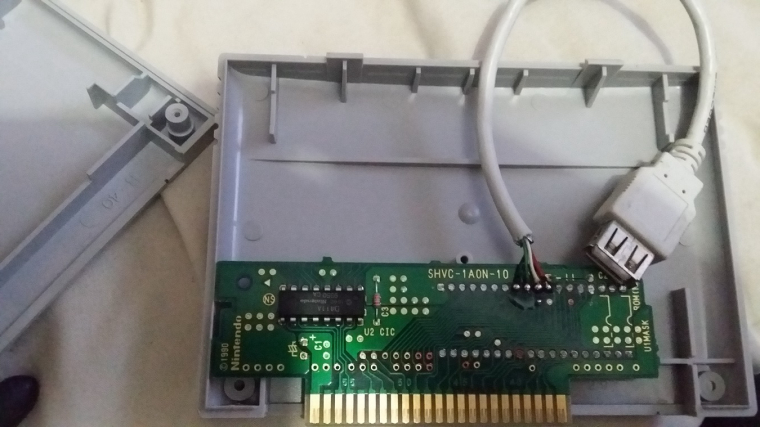
I directly connected controller ports to gpio. Power led works without doing anything extra. Reset works. I had to replace original AC power port because I kept getting the rainbow box. I split a wire to power button. I shutdown on ES first, then shut power off. No issues so far. Audio port just in case.
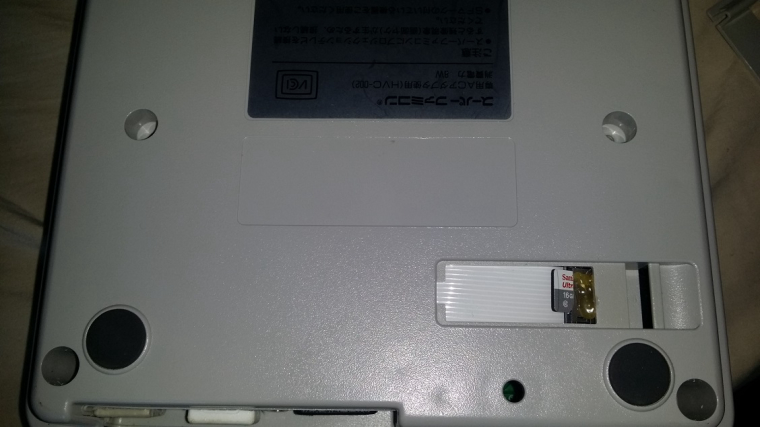
I originally tried to put an sd card inside a cart but that was more trouble than it's worth. Sometimes it wouldn't read. In the end I went with usb and it's faster to do (4 wires), and very reliable.
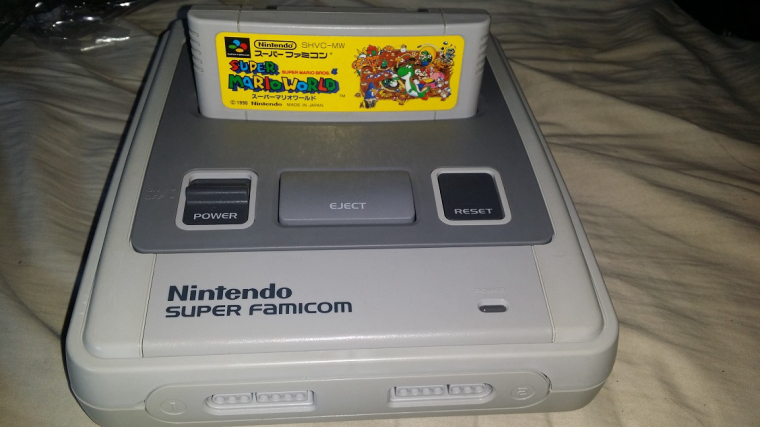
For the yellowing i highly recommend you dip your sfc/snes in a mix of water and peroxide for a week. Both sides. Otherwise, it will start to chip and break. Mine was almost brown. The end results aren't perfect but hardly noticeable.
 !
!
-
@Darksavior This looks great!
Any tips on the peroxide thing? Did it make the console less brittle, or just remove some of the brown-ness? I've seen some people use just regular peroxide that you'd put on a wound and other people say to get high concentration stuff.
-
@demesauce said in Pi in a Super Famicom Build:
@cyperghost That power supply is barely enough to power the Pi2, definetely not enough amperage for the Pi3. I use a 2.5a power supply and still get the low power "rainbow box" from time to time when using 4 controllers.
obsidianspider: I'd get a 2.5a or even a 3amp power adapter if I were you. If you decided to use a Mausberry Circuits power adapter, make sure is a direct plug in style
Guys you are all right. If you use a 2,5a suppyl and get the rainbow box please check the length of your power USB cable. That's the advantage of the Sony power supply. You can use very short USB cable (maybe 5") and you get real 1,5A on 5,1 Voltage. I used this to power one USB controller, one USB stick, one Keyboard and two BT controllers and I never saw the rainbow nor the Pi gets underpowerd by playing PSX games :)
I got also a cheap 2,5A power supply, no chance - it lacks of relieable support of constant voltage and gets down :)
-
@cyperghost I can definitely see an issue with a cheap power supply, but I'm still wondering about a 1.5A one being enough. That said, if it works for you, go with it. One thing I've seen with Raspberry Pis is that no one's setup is identical to anyone else's.
-
Well two solutions:
Bye one from europa :)
Bye a newer one from the US, Japan or europa :)You might use some Hydrogenperoxid to bleach the case but the plastic (ABS) is in poor condition and lacks of UV stabilaziers or some other batch ingredents were not properly mixed :(
So some day you have to bleach it again and again. Check youtube there are some howtos :) -
@obsidianspider
Yes I know, but defintly the length of the USB power cord is also important. You can have a 5 amps power supply but you can't power the Pi with a 20m cord because it may lack of the right voltage. I think the Pi3 got a maximum power of 6W and this are 1,2 amps. And if you got a good power supply with stabilized voltage then 1,5A of supply + some extras are enough.So the advantage of this power supply is the very short USB cord :)
But I tested a portabel 2,5" drive It needs in peak 0,7A and in standby 0,3A I was able to get it started but on playing a PSP title the Pi got down :(
So with keyboards and controllers there seems no problem :) -
@cyperghost First off the PS3 requires a whole lot more power than 6W, more like 250-380 watts depending on the model. The number of watts is equal to amps multiplied by volts.
I agree that cheap quality cables cannot carry the "advertised" amperage, but according to Raspberry Pi, 1.5a is not sufficient power. Doesn't matter if the USB portion of the power supply is 1 mm, if you don't start with enough power, you'll never have it.
-
@demesauce PS3?
-
Oops, my bad. cyperghost was talking about a playstation power adapter. And then he brought up 6 watts and low amperage and something about your mom.... kidding.
Anyways, disregard the PS3
-
@demesauce
Sorry I didn't get you. Where did I talked about a PS power adapter? PSP means Playstation portable so please ask yourself what are you telling.Well what else could I say. If you use power hungry USB devices than you need 2.5A but if you run just the Pi3 than 1.5A is more then enough. A 1mm power supply isn't possible because of the male and female plugs - you know. If the voltage is lower than 4.65V the rainbow square will appear and that's just a question of how stable your power supply is. Nothing more nothing less... But please don't get upset - just talk like a mature, okay? It's a great forum here and we no one wants to get this poisoned by a skirmish.
-
@cyperghost What are you talking about? I'm not upset, I was making a joke. And yes, I forgot to add "Portable" when mentioning playstation
The 1mm cord was to illustrate a point. I'm saying it doesn't matter how long or short the cord is if you don't have sufficient power to begin with.
This is straight from raspberry pi:
1. WHAT ARE THE POWER REQUIREMENTS?
The device is powered by 5V micro-USB. Exactly how much current (mA) the Raspberry Pi requires is dependent on what you hook up to it. We have found that purchasing a 1.2A (1200mA) power supply from a reputable retailer will provide you with ample power to run your Raspberry Pi for most applications, though you may want to get a 2.5A (2500mA) power supply if you want to use all 4 USB ports on the Models B+/2B/3B without using an external powered USB hub. The table below outlines the power requirements of each model.
Product____________ *Recommended PSU current capacity________ **Maximum total USB peripheral current draw
Raspberry Pi Model A _____________ 700mA _______________________________ 500mA
Raspberry Pi Model B _____________ 1.2A _________________________________ 500mA
Raspberry Pi Model A+ ____________ 700mA _______________________________ 500mA
Raspberry Pi Model B+ ____________ 1.8A _________________________________ 600mA/1.2A (switchable)
Raspberry Pi 2 Model B ____________ 1.8A _________________________________ 600mA/1.2A (switchable)
Raspberry Pi 3 Model B____________ 2.5A __________________________________ 1.2ASorry, graph did format as planned
-
@obsidianspider
I'd like to think it did make it less brittle:) Well, I watched a ton of videos of the process and I noticed the ones that used the paste mix and covered it with clear plastic had more tendency to mess up. Blotches. Real ugly ones. I also saw one on ebay with part of the nintendo logo removed due to this.
The normal peroxide bottles works but I noticed it wasn't as potent. Luckily, a local salon had the sally vol40 concentrated tub on sale so I was using that. I noticed a change within the first day out in the sun. Changing the water/solution once a day helped. The nintendo logo was intact too. It was my first time so I just did the outside and it became yellowish within 8-9months. This time I did it to both sides and hopefully that'll do. It was so much hassle (2-3 days for any real change but i did this for a week) that I'm looking for an sfc that doesn't that problem. If they're not yellowing now they never will. -
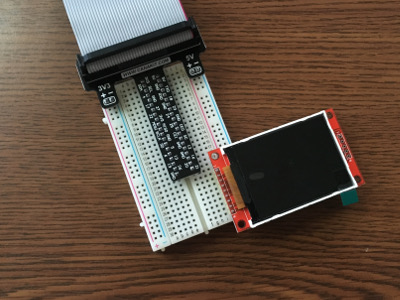
Woo hoo! My screen showed up today!
Next Steps
- Figure out how to wire it up (This blog looks like a good start, someone linked to it in another post.)
- Get it to display something while still having video working via HDMI
- Figure out how to get a script to show something on it when I'm in EmulationStation (which system's files I'm in would be sweet, but even a static image while in EmulationStation would be better than nothing)
- When I'm playing a game have it show some kind of game info
- Go back to the EmulationStation info when I'm done playing the game
I was thinking about maybe having the Reset button on the console act as a trigger to switch display modes for the secondary display, between game art, some kind of stats for the Pi (temperature, uptime, time of day, I dunno) and then another press to just turn it off if it's annoying when playing in a dark room or something. Something to ponder for a later time after I get the first stuff taken care of and I actually have the console here to wire up.
-
Woo hoo! The Super Famicom has arrived from Japan!
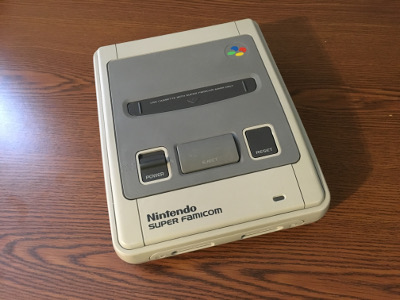
It's in really good shape and looks just like it did in the photos on eBay.
I still can't get my 2.2" screen to turn on, so I think I'll crack open the Super Famicom and start measuring for cables.
-
With the right security screwdriver it was really easy to get the Super Famicom apart. The board is dated 1994, which I am guessing is why the case isn't as brown as others I've seen. (I read somewhere that over time Nintendo got their plastic mix figured out.)

-
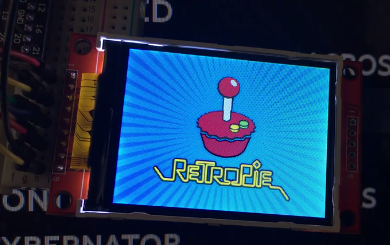
Progress! I finally got the secondary 2.2" screen working. I figured out how to get the screen to turn on with the Pi, display a default image, then, using runcommand, show an image for each game as it's being played, if the game doesn't have game art, to display a default for the system, and then go back to the default when in EmulationStation.
Here's a short video of it working
-
@demesauce Can you tell me where you got those white mounts to hold the Pi in place?
-
@demesauce Thanks for this post, I'm planning on doing the same with a Pi3 and a SNES. Just wondering, what did you use for the USB ports on the front? What does the blue and white cables going onto the mausberry circuit do?
-
I bought them on eBay. Try a search for standoffs or motherboard standoffs
The USB ports on the front are a small 4 port usb hub, also found on ebay (I bought a shit ton of them) The blue and white cables go from the GPIO to a Mausberry Circuits: http://mausberrycircuits.com/collections/frontpage/products/shutdown-circuit-use-your-own-switch
It allows you to use the original power and reset buttons to safely turn on/off the system
-
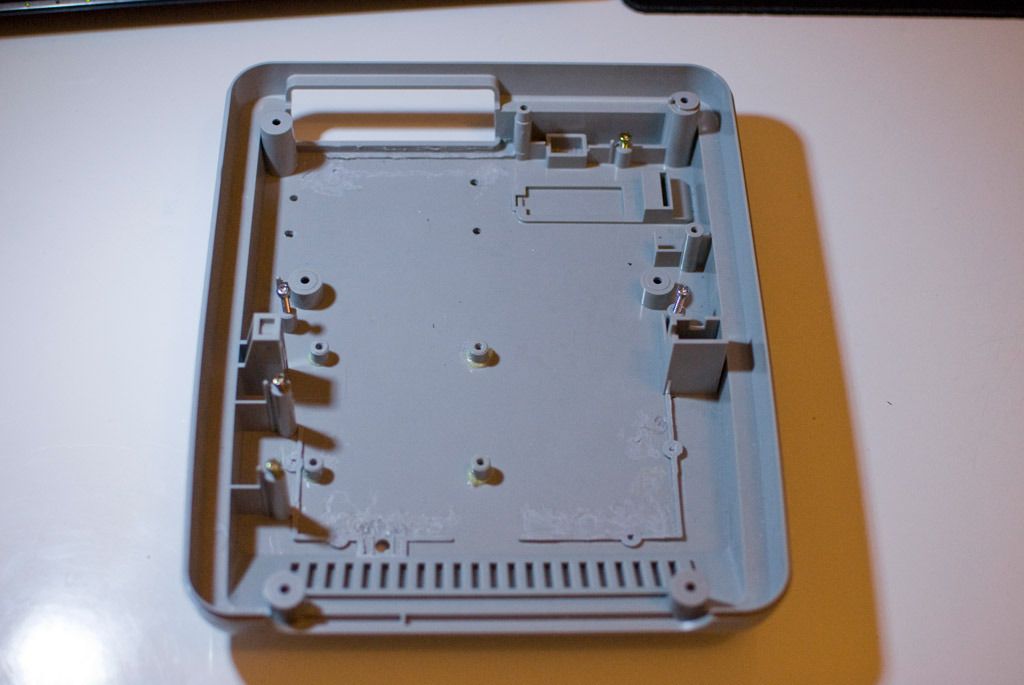
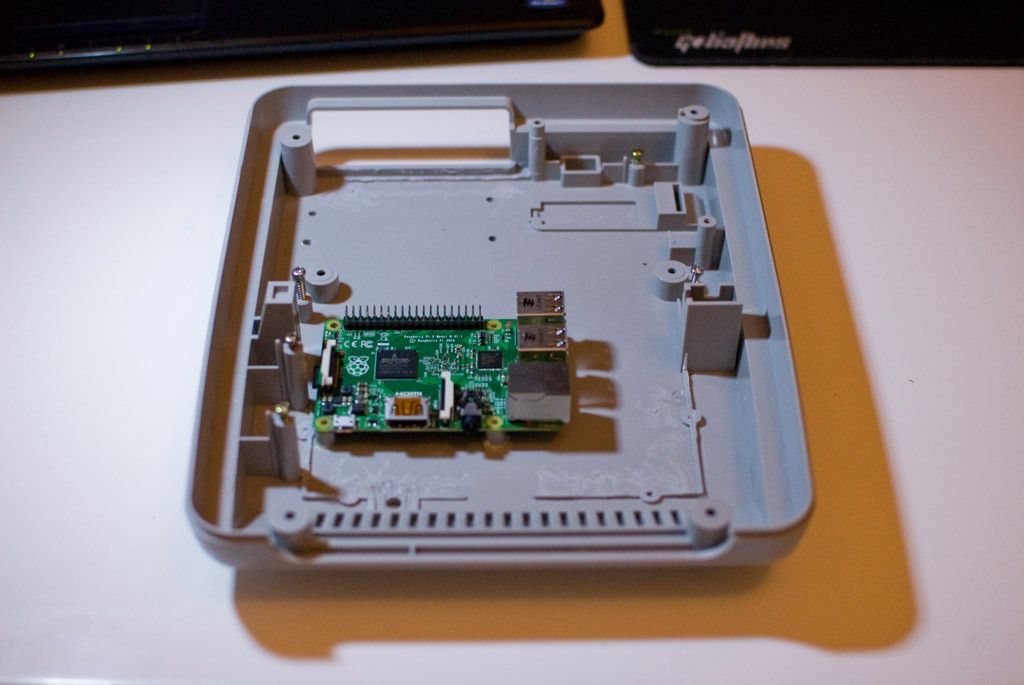
@Cheeturbo
With my Super Nintemu build, i reused pieces of the original SNES mounts. I like the idea of using as much as possible of the console i'm working with.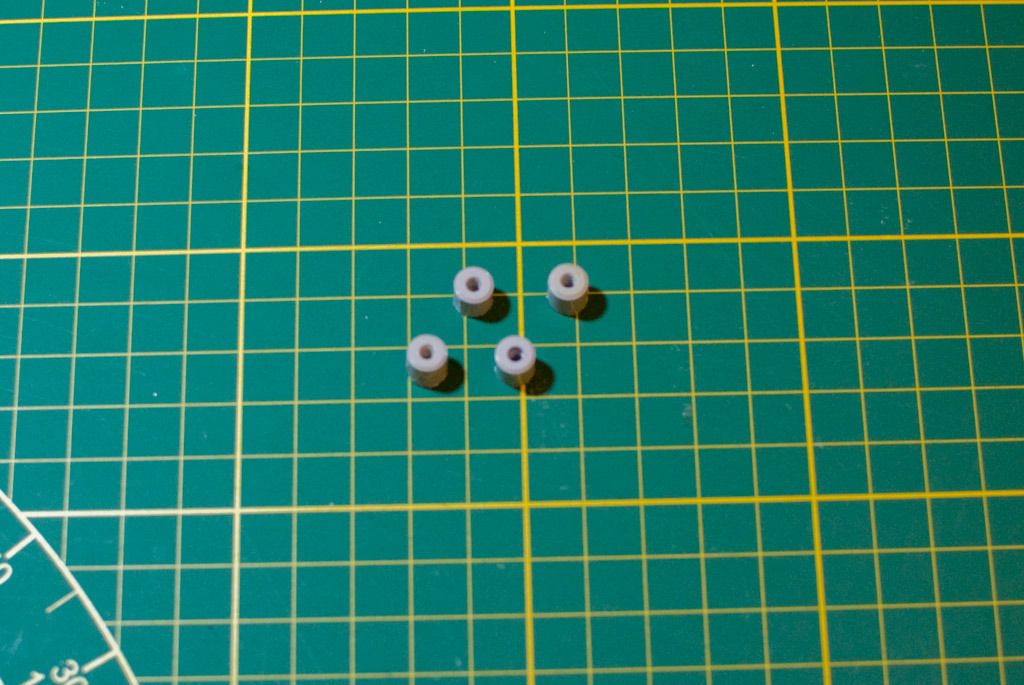
@obsidianspider
I hope this is helpful, i hope you don't mind me posting this in your topic.
Contributions to the project are always appreciated, so if you would like to support us with a donation you can do so here.
Hosting provided by Mythic-Beasts. See the Hosting Information page for more information.