Cashflow-126 coin acceptor / DIY coin acceptor to RPI gpio pins guide
-
@Folly Nice reversing/hacking. Thanks for the write-up. Luckily you did not fry the Rpi's GPIO with too high voltage.
About the voltage divider: I guess you did not have MOSFETs lying around, but probably you know the level-shifting trick with those [1]. I have some cheap BSS138 in my drawer for those occasions.
[1] https://www.digikey.com/en/blog/logic-level-shifting-basics
-
Thanks.
Yes indeed I agree I could have used some other stuff though I only had resistors and level-shifters.
The disadvantage of the level shifters is that you have supply it with 3.3V and 5V which would mean 2 additional wires.
The other thing is that my level-shifters have 8 bi-directional ports and I only had to use 2 ports. So that's basically the reason why I didn't use it.The other solution could be to apply about 10V to the pin 3(Coin Output Common Line). But that also required some stuff.
Basically the resistors were the easiest thing for the moment.
Made a small case a around my pcb and fixed the wires with a tie-wrap.
I am quite happy now so I think I will keep it this way ;-)Now I should make an arcade cabinet, not sure I have time for that :-)
-
@Folly These kind of coin acceptors are popular in virtual fruit machines, there's alot of info on https://www.desertislandfruits.com/forum/index.php?/topic/13385-mei-9524e-coin-mech-setup-for-mfme/
-
Nice picture in the thread you mentioned.
Although not directly suitable for the connections to the pi.
Will have a look if I can use and change the picture to display how I connected it to the pi like described in post 1.Edit:
I have added the basic connection schematic to post 1. -
@Folly Great work! Lovely bit of tinkering!
-
Nice to hear that you like it, thanks.
If you want, then you can just use the code and connect the gpio 24 and 25 via 2 push buttons to 3.3V on the pi.
It will then simulate the coin device.
Like this :
/=push button
3.3V----/ -----gpio 24
3.3V----/ -----gpio 25With above you would also be able to make a DIY coin acceptor.
Just inserting a coin through a selfmade coin-route that has just a switch. So that the coin will enable the switch temporarily. -
Discovered that
xdotoolneeds X to run properly, go figure.So for the normal Retropie without X(Desktop OS) another solution has to be made.
-
@Folly said in Cashflow-126 coin acceptor to RPI gpio pins guide:
Discovered that
xdotoolneeds X to run properly, go figure.So for the normal Retropie without X(Desktop OS) another solution has to be made.
A solution to this problem could be to make use of
ydotool.
To use this program you have to install ydotoold and ydotool from source like described on this page :
https://gabrielstaples.com/ydotool-tutorial/#gsc.tab=0
(the packages from the repository seem to be too old and are not work correctly , when installing with : sudo apt install ydotoold ydotool ,
if already installed then remove the packages first with : sudo apt purge ydotoold ydotool)To use
ydotool,ydotooldserver has to be running using this command :
To execute the output just do something like this :sudo -b ydotoold --socket-path="$HOME/.ydotool_socket" --socket-own="$(id -u):$(id -g)"
Press enter when it says ready after that the server is running.
Then we can startemulationstationtogether withydotoollike this :emulationstation|while true;do [[ $(raspi-gpio get 24) == *level=1* ]] && YDOTOOL_SOCKET="$HOME/.ydotool_socket" ydotool key 6:1 -d 200 6:0 -d 200;[[ $(raspi-gpio get 25) == *level=1* ]] && YDOTOOL_SOCKET="$HOME/.ydotool_socket" ydotool key 6:1 -d 200 6:0 -d 200 key 6:1 -d 200 6:0 -d 200;done
(it will press "5" or "55")After some tests
ydotoolalso seems to work only from within a linux setup with desktop environment.
Too bad as it supposed to work from a linux cli without using desktop.
Also tested the command using theevalcommand still same result.More tests reveal that
ydotoolis working now when using it with a setup without desktop environment but for now it will only work when using a RetroArch core like lr-mame. :-)For standalone MAME above, using "5" will however only work when using it on a setup with desktop environment.
In standaline MAME I discovered that
ydotooldis detected as a ydotoold virtual device looks like it's detected as joystick.
By trial and error I discovered the joy 1 back btn code.
Here mouse click examples can be found which uses 0xC1.
So I tested other codes and opened MAME gui to edit the button for coin 1.
0xC3 was the code for joy 1 back.
0xC4,0xC5,0XC6 are alse joy buttons If I remember correctly, they are in the same range.
So to getydotoolworking when using it with a setup without desktop environment and standalone MAME the command has to be :
(using only the 1 euro option)
emulationstation|while true;do [[ $(raspi-gpio get 24) == level=1 ]] && YDOTOOL_SOCKET="$HOME/.ydotool_socket" ydotool click 0xC3;doneHoped that this command would also work for lr-mame but that doesn't seem to be the case.
But for now both options seem to work fine.Edit :
Ydotool RetroArch autoconfig added over here :
https://github.com/FollyMaddy/RetroPie-Share/blob/main/00-retroarch-00/retroarch-joypad-autoconfig/ydotool_virtual_device.cfg -
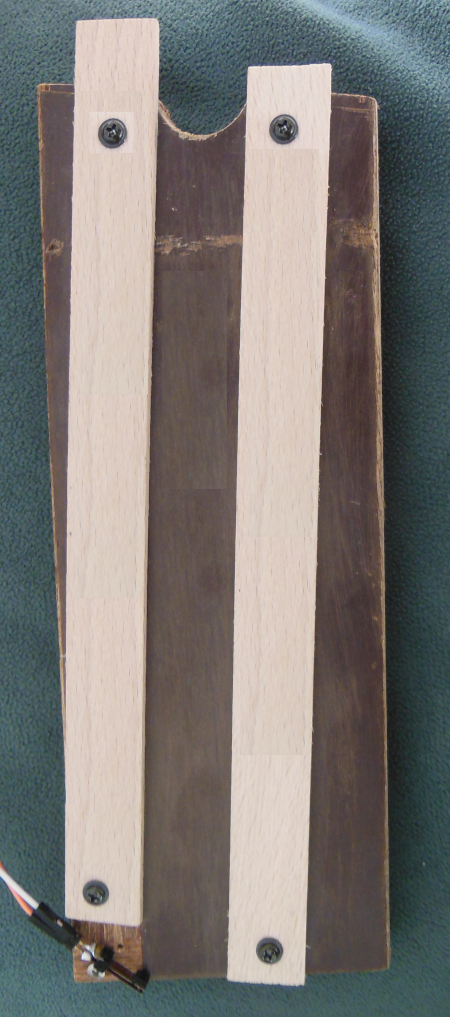
Today I had time to make a simple DIY coin-acceptor.
It's just a simple test setup using :
- a wooden plank
- 2 paint stirrers
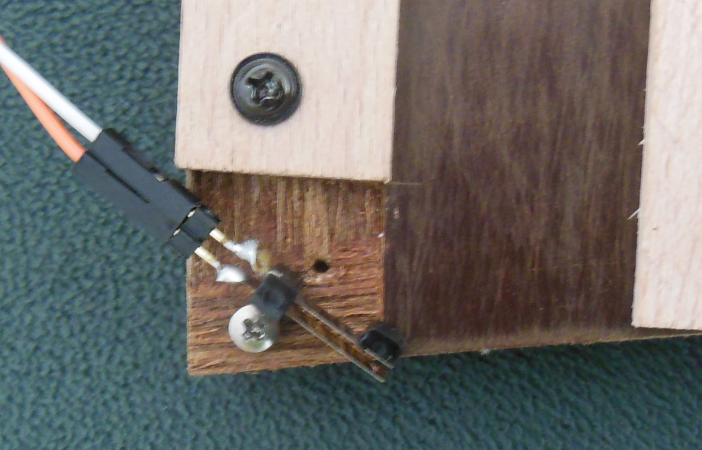
- a simple switch
- a few screws
- 2 jumper headers
- 2 jumper wires
- 1 euro coin
The created "open" slide setup :

Using a simple switch :
No resistors are needed as gpio uses a pull-down resistor by default, see here :pi@raspberrypi:~ $ raspi-gpio get 24 GPIO 24: level=0 fsel=0 func=INPUT pull=DOWN
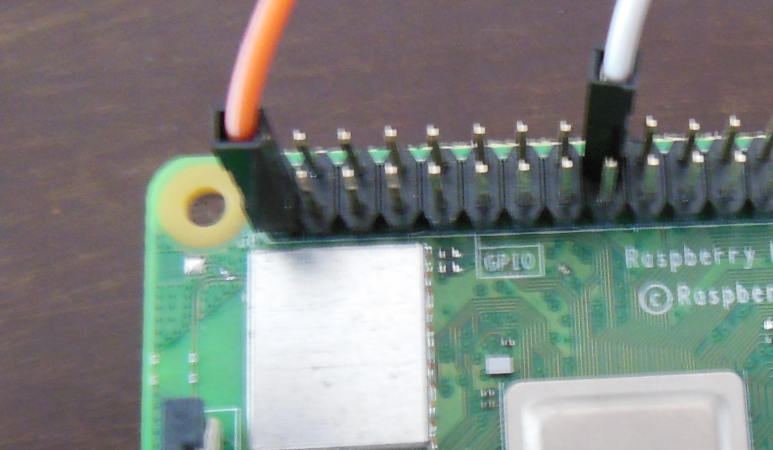
Orange connected to 3.3 Volt and white connected to gpio 24 :

The same commands can be used as used with the Cashflow-126 coin acceptor and can be found over over here.
-
 F Folly referenced this topic on
-
Just tested if this project can be combined with LEDSpicer like this over here :
Syncing button leds with gameplayIt works !
But be aware of the danger, do not use the GPIO 24 and 25 in LEDSpicer when using both projects together.
Contributions to the project are always appreciated, so if you would like to support us with a donation you can do so here.
Hosting provided by Mythic-Beasts. See the Hosting Information page for more information.