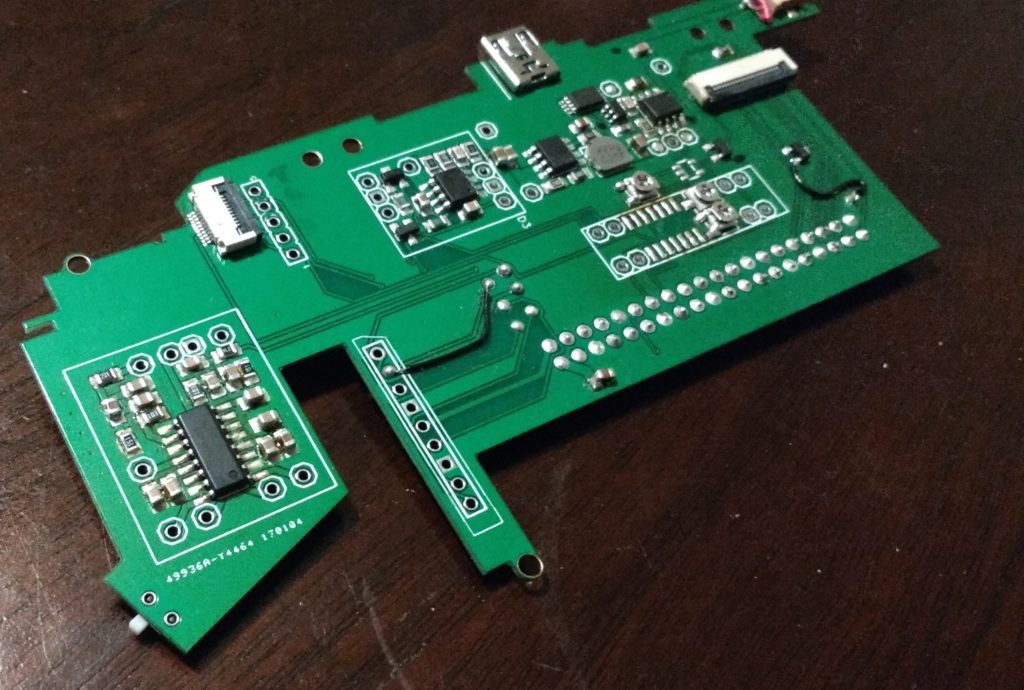
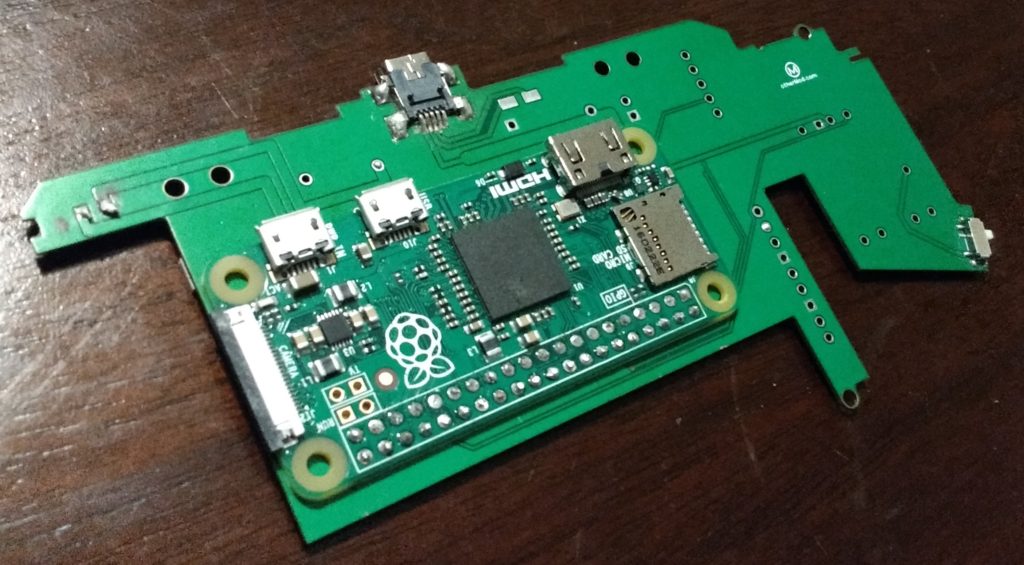
PSPi Version 3 - Custom PCB Prototype
-
@adamspc said in PSPi Version 3 - Custom PCB Prototype:
@obsidianspider I haven't seen daylight in 2 months
Do you have a background in electronics or is this all learning as you go? Piecing together parts is about where I'm at, but making a custom board is at a whole other level.
-
@obsidianspider Sort of in-between. I've been making stuff with a soldering iron since I was a kid, so the understanding of electronics was there. PCB design is a different area altogether though, and everything with this board was me learning as I went. Every circuit was designed from scratch or modified from free published circuits I found online.
-
Very impressive - great job! :-)
-
@adamspc Excellent work dude, been following your work for ages. Can't wait for you to start production of these coz I've got a pile of parts and an old PSP just waiting to be worked on, but I'm waiting on your PCB at the minute.
-
Wow dude, just, wow. Wicked build and super impressive.
-
@adamspc awesome job! Is the analog functional?
-
@edmaul69 Not quite yet. The first analog to digital converter ended up cooking. I think a couple pins got switched around on the schematic. Those things aren't cheap, so I made some breakout boards and I'm going to troubleshoot it when they arrive. Should be here before the weekend.
@markyh444 Soon. Very soon. Working on prototype #2 now.
-
@adamspc Ack ... always scares me to see a metal shield slapped over a freshly soldered power connection without putting some Kapton tape down first. Cool build though. Im still smazed you were able to make it all fit!
-
@adamspc good effort dude!! what are you using to design your board with? and the purple boards look oshpark like :)
-
@DirtyRob Lol. Nothing bad ever happened from shorting a pair of lithium batteries that are wired in parallel.
@moosepr Using Eagle for the design and Oshpark for the prototypes.
There have been a lot of changes since I posted this video. More stuff has been integrated, the mounting position is better, and everything fits better. Months of work so far and probably another month at least before I have it ready.
-
Let us know when they're 100% and hopefully available for purchase! I've been waiting for a cool project like this to work on, but always saw the DIY route to just be extremely messy with the wires everywhere (plus I've soldered a ton...but always larger gauge stuff so I've been kinda afraid to work with things as small as this) - I love the board you designed and hope you get it working!
-
Prototype 2 has been ordered. I'm quite excited. Celebrate with me by joining the giveaway for a 1000.2.1 kit.
-
@adamspc looking good!!! i bet that PCB wasnt cheap!!
-
I searched around....but what version of the PSP will this fit? There seems to be like 6 different versions through the years...
-
@Dochartaigh Original 1000 series. If this kit sells well enough to pay for the 6 months of work I did, I might do a board for the 2000 and 3000 series.
-
@adamspc Gr8t job on the board! Cant wait to see howbit all turns out with ur final version of the board. I know how much time it takes to design a pcb and optimize the placement of components, etc. When I was designing mine for the NES R2-D2 I was working on, I was like, "glad its finished" and sumbitted to the board fabricator only to realize that I could design it better and go smaller. 4 versions later, I still could go smaller by utilizing SMD components instead of through-hole components. Guess im old school when it comes to using though-hole components. Nevertheless, its a great learning experience for anyone wanting to design his/her own boards.
-
@iggy Yeah I'll never be satisfied. I keep wanting to add features or make improvements.
I just got the second prototype in and I'm running some tests.
http://othermod.com/pspi-version-3/

-
@adamspc looking good! Is that all hand soldered?
I take it you are using a row of headers to attach the pi to the board?
-
@adamspc Genuinely excited about this. Can't wait for you to start shipping these to the UK!
-
@moosepr
Yes, all hand-soldered. I use a mixture of stencil/solder paste for the bulk of it and a soldering iron for final details.I did use headers to attach it, then cut off the excess. The SD card pads are soldered directly to it using 6 holes in the board.
@markyh444
I'm excited too. Won't be much longer.
Contributions to the project are always appreciated, so if you would like to support us with a donation you can do so here.
Hosting provided by Mythic-Beasts. See the Hosting Information page for more information.