Pi in a Burger King Gameboy Color Build - WIP
-
Hey that looks like a fun little project. Good luck friend, If you ever have any questions as always don't hesitate to ask. Hopefully soon I'll have all the parts to start my new tiny game device. .... I'm really excited about this one if it works out. =]
-
@obsidianspider your going to have some fun with that one! There is even less space than there is in a GBA!
-
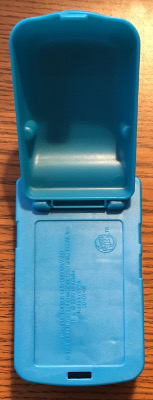
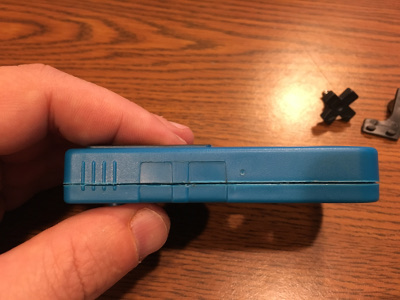
Today the Burger King Gameboys arrived. Wow, these things are small, but at the same time, bulbous.
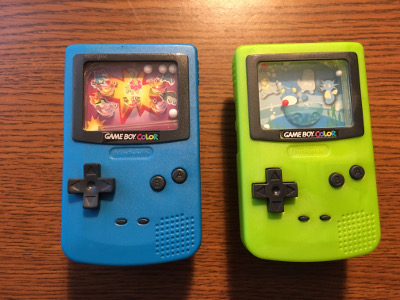
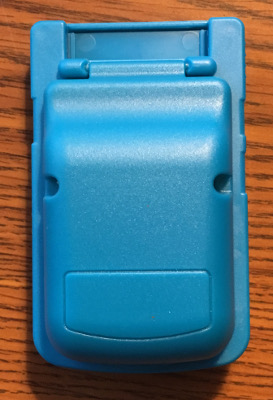
From the front they look like a Gameboy Color, but they have a big flip open compartment on the back that originally stored a Pokemon toy. That area is key to making this build even remotely possible.
The blue Gameboy is slightly damaged (likely from when it was made) near the screen, and it's the pachinko variant. The green Gameboy is the water variant and my initial impression is that it will likely be easier to work with since the water Gameboy's D-Pad area is already cut out so you can press it in, as opposed to the pachinko Gameboy where you actually pull the D-Pad down.
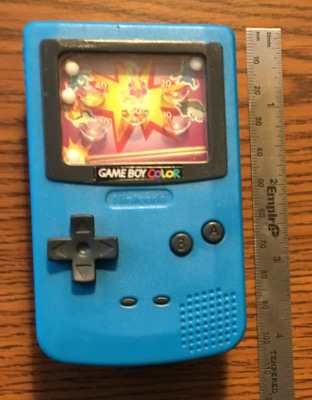
Dimensions of the Burger King Gameboy Color case are:
60mm wide
95mm high
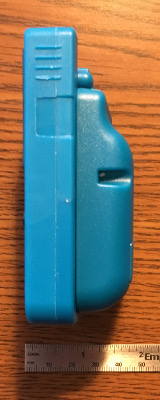
34mm deep (not including buttons sticking out of the front)The screen opening is
48mm diagonal
40mm wide
30mm highThe D-Pad is 18.4mm across
The B and A buttons are 5.9mm in diameterFor comparison, this is the Burger King Gameboy Color next to my real Gameboy Color.
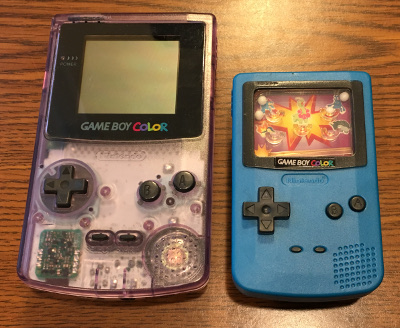
The real Gameboy Color D-PAd is 17.7mm across
The B and A buttons are 8.7mm in diameter -
@obsidianspider when i first saw the inital build i thought the 'hump' on the back had been added, didnt realize it was part of the toy.
if you could shoehorn it in without the hump it would be amazing!!!
want to get a tft into your project, look no further than here https://retropie.org.uk/forum/topic/7464/ili9341-tft-screen-guide
-
@moosepr Haha, I think I'm going to try making the blue one work first (with the hump), since it's slightly damaged anyway (see the top left corner of the screen surround?) and it doesn't have the D-Pad area pre-cut. If I can make that work, maybe I'll look at doing the other one, but I have a feeling I may end up using it because I mess up the first attempt. :-P
-
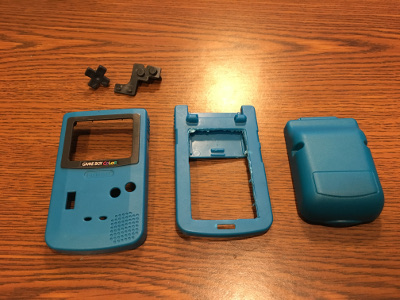
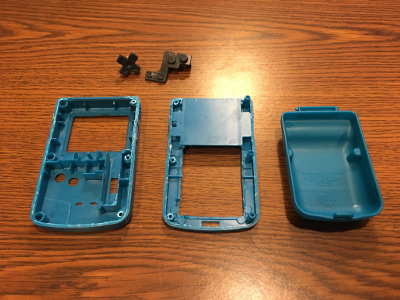
I'm glad I decided to start with the blue one. Getting this thing open is proving more difficult than I thought. I'm trying to use a razor blade on the seam between the front and the back, and I've already slipped a few times and scratched the case. Hmm…
-
@obsidianspider you should use a piece of thread and saw it instead of trying to cut it with a razor.
-
Well that was… educational.
I tried @edmaul69's suggestion of using string. That didn't work for me. After a long time of getting frustrated I decided to cut the back open since that would be cut open eventually anyway. I was hoping to easily separate the halves. No dice.
My results aren't horrible, but due to my slicing through with the razor blade I don't have a nice overlapping shell, and there's discoloration from where I was slicing with the razor blade.
It looks like if you cut the back open you can slice the plastic weld from the inside, based on this photo from ivanretrobit.
I kind of want to attempt to open up the green Gameboy right away to see if I can do a better job, but I think for right now I'm going to order some parts and see if I can make the blue one work and then use that as a model for the green one.
-
@obsidianspider a little late but easiest way to open them is if you make a hole about the size of the door flap on the back and then grind down the posts on the corners with a dremel or cut them with some angled cutters. Some are glued better then others you kind of just have to get lucky :/ but once those posts are cut its easy to pry it open
-
@ivanretrobit Thanks for the pointer! I've already determined that the blue one is going to be my guinea pig. Since it was damaged when I got it I don't feel as bad about wrecking the edge.
-
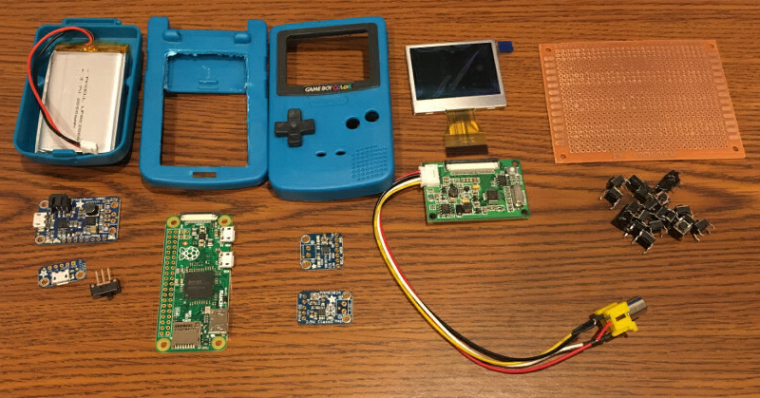
My parts from Adafruit came in. The 2" screen is a perfect fit. I got the I2S amp as well as the regular mono amp depending on if I think I can fit a headphone jack and USB sound card in the case or not, though right now I'm looking for a small enough speaker. I looked at some model railroad rectangular speakers, but even the tiny ones are pretty deep. Also, I got the tact switches from Adafruit to see just how clicky they are, and yeah, they're too clicky for this. I'm thinking about getting these from eBay. Does anyone know if those are quieter/less clicky? Ideally I'd make a custom PCB and use carbon pads from real buttons, but yeah, that's not happening, at least not with the first iteration.
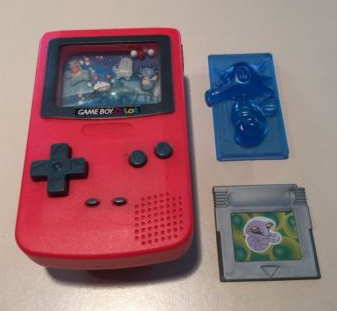
I also ordered a red Gameboy Color toy from eBay that should be here in a day or so. I still really like the blue, even though I bungled the edges and the screen is damaged from when it was made, but if I decide to make that shell the learning tool (which it most likely is going to be) I'm not sure if I should make my "real" one out of the lime green or the red. What do you think?
-
@obsidianspider Yes those buttons still click but are much more natural feeling and quiet. =] Looking good so far.
-
@obsidianspider they look like the ones i used on my little project. If they are, then they are totally silent, and have a nice soft feel (like the rubber domes of old) but do have a slight tactile feel when they activate
want to get a tft into your project, look no further than here https://retropie.org.uk/forum/topic/7464/ili9341-tft-screen-guide
-
@moosepr @thedudester80 Thanks! I'll order some then. I don't mind a somewhat clicky feel, but I don't want to hear it down the street. ;)
-
I also bought some burger king toys of these months ago for this same exact project but never got around to it. What soldering iron are you going to use?
I am not very knowledgeable in a good quality soldering iron but i used a couple in the past before to replace batteries from gameboy/gameboy advance carts as well as other little projects. However the irons i bought were from dollar stores and while they did work they only lasted for a couple of uses, the tip was too thick for small projects like these.
-
@pawpie I bought a Weller WESD51 earlier this year and I'm really happy with it.
-
@moosepr said in Pi in a Dreamcast VMU Build - WIP:
@obsidianspider try it straight from the li-po :P most things are pretty tollerant.
The specs from Adafruit say that the 2" TV has an operating range of 6-15V. I gave it a shot, but it won't power on straight from the LiPo (which was reading 3.8V). From the PowerBoost it was getting 5.1V, and it turned on. I pulled out the only NTSC source I had handy (My test Pi Zero doesn't have TV-out soldered up) and "tested" for a while with some Donkey Kong Country on my childhood Super Nintendo. Just to make sure everything worked correctly. Yeah, that's it.
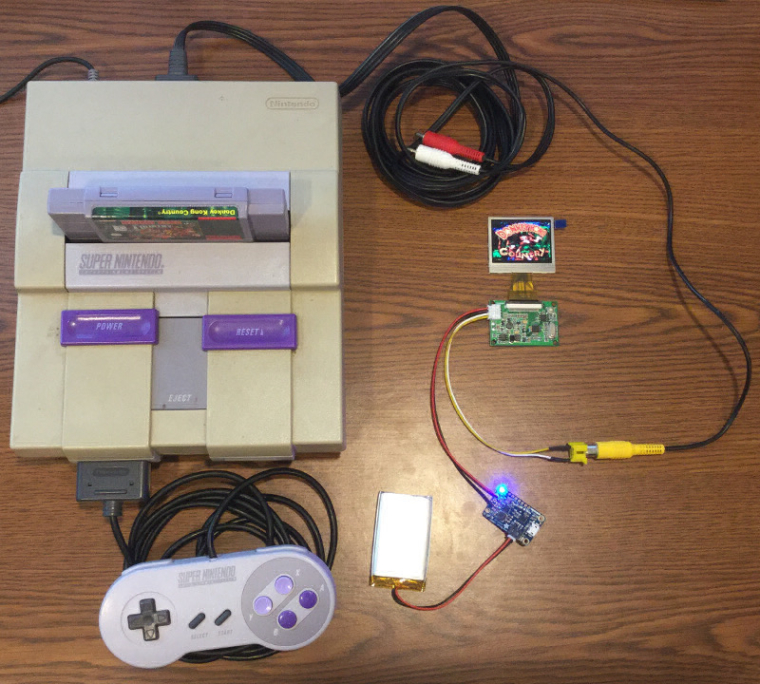
I was worried that being a NTSC source it'd look blurry, but with pixels so small, it's a really nice looking screen. Then again, for $40, it should be.
-
@obsidianspider nawww it was worth a shot!!! you forget how tiny these things are when you are looking at datasheets and web listings. Its not until you see them next to real world items that it dawns on you :P
want to get a tft into your project, look no further than here https://retropie.org.uk/forum/topic/7464/ili9341-tft-screen-guide
-
@moosepr Yeah, working on these handhelds has really made me appreciate the luxury of how large consoles really are. If I ever build another non-portable Pi, I don't think space will be an issue for me.
-
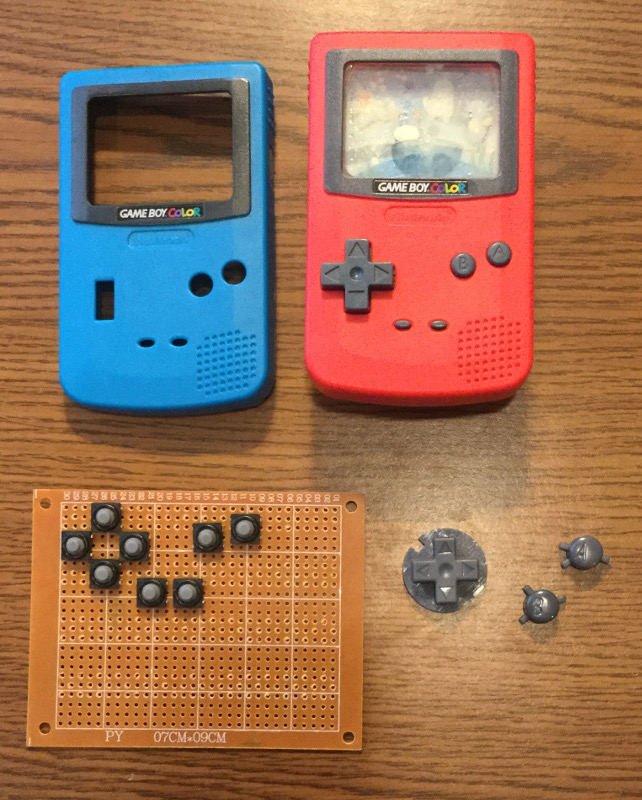
Testing that screen made me realize I have most of the parts for this build. I'm not sure what I've been waiting for. I still need to figure out the speaker situation as I have no idea which one ivanretrobit used in his (the model train store he referenced doesnt' seem to have ones on their website that match the size of the toy), but I can work on the rest of it.
After a quick mockup with the tact switches has me wondering if I even needed the repro full-sized GBC buttons at all. I guess I'll find out when I crack open the red one as it's the one I intend to use "for real". The "water" toys already have the D-pad area cut out, so things are lined up slightly differently than on the pachinko variant, which is what the blue one was.
I think I know what I'll be doing later today…
Contributions to the project are always appreciated, so if you would like to support us with a donation you can do so here.
Hosting provided by Mythic-Beasts. See the Hosting Information page for more information.