Pi in a Burger King Gameboy Color Build - WIP
-
@obsidianspider
I think you did a good job getting it apart! I was thinking that I might not have the patience to this and would probably crack it. The Start and Select buttons do look a little different. How odd. Seams like the factory that assembled these would've saved time and money if they made them all the same. -
@backstander As I was looking over the case just now I also noticed a small blob of clear glue near the top corner that must have always been there as I had glue nowhere near this thing. In looking over the green toy that I still have untouched, and will keep as a reference, that one also has some scratches and dings and imperfections, but I really think that's the nature of what these things were, cheap throwaway toys to be included with a kids meal.
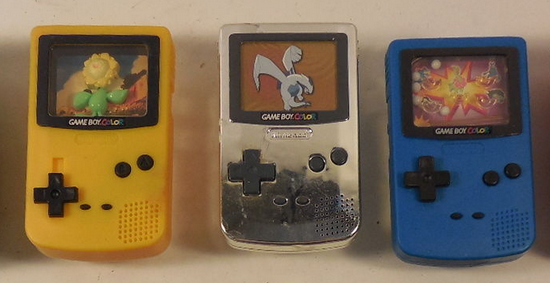
If anyone is going to do this too, I highly recommend getting the "water" toy if you can. It seems best suited for it. Other ones you're at least going to have to cut out the D-Pad, which wouldn't be awful, but some have a sliding D-Pad and there is a huge slot in the front to accommodate that. There are also some silver and gold ones out there, but are usually really expensive.
Here's a screen shot from an eBay Auction that shows what I mean about the slot.
-
@backstander said in Pi in a Burger King Gameboy Color Build - WIP:
Seams like the factory that assembled these would've saved time and money if they made them all the same.
The innards were very different, but yeah, the non d-pad buttons being different was weird.. The pachinko one had a little spring mechanism to flip balls into small cups. This water one had a little plunger thing that I guess would squirt water around? I don't know. It didn't work and I didn't see a way to refill it. My green toy is also a water one, and that doesn't have any fluid in it either.
-
Today on my lunch hour I started to mess with placing components in the case, and after dealing with the depth issues on the Gameboy Advance, having that huge bulge on the back of this case will help tremendously.
I got the button perboard fitted. I had to rotate the tact switches from my initial mockup as they are 3x4 holes wide, and were off a bit when I put everything in the case, but I think things line up pretty well. I'm not sure how to go about either attaching the buttons to the tact switches, or keeping the buttons in place inside the case so they don't go flopping around all over the place. I'll have to read up on that.
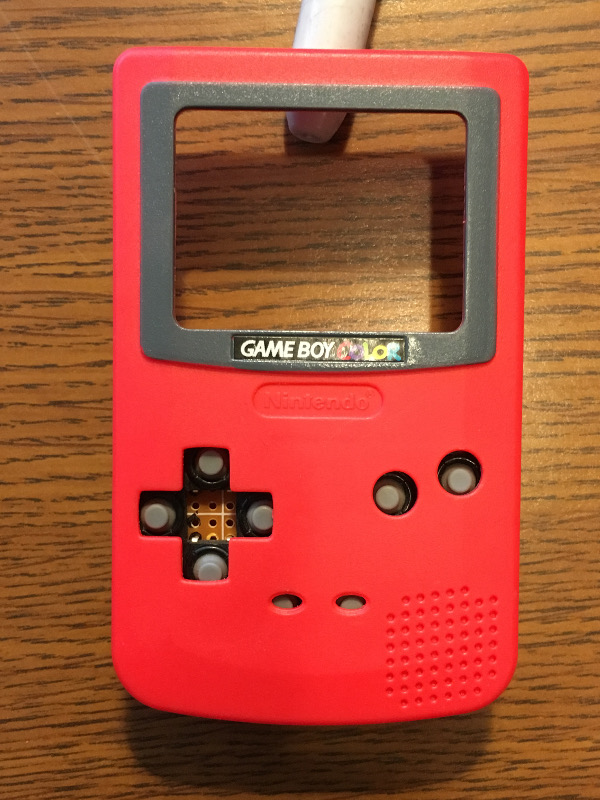
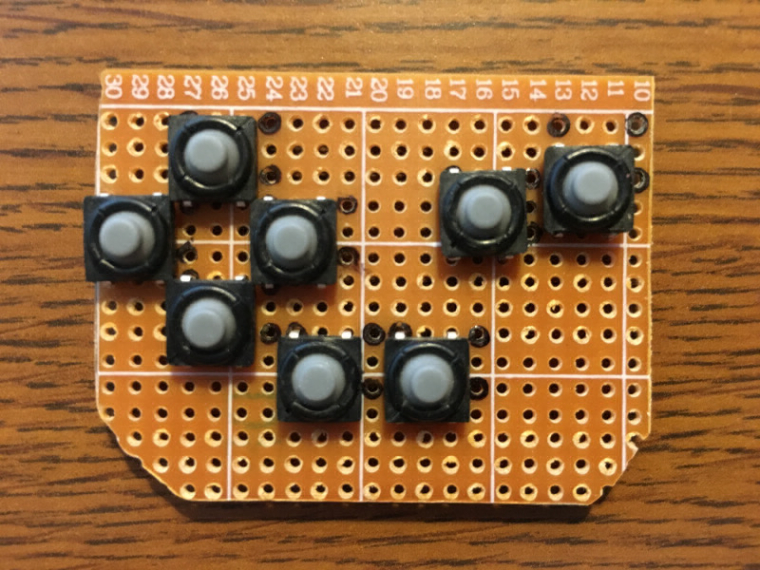
I left extra space on the board because I'm not sure if I'll use some of the other points to join connectors, or just use the board area as a mounting point.
I'm also going to need to find a source for small screws to keep the case together. Ideally I'd like some small machine screws and nuts where I can glue the nut to the case and then have the screw thread into it.
-
Tonight I got the controls wired up. Things got a little messier than I would have liked on the back, but it all works.
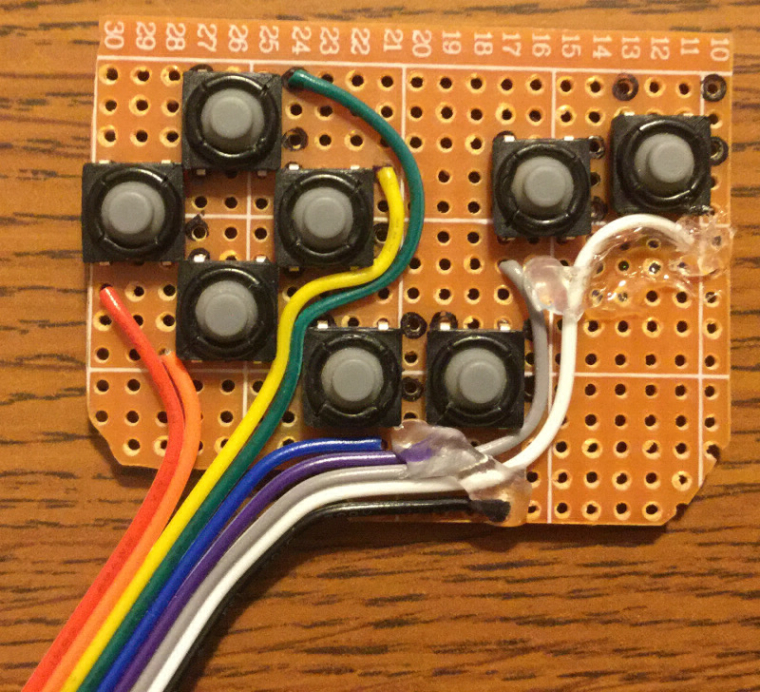
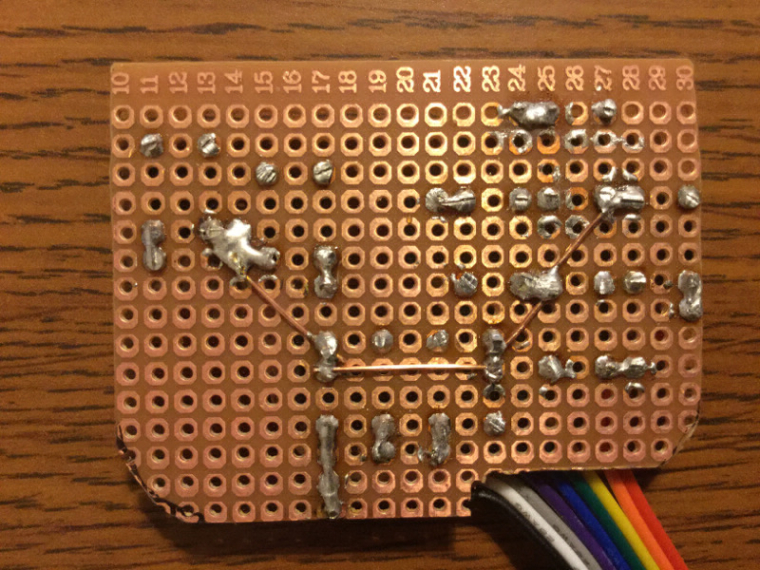
I then used Retrogame to get the Pi to see the controls as controller inputs, and I was able to test.
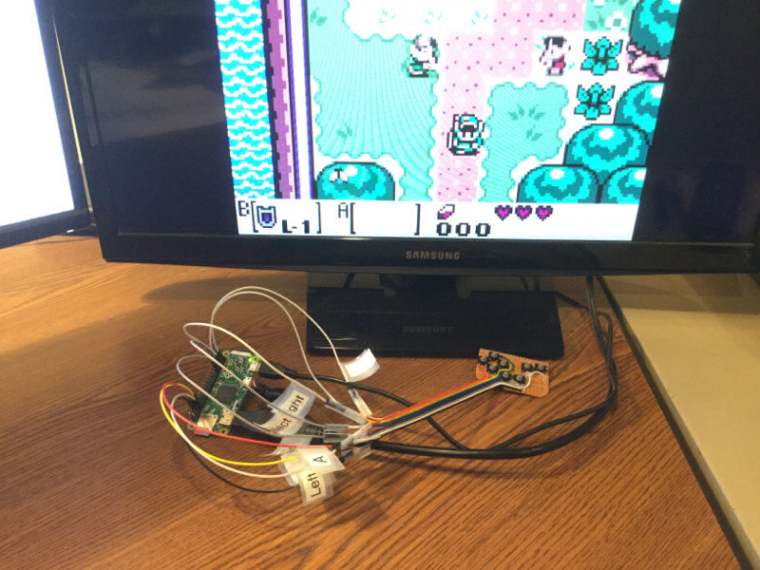
The default for Retrogame is to have
Selectact as the keyboardSpacekey, and unfortunately Gambatte sees that as Fast Forward. Mapping it to a different key solved the problem.I tried putting things in the case and holding them together with my hands to test playability, and I kept shorting button presses, so I temporarily backed everything with electrical tape. My dodgy alignment and pressure on the board had some errant buttons being pressed, but I think it's going to work pretty nicely.
-
I'm going to try experimenting with ABS cement to join the back of the case to the hinged piece. I bought some jars of baby food as they were the least expensive small glass jars that I could find at 63¢ each. The question now is, do I try the baby food?
-
@obsidianspider babies seem to enjoy it, the biggest problem, what happens if you love it?
-
@moosepr said in Pi in a Burger King Gameboy Color Build - WIP:
what happens if you love it?
More money for Pi projects!
-
YAAAY!
-

-
The question now is, do I try the baby food?
I haven't tried it but from my understanding, they don't use any seasonings and probably tasted pretty bland. I suppose if someone had a lot of food allergies, they would probably like baby food. Well I think they add a little bit of sugar to it for "taste" lol. If you like it you could save a lot of money on meals!
One time when I was very sick and was extremely dehydrated, my doctor told me to drink Gatorade and/or Pedialyte so, since I'd never tried Pedialyte and I thought it would have less sugar than Gatorade, why not give it a try! Well I can't remember which flavor I got (grape maybe?) but it literally tasted like vomit to me. It was one of the worst things I'd ever tried but I've seen small kids and babies drink that stuff like it was Coke/Pepsi or Dr. Pepper. I even saw an interview with Kid Rock saying he drinks it after a night of heavy drinking!
-
Curiosity got to me and I tried them.
"apple, pear & banana" - just tasted like apple sauce, but was really runny
"apple & blueberry" - more runny apple sauce, but purple, and a bit tart
"banana & strawberry" - the consistency of yogurt, but a weird aftertasteImportant information for anyone building a RetroPie project. Haha.
-
@obsidianspider gotta try them all!!!
-
Man, I have never heard of this Burger King Game Boy Color until now. Sounds pretty interesting, although I might not have been alive at that time (don't trust my profile).
So can anyone give me some background info on this thing? -
@itsnitro
-
My chemistry experiment leads me to believe these little Burger King toys are not made from ABS. Or at least a polymer that doesn't dissolve in acetone.
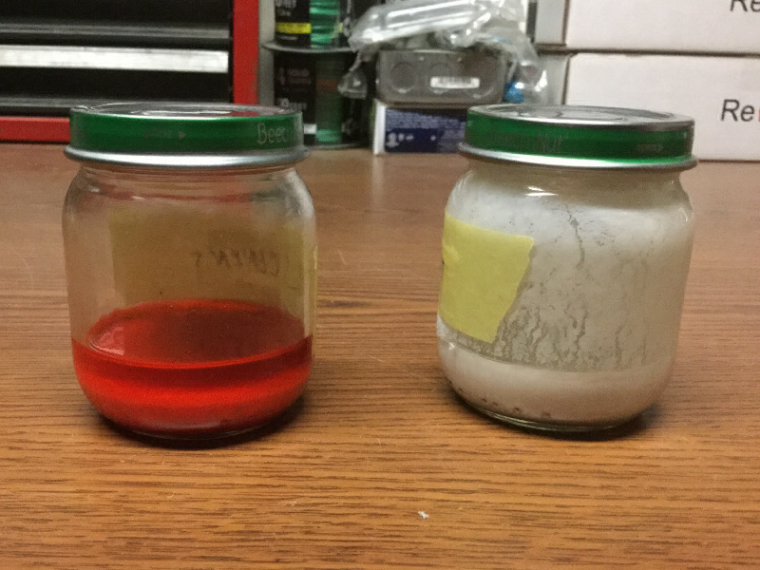
In the jar on the left you'll see the red plastic melted in a solid hunk at the bottom of the jar with the acetone floating above it. In the jar on the right you'll see the whitish substance which is acetone and plastic dissolved in it from the Gameboy Advance case I'm working on.
Given that, I'm not sure what adhesive I'll be using to join the back of the red Burger King toy together. I could just use hot glue for now, but I'd like something more permanent. I've read Loctite 401 is really good, but it's also quite expensive.
-
@obsidianspider does the red plastic actually mix with the acetone and then separate out after? maybe if you get it all mixed then you could dollop it on and use it before it separates again?
-
@moosepr Its the consistency of chewing gum. I think I'll try bonding two pieces of the blue toy (which has become my test bed) together to see how that works before doing it on the red one. That Loctite 401 isn't carried at any local stores and seems to be selling for $30 for a 20mL bottle. Um. No.
-
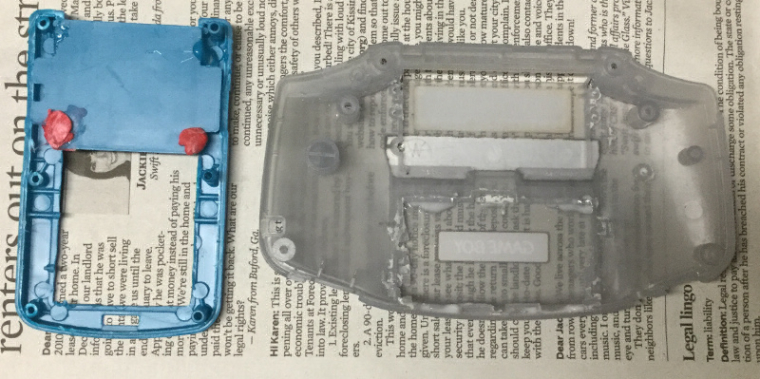
Using a toothpick I globbed some of the red "cement" on to the blue toy to see how things go. It was pliable, but seemed to "dry" quickly.
Using a separate toothpick I put some of the white "cement" on the Gameboy Advance shell to secure the battery door in place. I used Scotch tape to keep the door in place. After taking the photo I saw that the door was slightly away from the case, so I used a few dabs of hot glue to keep the door in place while things set up. In my research I saw that adding too much ABS cement can cause things to warp, so I only put it in four corners of the battery door. I'd rather not wreck the case if I can help it.
I've read that you should let ABS cement dry for a few days to a week before attempting to sand it or put any load on it, so I'll let things go in the garage for a while and check back.
-
After waiting a day, the results are good. The non-ABS cement seems fairly sturdy, though I'm not sure how strong it will end up being.
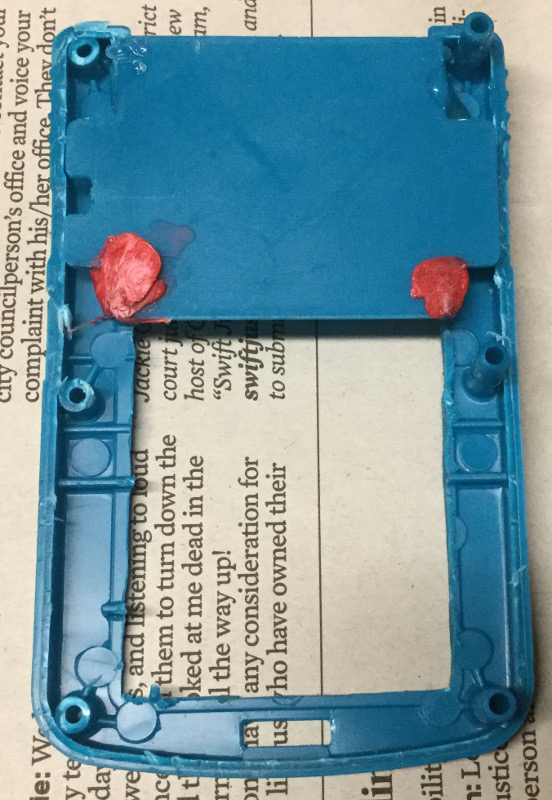
I'm going to hold off on gluing the "hump" on the back of the red toy because I still need to find a source for tiny screws to hold the front and back of the case together, and I know it will be easier to drill the holes without the hump.
Contributions to the project are always appreciated, so if you would like to support us with a donation you can do so here.
Hosting provided by Mythic-Beasts. See the Hosting Information page for more information.