Pi in a Sega Genesis USB Hub Build
-
@cyperghost I hear ya and your right, but the slider is there, and it can control the volume when hooked up to your TV and when you have headphones jacked in, I still think it's worth it. ;)
-
@meyemind ;) But keep in mind that this devices can only control analog signal and you can just use a slider resistor (afaik how the device works)
For me I see three possibilities- Use an AD changer, connect to I2C-Bus and then read out slider resistor value, poll this and use amixer command to lower and raise volume
- Use to push buttons, connect to free digital GPIO, poll the GPIO status and use amixer :)
- Use RC build and read out time capacitator keeps GPIO powered and then set volume via amixer
The number gives also my favourite order to do the volume control :) I think this topic will give very interesting builds - keep prepared :)
-
@obsidianspider - Do you use a wireless Xbox 360 controller (and dongle of course) by chance? I'd be curious to know if the hub is capable of feeding enough power to run that. A recent post in the xbox-360-controller thread has me thinking about this. Based on observations and a bit of thinking of my own, it looks like the hub isn't powered, and only gets it's juice through the USB. If that's the case, it might not be powerful enough to control some gamepads. Granted, I don't intend on having anything more than some USB Sega controllers. But for testing/etc, I prefer to use my trusty 360 controller.
Am I correct though, that essentially you're running USB power from the wall into the Pi (via the Mausberry) and then connecting the hub to the Pi? Or are you planning on going the other way, powering the HUB, and then the Pi from the hub? I guess it doesn't really matter, although going from the HUB to the Pi would remove the ability to use one of the "front of the case" USB ports.
If you are powering directly to the Pi first, will that cause any extra drain that would make the hub any less powered? If it does, can you do any sort of splitting, and have the 1 power coming in go off into the Pi and the hub simultaneously? Or is that just crazy talk? :) LOL.
-
@hansolo77 I've never used an Xbox 360 controller with a Pi project (or ever, wow, I just realized I've never played an Xbox, weird), but if you go back to how I powered the USB hub you'll see that I tagged GPIO for its power instead of the USB port power on the Pi. The reason I did that is that it's my understanding that the 5V GPIO pins get the full power from the power supply, and are not limited to 500mA like the standard USB ports. That said, I can't think that a wireless dongle takes THAT much power, but what I would do to test is try plugging the whole USB hub into the Pi before you take it apart, make sure that it works, then try plugging in your Xbox dongle into the hub and see if that works. It should. If you have power problems, you may need to hot rod the hub like I did to pull in more power.
-
That makes sense. I did actually go back and re-read your methods shortly after I posted the question. But I like your idea of testing first. I would have gone and cut stuff and soldered stuff before even testing, assuming it works because that's what you did. So thanks for that suggestion!
According to UPS, my hub is in town, so I might get it today. I don't have a Pi yet, going to have to wait on that. But I'm getting a better idea of what I'm going to be doing.
Oh hey another quick question. I took your advice and swung by the Harbor Freight store earlier this week. I found some files, but I'm not sure if it would be worth the investment so I passed for the time being. They had the ones I remember seeing in shop class in school, nice and heavy, 1 inch thick stuff. Then I saw some pouches with an assortment of really small (I think they were called) needle files. There were cheap ones, then some more expensive ones that have a plastic grip, then some even more expensive ones that just look like glitter (diamond). I wasn't sure if that's what you were talking about. I took one of the files out and felt the serrations, I wasn't impressed. There didn't seem to be much to them, compared to the heavy duty shop class type. Is that the right thing? I ran over to Home Depot after leaving them to see if they had anything. They only had the big shop class types. So I assume the ones I found in the little plastic bags at Harbor Freight is the right ones. Any suggestions?
-
@hansolo77 There's not a whole lot to a file. You don't want a real coarse one since you'll be working on soft plastic. I'd suggest picking up a cheap one and practicing on some soft scrap plastic. I know you want to get this right, but don't over think the file itself. Practicing on junk plastic will teach you a lot.
This is the file I used on my Super Famicom game with the screen in it and the Genesis hub. I don't even remember when I got it. It has to be 15 years old at least. (The green isn't a brand or anything, I just mark my tools with green electrical tape.)

-
So you think something like this isn't exactly what I need?
http://www.harborfreight.com/12-piece-precision-needle-file-set-4614.html
I should look more for something like these?
http://www.harborfreight.com/8-inch-flat-file-96626.html
http://www.harborfreight.com/8-inch-tapered-file-96627.html -
@hansolo77 If it were me, I'd get all three of those, because they're cheap, and you can never have too many tools. That said, I did mine with a flat file, so you don't need a fancy set, but it could be helpful in certain situations with weird corners and stuff. I already have a half-round files, but now that I know it exists I may pick up that 12-piece set the next time I'm near the Harbor Freight by my house. :)
-
Those needle ones are cheap (in price and quality). I mean, they're like the diameter of pencils, and not the fat ones you use in Kindergarten. When I took one out to feel it, etc, it was like I could snap it in half easily. I think I'll probably get the bigger ones. But before I do that, I might check out the toolbox in the basement. My dad my actually have a file in there.
-
@hansolo77 the needle ones are what you really want. I have sets of the diamond and the regular files. You need those to do fine detail for small cuts. I recommend getting some. I bought my sets from ebay for cheap. But i have no regrets. Ever. If you only get one set get the ones without the diamond dust so you can do fine detail.
-
@hansolo77 if it were me, and your only buying one of the ones you spotted, I would go with the needle files.
Sure they are small and feel fragile (all files can potentially shatter if you drop them) if you think of some of the sizes of things you will be working on, you will find the needle files more use. Plus if your using a dremel to get close to size anyway, you don't need anything rough
On a side note, files only normally cut one way (pushing away from you) so the proper way is push the file on the material, then lift it off the material before pulling it back ready for another stroke. The only exception being diamond dust files, they work not like sandpaper
-
I'm going to reclaim my thread from @hansolo77 for a bit. ;)
My Mausberry arrived yesterday and it looks like it's going to fit just fine. I'm going to have to remove the strain relief post entirely,but that's OK, there won't be a USB cable dangling outside the case anyway.
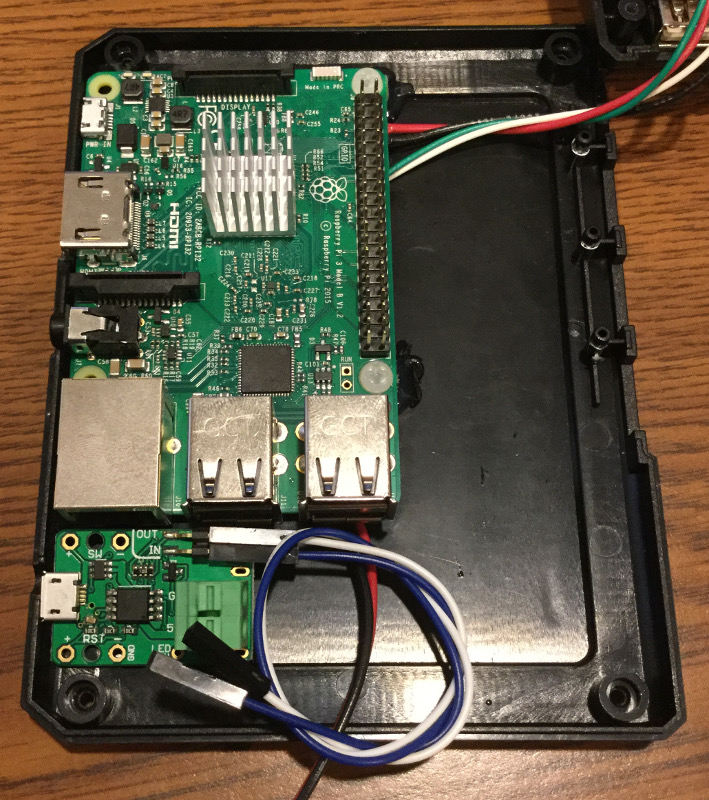
I did notice that one resistor is a bit crooked on the board (above RST), but I'm assuming that Mausberry tested the circuit, so hopefully it's ok. If not, I'll try to fix it, but man, I always mess up SMT stuff, especially in close quarters.
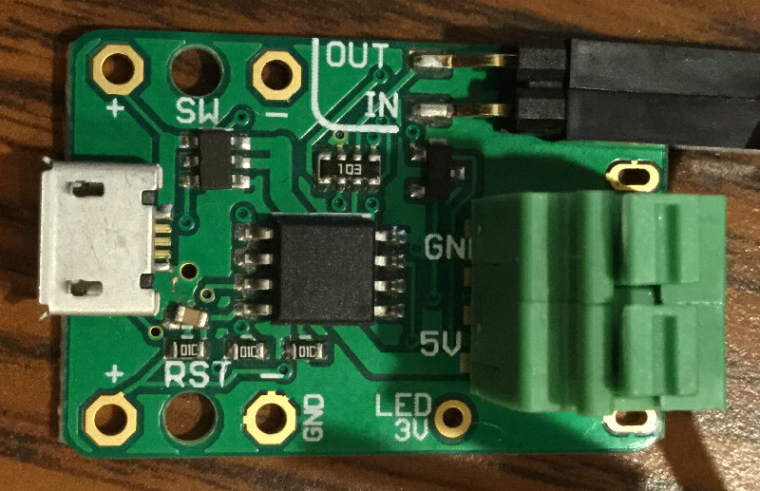
I'm going to try to get the Mausberry circuit mounted and the USB hub wiring re-routed today. I still am searching for a good power switch, so if things go well, I'll probably just use a spare light switch as a temporary way to control the Mausberry.
-
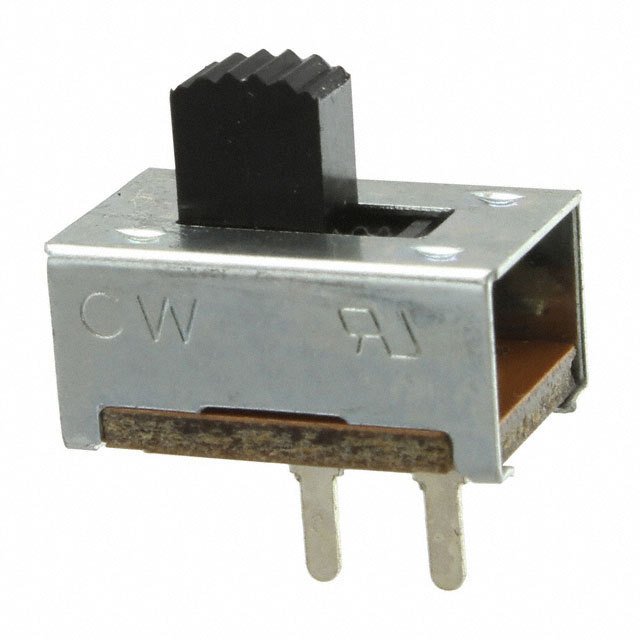
After giving up on local shops and my spare electronics parts, I ordered a few of these SPST switches from Digi-Key this morning. Based on the technical drawing it has a ~3.6mm switch travel, so it should work really well for this application. Since minimum shipping was $3.40, I ordered a few switches to make it more worthwhile, and I'm sure I will have a use for them in the future. We'll see how quickly they arrive and if one actually fits.
-
@obsidianspider that wonky component looks a little dicey. I guess if it works ok, then it should be fine. Speaking of smt soldering, I saw this the other day, could be handy
http://hackaday.com/2016/12/07/turn-cheap-usb-soldering-irons-in-to-tweezers/
Whenever I have had issues with smd, it has been because I couldn't heat both sides at the same time. You can also get special tips if your iron can take them

-
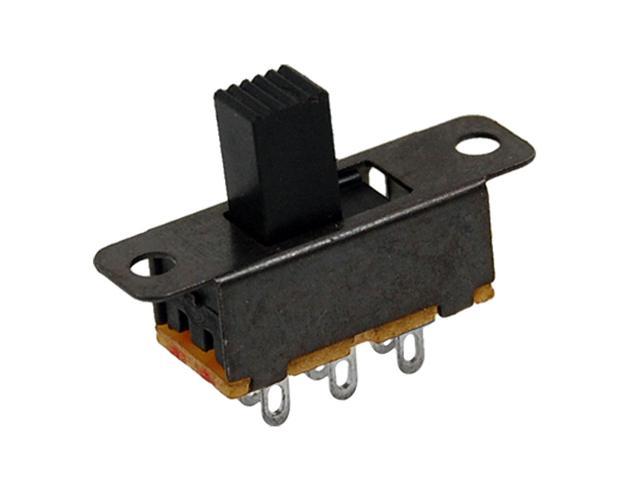
@obsidianspider Is that a 2 or 3 pin switch? Thanks for the updates, keep it up! :) I had to buy 10 switches via Newegg.com, here is what I have coming for mine, I'm thinking to use the taller switch and shape it inside the plastic slider already there instead of replacing it.
UPDATE: I didn't realize these were 3 position switches, for this build a 2 position switch is the way to go!! (sorry)
-
@obsidianspider Hiya, can you talk about how you fastened the pi3 to the inside of the hub? Looks pretty clean and secure.
-
Is that a 2 or 3 pin switch?
@meyemind It's a SPST (Single Pole Single Throw) switch that looks like it has two pins on it, which is all I really need for this.
-
@meyemind i am planning on rounding the post and snuggly fitting the switch cover on it where its screw was. you might want to drill the screw hole on the fake switch cover bigger so the switch doesnt have to get sanded smaller. If a switch is hard to flip making the switch too small can make it snap off.
-
@meyemind said in Pi in a Sega Genesis USB Hub Build:
@obsidianspider Hiya, can you talk about how you fastened the pi3 to the inside of the hub? Looks pretty clean and secure.
I hot glued nuts to the bottom of the case on one side of the Pi. Unfortunately the riser hardware I had was M3, and the Pi is made for M2.5, so I had to drill out the holes a bit, but it works. If I was going to do it again I'd probably order some M2.5 screws and nuts.
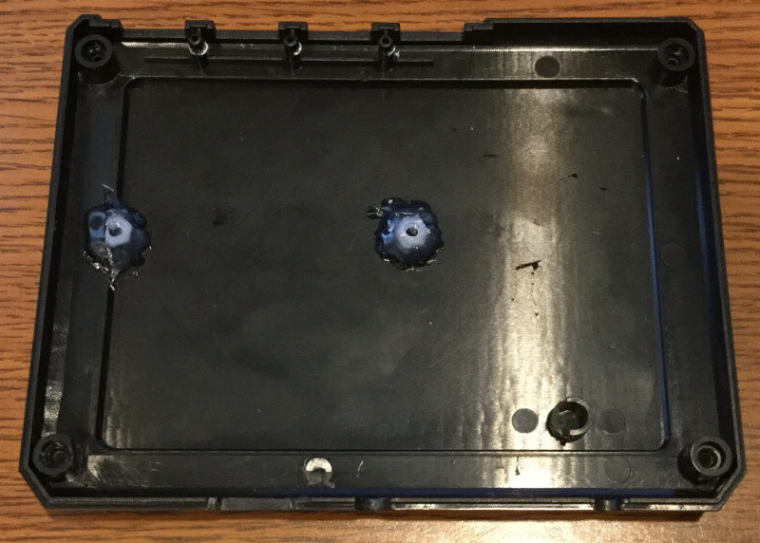
I only glued them on one side because putting them on all four holes would have raised the Pi too high and my holes were already made in the case. Plugging and unplugging my cables a few times seems like things are stable and with the case also pressing down on the ports it keeps the Pi from flopping around.
I haven't totally worked out how I am going to mount the Mausberry yet. I am leaning toward waiting until my power switch comes in the mail to mess with it.
-
@obsidianspider Thanks that's fantastic, I'll have to pick up some M 2.5 plastic nut/bolt action. I tried pretty hard to find a more simple switch like you found... ahh well :)
@edmaul69 That sounds like a good idea, nice one, thank you.
Contributions to the project are always appreciated, so if you would like to support us with a donation you can do so here.
Hosting provided by Mythic-Beasts. See the Hosting Information page for more information.