Famicom build
-
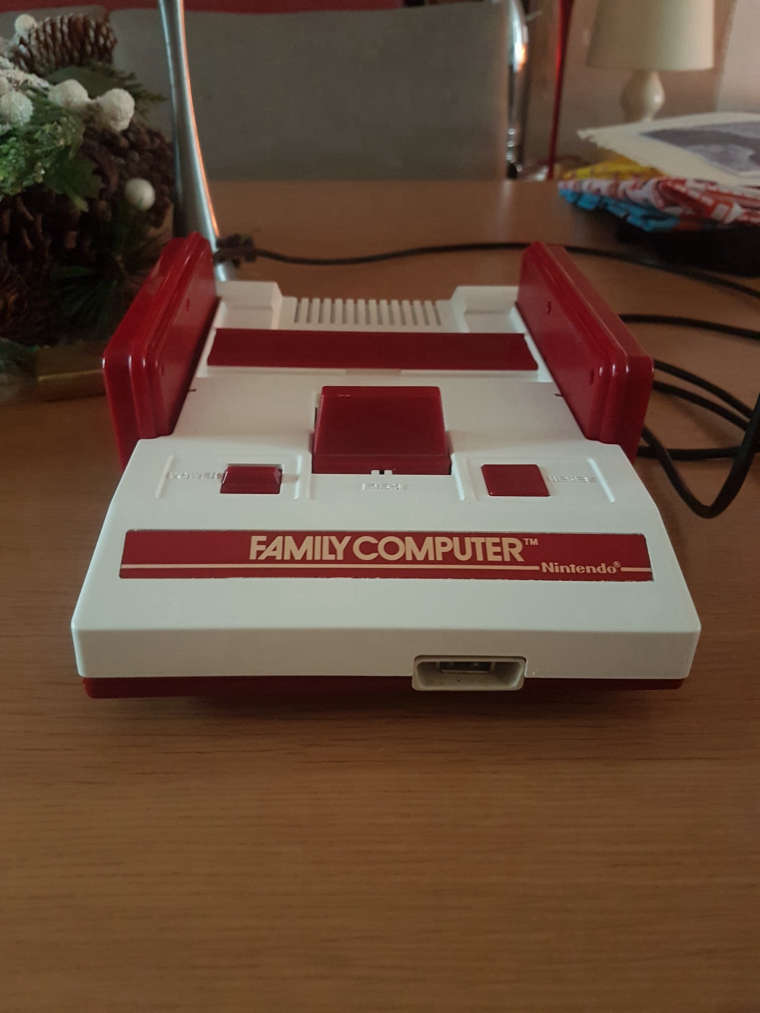
Hi everyone. I've just started work on a new build converting a Famicom to a Retropie machine. The Famicom was very kindly sent to me last year by @FlyingTomahawk (sorry it's taken so long for me to get started).
The first thing I wanted to try was to restore the original white colour. @FlyingTomahawk actually sent me two Famicom top sections one of which he had already attempted to retrobright but it hadn't succeeded. Now I could have attempted retrobright again but from what I hear it's only a temporary fix in most if not all cases (I've read that some revert to yellow again in as little 1-2 years) and there is no telling whether repeated treatment will cause more damage to the plastic.
Instead I decided to try Vinyl dye. Calling it a dye is a bit of stretch in my opinion as it really is more of a paint but it goes on thin so it has minimal effect on surface details and it supposedly fuses with the plastic so it shouldn't chip or flake off.
Here is the result next to the un-dyed top cover:
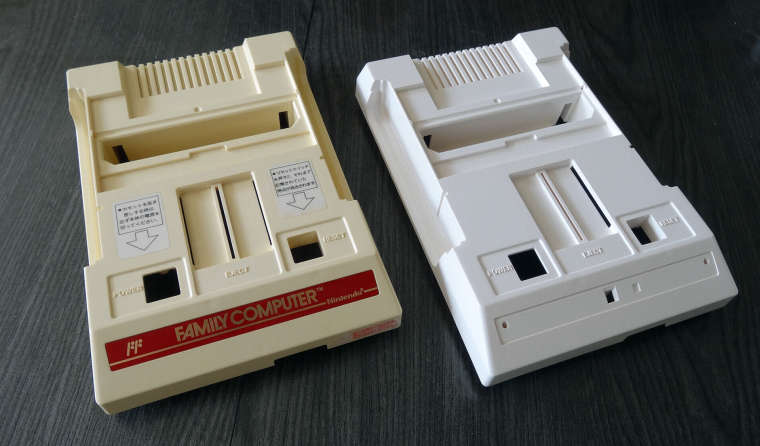
And a close up showing the texture detail is still visible:
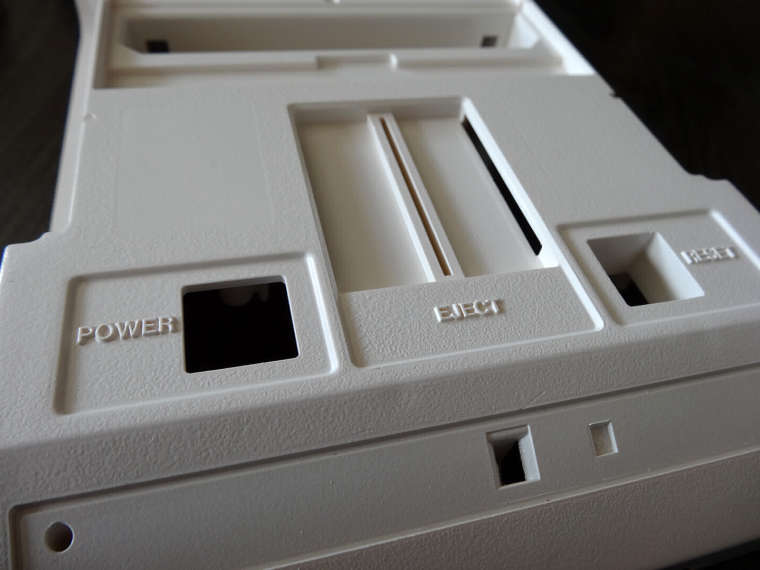
I'm really pleased with the result. It will never look exactly like the original plastic with this method for a few reasons.
- The original plastic has a slight translucence which results in subsurface scattering - the dye by necessity has to be fully opaque or you would see the original colour through it.
- The finish is glossier than the original plastic. You could fix this to an extent by applying a satin or matt varnish but I'm happy with the way it is.
If you do want to attempt this yourself be extra careful to make sure the surface is completely clean. I actually missed a small piece of adhesive at the back of the console (where the label for the ports was removed) so there is now a small lump which will probably peel off leaving a yellow spot. It's not a problem in my case as I will replace the label so you wont see it :) .
-
Looking good @ruckage thumbs up!
-
Looks good, I did similar, keeping the original controllers attached with USB guts inside.
I need to finish it, now I have decent WiFi the Pi fits in better, is a squeeze inside a Famicom, and the solder on me USB hub broke so need a new Hub inside.
Added to my one day list.
-
@paffley said in Famicom build:
Looking good @ruckage thumbs up!
Thanks :)
@madrikxiv said in Famicom build:
Looks good, I did similar, keeping the original controllers attached with USB guts inside.
I need to finish it, now I have decent WiFi the Pi fits in better, is a squeeze inside a Famicom, and the solder on me USB hub broke so need a new Hub inside.
Added to my one day list.
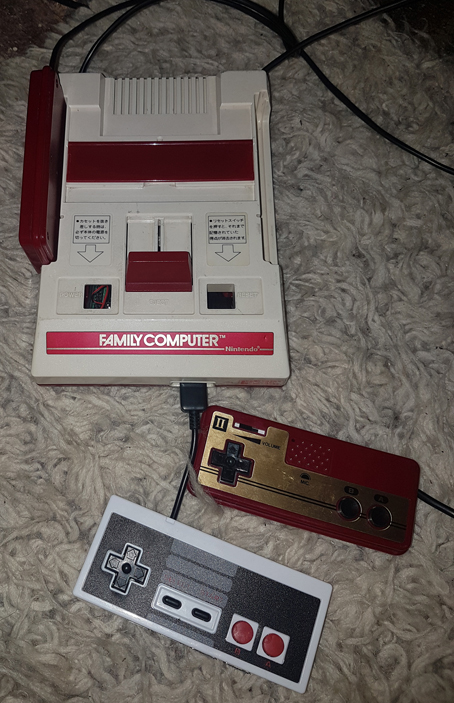
Thanks for the reply. This will also use the original controllers - they are a big part of the look of the console apart from anything else (I have raphnet converters ready to use). Like most of my builds it will be fairly specific so it will only be used for Famicom/FDS, Nes, and gameboy games so the original controls are ideal. The only modification to the controllers will be replacing the membranes as the originals have several splits in them.
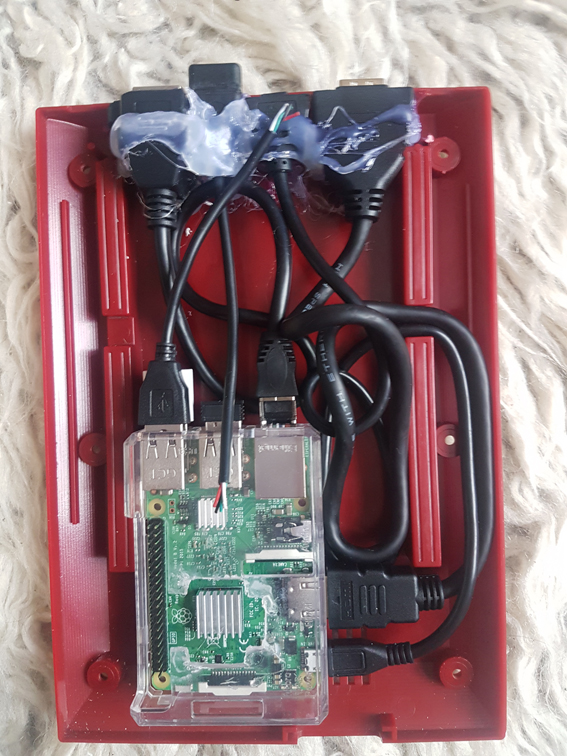
Did you have a build thread - it would be interesting to see it.This actually is one of the trickier consoles for fitting the rpi inside. My plan at the moment is to have the pi at the front of the console as space is very limited at the back. I normally like to keep cartridge eject mechanisms working but that may not be possible in this case.
-
Did a quick test fit to see how it looks. I should have taken before photos of the eject slider as it had impact damage/skuff marks to all 4 corners leaving them looking white so I gently used a heat gun on them and the white marks faded away so it looks almost as good as new again. Once I'd inserted the eject switch I also used the heat gun to 'erase' the stress marks on the tabs caused when clipping it onto the console.
It just needs a new sticker on the front now (I've made a reproduction which I think will do the job). Not sure if I'm going to replace the transparent stickers for the power and reset button as I quite like the look of it without them.

-
@ruckage looks very nice! I’ll be following this build, you do great work man. What was the product name you used to paint onto the shell? Wonder if it would has the same effects on a yellowed DMG shell.
Currently Playing: Tetris (Gameboy)
-
@celly said in Famicom build:
What was the product name you used to paint onto the shell?
I think it is something called Retrobright
Creator of the Radiocade: https://retropie.org.uk/forum/topic/6077/radiocade
Backlog: http://backloggery.com/lilbud
-
@lilbud no not Ret0brite, he said he used a vinyl dye. I was just wondering what brand.
Currently Playing: Tetris (Gameboy)
-
@celly said in Famicom build:
@ruckage looks very nice! I’ll be following this build, you do great work man. What was the product name you used to paint onto the shell? Wonder if it would has the same effects on a yellowed DMG shell.
@lilbud said in Famicom build:
I think it is something called Retrobright
No, not RetroBright, It's vinyl dye. The brand I used was TRG. Essentially it's a type of paint that bonds with plastic (I believe it at least partially seeps into the plastic). It doesn't actually remove yellowing, it covers it over with whatever colour you choose.
I'm sure it would work on a gameboy shell though I couldn't say how hard wearing it would be. It is supposed to be quite durable though. The main challenge would be getting the exact grey colour of the original. -
@celly Just a heads up if you plan to try out the Vinyl Dye. It takes a lot longer to dry than you probably expect. Within a day it's definitely dry enough to handle but I noticed the plastic parts I reattached such as the cartridge flap and ejector began to adhere slightly so the solvents were obviously still present to a degree. It's been a week now and the vinyl dye definitely seems much harder and I'm guessing far more durable now so I would recommend allowing at least a week for the dye to fully cure.
SNES mini/Nes mini/Famicom mini theme developer.
If you'd like to support my work you can donate here: Donate
-
@ruckage good info to know, thanks. I found the brand you used on Amazon. Just not sure if it’d bring the same results on a DMG shell as you had with your Fami.
-
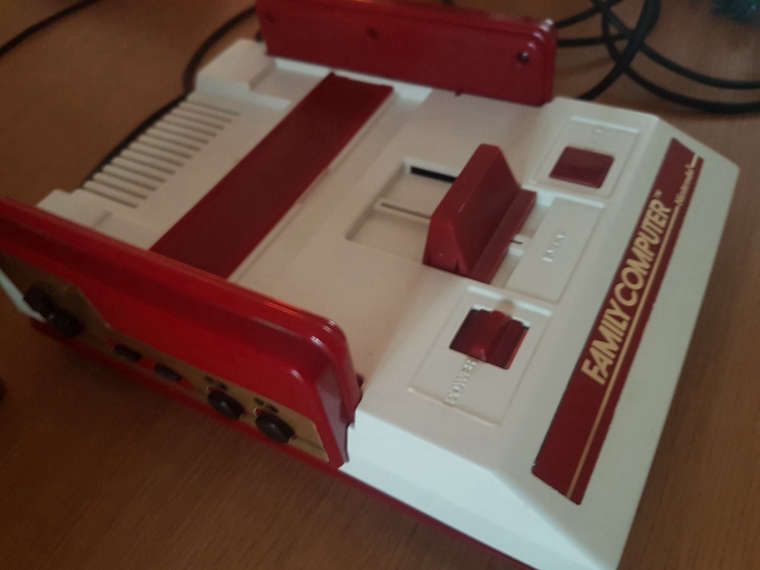
I used PlastiKote on mine, came out well.
Some pics from a while back, and was a tight fit inside...
-
@ruckage how did your repo of the front sticker turn out?
I'm doing a similar project and was having trouble finding a new sticker, so I was hoping you had some success! (or failures I can learn from!)Apologies for digging up an old thread; it seemed more appropriate than creating a new topic!
Contributions to the project are always appreciated, so if you would like to support us with a donation you can do so here.
Hosting provided by Mythic-Beasts. See the Hosting Information page for more information.