My Arcade Build
-
Hello.
Just some photos from my arcade build (albeit some of it was built already). I had been given an arcade cabinet (used to be Lethal Enforcers) and some buttons and random stuff (keyboard, mouse leads). I already had some basic tools, knowledge and wood.
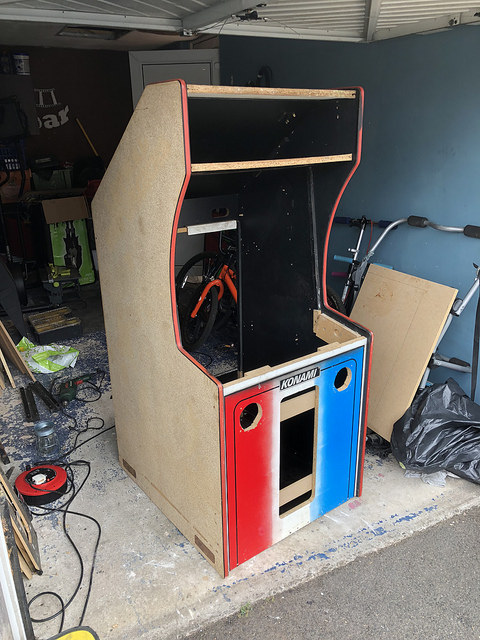
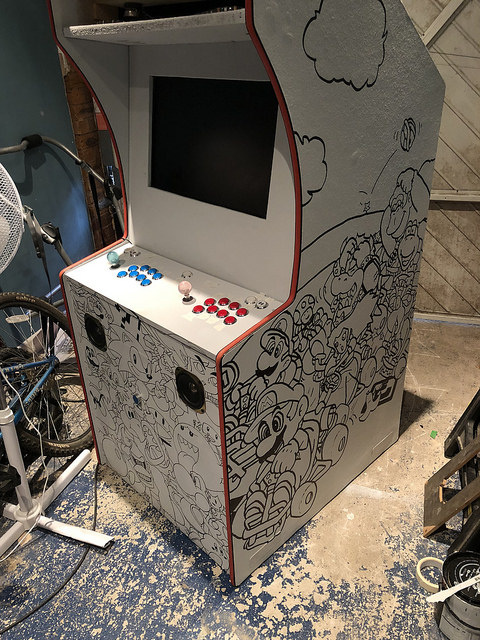
I had took the vinyl from the original arcade so this is what I started with.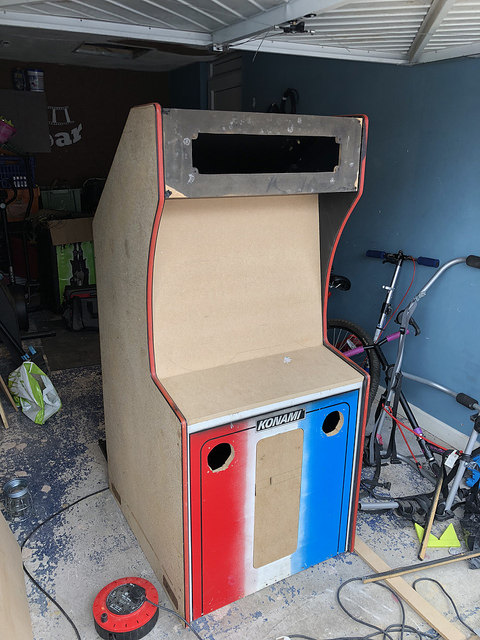
Cut the parts for the console and screen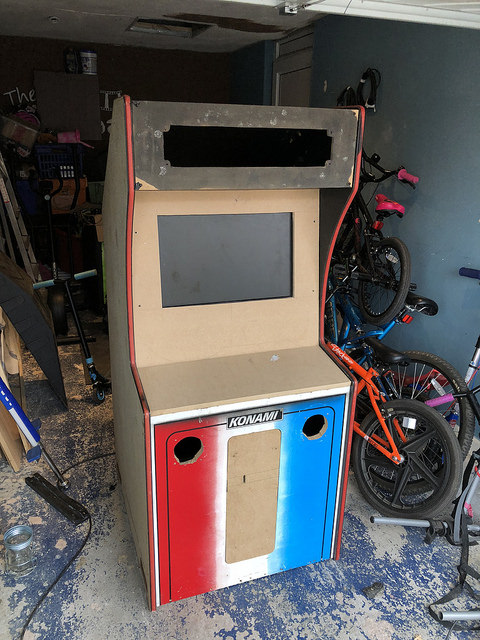
Cut the hole for screen and mounted an old 24" TV
Cut holes for buttons awaiting extra buttons I had ordered.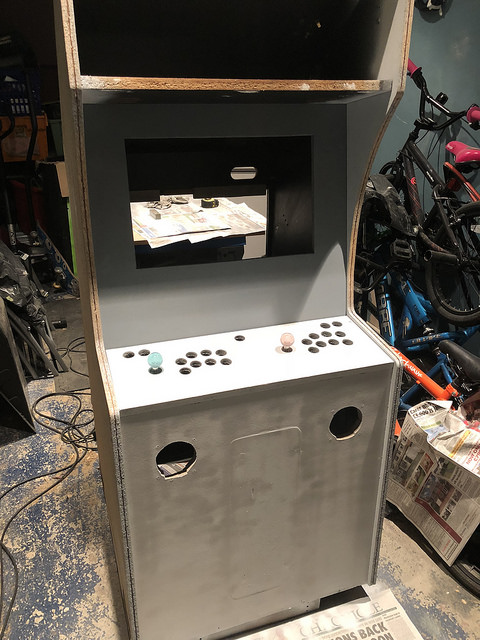
Started painting with regular paint after a failing with spray paint.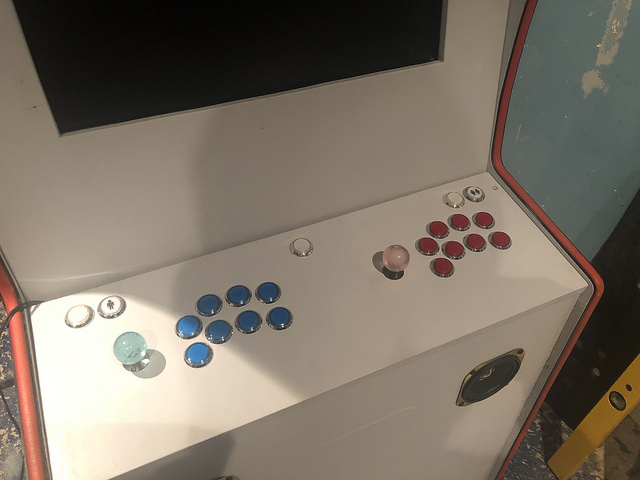
All buttons (donated and bought) in.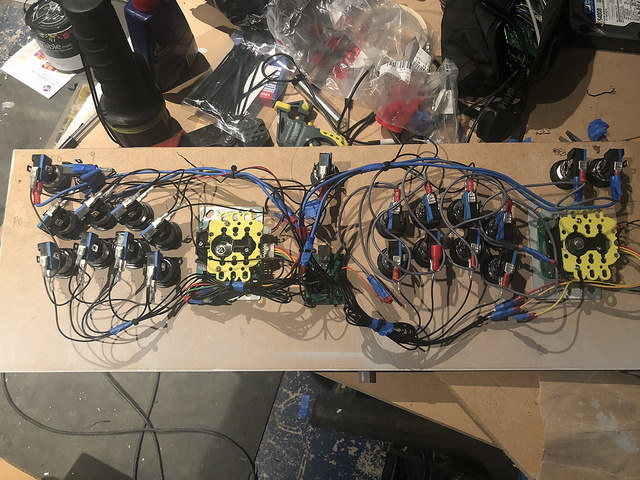
Buttons all wired up (Using Xin-Mo encoder)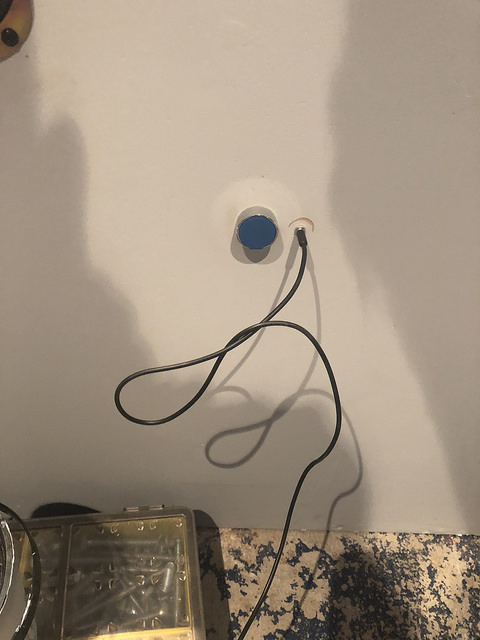
Added button to front which turns tv on and boots up the pc (which my work was throwing out) also an audio in for playing songs via 3.5mm jack. I plan to add a twin usb to the right of this also.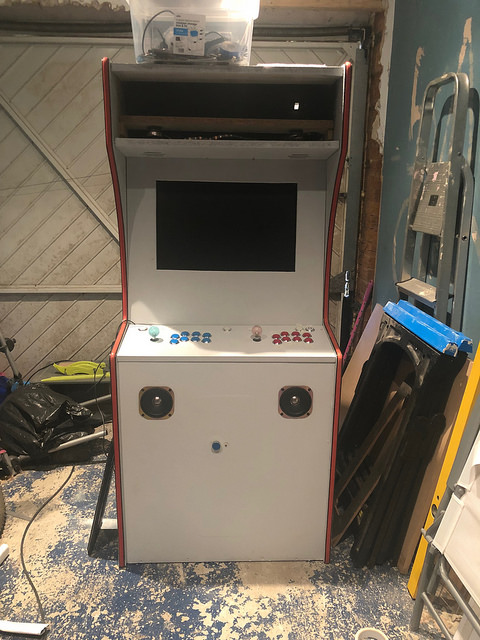
Speakers added which I got from my parents (still need some 4"grills). The amp for the speakers was from an old Angry Birds speaker which I stripped and used (2 speakers are also in the marquee area)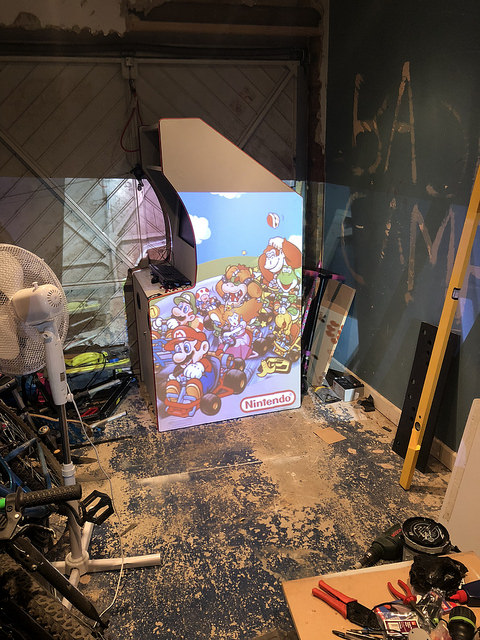
Due to my love of Super Mario Kart I used a projector to see what the boxart would look like on the side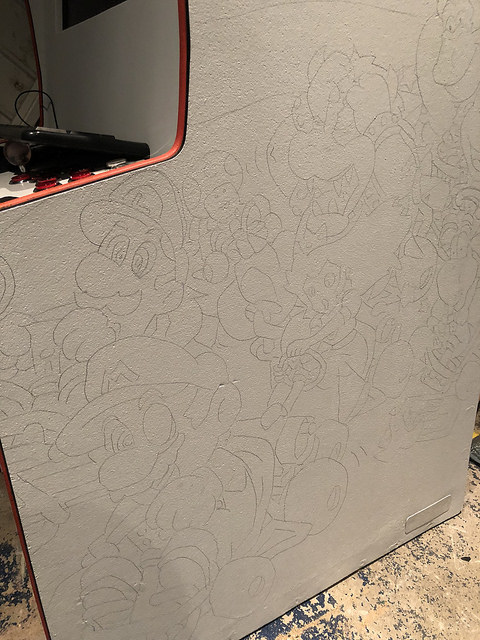
Happy with this I pencilled it on.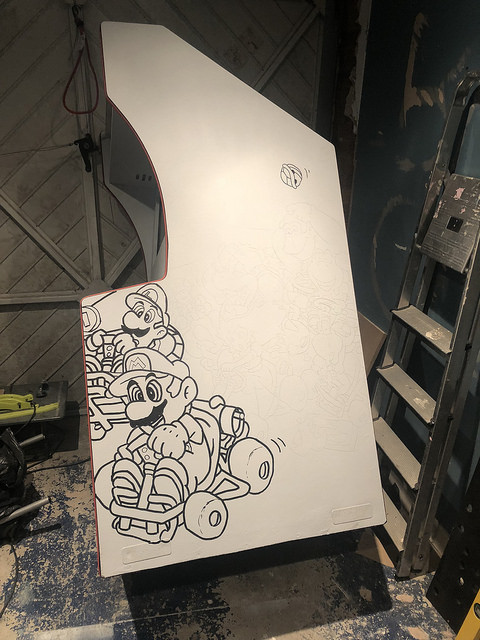
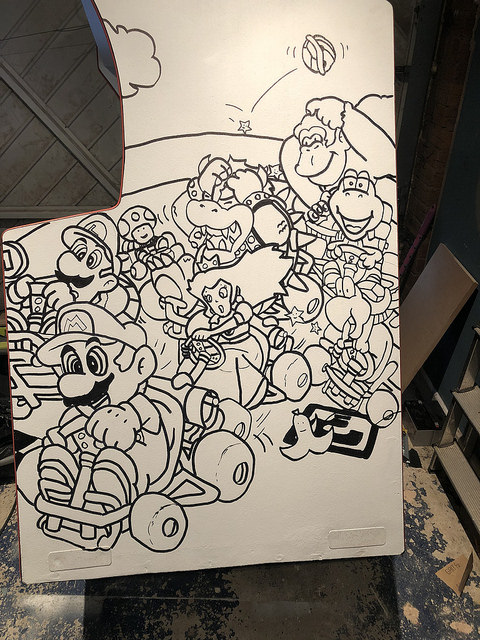
I was going to paint it but love the contrast of the marker on the light background.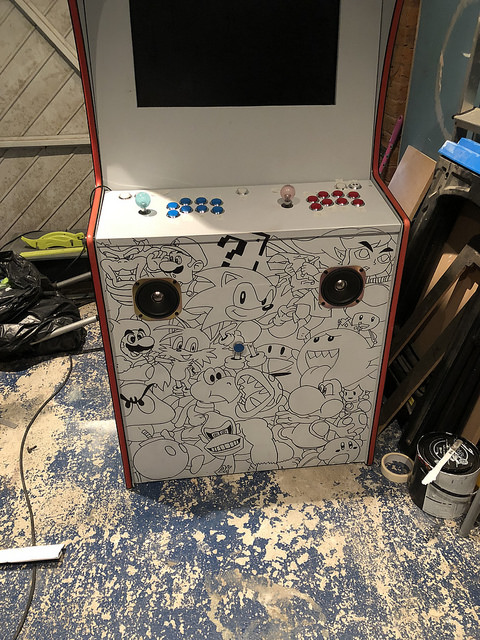
More console related artwork
I have since now added a marquee with remote led colour changing lighting (£3.99 from ebay)
Still to do:
Get marquee Vinyl
Get and fit speaker grills (4")
Add similar artwork to console area, left side and monitor area.
Add twin usb to front (for configs etc) when it arrives.Would of like the middle button to exit emulators but this is part of joystick 2 and isnt possible. (perhaps)
Any comments, thoughts, further ideas welcomed.
-
Great work! I especially like the idea of copying the artwork from a projector's picture. :)
-
@clyde
Thank you. Using the projector makes getting the artwork good. Also gives you an idea of how it will look before completing. -
Loving the artwork
-
Looking nice.
I'm wondering, is there a reason the cabinet is so deep? It doesn't look like you are using a CRT monitor. I don't want that to sound like a critique, just curious.
Second question. For the black lines. They look very sharp. Is that marker or paint?
As it is (black line on white) gives it a kind of comic/coloring book vibe. It gave me an idea. Use whiteboard paint as a base and then do the same outline image in black permanent paint. Then kids can color the characters in with white board markers.
I need to write that down.
If you want the center button to exit by its self, it is possible. there are threads on different ways of doing it.
Me? I'm not that determined to have a single button exit and would just assign the center button as the "hot key" So that + Player 1 exits. -
@dirty_monkee said in My Arcade Build:
I have since now added a marquee with remote led colour changing lighting (£3.99 from ebay)
Would you mind sharing a link to this please :)
-
@lurker
The cabinet is deep as it used to be a Lethal Enforcers arcade game. It originally had the light guns with the mirrors etc. It was a free cabinet that my friend gave me and my first arcade build. It’s a little low and some seating would be required but great for the kids.The paint is from Wilkos (can’t remember the colour name) and drawn on using permanent marker.
-
This post is deleted! -
@brigane said in My Arcade Build:
@dirty_monkee said in My Arcade Build:
I have since now added a marquee with remote led colour changing lighting (£3.99 from ebay)
Would you mind sharing a link to this please :)
Sorry if this is a double post, still getting used to forum.
https://rover.ebay.com/rover/0/0/0?mpre=https%3A%2F%2Fwww.ebay.co.uk%2Fulk%2Fitm%2F332734482695
-
@lurker said in My Arcade Build:
Looking nice.
I'm wondering, is there a reason the cabinet is so deep? It doesn't look like you are using a CRT monitor. I don't want that to sound like a critique, just curious.
Second question. For the black lines. They look very sharp. Is that marker or paint?
As it is (black line on white) gives it a kind of comic/coloring book vibe. It gave me an idea. Use whiteboard paint as a base and then do the same outline image in black permanent paint. Then kids can color the characters in with white board markers.
I need to write that down.
If you want the center button to exit by its self, it is possible. there are threads on different ways of doing it.
Me? I'm not that determined to have a single button exit and would just assign the center button as the "hot key" So that + Player 1 exits.Would be Interested in being pointed in the right direction of having the middle button acting as a hot key. Bear in mind this is part of player 2 buttons.
-
Any comments, thoughts, further ideas welcomed.
Perhaps add special lighting to make your cabinet really shine.
Here's a few images for your consideration.

Maybe something like this for edging.

I just think that creative lighting, if done correctly, can make most anything look more magical.
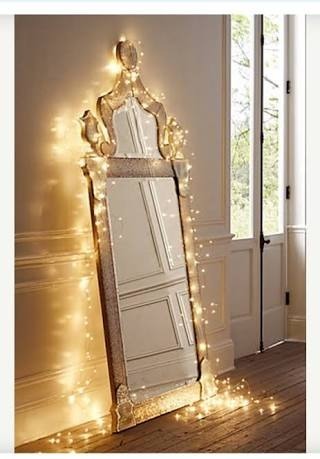

It's probably a dumb idea but you asked for comments. :)
-
@dirty_monkee said in My Arcade Build:
The paint is from Wilkos (can’t remember the colour name) and drawn on using permanent marker.
Cool. I would definitely recommend (if you are not already planning to do so) to give the cabinet a few coats of a clear coat (either poly urethane or varnish) other wise the marker will start to smudge off if anything rubs against it.
As for the hot key center button. You can make it a hot button for player2 but it is much less of a headache to move the button over to player 1 and then just set it as a hotkey in the controller configuration. Having it on player 2 will not always work properly in every game. It can be done but not usually worth the effort when a simpler solution is readily available.
-
@lurker
Thanks for that.Didn’t plan on protecting it but I may after you advised so. Means having to take those damn buttons out again, right pain in the a** that is.
I think I’ll keep the middle buttons as “for show” or perhaps find another use for it. The select/insert coin button on the player one works well as does the rest of the buttons so I don’t really wanna go messing anymore. Took me ages (with the help of @mitu to figure out)
Looking forward already to building my next one. Perhaps something smaller with my Pi 3 instead. I had thought about an oversized SNES controller. Imagine 60mm push buttons. Shoulder buttons may be a little difficult to “build”
Again ideas of this or any future build welcomed.
-
@dirty_monkee said in My Arcade Build:
Didn’t plan on protecting it but I may after you advised so. Means having to take those damn buttons out again, right pain in the a** that is.
Don't fret, many of us have been there. ;) But especially the control panel should be well protected, since it has the most strain to bear. I covered mine with a special transparent protective vinyl that "you can do Tango dancing on" according to the vendor. :D
-
Impressive, the design looks great.
-
This post is deleted!
Contributions to the project are always appreciated, so if you would like to support us with a donation you can do so here.
Hosting provided by Mythic-Beasts. See the Hosting Information page for more information.