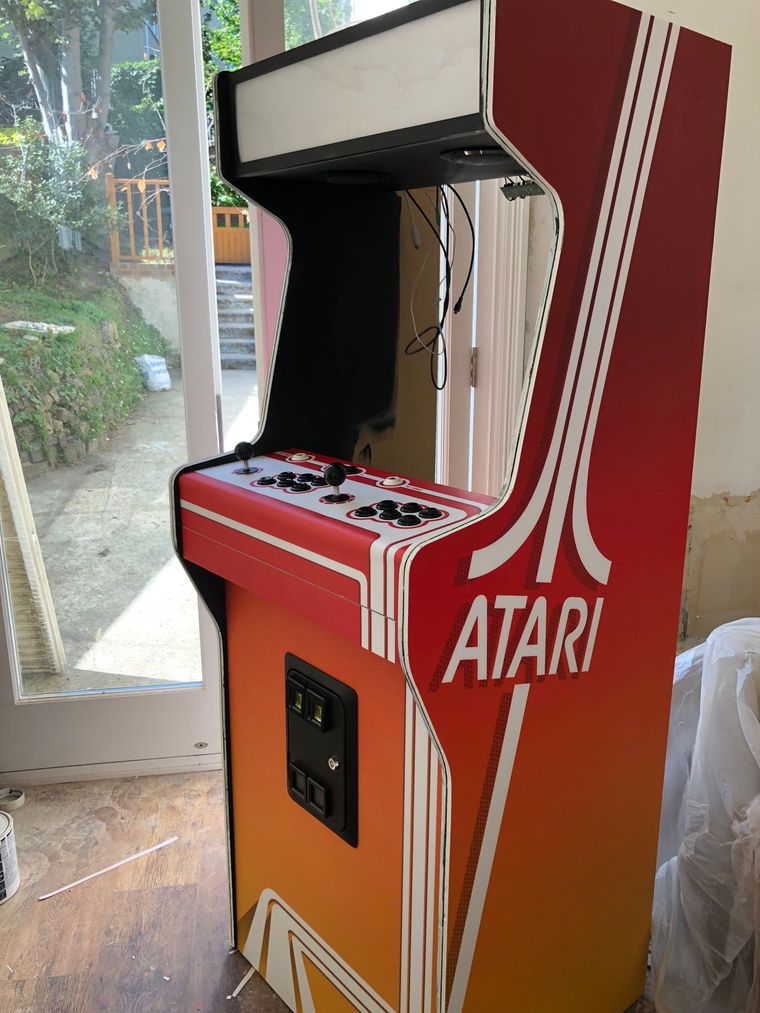
Custom Build Atari themed cabinet
-
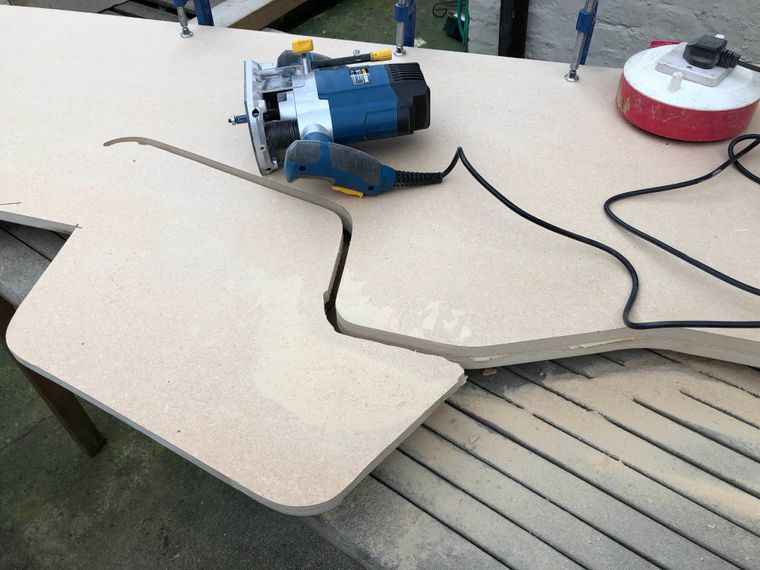
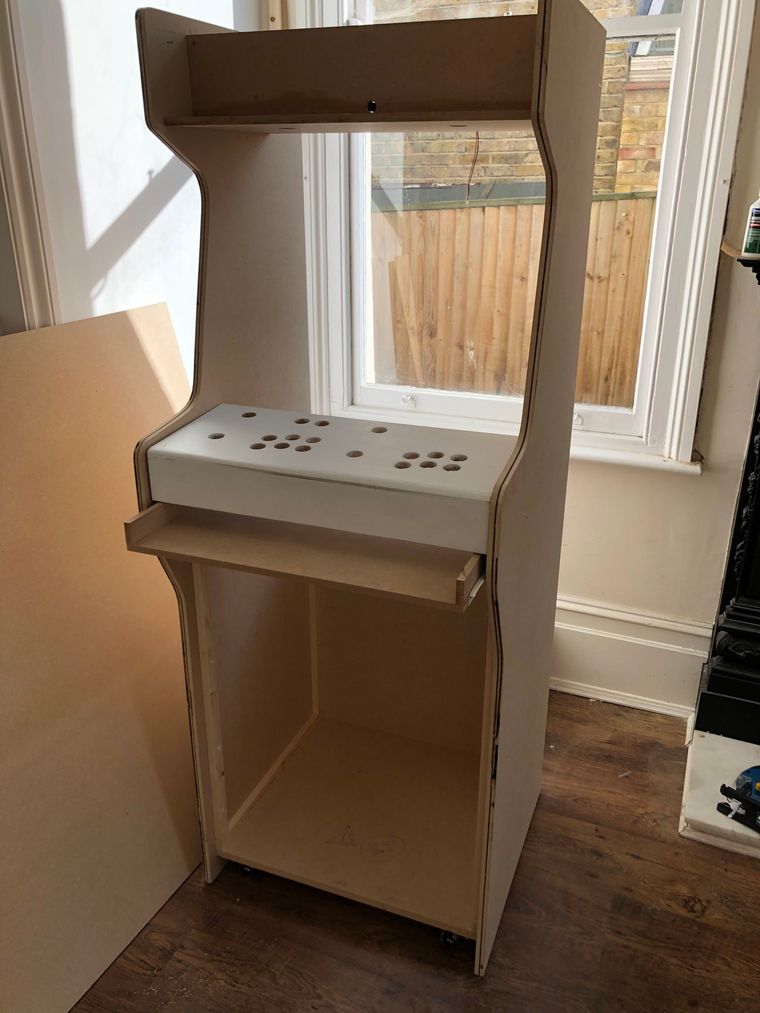
Replicating with a router.
-
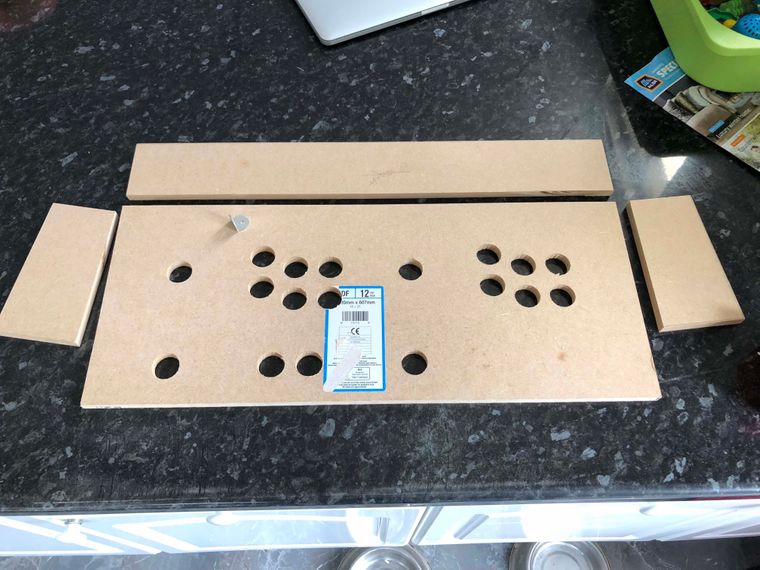
Making the CP.
-
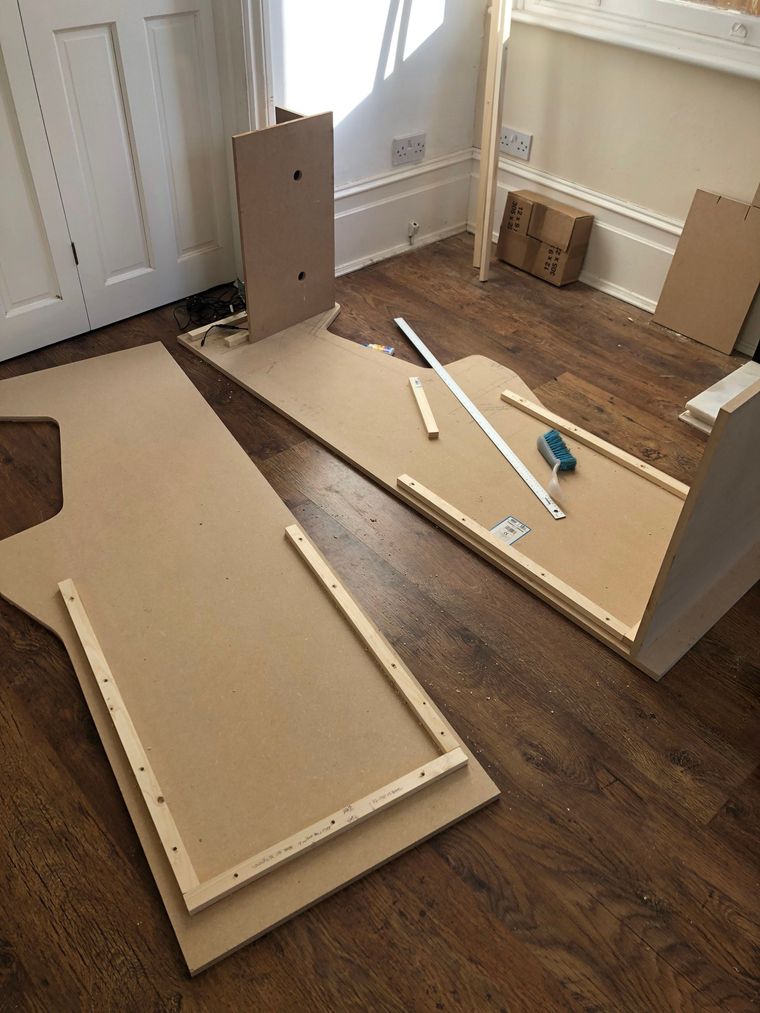
Lego for adults.
-
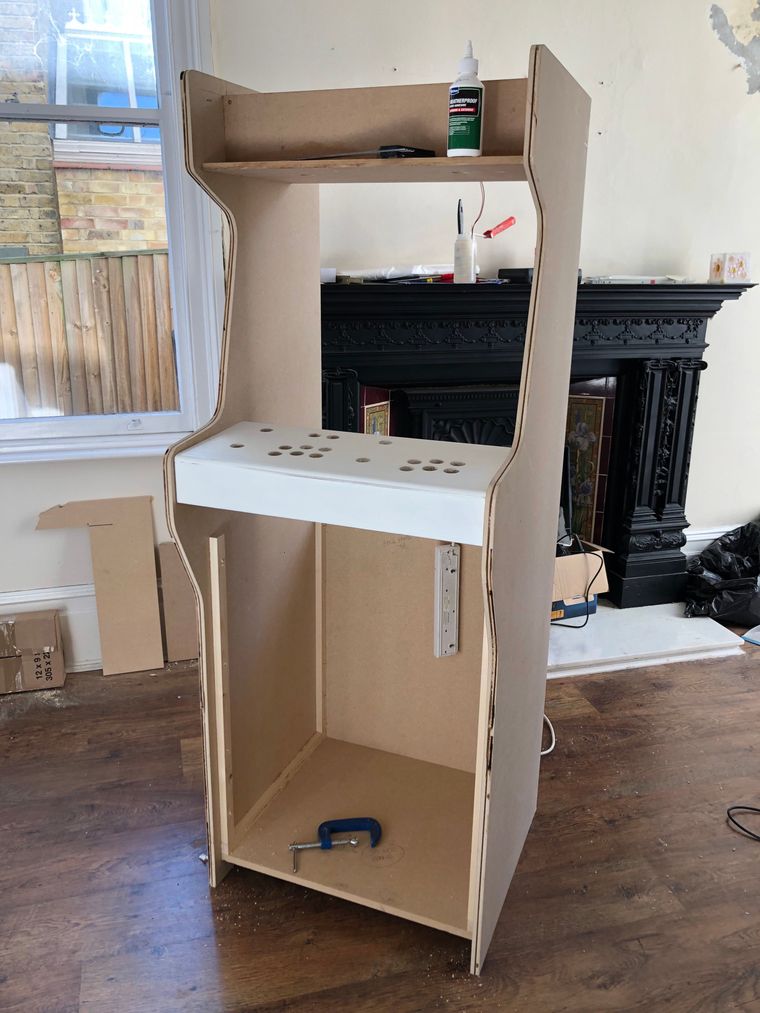
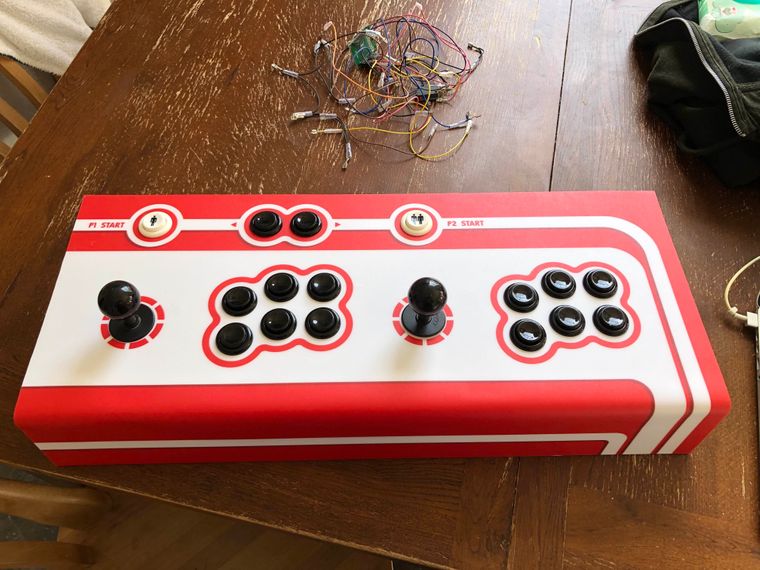
You could almost play it!
-
Suddenly... a drawer appeared.
-
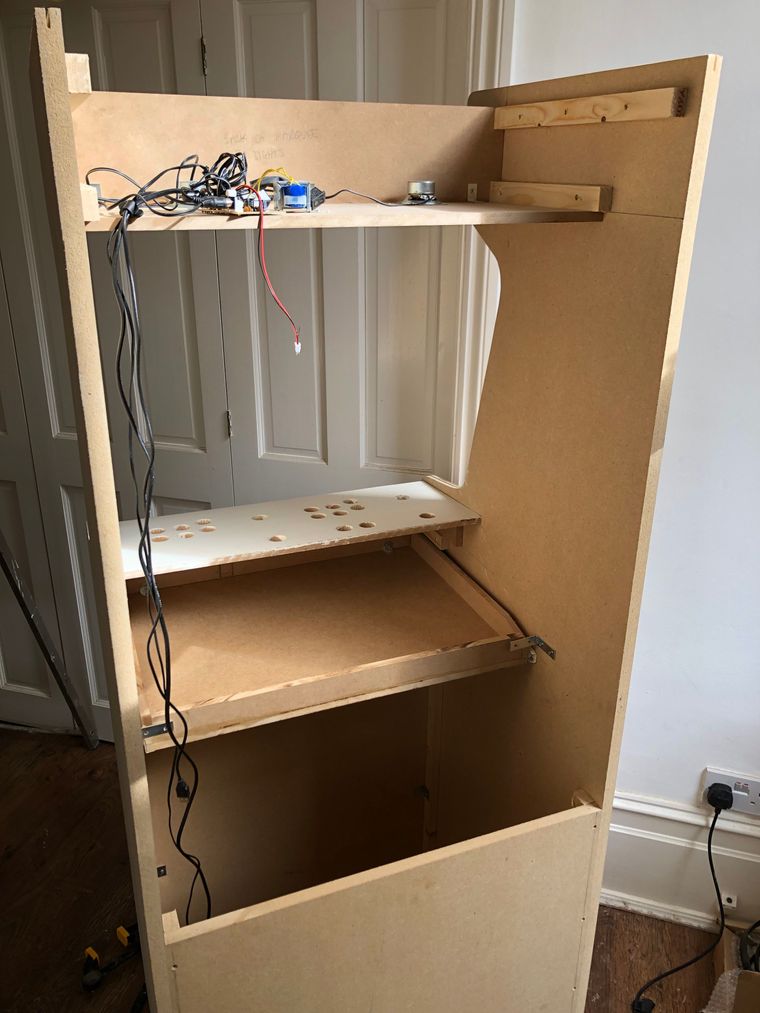
Spaghetti... with plenty more to add.
-
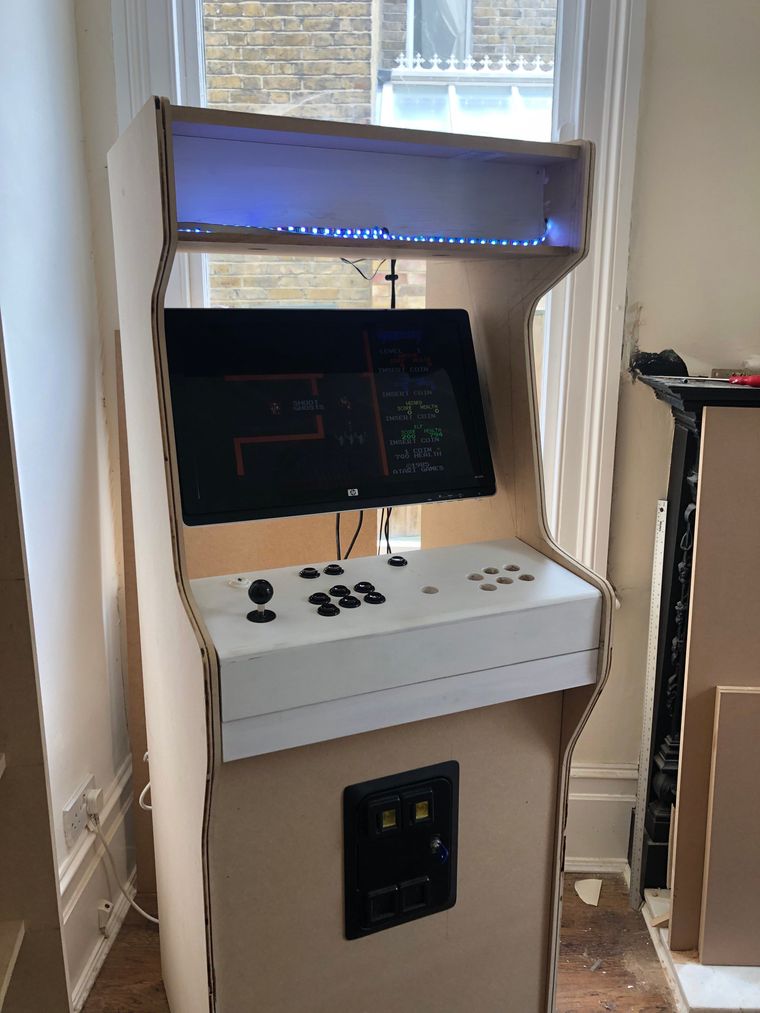
"You haven't finished building it Dave"
"I need to test it darling."
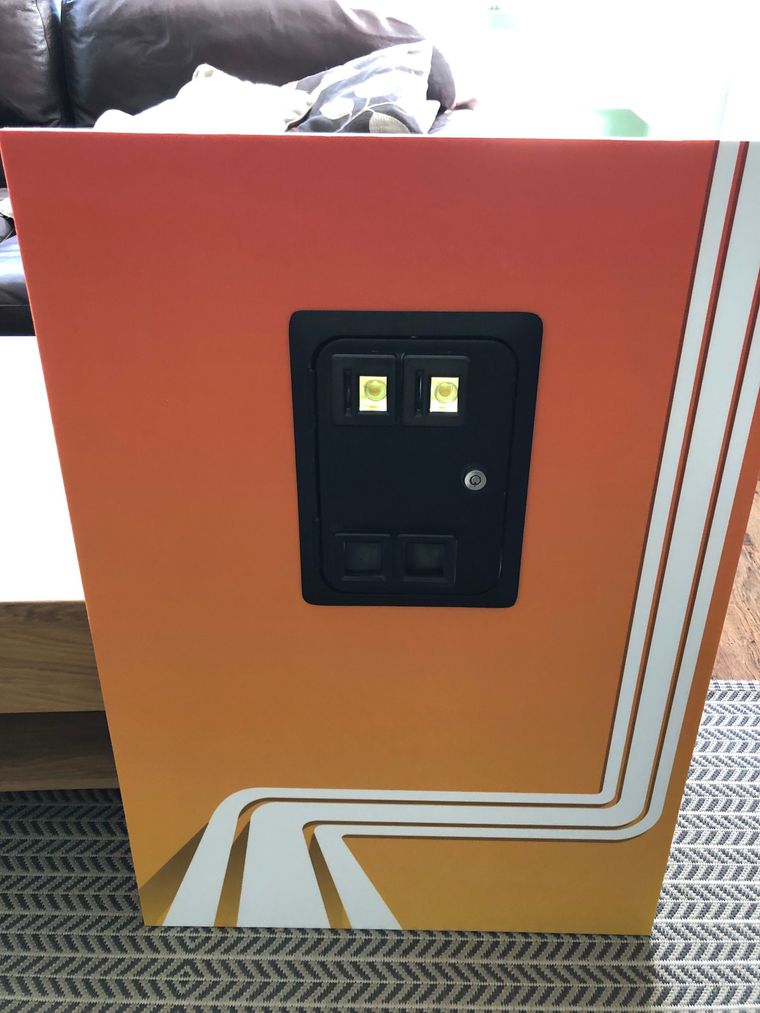
Featuring guest appearance by very cheap Chinese coin door.
-
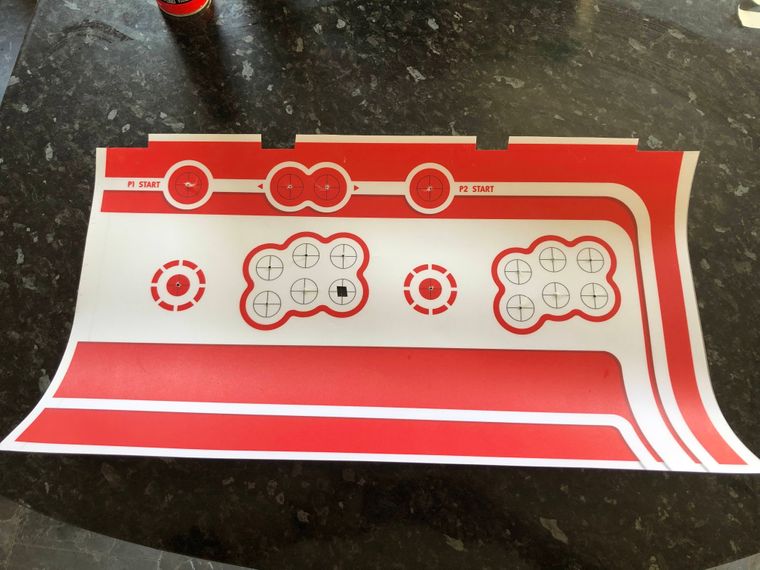
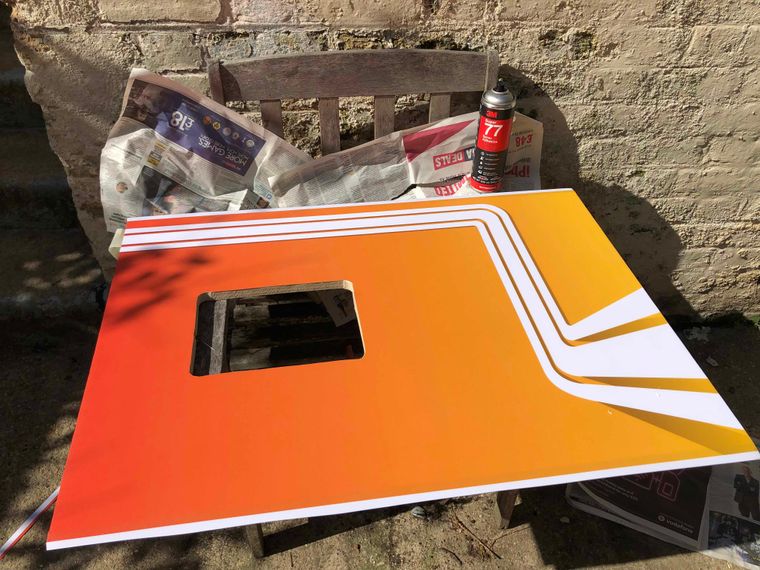
Prepping the vinyl for the CP. The printer that did me a favour printing for free, supplied my vinyl... but not self-adhesive like I had wanted! Helpful. Cue some 3M77.
Masked it on one side so I could lift and drop. Carefully does it with the spray adhesive - outside with face protection. I was careful not to get too close while spraying - 3M 77 can blob if you're too near your surface.
-
Buttons and sticks in place. Looking tasty.
I'm going to try to be super disciplined and not wire it up until I've assembled the whole project.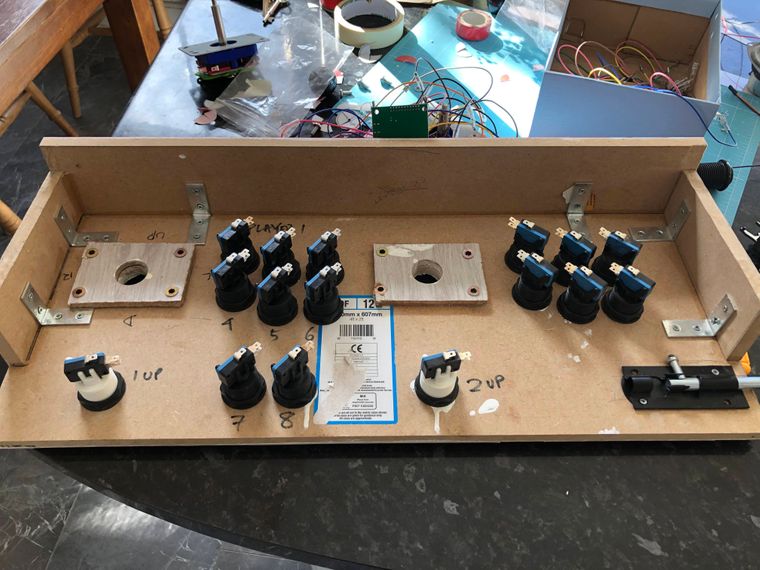
-
Front panel finished. Now a slight pause while I find the time to do the perspex and resite the monitor. Still not sure how to do a bezel between the monitor and perspex. how do others approach it? I'm aiming for black I guess.
-
What a lovely day to finish the vinyl. I've already routed out a 2mm slot, so t-molding may be next. Still pondering the inside of the perspex; maybe two colours of mounting board - I wanted black but I'm thinking a touch of red would really look good...
I bet my wife wonders why the decorating is taking so long.
-
This post is deleted! -
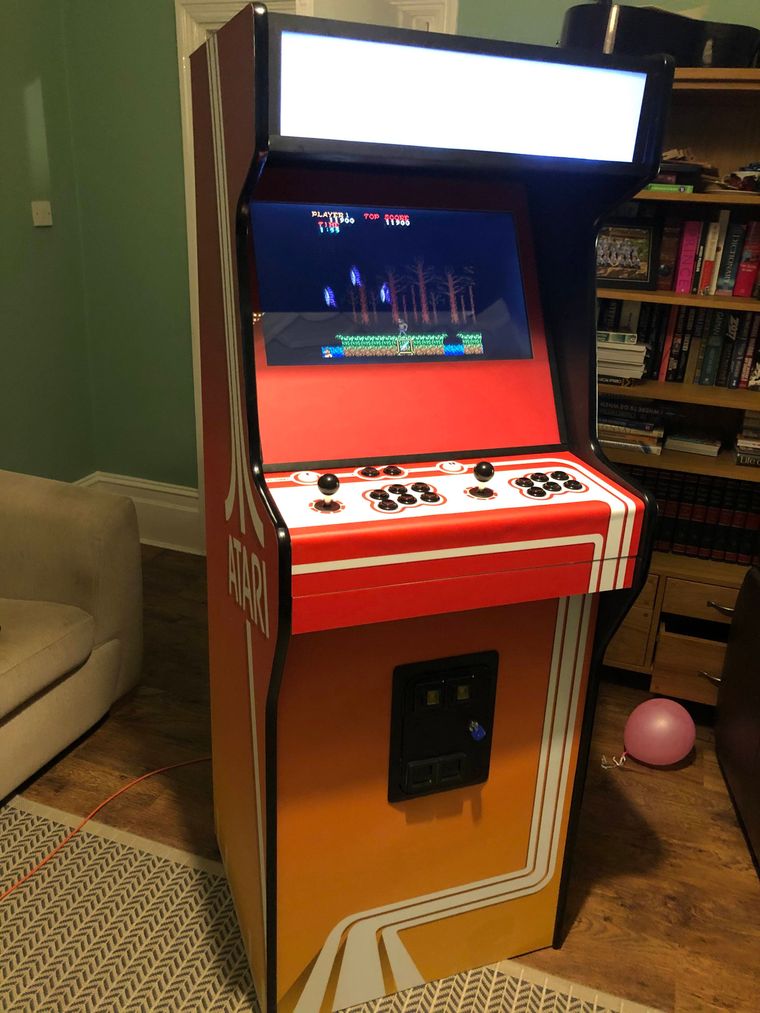
Well, after a burst of activity this week, I got 99% of the way there. The T-molding really looks good. Externally just the marquee to do, But I can't seem to come up with a design I'm happy with.
I've made the bezel with some red mounting board, but I now feel that the monitor is too high. I had planned on putting a strip of hotkey button combos instructions under it, but I'm now not so sure. Your ideas, please!
Inside, tons of wiring tidy up, and I'm now going to try and sort out player 2... I understand that's a bit of a challenge with a Xin Mo encoder, so wish me luck! On top of that I need to figure some kind of switch in each coin slot as I don't have any coin validator mech's behind the door. Maybe just pushing the coin reject to avoid actual coins? Mind you I'll never make money off the kids that way 😁
-
I've made the bezel with some red mounting board, but I now feel that the monitor is too high. I had planned on putting a strip of hotkey button combos instructions under it, but I'm now not so sure. Your ideas, please!
In that picture it does look a little high but try putting some mock up hotkey button combos instructions under it and see if it still looks too high.
It's looking really cool btw!
-
I second @backstander: Looks too high, but the space below it may be used for instructions etc. But if you want to keep the plain colour below, you should consider lowering the screen.
All in all, it looks great! 👍
What do you plan to put in the marquee space?
By the way, I like the little balloon in the background. 🎈
-
Awesome work on that cabinet! Great job!
VitroLight
https://www.ebay.com/str/vitrolightlcdmodulestore
makes an LCD that would fit your marquee space. It would be controlled by Hyper Marquee and Event Dispatch System.
-
looks very nice except I'm afraid, the monitor... what size is it, you may find that a 4:3 would look much better in there if you can get a large one, after all the games are generally designed to be played in that aspect ratio.
Raspberry Pi 400 - overclocked to 2.3GHz
Theme - Comic book
Emulators: All of them...
Roms: Pretty much all of them...
Favourite games: Circus Charlie, Gorf, Gauntlet Legends
Controllers: Mayflash F101 -
I second @chubsta about 4:3. You may get refurbished 21-22" TFTs from specialized shops for relatively little money. For example, the monitor of my own DIY upright cabinet from 2006 is in perfect condition and only cost me 60€.
-
@backstander Thanks! You're right - I'll try it out before altering.
-
@Clyde Marquee... don't know. probably follow the overall design and give it a name. Ataricade? Atarcade? But it may mean more custom printing which is beyond my wallet at the moment. Balloon was after my youngest's party! I do love a balloon, and so does he.
Contributions to the project are always appreciated, so if you would like to support us with a donation you can do so here.
Hosting provided by Mythic-Beasts. See the Hosting Information page for more information.