My Dragon's Lair Themed Retropie Build
-
Oops, almost forgot I added a USB light in the marquee - cheap colour changing USB powered thing from Amazon - cost was £4.50
I'll try to get a video of it when I update later.
-
Really beautiful work.... I always like dragons lair. =]
-
Really nice cab. Love the decals.
Always remember to divide the total cost by 3 to calculate the figure for spousal consumption!
How easy/difficult was it to drill the button and joystick holes in the perspex over the control panel and have them match up with the MDF?
Good advice on the chrome strip from Amazon, I was looking for some of that myself, but could only find the t-moulded stuff.
I'm assuming you've got perspex on the marquee as well - did you get it cut to size somewhere?
What are you doing for sound?
The artwork really makes that cab something special. Very nice work.
-
Hi,
Thanks for the comments.
Maybe I hit lucky but it was really easy. I used a paper template to mark the holes in the MDF and used the same printout for the perspex. I got the perspex from a local sign shop and cut it myself but have since found lots of onlines shops that will cut it to order and post it out.
I think I'll be going that route for the screen.
Yes, the marquee is perspex too (I'll get a video up later of it in action).
For now the sound will come from the monitor speakers but I do plan to upgrade this in future ~ wife depending!
-
Ah, the initial case/box is always the difficult part!
I once built an entire PC by stealth over the course of about 6 months, after proving to my girlfriend I had only purchased 'an empty tower case for no specific use' and then sneaking all the other components in one by one!
These are the additional required project skills they don't mention on instructables!
:-)
-
Nice build! I always like bartops. Those decals are fantastic.
-
Very nice build !!
-
Looks great!
-
Very cool. I love that you skinned the inside panels too. Nice extra touch. Cant wait to see it finished.
-
@GtBFilms said in My Dragon's Lair Themed Retropie Build:
Ah, the initial case/box is always the difficult part!
I once built an entire PC by stealth over the course of about 6 months, after proving to my girlfriend I had only purchased 'an empty tower case for no specific use' and then sneaking all the other components in one by one!
These are the additional required project skills they don't mention on instructables!
:-)
Ha ha ha, i did the exact same thing with my barrel build. Had it all sorted out on the sly then one day... bam she all came together. Some people will say get ya gonads out of the missus' purse but happy wife happy life... 'n all that*. :D
*Definitely helped that everyone else thought it was amazing once built.
Fantastic build btw OP. Nice job.
-
Looks great @BigLarry !
I'd love to know where did you get the design from? I'd like to do the same (get B&Q to cut the majority of the wood for me), as my previous attempt at a 3/4 height cab using a Jigsaw to cut the wood wasn't that great (required lots of reinforcing.
Any advice would be great.
Si
-
Hi Si,
I can't find my original scribblings but I think I have a copy at work I can upload for you in the morning.
It's nothing special but it was enough for the guy at BnQ to cut all the major pieces.
I based it mainly on these plans:
http://www.instructables.com/id/2-Player-Bartop-Arcade-Machine-Powered-by-Pi/
(The refsheet pdf) - I basically just organised it so that he had to do one main cut of 500mm wide which covered all the main bits and then the other at 454mm wide (and subsequently into rectangles of 636mm high which would become the sides).
For £16.50 for the sheet and the lion's share of the wood cutting it was a bargain compared to the £69.99 they want on ebay for a similar kit.
Need anymore help / tips just shout and I'll help where I can.
-
This looks fantastic, and I really love the decals.
I must run with the wrong crowd because no one I know has access to printing stuff like that but it seems quite a few people on here either work in or know someone at a print shop.
-
Here's the print off I gave to the guy at BnQ.
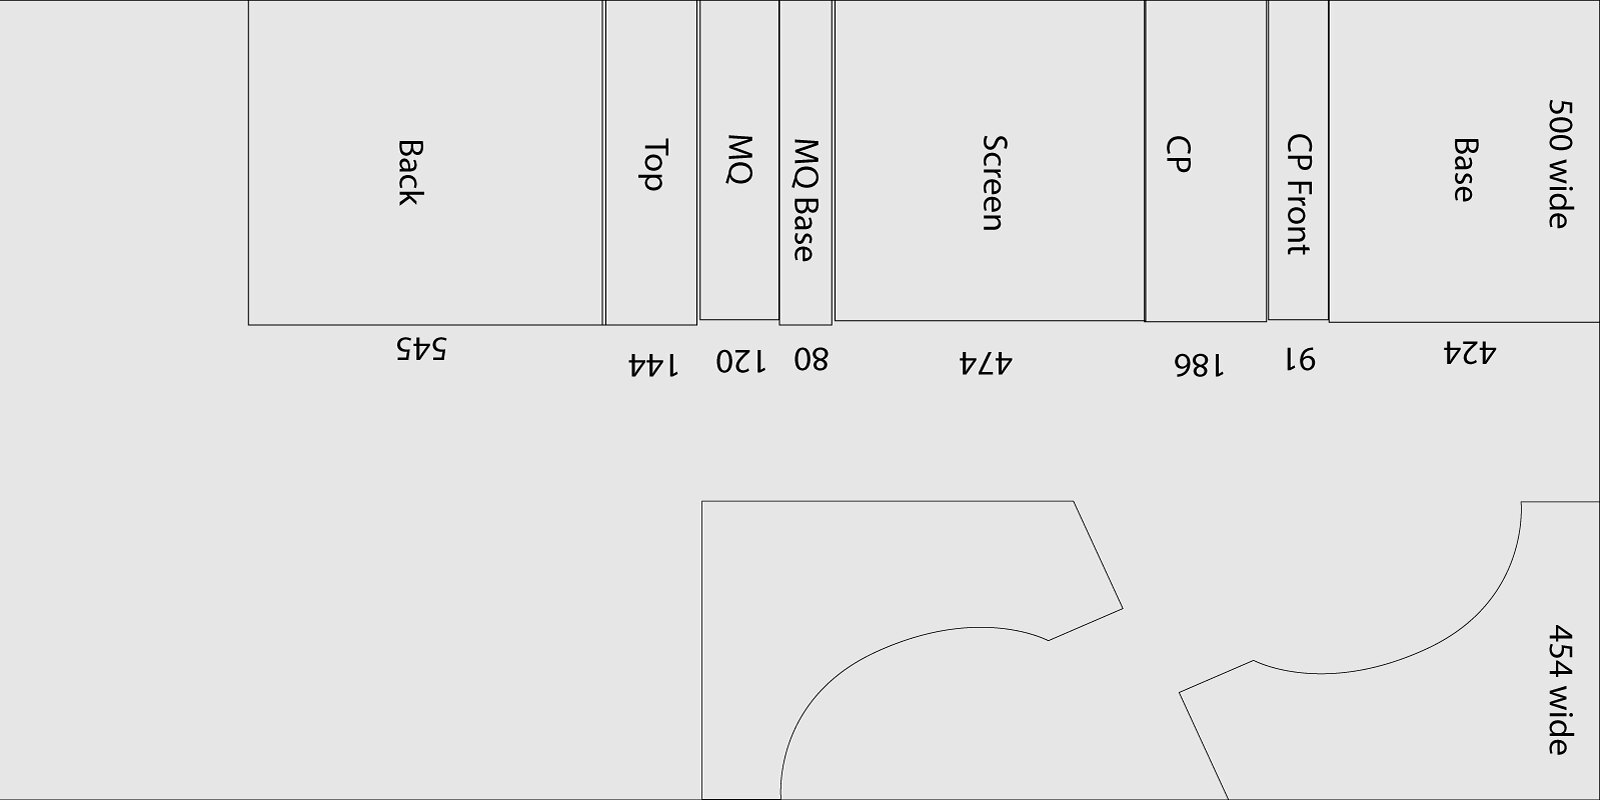
Obviously it's not all lined up etc - but it was enough for him to get the idea and do the cuts :)
Contributions to the project are always appreciated, so if you would like to support us with a donation you can do so here.
Hosting provided by Mythic-Beasts. See the Hosting Information page for more information.