Super Famicom / SNES build
-
@ruckage Here's mine if you want ideas: https://www.dropbox.com/sh/pc27fe31cruc4q4/AADWrnunXI4jrt0qIkQLkUAja
The last pic is showing most of the wiring. The grey wires go to the gpio and power the controllers/led with the gamecon driver, the blue/yellow are reset, and the blue usb cable is soldered to 4 random pins i chose that read the usb stick from the cart.
I still want to find a shorter microsd extension cable and maybe buying a flirc case to reduce heat.
-
Thanks, getting everything to fit nicely is always the trickiest part so it's nice to see how others did it. Since my Neo Geo build suffered with overheating I've already decided that I'll be using a fan in this project as well.
Speaking of heat - have you noticed any yellowing yet of the Famicom casing due to the heat produced by the pi as I've read heat accelerates it? I'm assuming that as mine hasn't really yellowed in the 20+ years since it was made that it's one of the lucky ones that isn't prone to it.
Yours looks nice and grey like mine, the only yellowing I can see on your photos is very slightly around the controller ports which is almost exactly the same as on mine.
SNES mini/Nes mini/Famicom mini theme developer.
If you'd like to support my work you can donate here: Donate
-
@ruckage I think the early units had a different mixture of fire retardant chemicals which is affected by ultraviolet/sunlight so the inside will usually be safe from that. If yours hasn't yellowed now, it probably never will. Mine looks fine to the naked eye.
I bought a previous unit that was almost brown and chipping away and I managed to bleach it back to grey but it was so uneven with blotches that I decided to buy another one. The inside was still originally grey. That one was like $35 with 2 controllers so it's not much of a loss. This second one was like $25 because it wasn't working.
I originally tried to keep the original ac port, but it wasn't getting a good contact so I'd get voltage drops. I didn't think to use some spray cleaner at the time and instead went with a printer usb port.
I also tried to go with a microsd inside a cart, but in the end it was a lost cause. microsd's are so picky with the wiring. I kept getting random freezes. No issues with usb, and it's only 4 wires.
-
I got a bit ahead of myself and bought a cheapie cartridge from Ebay so that I could re-label it and add it as decoration to this build (I think it's nice to have a cartridge in the console even if it isn't functional.)
This is the cartridge I bought - it's Super Goal 2:
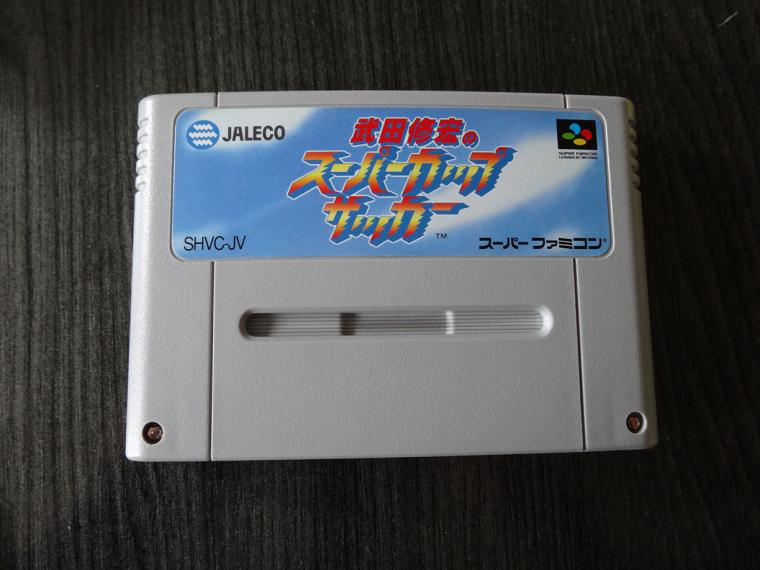
I removed the label which came off completely cleanly which was nice as it saved me time and gave me an exact size template for the label I was designing.
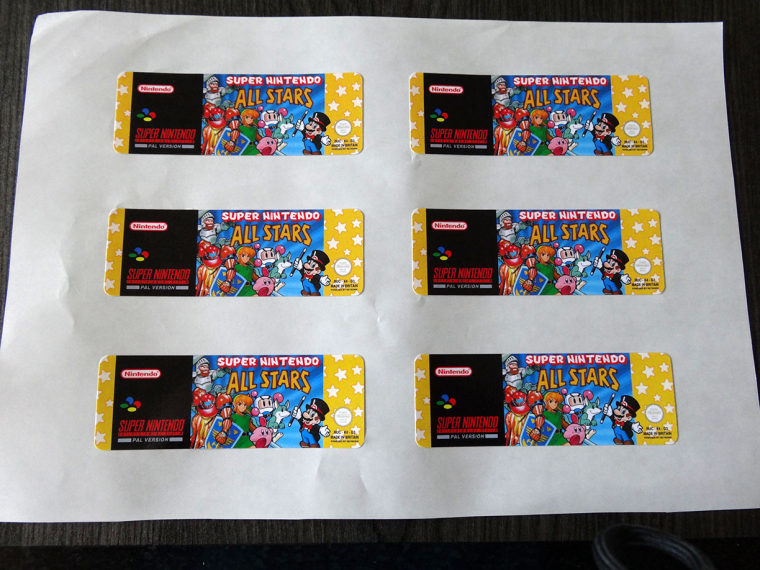
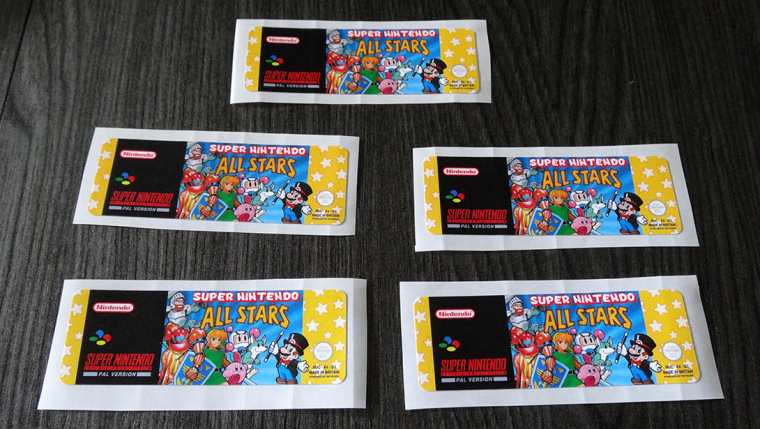
I based my label design on 'Super Mario All Stars' but featuring characters from various games that I particularly enjoyed on the SNES when I was younger and I felt defined the SNES. I used the same label layout as the cartridges in the UK used (I think the rest of Europe as well). Here is the sheet of labels after being laser printed, having an adhesive backer applied, laminated, and cut out using my cutting machine.
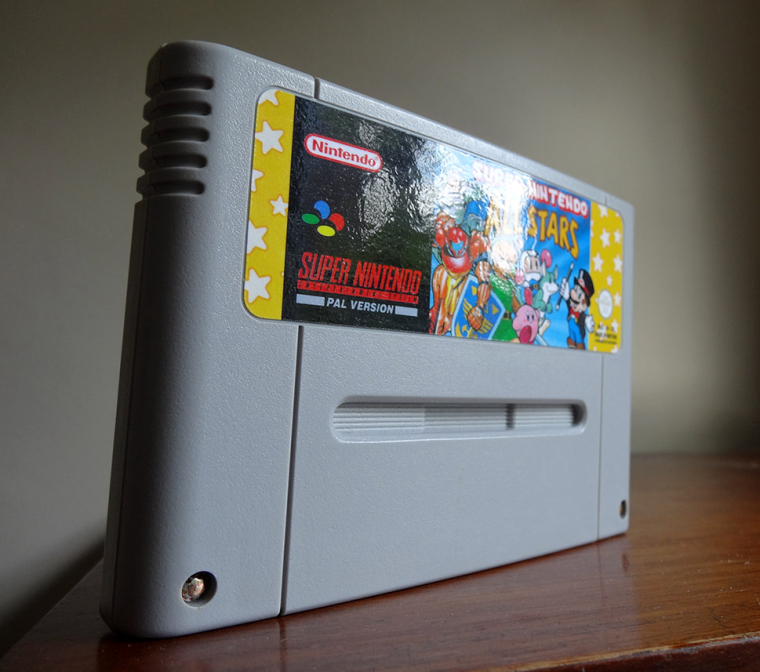
And here is the label applied to the cartridge, I think it looks pretty authentic.
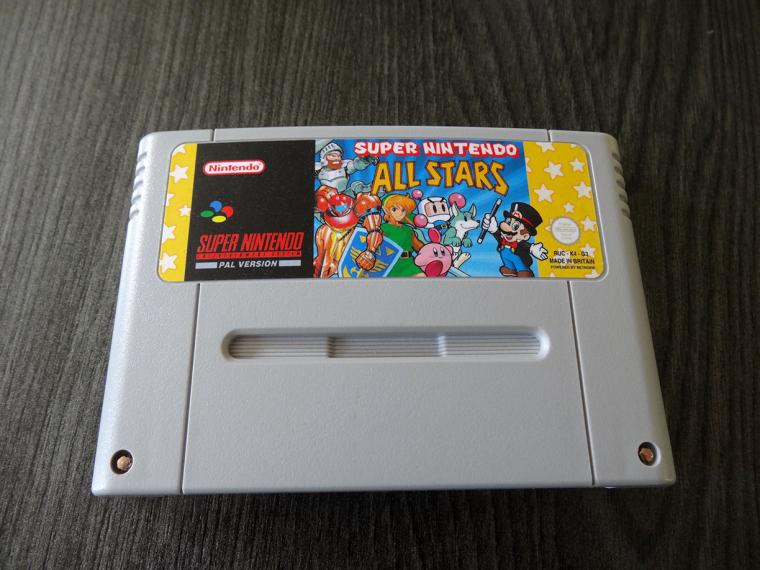
This photo shows how glossy the label looks - it's pretty close to the glossiness of the real label I removed.
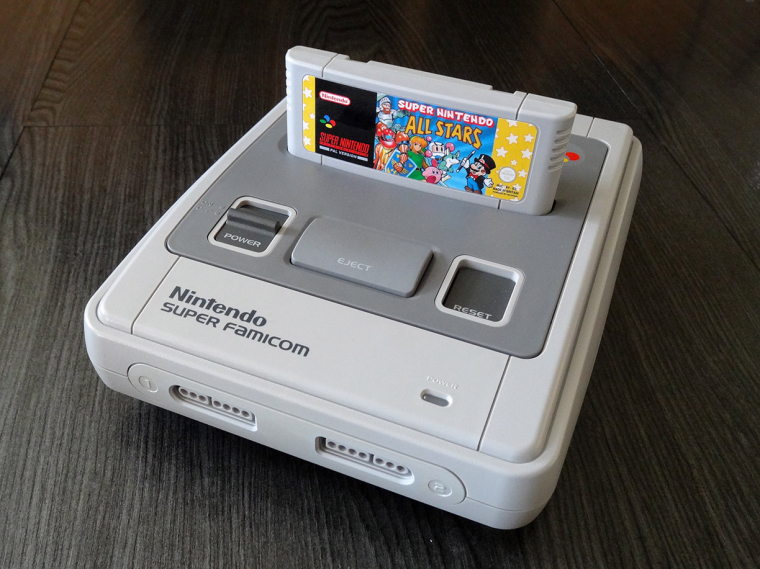
And here's how it looks in the console (ignore the sunken reset button - he's had his insides removed so isn't his usual self at the moment.)
I have 5 labels spare, I'm happy to give these away if anyone else would like one for a similar project - you'd just need to cover the postage costs.
-
I've been working on a concept for a SNES theme for this, I know I will probably end up trying to mimic the snes mini when its released but wanted to see what idea I could come up with myself. This is a very early wip, the background is a placeholder at the momentl. I'm quite pleased with how the SNES itself looks (just needs a few tweaks).
This would obviously be the system view but wouldn't it be cool if we could use the carousel in the gamelist (hint, hint @jdrassa ;) ) , it would be awesome to scroll through game cartridges like this.
-
@ruckage It is an idea I have been considering trying to tackle. I have a few things in progress that I need to finish, but I may give it a try afterwards.
Get latest build of EmulationStation for Windows here
-
@jdrassa said in Super Famicom / SNES build:
@ruckage It is an idea I have been considering trying to tackle. I have a few things in progress that I need to finish, but I may give it a try afterwards.
Fingers crossed then :) , I'm assuming if you attempt it it would be done as a separate view? I can see it being very popular if added.
I'm thinking of faking it for my setup by giving each game it's own system, that's feasible for me as I don't intend to have every single game on it. Once you click on a game the gamelist view would contain that single game to launch and info/art about the game. This would be a bit time consuming but would look pretty good I think. The only thing that I'm not sure about is what impact that would have on the startup time as more systems seems to slow things down - or would that not be an issue with only 1 game in each system?
-
@ruckage I love those labels. What sort of cutting machine did you use? Much nicer corners than my hand cut label that I used on my build.
-
@obsidianspider said in Super Famicom / SNES build:
@ruckage I love those labels. What sort of cutting machine did you use? Much nicer corners than my hand cut label that I used on my build.
It's a silhouette cameo, really good machine (one of my favourite gadgets).
-
I've decided on how everything is going to fit now. @AndersHP will be pleased to hear that I'm trying to be as non-destructive as possible and although some parts are being desoldered it would be relatively easy to turn this back into a functioning Super Famicom in the future.
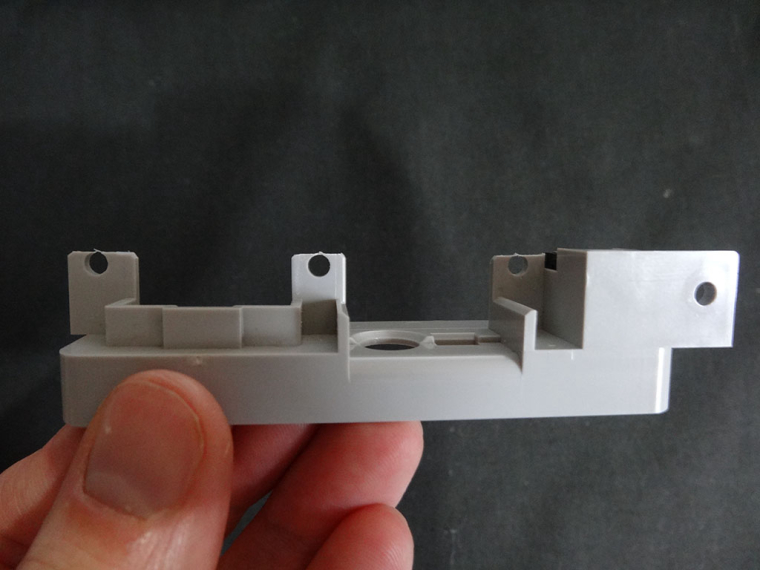
The rpi will be placed at the very rear of the console behind where the power/display port panel is. There is very little clearance there so I had to modify the rear panel slightly by cutting off part of the screw tabs using a rotary tool, this won't affect stability when screwed into place as the screws only prevent the panel being pushed inwards.
Note: For others attempting this the only way to remove the rear panel is to de-solder the power connector.
Rear Panel
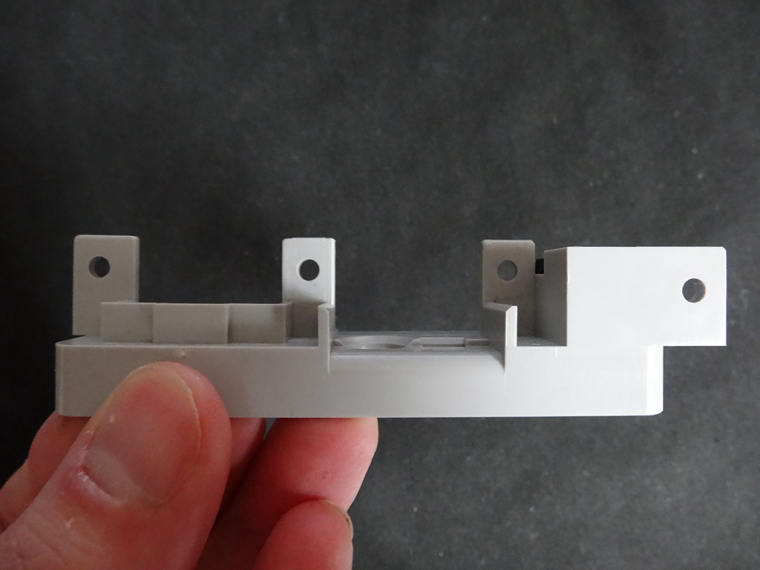
Rear Panel Modification
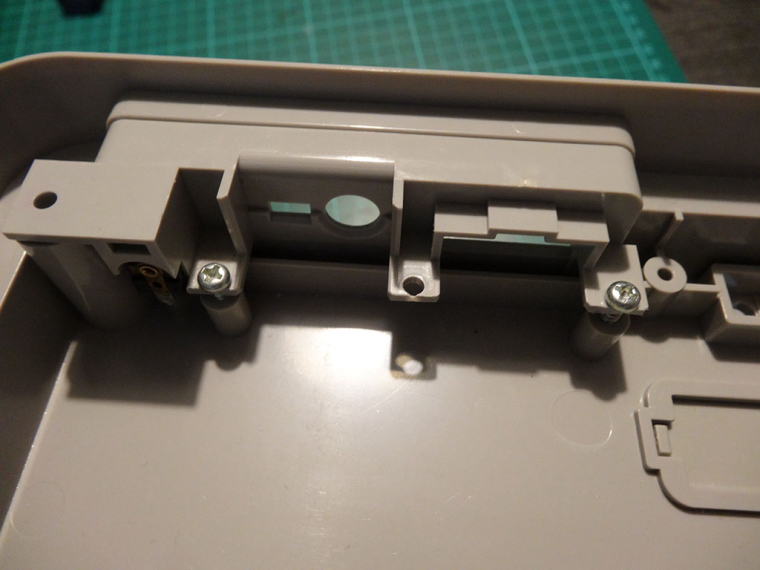
Panel secured with screws
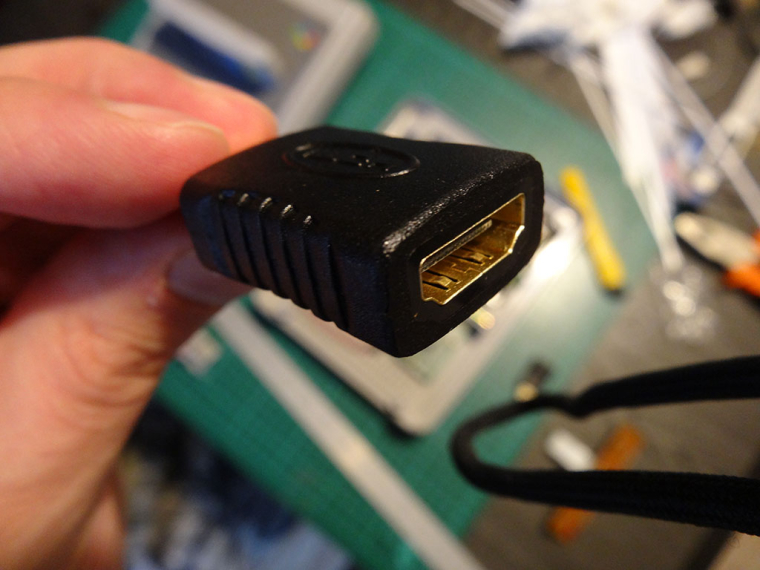
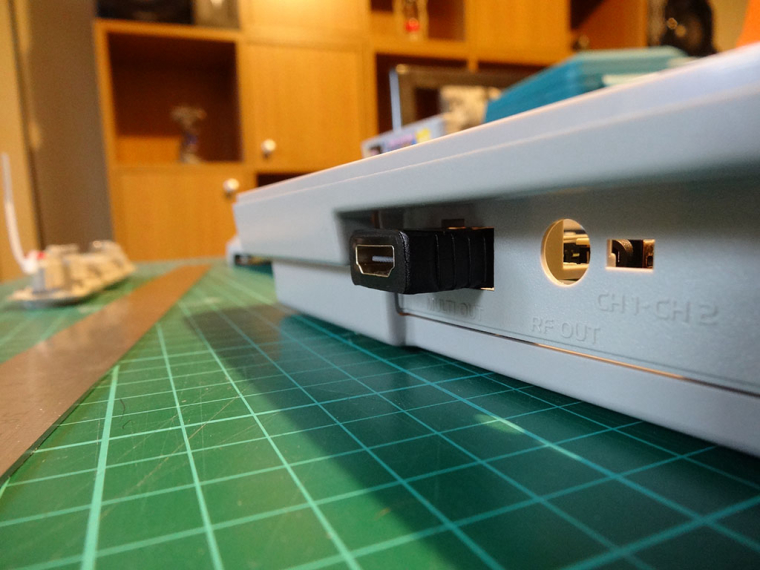
When positioned correctly and raised using standoffs the rpi hdmi port will line up perfectly with the 'multi out' hole on the rear panel, unfortunately I found its bit too far inside the console to reach compfortably so I needed a way to extend it outside. I found these connectors which are basically an HDMI throughport, no idea what use they are to most people but they are perfect for this:
HDMI Connector
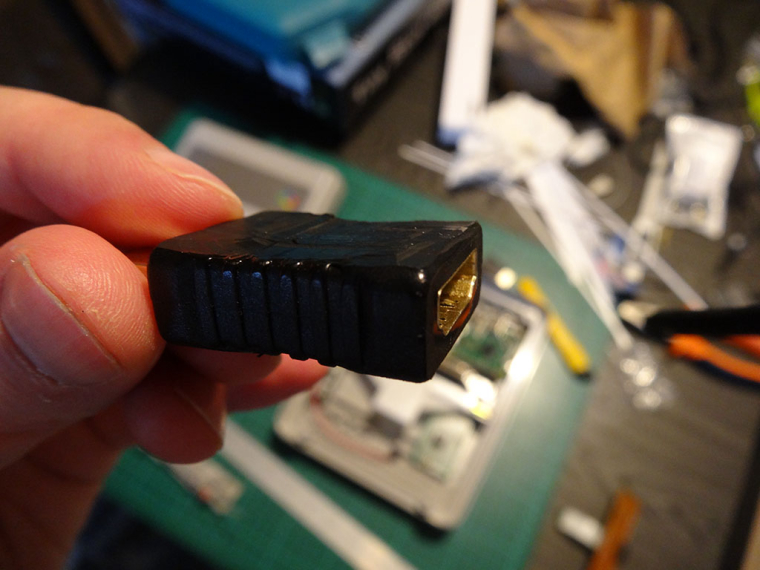
It wouldn't quite fit though the 'multi out' hole so I had to trim the top and bottom - leaving a step in the bottom so it won't push all the way though. Admittedly it looks a bit of a mess after this but once installed you can't see my hack job.
HDMI Connector Modified
It does stick out but it doesn't protrude past the main body of the console. This seems a good compromise to me as it allowed me to use the original rear panel with minimal modifications.
HDMI Connector installed
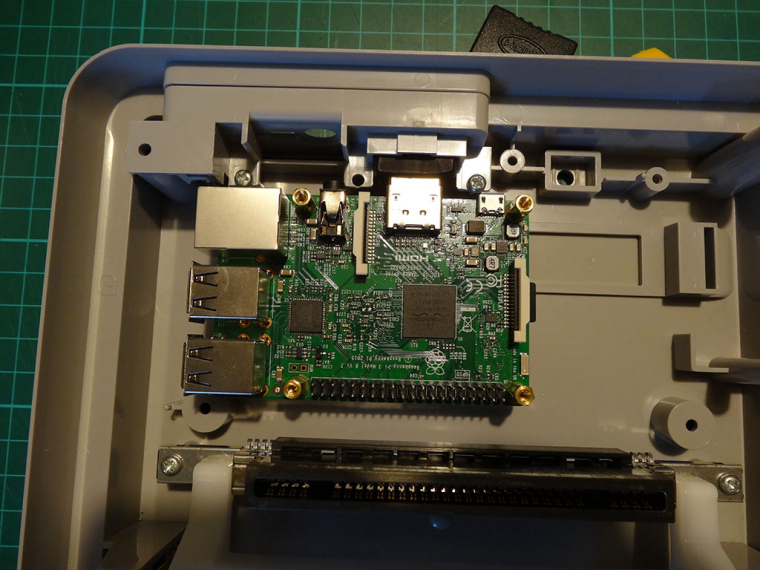
Here is how the RPI will be placed, it's raised on stand-offs which will be screwed into place. There is enough room beside the USB ports to fit right angle USB cables. The only problem is there isn't enough room to connect a Micro USB for the power so instead I will be soldering power leads directly to the test points on the rear of the RPI.
Placement
I've also begun work on the controller ports. These will basically be large SNES shaped USB ports. I won't need the PCB on the rear of the ports so I've de-soldered it so that I can solder directly to the pins. I've placed a new LED for the power and as there is no PCB to hold it in place now I've secured it with a cable tie.
Controller ports de-soldered

-
I have 5 labels spare, I'm happy to give these away if anyone else would like one for a similar project - you'd just need to cover the postage costs.
@ruckage I would really like to use this label for my upcoming SNES project. Is there still one available? -
@martino_heat
Hi. Yes, they're still available so you're welcome to have one. What country do you live in so I can find out the postage cost for you? -
@ruckage said in Super Famicom / SNES build:
I've been working on a concept for a SNES theme for this, I know I will probably end up trying to mimic the snes mini when its released but wanted to see what idea I could come up with myself. This is a very early wip, the background is a placeholder at the momentl. I'm quite pleased with how the SNES itself looks (just needs a few tweaks).
This would obviously be the system view but wouldn't it be cool if we could use the carousel in the gamelist (hint, hint @jdrassa ;) ) , it would be awesome to scroll through game cartridges like this.
I agree @ruckage @jdrassa .....A horizontal/vertical gamelist view that adopts the marquee tag maybe? making way for wheel art or cartart.
-
@ruckage Great! I live in Germany. Can you please contact me via Email -> MartinoHeat@gmx.com?
-
@martino_heat
I've sent you an email. -
I've finished the controller extension leads and soldered usb leads to the control ports.
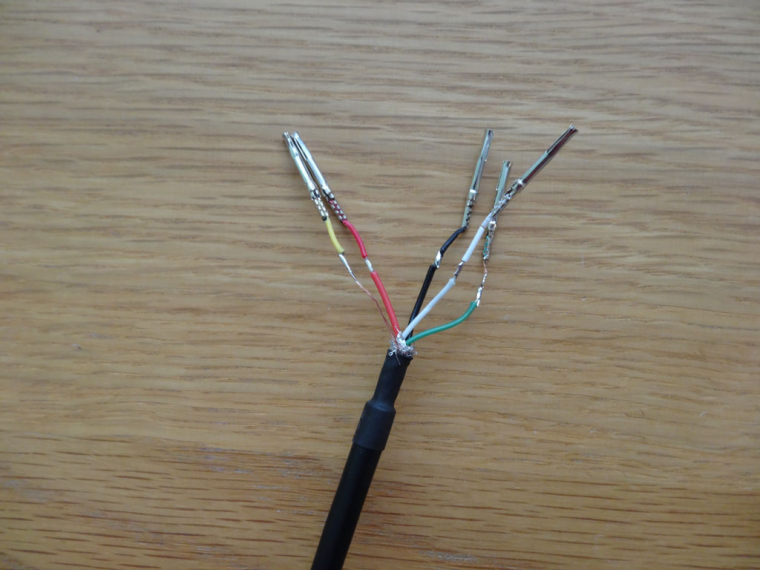
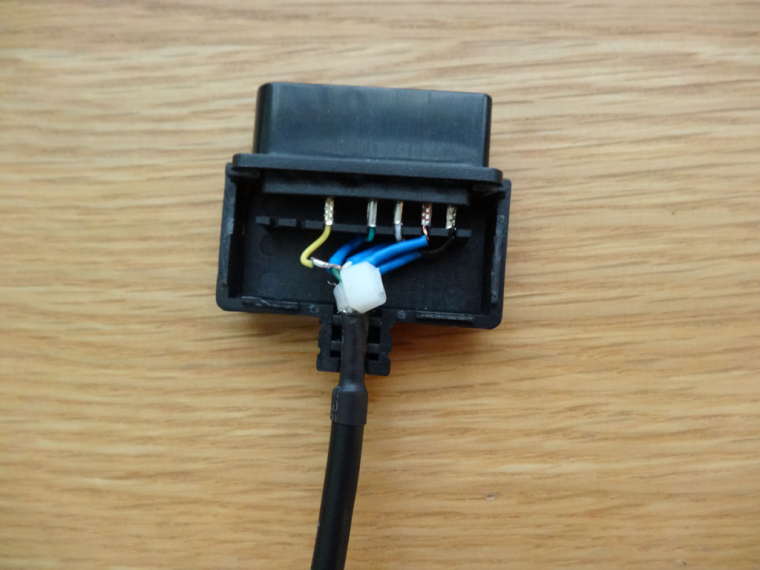
Here is the snes extension lead plug dismantled and the wires cut.
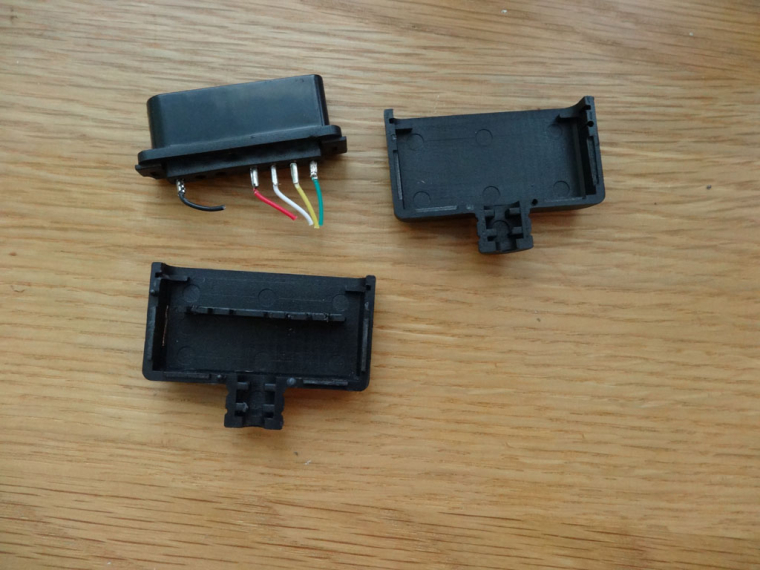
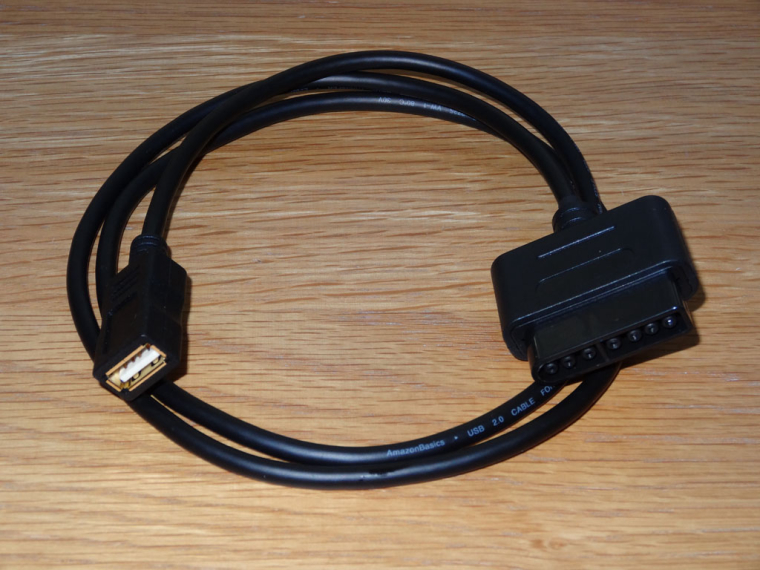
I removed the pins and soldered them to the end of a usb extension cable.
The pins were re-inserted back into the plug and a cable tie was used to prevent the wires from being yanked out.
This is the finished USB to SNES extension cable.(I made 2 of them).
Next USB leads needed to be soldered to the control ports so that they can be connected to the pi.
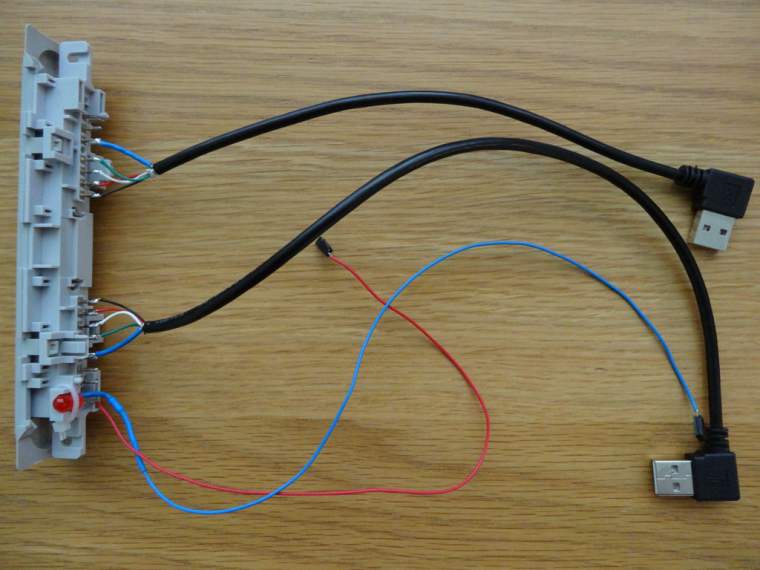
Now I can plug any usb controller into my extension leads and connect them to the super famicom. Not as authentic as using real controllers but it gives me more flexibility and I still get to use the control ports on the console. I've given them a test with my pokken controllers and they work perfectly.
-
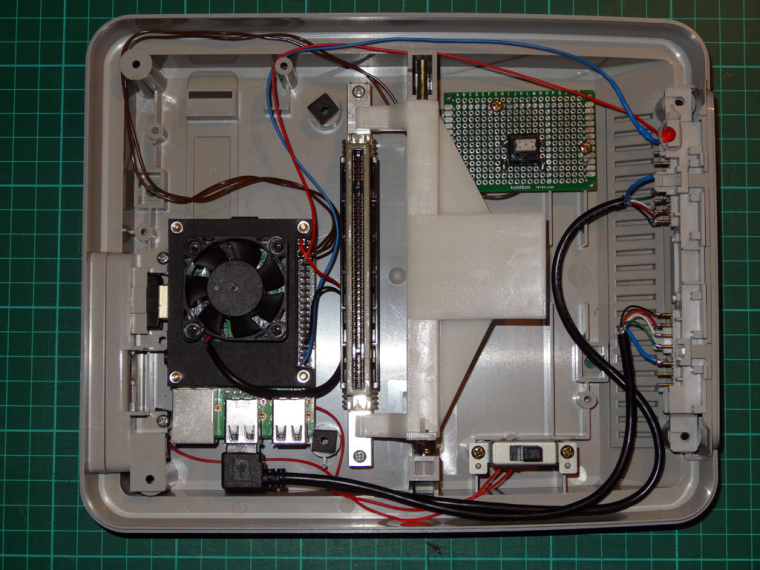
I think I'm almost finished. Just the theme/software side of things to do now.
The pie is connected to the original power input via the power switch - it's actually soldered directly to the underside of the rpi using the test points (I think it was ppt1 and ppt6) as there wasn't room to power it via the microusb.
The switch on the proto board is the original Super Famicom reset switch and is positioned in the correct place so that it is activated by the reset button - this will be used as a shutdown button (the brown wires connect to it).
Finally I added a small fan (but no heatsink), this seems to be enough to keep it cool.
SNES mini/Nes mini/Famicom mini theme developer.
If you'd like to support my work you can donate here: Donate
-
Very cool! I've been wanting to do something similar in the NES build I'm doing. I hadn't seen anyone adapt the ports like that yet. I'm Glad it can be done!
-
Thanks. The ports work perfectly and it gives me more flexibility regarding what I can connect to it. And if I want real snes controllers I can either convert them to USB using the circuits provided at raphnet or buy a SNES to usb converter.
-
@ruckage said in Super Famicom / SNES build:
Wow, this is awesome - any progress on this? I'd love something like this for my build.
I've been working on a concept for a SNES theme for this, I know I will probably end up trying to mimic the snes mini when its released but wanted to see what idea I could come up with myself. This is a very early wip, the background is a placeholder at the momentl. I'm quite pleased with how the SNES itself looks (just needs a few tweaks).
This would obviously be the system view but wouldn't it be cool if we could use the carousel in the gamelist (hint, hint @jdrassa ;) ) , it would be awesome to scroll through game cartridges like this.
Contributions to the project are always appreciated, so if you would like to support us with a donation you can do so here.
Hosting provided by Mythic-Beasts. See the Hosting Information page for more information.