Bubble Bobble themed Bartop Arcade Build
-
Here's my photolog of my first arcade build: A Bubble Bobble themed Bartop Arcade.
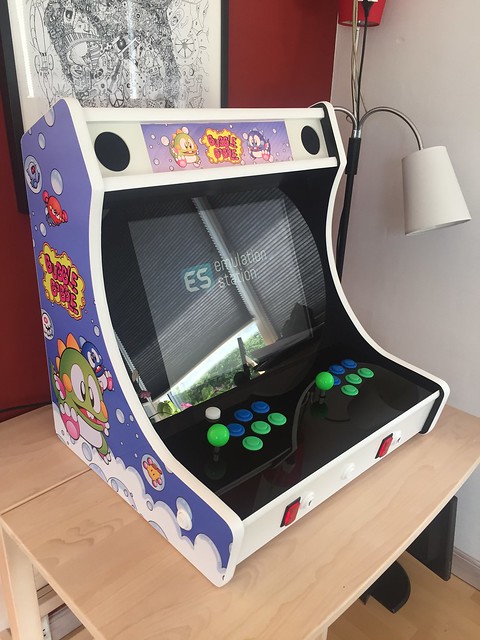
My philosophy in this build is "clean and simple before anything else".
On the Electronics side, the simple and compact design and no active cooling need for the Raspberry Pi matched my philosophy perfectly. Plus, I always wanted a Raspberry Pi project.
The fact that the RetroPie community is so alive and productive is something that really adds to the attractive side of the tiny computer over a regular pc. It's like one big family, right? :-)
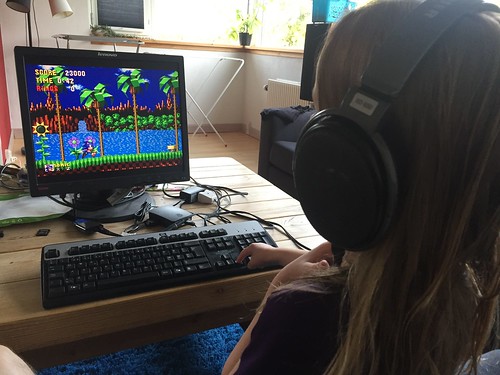
First, a photo of my initial setup, getting familiar with the software, testing that the sound works, and the fun-fact that my 4 year old daughter loved Sonic instantly just adds to the joy of the project. I'm sure she will enjoy a lot of 2-player co-op with her old man! :-)
Buttons and joysticks ordered from ArcadeWorld UK! Instead of buying a generic kit I decided to pay a bit more and pick the brands myself.
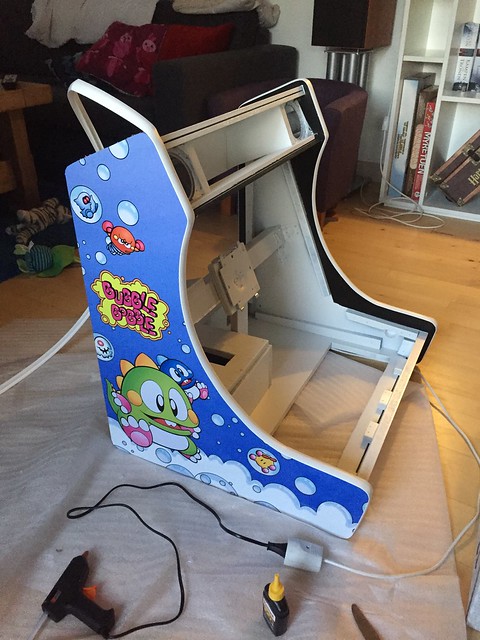
I went with classic arcade buttons in green/blue colors to match the theme, and the IL branded buttons seems to give a good balance between durability, quality and price. For extra quality-feel I went with cherry-switches. I knew that I wanted japanese joysticks but had a tough time deciding between Sanwa and Seimitsu. Because of the thickness of my control panel (19mm), I went with Sanwa JLW-8 joysticks, since the Seimitsu LS-32 seems to be too shortshafted for this.Now for the fun part. Making the cabinet. Went with a generic template from the web and tweaked into my own design by angling the front controlpanel, prolonging the main controlpanel and rounding the edges. Lots of YouTube videos later, I find myself glueing and nailing MDF plates together.
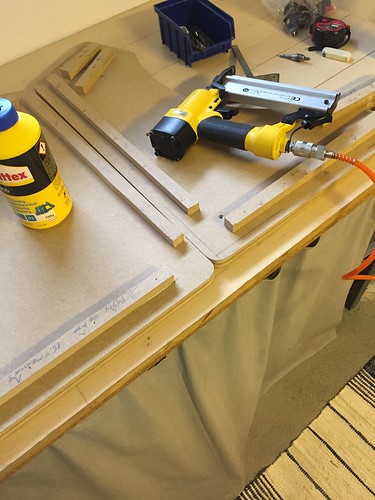
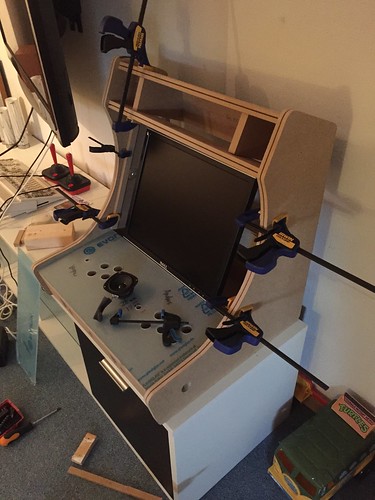
Had a hard time choosing between full marquee and speakers facing down vs small marquee with speakers facing forward and went with the latter. Once a HiFi geek, always.... The front-facing speakers just sound so crisp! Disassembled a Logitech 2.1 system, building the sub into the bottom, will show you later.
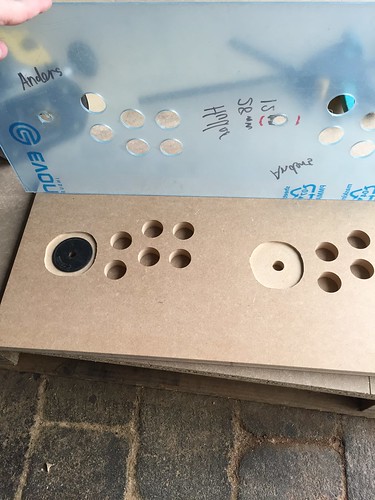
16 mm MDF controlpanel + 3 mm plexiglass on top adding up to the 3/4 inch of the sides. The CP is sporting a classic 6 button lineup. I'm routing out the dust-covers in the MDF, since I really hate the fiddling I can't stop doing when they're on top :-D I'm glueing felt into the niches, boy, those draperunners - I mean dust covers! will be silent now...
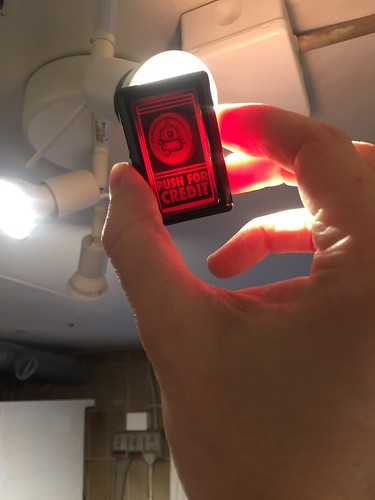
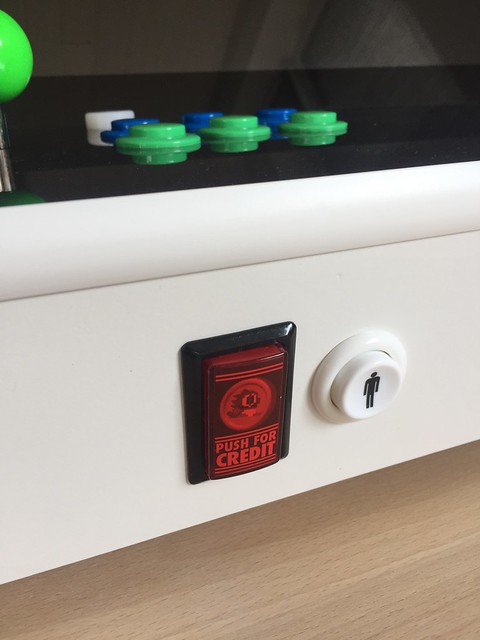
Buttons: Both the convex and concave buttons are nice to the feel. The cherry switches, too. Even less actuation force could be even nicer, but overall I'm satisfied. Here's an early photo of my home-made coin buttons matching the theme of the bartop, and one of my beta-test setup.
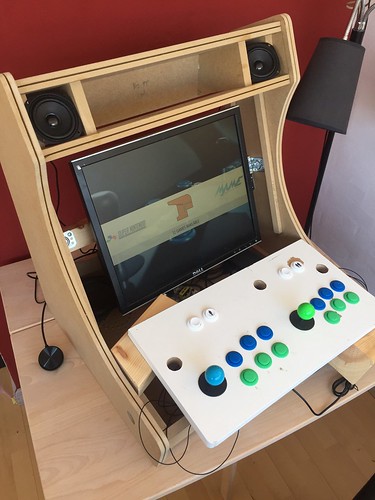
Joysticks: I think the dead zone before activating the microswitch is too large on the stock Sanwas. Like stirring a large pot. I had some new brass-actuators made on a lathe, which is wider both on top and bottom, which improves the feel of responsiveness drastically!
Buttons and joysticks are quite loud "clickety clackety 'ish", but I guess that's just me coming from an Amiga Wico joystick with leaf switches. And I guess in the true arcade, audible clicks is part of the experience.I ended up paying for the cabinet getting spraypainted in a shop instead of rattlecans. The result is pretty neat. Now for the artwork and T-molding!
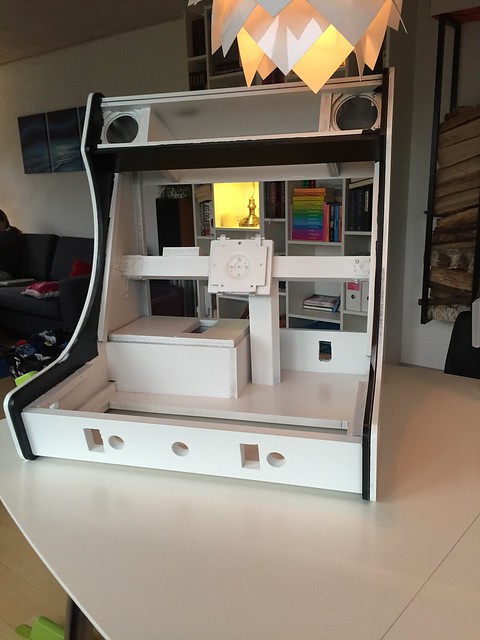
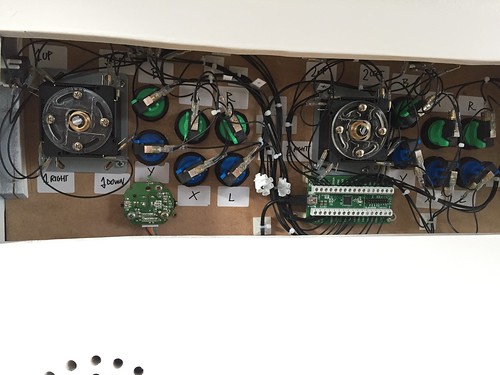
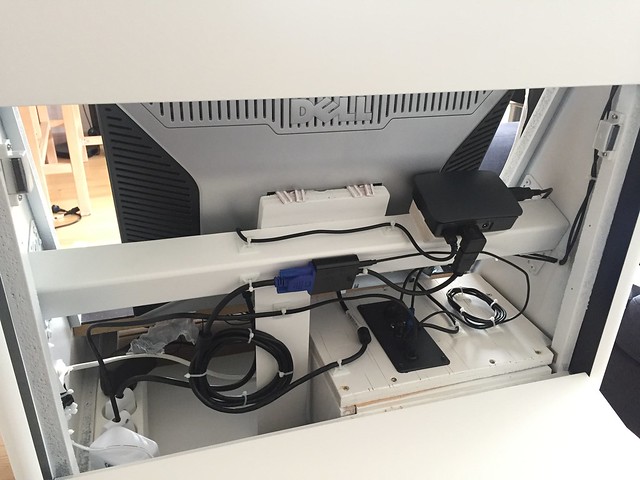
Now for some wiring! Tried getting it as neat as possible, but it's not that easy :-)
First glimpse of the final control panel, the black, white and colored buttons seem to be getting along nicely. I cannot wait to peel the protective film from the plexiglass though! Back door and power plug mounted also!
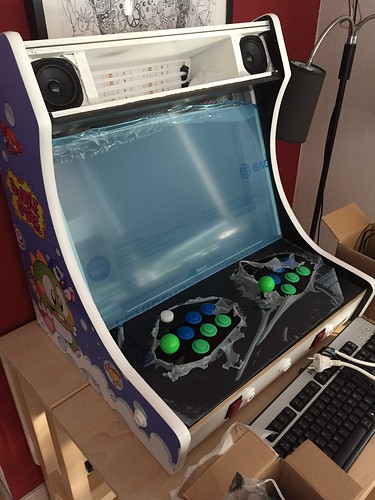
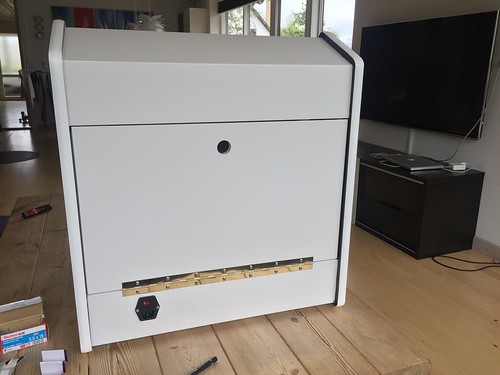
Wiring all done! I think I've done a smart job by giving my wife the microSD and USB, and telling her to hide it and not give it back before she has inspected that I didn't cut too many corners with the finish. Only because I know myself too well to know, that as soon as things are about 70% finished, I tend to start a new project - and that'd be a shame :-)
Finally got my project finished! Here's some final pictures, including a close-up of the Bubble Bobble coin-buttons I made!

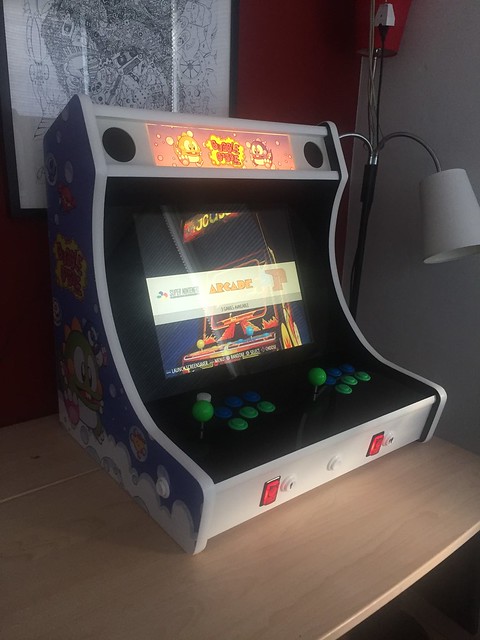
And a night shot, showing the marquee and button lighting! Very pleased with the result. Now it's all about the games!
Please feel free to comment! :-)
-
I would very much like to buy this as a kit...not from those guys that sell Retropie for profit but people like us that does it as a hobby. I do not have power tools for woodworking nor the knowhow to use them. But I can tighten screws. glue things up and solder electronic parts. Please have it available for us.
-
@AndersHP do you have a template for the cabinet that you would be willing to share? This is really cool work. I have a few full size standups but i would like to do 3 or 4 of these that can be lined up all with their own themes! Cool and thanks for sharing.
-
Looks incredible! I was very gun-ho to build a bartop but ended up doing a retro console instead. Maybe the next project. Keep up the good work.
-
@AndersHP looks like a great, solid build by any standard. I appreciate thoughtful details like bottom panel access to the controls. That will come in handy. Well done. Keep up the good work!
-
That looks brilliant, I am planning a build for over the summer, where I live its impossible to go outside for two months since its so hot,
i love the bubble bobble artwork.
Im trying to work out what artwork to use on mine, I think I will go full retro and use painters tape to mask areas off and then make it look stenciled.I like your idea for the speakers, last night I took apart an altec lanseng 2.1 system to see how it would work.
I was wondering how to get the speakers to project correctly, Im a bit of an audiophile, im considering building a dropdown hinged door above the screen that opens up to behind the marquee, and putting a retro 70's car radio up there to run the speakers, then while im at it hide the controls for the lights etc up there, im planning to have lit switches and program an arduino to make them all flashy and stuff, lol
i will watch this thread closely, good work!
-
@ortsac said in Bubble Bobble themed Bartop Arcade Build:
I would very much like to buy this as a kit...not from those guys that sell Retropie for profit but people like us that does it as a hobby.
@TMNTturtlguy said in Bubble Bobble themed Bartop Arcade Build:
@AndersHP do you have a template for the cabinet that you would be willing to share? This is really cool work. I have a few full size standups but i would like to do 3 or 4 of these that can be lined up all with their own themes! Cool and thanks for sharing.
Thanks for the interest, for both of you! I have partially rented some of the powertools, so the manufacturing wouldn't be something I could offer. But it's based on the templates from this site: Instructables
I just rounded the corners and prolonged the control panel a bit, whilst adding an angle to the front of the CP. I could perhaps draw some DWG files of the design if you like, but the PDF's in the link is actually possible to print out on A4 paper and then stitch together - that was pretty accessible I think!
@numotiv said in Bubble Bobble themed Bartop Arcade Build:
Looks incredible! I was very gun-ho to build a bartop but ended up doing a retro console instead. Maybe the next project. Keep up the good work.
Thanks man! I can recommend a bartop, but actually I would like a retro console also :-P
@caver01 said in Bubble Bobble themed Bartop Arcade Build:
@AndersHP looks like a great, solid build by any standard. I appreciate thoughtful details like bottom panel access to the controls.
Thanks! Solid it will be, it's starting to weigh a bit to say the least!
@spruce_m00se said in Bubble Bobble themed Bartop Arcade Build:
I was wondering how to get the speakers to project correctly, Im a bit of an audiophile, im considering building a dropdown hinged door above the screen that opens up to behind the marquee, and putting a retro 70's car radio up there to run the speakers, then while im at it hide the controls for the lights etc up there, im planning to have lit switches and program an arduino to make them all flashy and stuff, lol
i will watch this thread closely, good work!
Sounds pretty cool! Please share, I wanted to do some arduino lighting, but I thought that maybe the project could get out of hand. Maybe in the next build ;-)
-
@AndersHP arduino lighting would be pretty darned easy, if you have illuminated switches, just buy a few sub mini relays that can handle 1A for example, they would be tiny relays, then connect em up to the pins on the arduino.
My cabinet build is getting closer, i got paid, the mrs leaves in a month and I have no woman to moan at sawdust in the house for 5 weeks, GAME ON
-
https://www.iliketomakestuff.com/arcade-cabinet/
this is THE cabinet to make, i want one, but it looks a bit beyond me to start with,
-
@spruce_m00se But what about the software on the arduino? Have you got experience with this?
Only my coin buttons and marquee will be illuminated, but some dimming effect could be cool.Yeah, Bob's arcade project was what got me into this in the first place. Really cool videos!
-
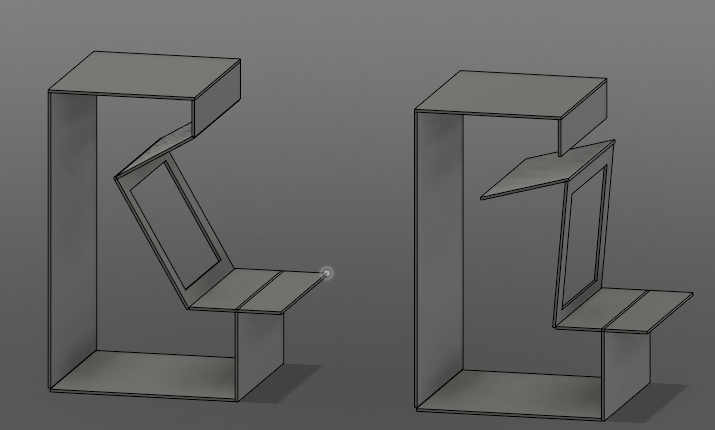
I have been using arduino for about 8 years now, I got my first one in order to make a drone flight computer with it, I can hold my own with it with use from the forums, I can easily program a program to do the lighting that bob has in that video, im not a great programmer but the arduino has a lot of space, so you dont need to be good at cutting code down when using simple code like this.
the pic I have attached is an idea running through my head that I just sketched out. you can see the plate above the screen move between the two images, this is the area i would hide my audio and lighting controls, but it occured to me whilst pooping that I can also use it to solve my issue of being able to have two screen angles, I want to use this as a feature in the bedroom or mancave, which means that the storage idea from bob is amazing, but i want to use KODI to watch videos and listen to music, hence the need for an audio system in it, and obviously the screen angle needs to change when watching video, so i would use dowels in the side panels to hinge the screen and top plate, then basically pull the screen forward and lock it onto the topplate to secure it.
i think it looks feasible and easy, what do you think ?
-
@spruce_m00se Ah, so the dovels are placed on the topplate's back edge, and you then need some kind of brackets that either snaps to the marquee or the top of the screen. What kind would this be?
Just thinking out loud here.. What about making your topplate fixed, and ensuring it is a tangent to the circle with the center in the bottom hinge on the screen. On the back of the screen, you could have a sliding latch in each side, and have holes for this in the two positions.
This way, you wouldn't need to attach/detach the topplate, and I think the gap over the monitor in the KODI position would be smaller, or at least not leave the cabinet open.
I dunno. But the idea for the screen tilting is pretty good.
-
@AndersHP This is wonderful - I've been very much planning to build a Bubble Bobble themed Arcade Bartop!
Where did you get the art done, if I may ask? I was in touch with the XCade folks but they didn't have any similar artwork, and most would be either generic or "aggressive" (i.e. SF2/Ghouls and Ghosts) which would make it not necessarily kid-friendly at home.
Well done!
-
@pjft if you send me your bartop dimensions I can create custom art for you. You can pick out all styles/colors/design. I will provide you with the native photoshop file as well as PDF and jpeg. Getting them printed will be up to you!
-
@TMNTturtlguy You're very kind for offering. :)
It'll likely be a October to December project for me, given that there's a chance we might be moving countries in a few months, so I'll hold off building one until that happens and things settle down again.
Still, when that does happen, and when I do have a definitive size and format, I may certainly reach out to you in case you'd still be up for that! And if not, it is - as always - perfectly fine. :) I am sure one such undertaking would take up a lot of time, so I acknowledge and respect that.
Thank you!
-
@pjft Moving countries! Adventure! No problems, just keep me posted.
I love doing graphic art and design and something like this actually doesn't take that much time or effort. I could put together a similar bubble bobble graphic package in maybe 2 hours. The time consuming part is being picky and never happy! Finding the right high quality images is the trick and that can take time as well, but all in, it is fun and easy to do, so it will be no problem.
-
@TMNTturtlguy You're too kind, and are likely underestimating the time and effort, but I appreciate the positivity :)
I'll keep this on the backlog, for sure. Thank you very much for the openness, regardless of the outcome!
-
@pjft i too may be moving countries soon, i currently live 8000km from home maybe 6k cant remember.
if i make one next week then its a practice run for the real thing when i get home
-
@pjft Thanks! Yeah my daughter really likes the artwork - "look at the sweet dragons" was her initial reaction :-)
I got it printed at http://rockstarprint.co.uk/
-
@Rookervik What would it take to make you create some custom graphics for the coin buttons on my arcade, following my Bubble Bobble theme? :-)
See photo above for dimension proportions and my first attempt. It's not that it's really horrible, but I'd just really love to see what you might do...?
Only if you can spare the time, though :-)
Contributions to the project are always appreciated, so if you would like to support us with a donation you can do so here.
Hosting provided by Mythic-Beasts. See the Hosting Information page for more information.