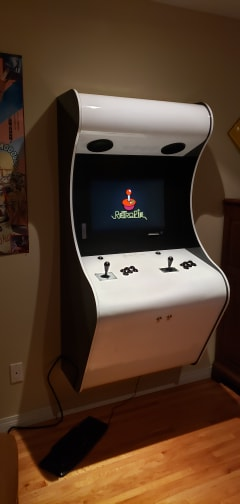
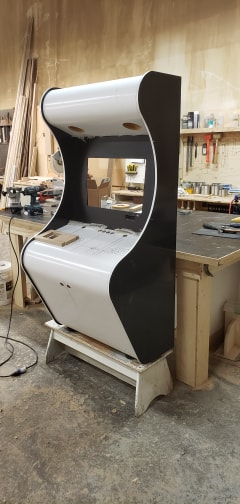
My custom arcade cabinet. Who's got dibs on player one?
-
 )
)
-
Is this really your cab? Care to share some pictures from the inside or building process?
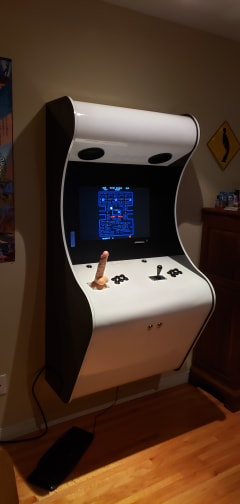
It's surely a matter of taste, but I hope that stick 1 is exchangable, because for me it ruins the overall outstanding design. It also doesn't look very playable.
-
@Clyde Yeah it's mine. Stick 1 is easily interchangeable, not to worry. It's totally playable though. I'll post some other photos below.
-
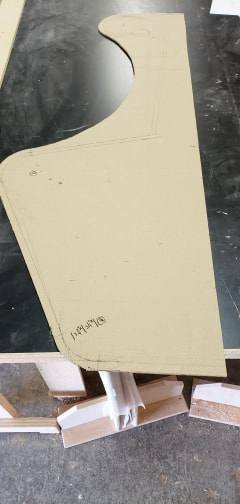
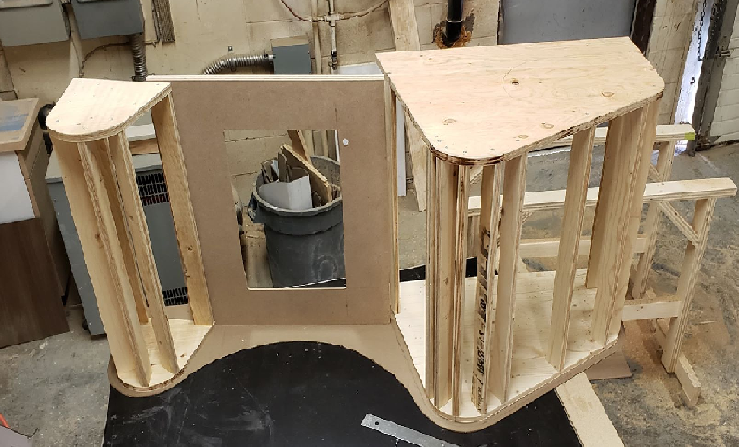
I started with a cardboard template of my gables, starting with my desired dimensions. The radius on this template was a little too tight for the bead board to wrap around it.
-
(I'm really having to lower the quality of these photos in order to post them)
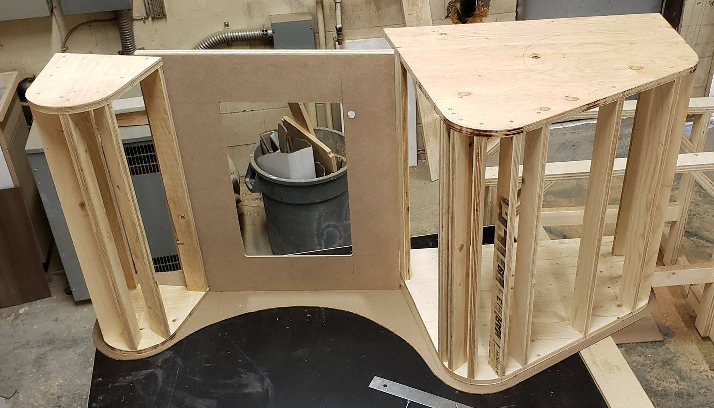
Next I made the frame.
-
Then, because I was only using available scraps from the shop, I used rubber ply for the top, and bead board for the bottom curves. I used 3\4" MDF for where the controls go, and rabbeted the edges so it could sit flush with the 1/2" of bead board.
-
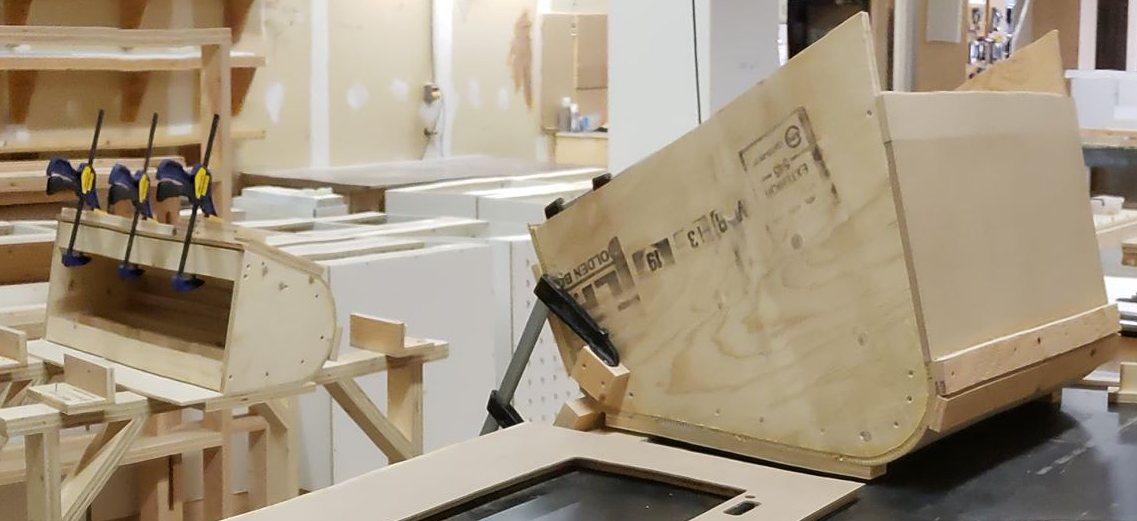
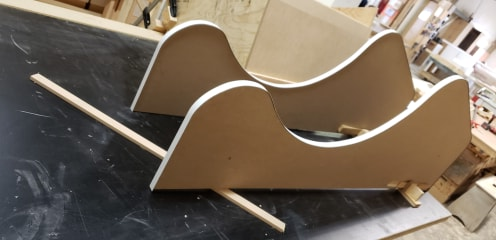
I did the gables last so I could do any final adjustments to the design/size to better match the pieces I had made. I have access to a CNC , but decided to do it by hand
-
Assemble
-
Poke the holes
-
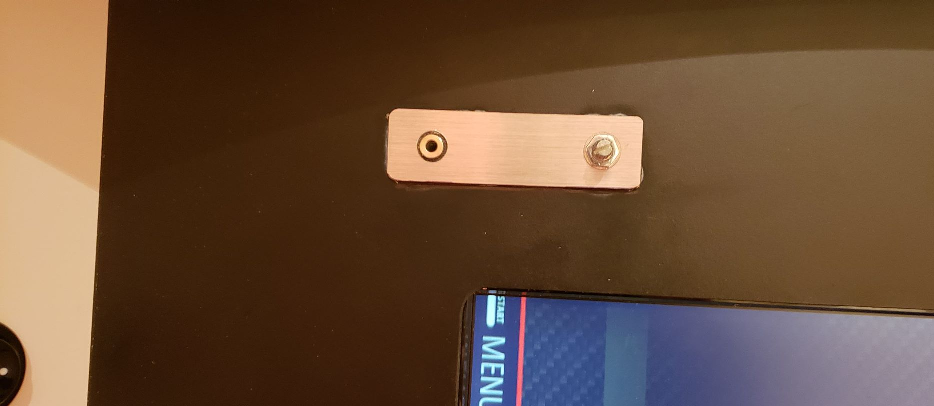
As I was routering out space for the mini hi fi audio amp in the monitor panel so I could poke the volume dial through, there was a little mishap, and the router bit rattled out of the collet just enough to go through the face, So I had a 3" hole. I fixed it with a little piece of aluminum. I ran an AUX splitter from the pi, so I could have a headphone jack, as well as a volume dial for the speakers overhead.
-
Finally, mounted this thing on 2 french cleats. This took a LOT of work. Thinking of making more to sell, but would be cut on the CNC to increase production speed. Interior design would improve.

-
Thanks for the update, it's really impressing piece of work. I do admire anyone who can build something like this from scratch, since I'm the extreme opposite of a handyman. Thus, I built my own upright cabinet from a flat pack kit and used printed car foil instead of paint.
I have two questions about your project:
- Why didn't you use the CNC if you could have?
- What made you choose grey as the base colour? It's rather unusual in the colourful arcade world.
-
@Clyde I do custom millwork for work. Not everyone is highly proficient in woodwork, and that's okay. Thanks for comments!
To answer your questions
-
I wanted this one to be fully handmade, and using the CNC removes that aspect. Less skill involved. I did the curves with a bandsaw, edge sander, and a random orbital sander.
-
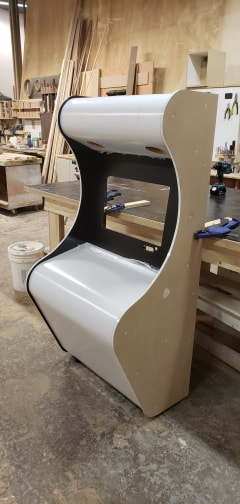
I used black and white high gloss plastic laminate (no grey, I suppose it's just my shoddy photography) for a number of reasons. I was limiting myself to shop scraps so i paid nothing in material costs. I barely squeezed out what I needed from what we had. Laminate Is also durable and more impact resistant than paint or vinyl. I did use matte black paint for the monitor panel to reduce distracting reflections and glare. I almost went with a brushed brass laminate instead of white, but decided the black and white would better fit the retro/modern look I was going for
-
-
That thing is sexy! Super clean and sleek and it's a great modernization of the 50s and 60s view of the future. Well done!
-
@simpleethat said in My custom arcade cabinet. Who's got dibs on player one?:
That thing is sexy!
me: looks at picture number 2 after reading this quote..
me: snickers out loud because I am 12... -
me: looks at picture number 2 after reading this quote..
me: snickers out loud because I am 12...Hahaha! That had me chuckling pretty well as I was scrolling through the post
-
@simpleethat I'm still giggling about it
-
@Skinsey said in My custom arcade cabinet. Who's got dibs on player one?:
- I wanted this one to be fully handmade, and using the CNC removes that aspect. Less skill involved. I did the curves with a bandsaw, edge sander, and a random orbital sander.
Haha, from my unskilled perspective, using the CNC is still absolutely handmade, but with a bigger, slightly more convenient tool. 😄
As for the laminate, it really looks grey on my monitor, not white at all. 😎 The control panel of my cabinet is also coated with laminate, about which the printing shop said "you can dance a waltz on it". 😄
@Thorr69 said in My custom arcade cabinet. Who's got dibs on player one?:
me: looks at picture number 2 after reading this quote..
me: snickers out loud because I am 12...At first, picture #2 was the only picture in the opening post. 😲😉
-
@Clyde Where did you get the laminate from?
-
Nice build. I'll take player 2 please... I also need that workbench/assembly table you have. Mine is too small for my new shop setup and I've been too lazy/busy to build a new one.
Contributions to the project are always appreciated, so if you would like to support us with a donation you can do so here.
Hosting provided by Mythic-Beasts. See the Hosting Information page for more information.