RetroPie forum home
    • Recent
    • Tags
    • Popular
    • Home
    • Docs
    • Register
    • Login

    Pi in a Super Famicom Build

    Scheduled Pinned Locked Moved Projects and Themes
    super famicomsuper nintendobuildconsoleproject
    187 Posts 23 Posters 147.8k Views
    Loading More Posts
    • Oldest to Newest
    • Newest to Oldest
    • Most Votes
    Reply
    • Reply as topic
    Log in to reply
    This topic has been deleted. Only users with topic management privileges can see it.
    • obsidianspiderO
      obsidianspider @edmaul69
      last edited by

      @edmaul69 said in Pi in a Super Famicom Build:

      @backstander i think the eject button would be best if it exited out of the game too as that best simulates what you are doing on a real system

      Right now it does what a real SNES/SFC does if you press the eject button and it's turned on, nothing. ;)

      The power switch activates a lever that locks the game cartridge in place so you can't eject the cartridge while the system is powered on.
      0_1474324678639_cartridge-lock.jpg

      πŸ“· @obsidianspider

      edmaul69E 1 Reply Last reply Reply Quote 1
      • edmaul69E
        edmaul69 @obsidianspider
        last edited by

        @obsidianspider yes. It is how you change games. Just like if it exited back to the menu to, you know, change games. :D

        1 Reply Last reply Reply Quote 0
        • mooseprM
          moosepr @obsidianspider
          last edited by

          @obsidianspider my 'milky plastic' idea didn't work :( I was basically thinking of you were to get something like this

          milky

          which you cant see through from a distance, but once its close to something you can, Then I thought if you put that over the screen, it would be all nice and hidden until it was on. However the pixels being as small as they are on the little tft screen, you actually loose a bit of quality

          blurry

          so scrap that!! I was just thinking out loud

          want to get a tft into your project, look no further than here https://retropie.org.uk/forum/topic/7464/ili9341-tft-screen-guide

          1 Reply Last reply Reply Quote 1
          • meleuM
            meleu @backstander
            last edited by

            @backstander said in Pi in a Super Famicom Build:

            check to see which emulator is running and just kill that one.

            I think the best way to achiev it is looking for the command line used to launch the emulator. It's usually the 4th line in /dev/shm/runcommand.info. ;-)

            • Useful topics
            • joystick-selection tool
            • rpie-art tool
            • achievements I made
            obsidianspiderO 1 Reply Last reply Reply Quote 3
            • obsidianspiderO
              obsidianspider @meleu
              last edited by

              @meleu said in Pi in a Super Famicom Build:

              It's usually the 4th line in /dev/shm/runcommand.info. ;-)

              Wow! I didn't know that runcommand.info existed! That will help so I don't have to create a temp file with what's going on with a given game while I'm playing it.

              From github

              /dev/shm/runcommand.info now contains
              system
              emulator
              rom
              full commandline

              πŸ“· @obsidianspider

              cyperghostC 1 Reply Last reply Reply Quote 1
              • cyperghostC
                cyperghost @obsidianspider
                last edited by

                @obsidianspider This thread is very informative and it's a pleasure to see your progress in your SNES build. Keep up the good work

                1 Reply Last reply Reply Quote 2
                • darthpaulD
                  darthpaul
                  last edited by

                  Really good stuff here and a great build. I want to thank you sharing everything you have been doing, it is going to save me a lot of time and many headaches because I too was looking to use a secondary screen but I want to try and stuff it in a Gamecube.

                  obsidianspiderO 1 Reply Last reply Reply Quote 2
                  • obsidianspiderO
                    obsidianspider @darthpaul
                    last edited by

                    @darthpaul said in Pi in a Super Famicom Build:

                    Really good stuff here and a great build. I want to thank you sharing everything you have been doing, it is going to save me a lot of time and many headaches because I too was looking to use a secondary screen but I want to try and stuff it in a Gamecube.

                    I've seen a few Gamecube builds and it looks very doable. If you do use a second screen, where would you put it?

                    πŸ“· @obsidianspider

                    darthpaulD edmaul69E 2 Replies Last reply Reply Quote 0
                    • darthpaulD
                      darthpaul @obsidianspider
                      last edited by

                      @obsidianspider I would replace plastic circle on the top with clear acrylic and have the screen displayed through it.

                      obsidianspiderO 1 Reply Last reply Reply Quote 0
                      • obsidianspiderO
                        obsidianspider @darthpaul
                        last edited by

                        @darthpaul said in Pi in a Super Famicom Build:

                        @obsidianspider I would replace plastic circle on the top with clear acrylic and have the screen displayed through it.

                        Go for it!

                        πŸ“· @obsidianspider

                        1 Reply Last reply Reply Quote 0
                        • darthpaulD
                          darthpaul
                          last edited by

                          You should create a how-to thread just on a secondary screen. I'm sure there are many "MAME" users who could find many ways to use that second screen on a full size Arcade cabinet.

                          obsidianspiderO 1 Reply Last reply Reply Quote 0
                          • obsidianspiderO
                            obsidianspider @darthpaul
                            last edited by

                            @darthpaul said in Pi in a Super Famicom Build:

                            You should create a how-to thread just on a secondary screen. I'm sure there are many "MAME" users who could find many ways to use that second screen on a full size Arcade cabinet.

                            I'm still working out the kinks, and my code is a hot mess because I don't know what I'm doing, but everything I'm doing with that screen is based on the examples from Adafruit.

                            πŸ“· @obsidianspider

                            1 Reply Last reply Reply Quote 0
                            • edmaul69E
                              edmaul69 @obsidianspider
                              last edited by

                              @obsidianspider it should be done in the disc drive on a gamecube. Hinged so when you open the drive the screen sits vertical.

                              darthpaulD 1 Reply Last reply Reply Quote 1
                              • darthpaulD
                                darthpaul @edmaul69
                                last edited by

                                @edmaul69 I like it, the hinge would have to be modified so the lid opens wider but I'm always up for a challenge.

                                1 Reply Last reply Reply Quote 1
                                • obsidianspiderO
                                  obsidianspider
                                  last edited by

                                  Reddit really likes a Super Famicom clock that someone made. Looks like I'll be in good company once I get back from traveling for work and can get my build "done." (Are they ever really done?)

                                  πŸ“· @obsidianspider

                                  1 Reply Last reply Reply Quote 0
                                  • obsidianspiderO
                                    obsidianspider
                                    last edited by

                                    Before I hack up the cartridge for my screen I decided to do a test cut on a light switch plate. To keep things simple I'm making it 36mm high and 46mm wide.
                                    0_1474668416329_plate-measured.jpg

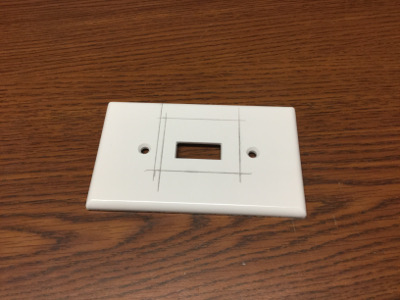
                                    I made a rough cut with my Dremel inside the line.
                                    0_1474668467588_plate-rough.jpg

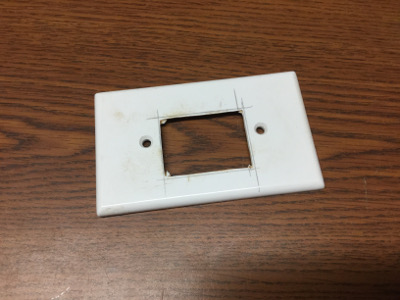
                                    I used a hand file to clean up the edge and get it to the right size.
                                    0_1474668488727_plate-filed.jpg

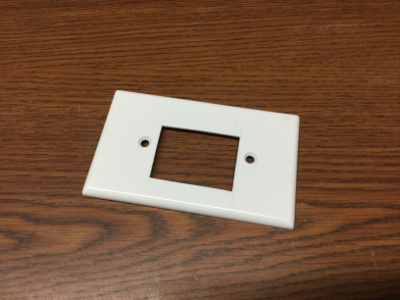
                                    I set it on the screen and it looks pretty good. Not perfect, but pretty good for a first try.
                                    0_1474668512981_plate-with-screen.jpg

                                    Now to try it for real…

                                    πŸ“· @obsidianspider

                                    1 Reply Last reply Reply Quote 0
                                    • obsidianspiderO
                                      obsidianspider
                                      last edited by obsidianspider

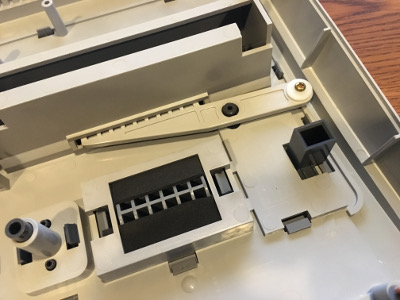
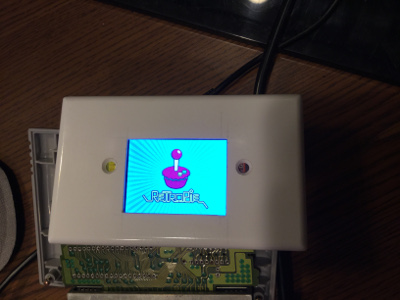
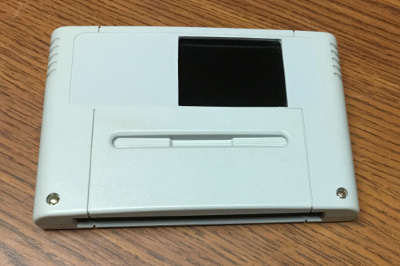
                                      My friend is still working on the 3D printed back panel, so I decided to work on the screen in the cartridge after work today and I am really happy with how it turned out.

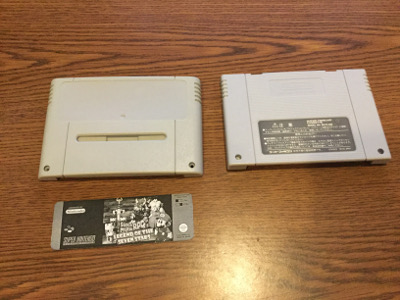
                                      I started by taking the label off the cartridge. I tried putting it in boiling water, but that didn't work well and I didn't want to warp the plastic, so I soaked the label with WD-40 and then used my fingernail to scrape it off. I printed out a label to use as a mock-up so I could get placement for the screen hole.
                                      0_1474687337327_cart-label-off.jpg

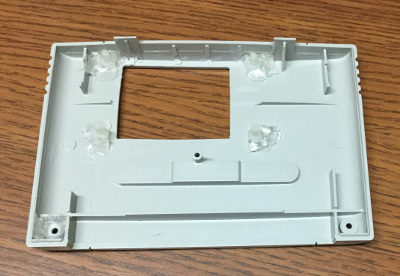
                                      After some careful time with a Dremel and file I got a pretty decent hole.
                                      0_1474687411355_cart-hole.jpg

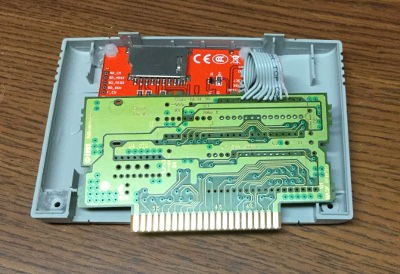
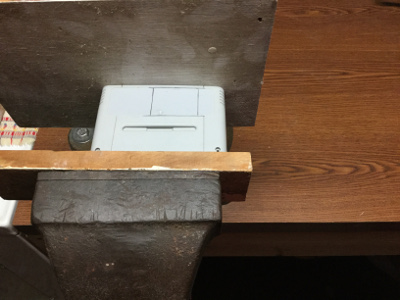
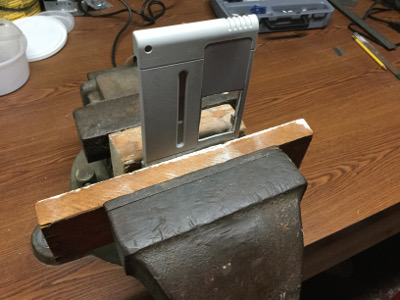
                                      I decided to cut down some standoffs and glue them to the cartridge so the screen would be removable. You can also see the one screw tab that came cracked off while I was filing (I guess the tweaking in the vise must have caused stress on the 20-year old plastic) and I had to slather it with hot glue to give it strength when I put it back in.
                                      0_1474687354288_standoffs-in-cart.jpg

                                      Having the screen removable proved a good idea as my quick disconnects that I planned to use didn't fit when I tried to close things up so I had to remove them and solder the ribbon cable directly to the screen from the cartridge board.
                                      0_1474687431545_cart-apart.jpg

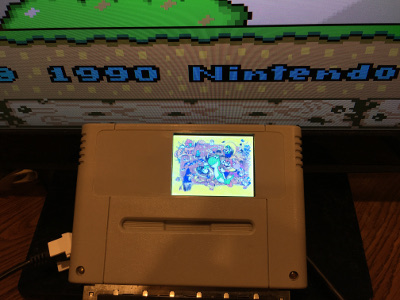
                                      It fit together pretty nicely
                                      0_1474687451277_cart-assembled.jpg

                                      And it works really well! Now I need to design a label.
                                      0_1474687465784_screen-in-cart.jpg

                                      πŸ“· @obsidianspider

                                      mooseprM 1 Reply Last reply Reply Quote 3
                                      • mooseprM
                                        moosepr @obsidianspider
                                        last edited by

                                        @obsidianspider looking slick man! You must have spent ages getting that hole just right. It looks perfect in the picture

                                        want to get a tft into your project, look no further than here https://retropie.org.uk/forum/topic/7464/ili9341-tft-screen-guide

                                        obsidianspiderO 1 Reply Last reply Reply Quote 1
                                        • obsidianspiderO
                                          obsidianspider @moosepr
                                          last edited by obsidianspider

                                          @moosepr said in Pi in a Super Famicom Build:

                                          @obsidianspider looking slick man! You must have spent ages getting that hole just right. It looks perfect in the picture

                                          Thanks! It really did take hours. From the time I started the test cut on the light switch to the actual photos I posted here it was about 7 hours. The hole isn't perfect, but I think it's pretty good for being the second time I've done anything like that (the first time being that light switch mockup), and being freehand.

                                          I used a piece of craft foam to smoosh between the screen and cartridge to take up the gap so the backlight doesn't bleed through since the Super Famicom cartridges aren't flat.
                                          0_1474715757158_foam.jpg

                                          To anyone else who is going to attempt this, what worked well for me was to cut an undersized hole with your Dremel (~1mm inside the line) and then finish it off with a razor blade to get the melted plastic off, and hand file to get it to the right size, make it straight, and smooth it out.
                                          0_1474715422963_in-vise.jpg

                                          0_1474715429810_filing-in-vise.jpg

                                          πŸ“· @obsidianspider

                                          1 Reply Last reply Reply Quote 1
                                          • obsidianspiderO
                                            obsidianspider
                                            last edited by

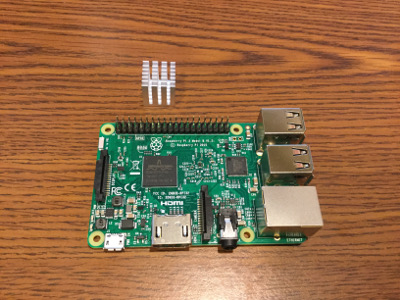
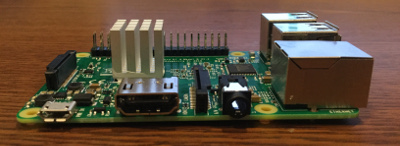
                                            I'm finally back from a two-week business trip and I was fortunate enough to be near a Micro Center this past weekend where I picked up a Pi 3 and an Adafruit 15mmx15mmx15mm heatsink. Since I'm past the "I might fry something while figuring out these GPIO pins" phase I figured it was time to update to a Pi 3 from the Pi 2 that I had been using during the main part of construction. I know there hasn't been a consensus on how much a heatsink will help but for $2 I figured it would probably help some and would give some peace of mind. The 15mm tall heatsink from Adafruit is bigger than the ones that come with most kits, is not much taller than the Pi itself and aside from my thermal paste oozing out a bit, looks pretty good.

                                            0_1476101431128_pi3-heatsink.jpg
                                            0_1476101438215_pi3-heatsink-mounted.jpg
                                            0_1476101444682_pi3-heatsink-installed-side.jpg

                                            Now I'm installing a fresh RetroPie Image on a 32GB micro SD card, and doing the Raphnet kernel patch to address the "northwest" issue.

                                            πŸ“· @obsidianspider

                                            1 Reply Last reply Reply Quote 1
                                            • First post
                                              Last post

                                            Contributions to the project are always appreciated, so if you would like to support us with a donation you can do so here.

                                            Hosting provided by Mythic-Beasts. See the Hosting Information page for more information.