My SNES Build
-
@jackal123uk said in My SNES Build:
Been a while since the last post as I've been busy enjoying the finished article. Not encountered any problems other that one slight annoyance - changing the SD card required some disassembly. Thought I'd try and solve it with a SD card extension cable from eBay.
By some sort of incredible fluke the EXT port on the underside of the SNES is exactly the same width and the same depth of the micro SD connector.Great build.
I could really do with an SD extension like that for my Super Famicom build as gaining access to the sd if needed is a pain. Do you a have an ebay link to the item you bought and has the SD extension worked reliably?
How did you secure it in place in the end? -
@ruckage here is the one I bought, the ribbon cable is a tad long so I've folded it over in places and it's fixed to the EXT port with hot glue - not my preferred solution as it's a little messy, I think next I'll look at mounting to a backing plate that marries up with the original PCB screw holes.
Regarding performance and reliability I've not noticed any issues and so far it's indistinguishable from a card being directly in the pi. If I can find any suitable tools I might check the read/write times to see if there actually is any difference.
-
@ceeeeee4 said in My SNES Build:
thank you so much dude. some great info.
i dont suppose you have any knowledge on doing a similar thing with the genesis/megadrive.. im having a bit of trouble with the db9 driver config.
Not yet but the megadrive was going to be my next project once I get some spare time. If that happens any time soon all post my progress.
-
@jackal123uk
Thanks, I'll get one of those ordered. I may see if it's possible to shorten the cable when I get it. -
Hi @jackal123uk ,
I got my cable, I bought it from Pimoroni in the end as it appears to be the same as yours but much shorter (15cm).
I've fitted it into my case and it works perfectly :)Here's a link to my build thread to show how I Secured it in place: https://retropie.org.uk/forum/topic/11681/super-famicom-snes-build/45
-
@jackal123uk said in My SNES Build:
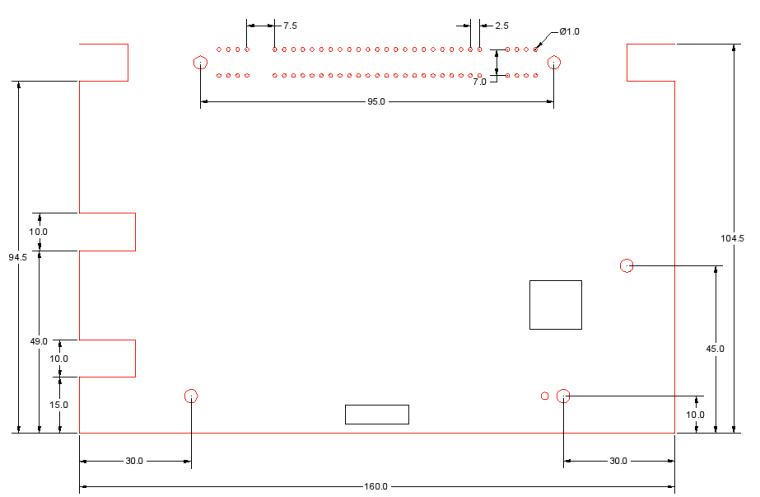
I'm turning my attention to the next version of my pcb, I've decided to go easy on myself for now and leave the USB hub contained in a cartridge although this means I've now to mount the 62 pin cartridge connector onto the pcb. Below are my measurements of the original board - I know the position of the reset switch and the mounting holes to the right are correct as I used these on the last version of my board. Anyone know if there's a more official version of this type of drawing or something that's at least been verified?

It seems like you manage to find information about the SNES board. Do you mind sharing it with us? I'm working on a similar PCB in combination with a ControlBlock for my custom SNES build.
In addition can you also share the files of your custom PCBs?Best, Alexander
-
@ahaertig I didn't find the information per se, I just measured board with a set of digital callipers and modelled it in AutoCad. Pretty accurate as you can see from the photos of my build - everything fits perfectly.
Here's the CAD file for the board and here's the gerber files for the PCB - hope they help you out.
-
@jackal123uk Thanks for your quick reply and for providing the files! I only had a chance to take a look at it today.
Unfortunately the CAD and gerber files do not match. As the gerber files represent your "SNES-RPi Interface v3", which you described in your posts above and I'm interested in, the CAD files seem to be another project called "SNES Controller PCB". In case you still have the CAD files for the SNES RPi Interface, could you also provide them?
Just to assure we're on the same page: what I'm interested in are the PCB footprints of the Reset switch and the 11-pin flat cable frontpanel socket, so I can design a custom PCB. -
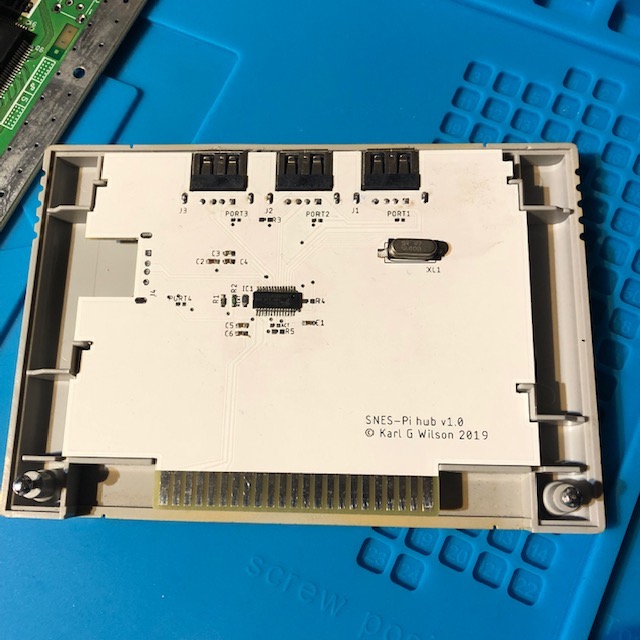
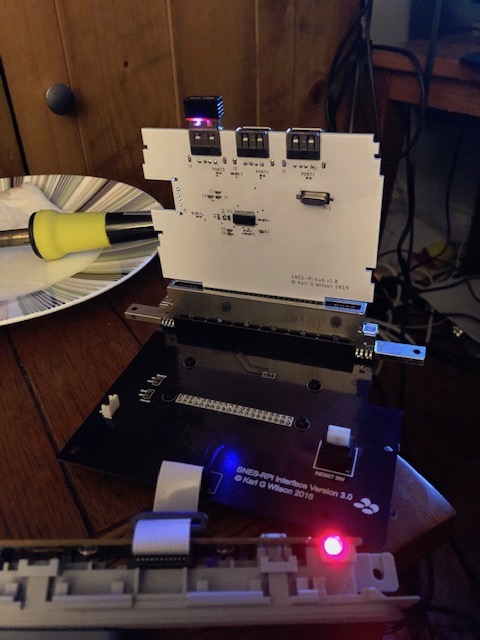
It's been a while but I've finally had a little more time to play with this project. It was always planned to integrate the USB hub onto the main board but I'm not massively experienced in board design or SMD soldering. As such, I thought I'd start easy with just the hub in the cart.


Quite surprisingly it actually works! This paves the way for my next project which is a tad more demanding on the board design front.
If anyones interested in doing the same I used the FE1.1S hub IC which incidentally is the same as was installed in the purchased hub I originally used. In both cases it seems to play well with the Pi zero.
-
@jackal123uk Can you re-upload the back panel, please. Thanks a lot.
-
@Felix-Benz said in My SNES Build:
@jackal123uk Can you re-upload the back panel, please. Thanks a lot.
sure, here it is - hope it helps you out.
-
Hello can you reload the file?
-
Assume you mean the backplate 3d file? If so, here it is:
https://mega.nz/#!UZUXXI7Q!gUF5Ro0m-95JX4E32paMOUTyh7FVfWTXIsawnnZWUg8
If not let me know what you need
Contributions to the project are always appreciated, so if you would like to support us with a donation you can do so here.
Hosting provided by Mythic-Beasts. See the Hosting Information page for more information.