Pi3 Super Famicom Build
-
Hello everyone,
Here is my build project.
My main goal was that I wanted to keep the original look of the system intact.
Finished photo first.
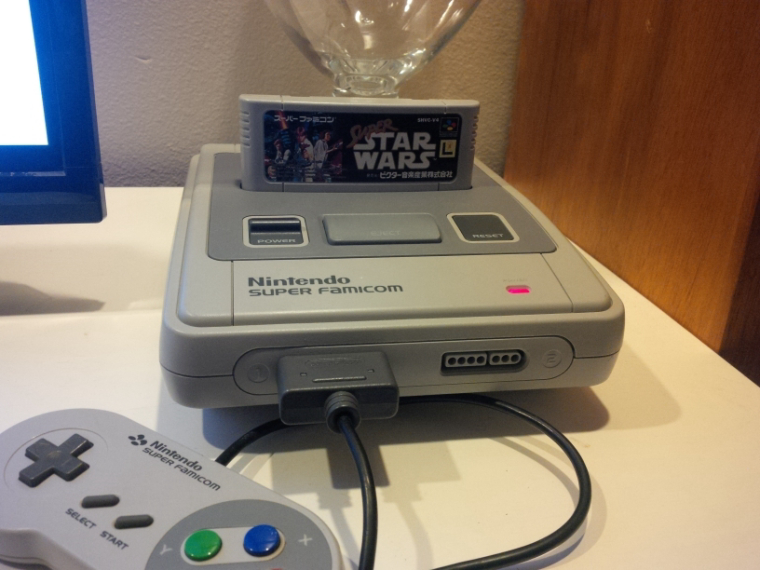
Here is what my build supply list looked like.
- A Japanese Super Famicom.
- Raspberry Pi3
- 16GB micro SD
- 5.25V/2.4A Micro USB power supply
- ATXRaspi power controller
- Panel mount HDMI cable
- Two panel mount USB cables
- Micro USB extension M/F
- USB to micro USB
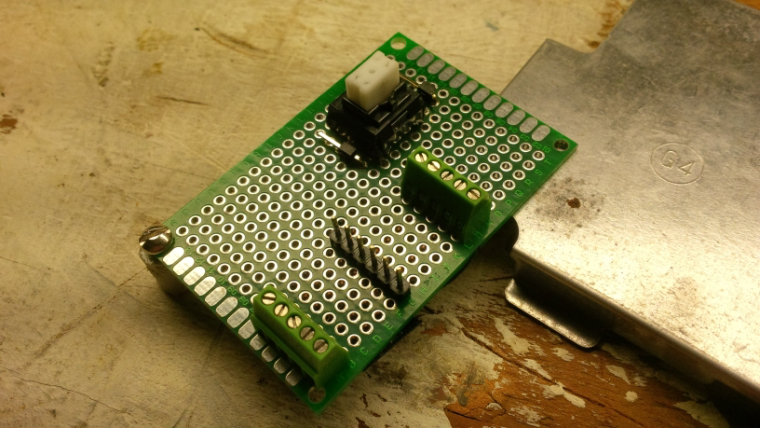
I've seen a lot builds use the Mausberry power controller. I ended up using a ATXRaspi power controller from LowPowerLab for my build.
The main difference is this uses a momentary button not a latching one.
Which worked for me as I wanted to use the reset push button to turn off on on.I was able to reuse the original reset switch from the board. Here is a photo of the board I made to connect the switch and the controller inputs.
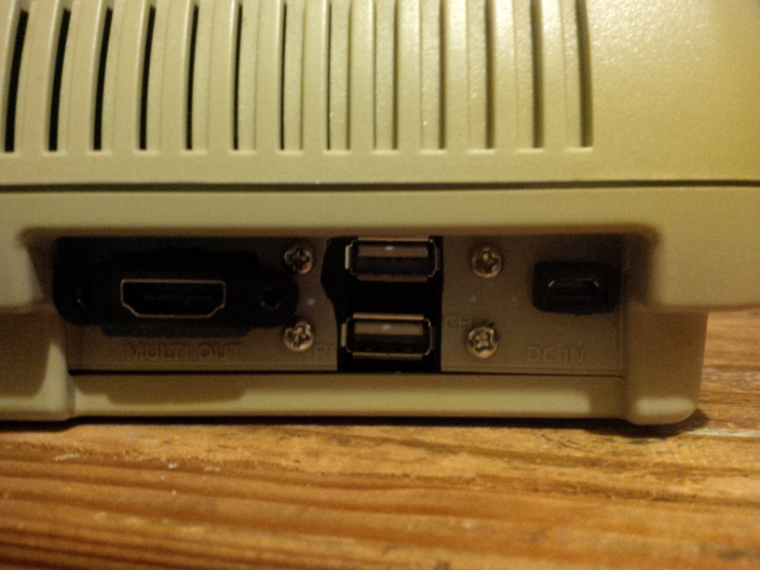
I also modded the back plate to house the HDMI out, power input, and two USB ports.
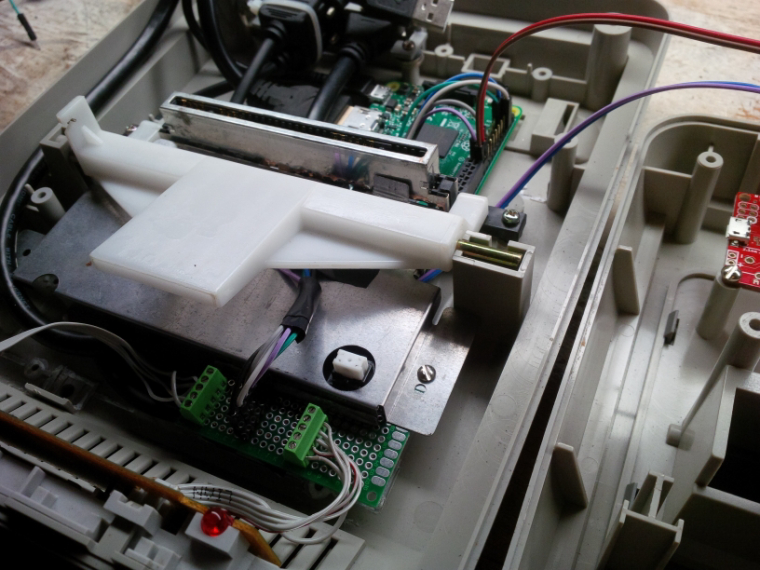
Finding the right way to make it all fit together was the hardest part about the build. I wanted to keep the cartridge slot and eject mechanism working.

Test fitting the parts.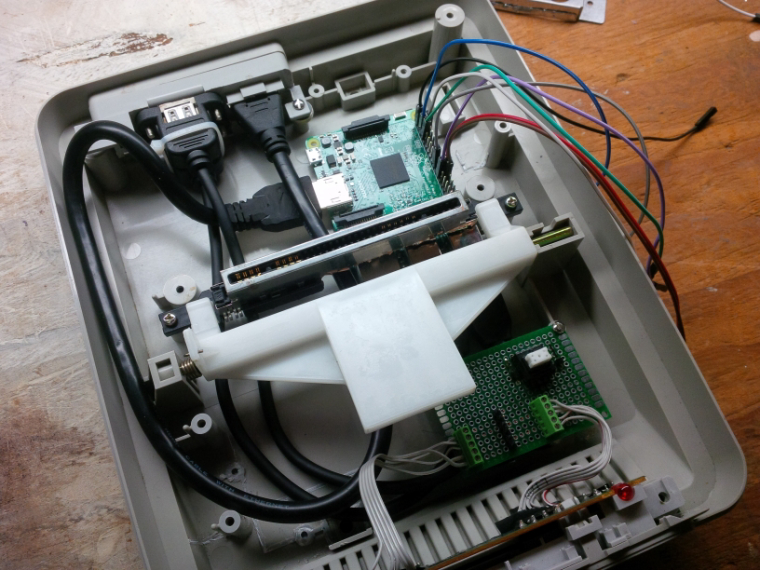
I had to remove some of the plastic from the front right side of the cartridge connector to make room for the USB and Ethernet ports on the Pi.
The connectors on the left side work but I lost the right side in fitting it in this way.
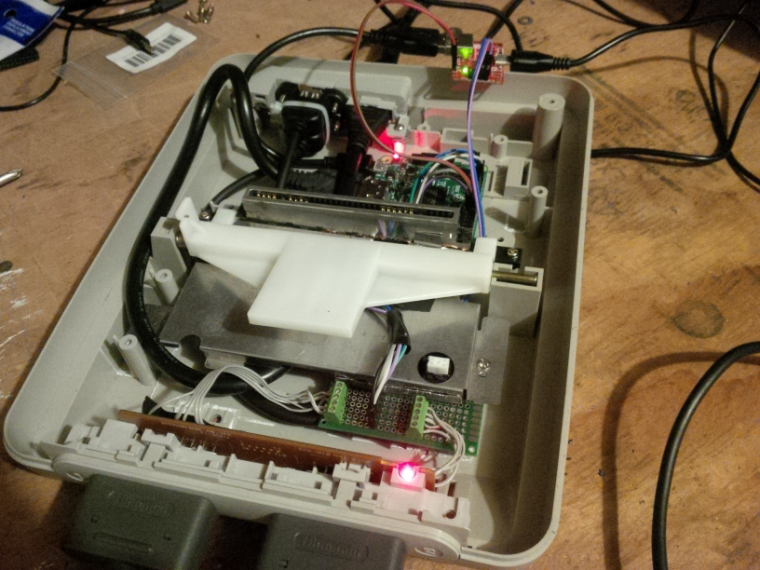
All put together with the eject mechanism working.
It was a lot fun to put this build together and a great learning experience for me.
Thanks for taking the time read this.
-
@SirBilly thank you for shearing your build! I hadn't heard of the ATXRaspi power controller but looks like it is a good addition. Also since I'm in the States, I've never seen a Japanese Super Famicom in real life before.
-
Looks great! Where did you end up mounting the ATXRaspi?
FWIW, the Mausberry can do a momentary switch or a latching one.
-
@obsidianspider said in Pi3 Super Famicom Build:
Looks great! Where did you end up mounting the ATXRaspi?
I put in on the top cover it is the red board on the right. A lot of unused space there.
Sorry I don't have a better picture with it all hooked up. I kind of rushed through the build and didn't take any with the switch installed.FWIW, the Mausberry can do a momentary switch or a latching one.
Thanks, that is what I get for not reading and more just looking at the pictures.
-
This is a great build! I especially like the fact that you managed to squeeze everything in while still maintaining the cartridge eject function. Very nicely done!
I feel as though you could have done a slightly better job with the ports in the back, it looks a bit rough compared to the rest. But overall this is an impressive build!
-
@Morph-X said in Pi3 Super Famicom Build:
This is a great build! I especially like the fact that you managed to squeeze everything in while still maintaining the cartridge eject function. Very nicely done!
Thank you.
I feel as though you could have done a slightly better job with the ports in the back, it looks a bit rough compared to the rest. But overall this is an impressive build!
I agree, I'm surprise I was able to kept it in one piece with the few slip up making it.
It was better for me to just leave it be then lose any more integrity with the plastic.
Contributions to the project are always appreciated, so if you would like to support us with a donation you can do so here.
Hosting provided by Mythic-Beasts. See the Hosting Information page for more information.