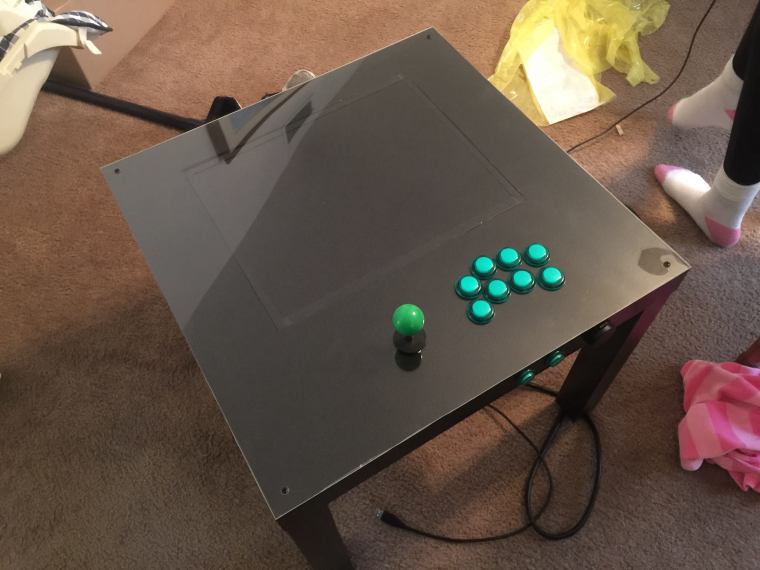
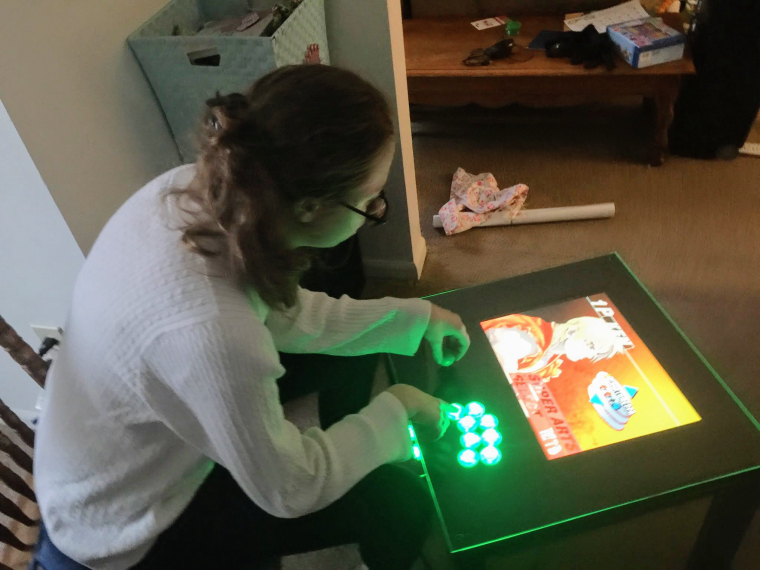
RetroPie forum home
    • Recent
    • Tags
    • Popular
    • Home
    • Docs
    • Register
    • Login

    IKEA hack (PIKEA)

    Scheduled Pinned Locked Moved Projects and Themes
    ikeadiycocktail tablecocktailhow-to
    7 Posts 4 Posters 4.6k Views
    Loading More Posts
    • Oldest to Newest
    • Newest to Oldest
    • Most Votes
    Reply
    • Reply as topic
    Log in to reply
    This topic has been deleted. Only users with topic management privileges can see it.
    • I
      igillen
      last edited by igillen

      https://goo.gl/photos/hxzFX18aBPpewbuz9

      Click near the bottom to read the description for each photo. Would love feedback
      1_1485229935931_A8DAC025-9178-4E79-B9C2-B6C60C8C8B26.JPG 0_1485229935919_1A9A1A2D-D91C-40F4-B3FB-4A403C73E0C0.JPG

      BuZzB 1 Reply Last reply Reply Quote 4
      • BuZzB
        BuZz administrators @igillen
        last edited by

        @igillen Very nice! :)

        To help us help you - please make sure you read the sticky topics before posting - https://retropie.org.uk/forum/topic/3/read-this-first

        I 1 Reply Last reply Reply Quote 1
        • obsidianspiderO
          obsidianspider
          last edited by

          Nicely done! Do you find that you need to run the fan often? Is it temperature-controlled or is it on all the time?

          📷 @obsidianspider

          I 1 Reply Last reply Reply Quote 0
          • I
            igillen @BuZz
            last edited by

            @BuZz thanks!

            1 Reply Last reply Reply Quote 0
            • I
              igillen @obsidianspider
              last edited by igillen

              @obsidianspider honestly, I'm not convinced it needs the fan at all seeing as I don't overclock at all, but I figured better safe than sorry. The way the fan is set up it just runs anytime the pi is on. I wasn't even aware you could set it up otherwise. I did set it to run of the 3.3v pin instead of 5v so it runs much quieter.
              Not a very elegant solution but it suits my needs. That said I'm always open to suggestions or even some constructive criticism.

              1 Reply Last reply Reply Quote 1
              • GtBFilmsG
                GtBFilms
                last edited by

                That's a very nice project!

                How do you stop the monitor sliding around when the table is moved?

                I 1 Reply Last reply Reply Quote 0
                • I
                  igillen @GtBFilms
                  last edited by

                  @GtBFilms I left in as much as the cardboard filler inside as I could to help in not slide while still letting the cables get where they needed to.

                  We cut it so close to the screen dimentions that overall it's a very snug fit. I suppose if you were really worried about it sliding around you could drill holes in the bottom of the table to match those found on the back of the monitor where I removed the mounting plate piece. Then it would just be screwed into place. Another alternative would be to put blocks in place on the table that prevent the screen from sliding rather than relying on the cardboard. So far I havent had any problems though

                  1 Reply Last reply Reply Quote 1
                  • First post
                    Last post

                  Contributions to the project are always appreciated, so if you would like to support us with a donation you can do so here.

                  Hosting provided by Mythic-Beasts. See the Hosting Information page for more information.