Pi in a Sega Genesis USB Hub Build
-
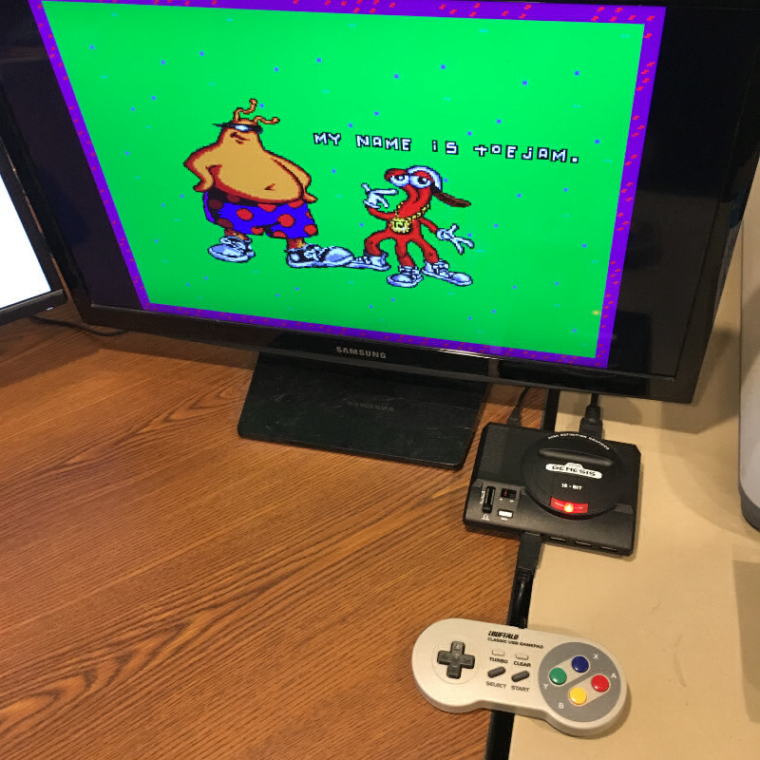
My switch arrived Tuesday and I was able to get my build complete on my lunch break today.
The switch I ordered was a very good fit size-wise for the Genesis USB hub's slider.
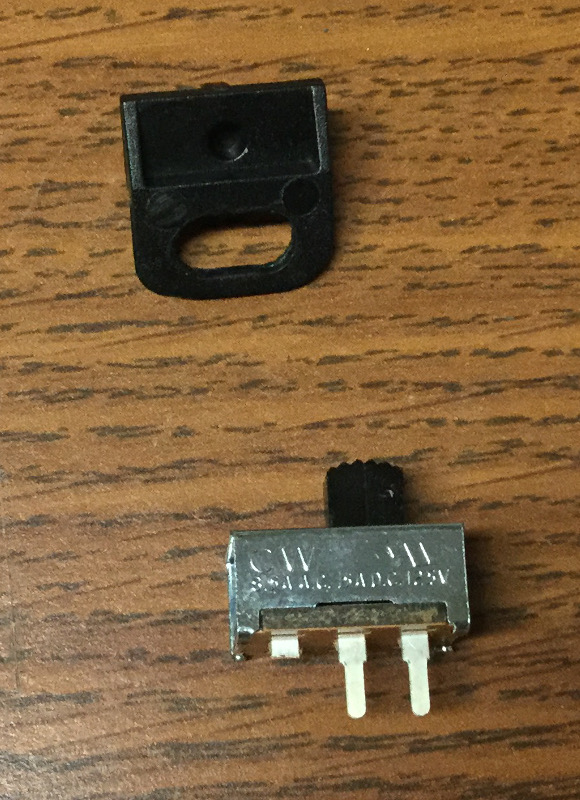
In order for the switch to fit the case I had to remove half of the nubs that the lock the slider in place. I did this with an xacto knife.
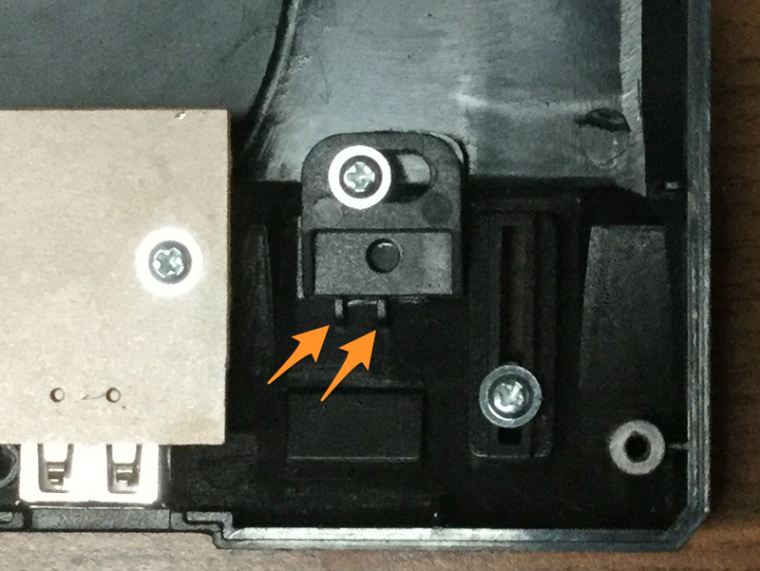
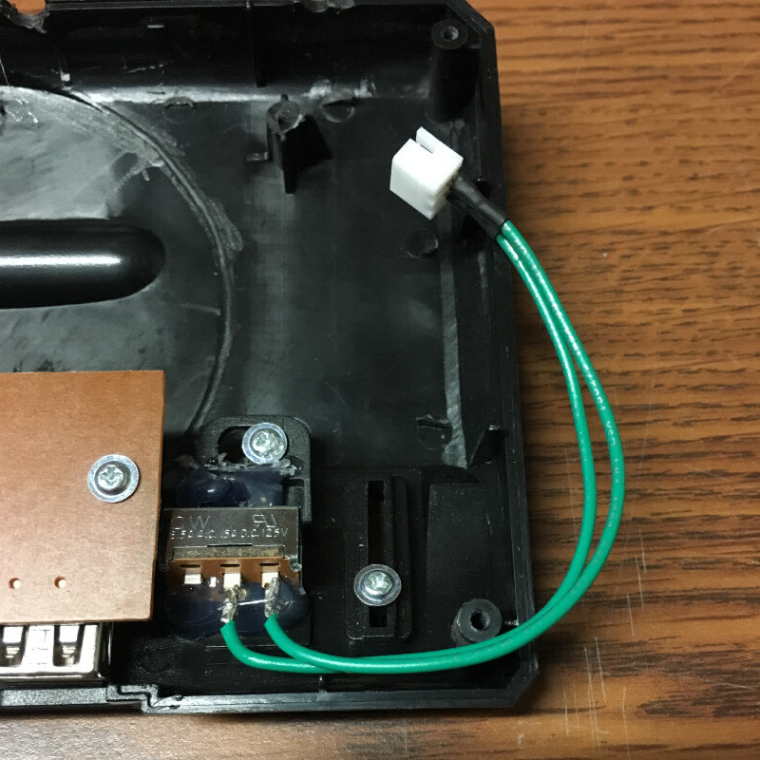
I used hot glue to secure the switch to the slider first, then I soldered the power wires to the switch, then I glued the switch to the case. I had to trim a bit of the glue as it caused some binding with the slider, but overall it seemed to turn out pretty well. I chose to use a JST connector to make taking the case apart manageable in case I want to swap out the SD card or if something breaks. I'm not sure how durable the hot glue will be, but with quite a few on-off cycles, it seems to work pretty well.
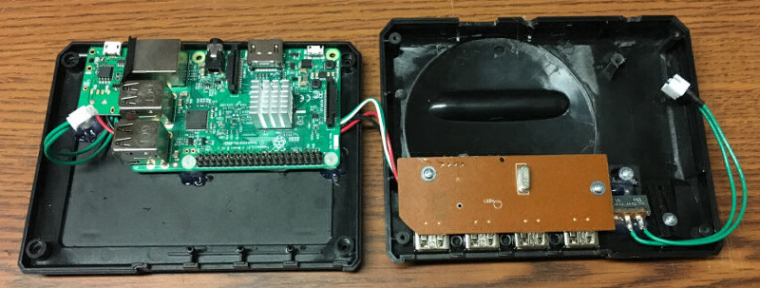
It's about time that I actually finished at least one build that I started this year.
-
@obsidianspider awesome job. Awaiting my switches. Quick question. It seems you don't have the mausberry USB plugged in. Did you just solder the pads directly due to it wouldn't fit other wise? I have the zero, would this same setup work with the zero as well? Mausberry just got restock and I'm going to make a purchase but want to make sure I'm getting what I need
-
Looking good. I think I'll order my switches from them too. @obsidianspider - Did you happen to test all 4 USB hubs to see if they are identified left to right or not? I haven't taken mine out of the box yet, and actually don't have 2 USB controllers to test with. I'm curious to know if the left port is recognized in RetroPie as Player 1 and the next one as Player 2, or if some finagling is required.
Who's Scruffy Looking?
-
@hansolo77 I haven't tried multiple controllers to see how RetroPie tries to number them, but I did plug in a controller, keyboard, and two USB drives concurrently and the Pi didn't flinch.
-
@hansolo77 if you order the switch i posted you dont have to cut the tabs to make it fit. plus you can solder and desolder wires easier.
@obsidianspider awesome job finishing the genesis.
-
Forgive me, I read all the posts in the thread, but at the end I didn't understand why you went with the mausberry switch instead of just A switch like you used in conjunction with the mausberry?
Looking great! -
@doobdoob the mausberry does a safe shutdown to avoid sd card corruption. I do a shutdown in the emulationstation menu before i turn mine off so i dont care too much about the mausberry. Plus the way my apple iie pi is designed i cant even use one if i wanted to.
-
@edmaul69 I wondered if something like this was possible. Is there a possibility to make a sort of hot key to power off? Maybe something like d pad left+select for safe shutdown?
-
@antricluc i know you can by adding a button to the gpio and adding the python script for it. But i dont think there is any way with a controller
-
@edmaul69 I thought so, just wanted to check.
Thanks! -
@obsidianspider Well done!
I hope if i get time I can start (and finish) the project, too.Do you habe any issue with the cooling? I think a small fan in this closure would be usefull if it is in heavy duty.
I wish you all a happy New year....
May the farce be with you¡ -
@cyperghost I have zero cooling issues, but I'm not sure what you consider heavy duty usage. I don't do any N64 stuff on it, and it's not overclocked.
-
N64 and PSP would be heavy duty. So I am looking forward into a non cooled build.
-
@cyperghost Yeah, I played some Lunar (Sega CD) for a few hours with no issues, but PSX, PSP and N64 are things I haven't messed much with.
-
I guess I need a few pointers when it comes to installing the switch. I am waiting for Mausberry to get some more power adapters in stock, so in the mean while I spent my day off today making the case modifications to my Mini Sega. I took your advice and got some files, and did a few very small dremel cuts to get the work started. Switched over to the files and used them for the rest of the work. You're right about the practice. I need lots more of it, but the holes I made look a HECK of a lot better than they would have if I used a cutting wheel the whole time.

When I took my case apart, the posts between the USB plugs wouldn't come loose and broke. I didn't damage the outside of the case in anyway though, so it looks ok. When I messing around inside though, trying to get the cut outs, the wires to the LED broke from their contacts. So once I was done cutting, I went back over the contacts with my soldering iron and fixed it. Made sure it worked, then covered them up with some hot glue to help make sure it doesn't break loose again. I then went back over everything and made more hot glue fixes. Everything was still working. I then cut the USB plug off (fully dedicated now) and began soldering it to the Pi pads directly. Using your guide, I wired up the RED and BLACK to the +5 and GND on the GPIO. I then ran the GREEN and WHITE to their pads. Booted up, and everything still works (whew!). Since I problably won't be doing much else with the GPIO (other than running the wires for the Mausberry) I decided to go ahead and hot glue up the solders to make sure they won't come loose either.

So here's where I'm at now. Trying to figure out how to get the switch working. I ordered those same switches you got Obsidianspider. I looked at your pictures and saw what you did. I took my box cutter blade and cut off the 2 little posts to the switch, then hot glued the switch to the, well, switch. I figured out that the best way to do it was to have the Case switch to ON, and then the new switch to the position that had the 2 pins. I then switched the Case OFF, and saw what direction the switch moved.. It's hard working backwards like that.. Once I figured out the orientation, I glued the Case switch to the new switch, with the new switch's black piece centered on the Case switch, right above the little hole. I then waited for it to dry, and gave it a go. Of course, the whole thing moved, not just the switch. So I took the whole thing apart, put some glue down, and re-screwed the case switch back on. Waited for everything to dry, then gave it a test. It sort of worked. There is way too much give in the entire setup. When I go to switch the Case OFF, the new switch only moves a little bit. Then when I go to switch it back ON, the new switch just moves a little bit again and not all the way over. So I dont' know if it'll work or not. I did discover an alternative, though it's not pretty. If I remove the Case switch, and just slide the new switch up in it's place, it works. But I'll lose the nice look of the real switch, plus I have no idea how I'd mount it, since hot glue seems to not be the key ingredient here.
Any tips or suggestions?
-
@hansolo77 I'm having a hard time visualizing what you've got going on with the power switch area. If you can post a picture I can try to help. Otherwise I'd say try to look at what I did with mine and what @edmaul69 did with their switch. You want the plastic switch slid all the way over to "ON" and the electrical switch in the "ON" position and then slide it as far over to the side as you can, so it's closest to the USB hub's board, not centered on the switch area. That way when you move things you don't bump into the volume slider area. Sorry that this is hard to articulate, but pictures do really help a lot.
-
I took it all out and put it the way it was before. Aside from the missing support pins, you'd never know I was fidgeting with the switch in the first place. I'll try and get some pictures of the switch area Tuesday (my next day off). I thought I explained it well enough, but maybe it got lost in the long winded details. :)
Essentially, I discovered that hot glue isn't strong enough to mount the switch to the case. It's too "gooey" (for lack of a better word) to prevent the "new" switch housing from moving when the "old" switch was being thrown. Even after I let it dry for an hour, the whole thing "wobbled". It was enough that I noticed the "new" switch wasn't making contact inside it's housing. The whole housing was was moving, not the little black switch part. Is that better? I think I need something like superglue, or maybe something to have on either side of the housing to prevent it from moving.
-
@hansolo77 you need to apply hotglue to 3 sides. You really need to use high temp hotglue which also requires a high temp gun. Also smearing the glue makes it stronger than just blobbing it on. You want to get it to adhere to the surfaces not just sitting on top of it.
-
@hansolo77 mausberry has restock on the switches. Got an email not long ago. Just ordered me 3
-
@antricluc Cool... I actually signed up on their page for a restock notice too, but never got it. I'll order mine right away!
@edmaul69 Thanks, I'll try doing this again tomorrow.
Contributions to the project are always appreciated, so if you would like to support us with a donation you can do so here.
Hosting provided by Mythic-Beasts. See the Hosting Information page for more information.