How to shrink a retropie image?
-
@kevlar Under Windows you need specific software to access Linux partitions (ext2/ext3). I haven't tried it but Ext2 Installable File System For Windows (free) should do the job. Still you then need to write the image (e.g. with win32diskimager) to a 128GB USB stick or SD, remove unwanted files until size is less than 64 GB, and create the new image file.
-
How are you accessing the partition currently in order to remove those roms? I'd imagine that even after freeing up enough space, the partition would still need to shrink before re-imaging and flashing in a 64GB drive.
If your using windows, MiniTool Partition Wizard might be able to shrink this partition down for you. I am unsure if linux partitions are compatitble though, but it's worth a shot.
-
Hi there,
I have used this article and an Ubuntu VM to shrink SD images. It turns out all 32GB MicroSD are not exactly the same size.
http://www.aoakley.com/articles/2015-10-09-resizing-sd-images.php -
The only thing that worked for me:
https://github.com/Drewsif/PiShrink -
@GaM3r2Xtreme , I'm using 7zip to extract everything from the image file, thats the easy bit though.
-
Oh I see how your doing it now, @kevlar . So your using 7zip to delete these files out without flashing the .img to some drive that could handle at least 128GBs.
Seems like PiShrink would be a viable option, but your not running on linux. If you have these, you could mount a USB hard drive that contains the edited .img file to your raspberry pi, install PiShrink from the git respatory, and then run the PiShrink
Another option is to flash that edited .img file to another empty drive, and then shrink the partition down with a program like MiniTool Partition Wizard, and then back up those partition to a new .img file. This is a little trickier than the first option.
I can't seem to find an easy program such as PiShrink for windows sadly. Maybe having an emulated linux environment might work. This link from the "How to Geek" blog explains how to get a bash terminal onto windows 10. Maybe install that, then install PiShrink on the virtual environment and run it to shrink the .img file.
-
Put VirtualBox in your Windows Box, install a Linux distro eg [CentOS 7 (Server Gnome)], add VirtualBox Add Guest Share folder (to share a Windows folder within Linux), copy your img from there to the Linux virtual machine and PiShrink
-
@Pyjamarama OH YES. I've been searching high and low for months and just found this post. Every method I found before this involved creating a dupe of the image which was a huge pain, but this method doesn't need to dupe anything unless you want it to. The only Linux I have is on a virtual machine with 100GB total space, so duping a 64gb image was otherwise impossible. Thanks!
-
This thread was a while ago, but I thought I'd follow the suggestion from @pyjamarama and after a bit of head-scratching and watching YouTube videos I finally got this working on my WIndows 7 PC.
I thought I'd document the steps I followed in case it is of use to someone else.
Apologies for the length, and the number of images, but I find that helps me when following these things. If it's not appropriate for the forum let me know and I will delete it.
Usual disclaimers that you follow any of these steps at your own risk, etc.
Issue:
- SD card img file is large - the capacity of the card, regardless of how full the card actually is.
- All SD cards have slightly different capacity, so often an image made of one card won't fit on another card, even though the capacities are meant to be the same.
- Storing backups of SD card images uses a lot of space, with each image being the full card capacity.
- Pishrink can reduce the size of the image file but only runs in Linux. It could be run on the raspberry pi itself but would take a long time to reduce the size of larger images.
I mainly used a good video tutorial at:
However the VM software they use wouldn't install on my PC, so I varied it a bit:
I used:
Linux Mint: https://www.linuxmint.com/download.php
Pishrink Script: https://github.com/Drewsif/PiShrink
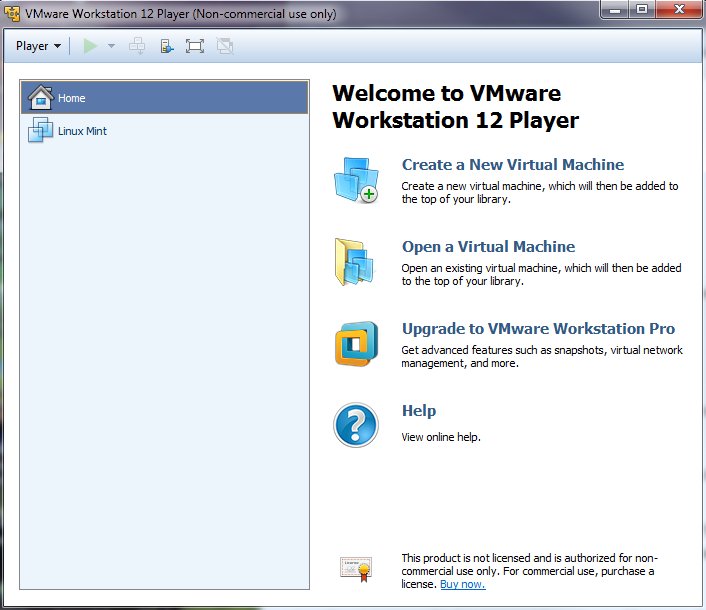
VM Player: https://www.vmware.com/go/downloadplayerI used Win32DiskImager to make an image file of my micro SD card.
Install VMPlayer.
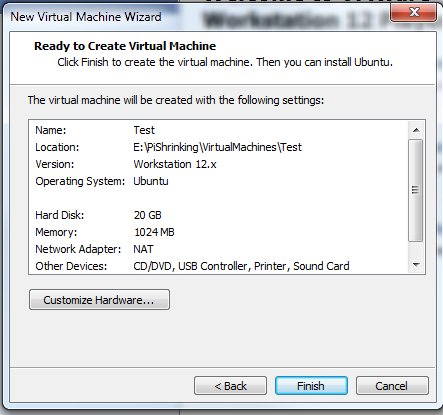
Select 'Create New Virtual Machine'
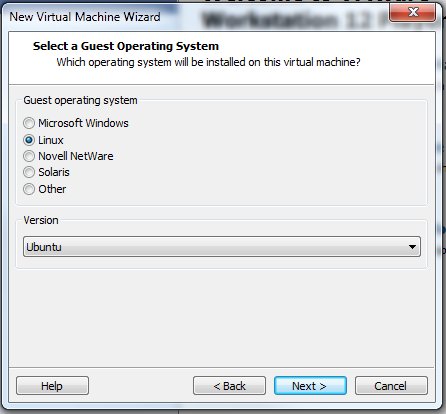
Select 'Installer disc image (iso)' and point to the Linux Mint ISO

Leave it as 'Linux - Ubuntu' operating system
Give it a name and a location for the Virtual Machine
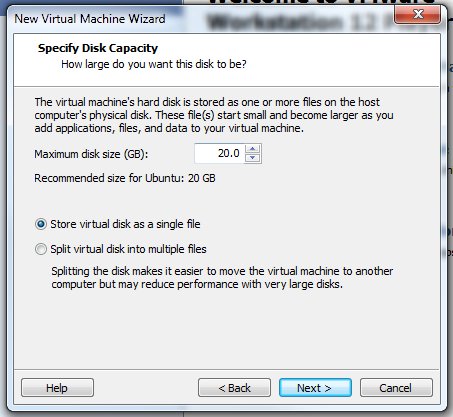
20GB Hard disk, single file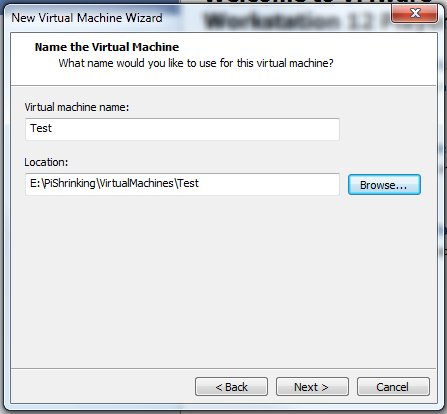
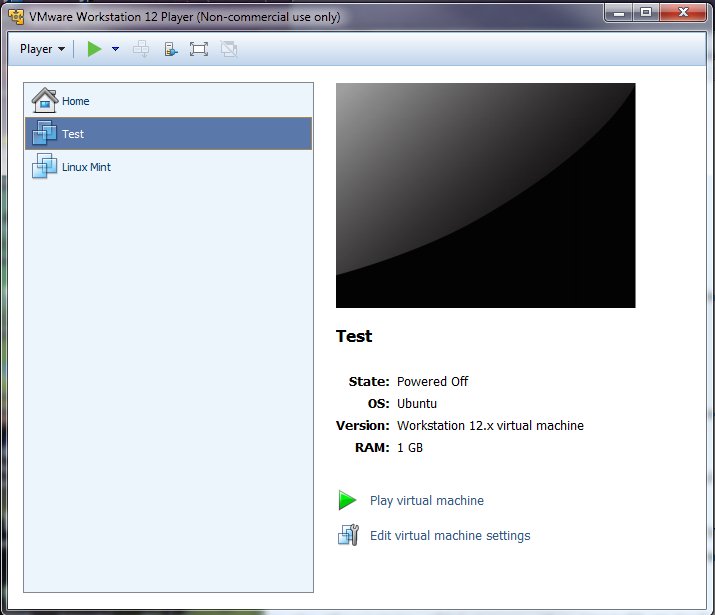
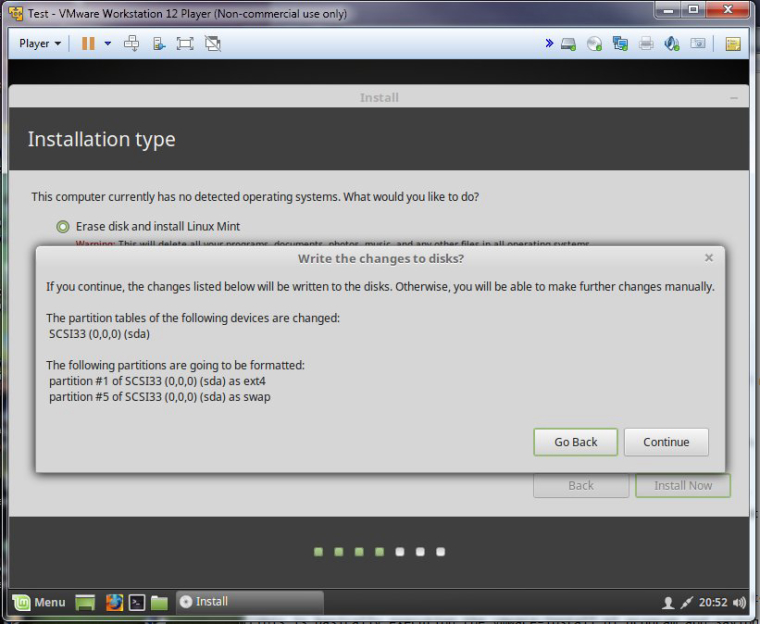
Right click the new virtual machine and 'Power On'
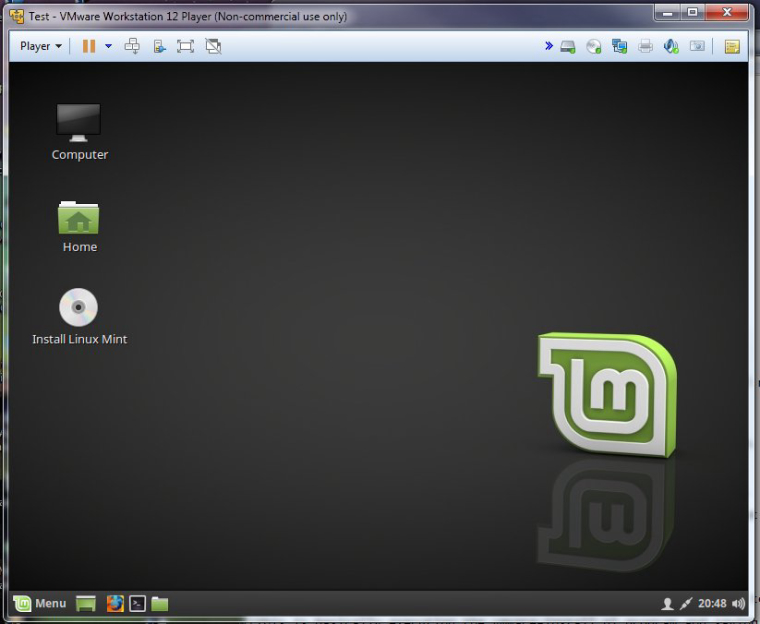
It boots to a trial desktop with an install CD icon.
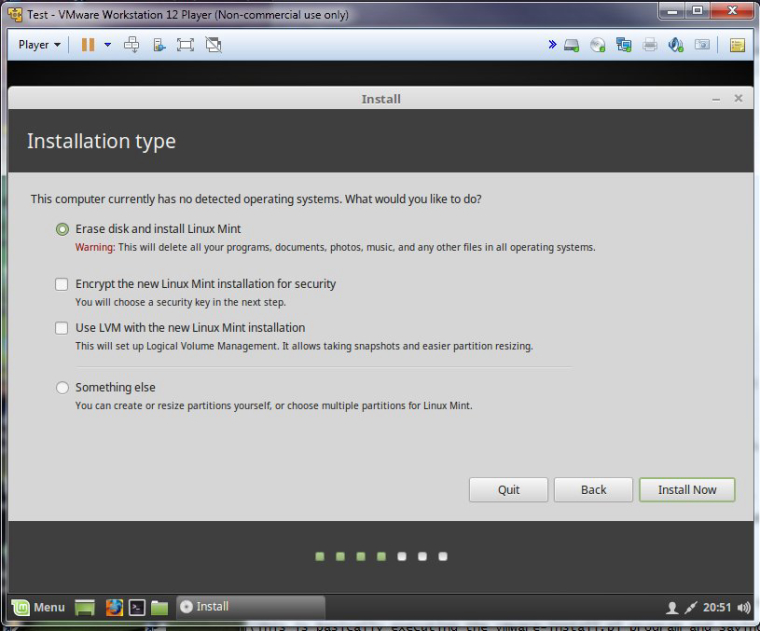
Click the install CD and install the operating system to the virtual machine. Note the drive it is installing to is the 20GB virtual drive.
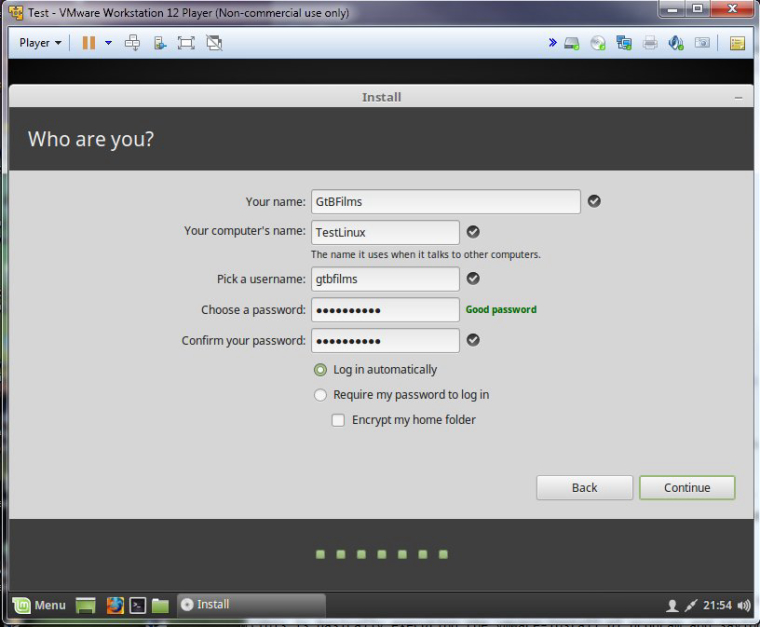
Remember the password you set!
After installation, shut down the virtual machine.
In VMWare, right click the (Powered off) machine and select settings.
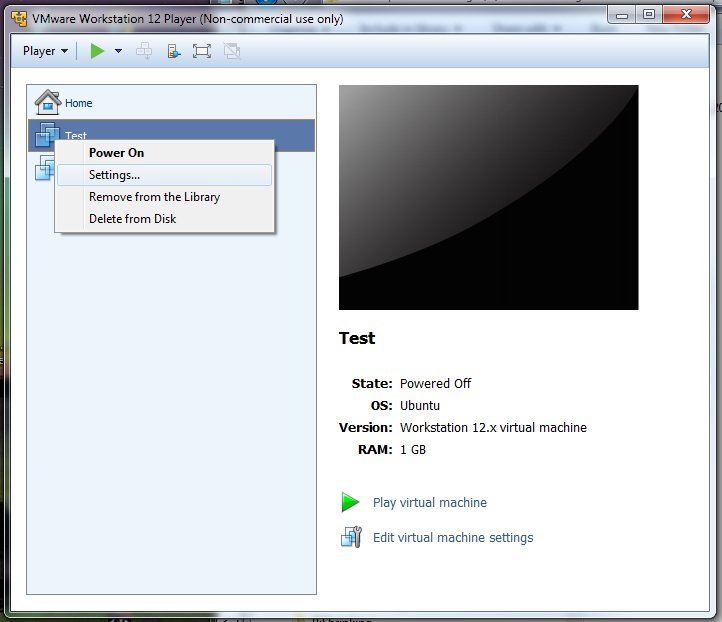
Click the Options tab
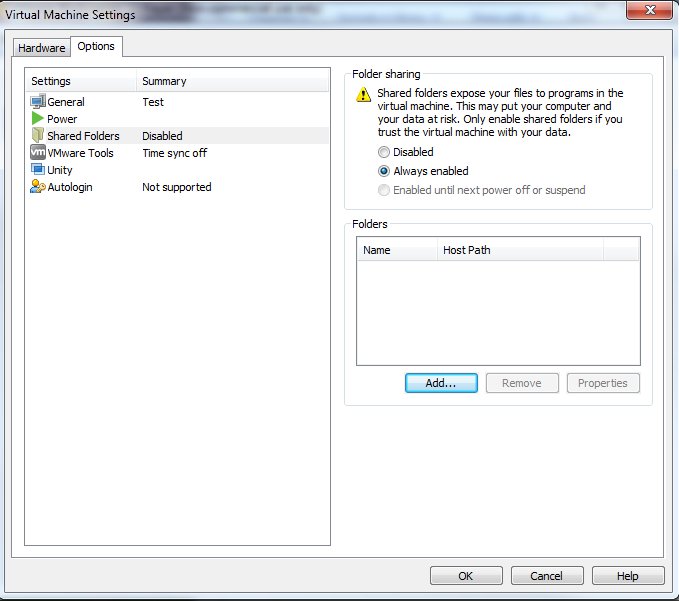
Click Shared Folders and add one pointing to a directory in WIndows.
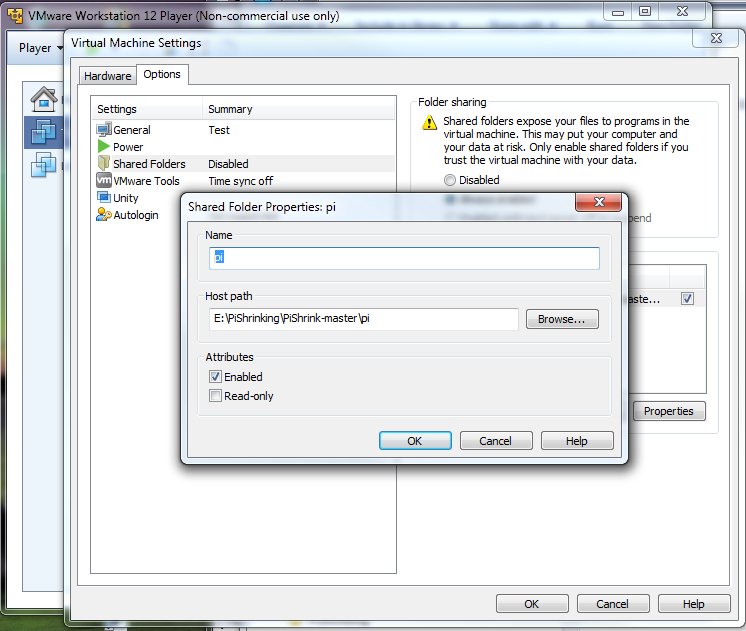
In Windows, place the pishrink.sh script and the Retropie SD card image into that directory.
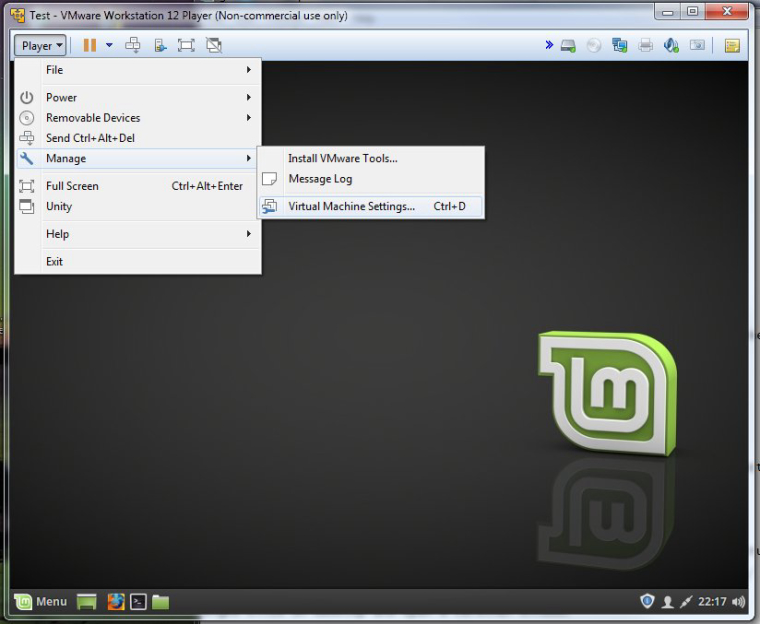
Boot up the Mint virtual machine.
On the Player Menu, select Manage -> Virtual Machine Settings
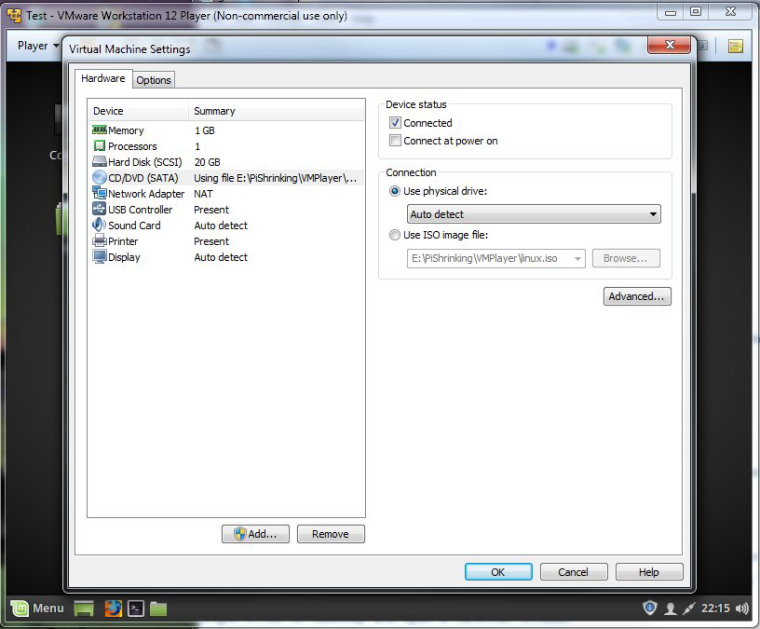
Change the CD mapping back to the physical drive instead odf the Linux Mint iso file.
On the Player Menu, click Manage, then 'Install VM Tools'
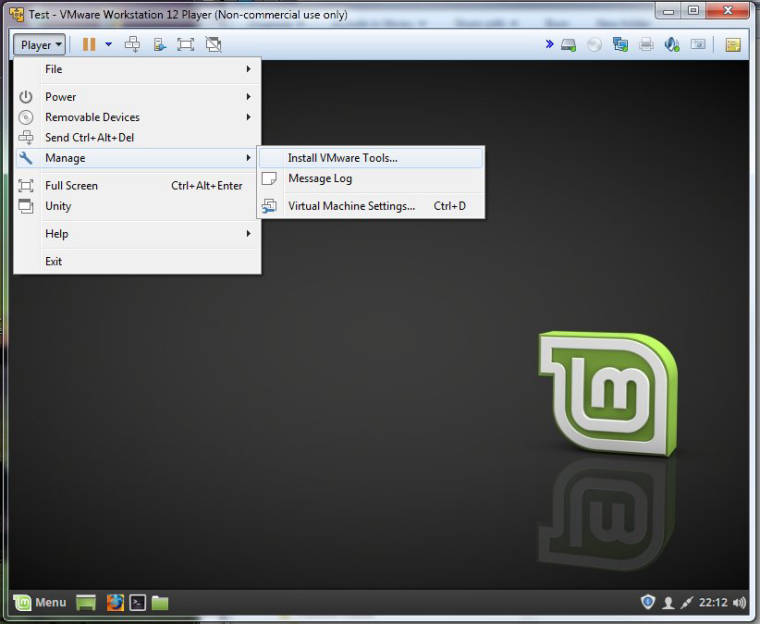
After a delay, the VMTools folder will open on the desktop (or the icon for the VMTools CD will appear, click it to open the VMTools folder)
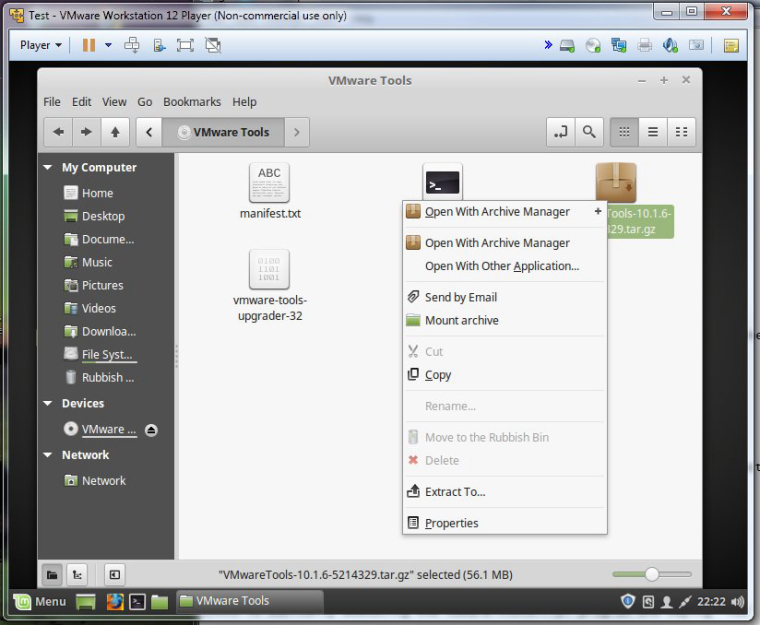
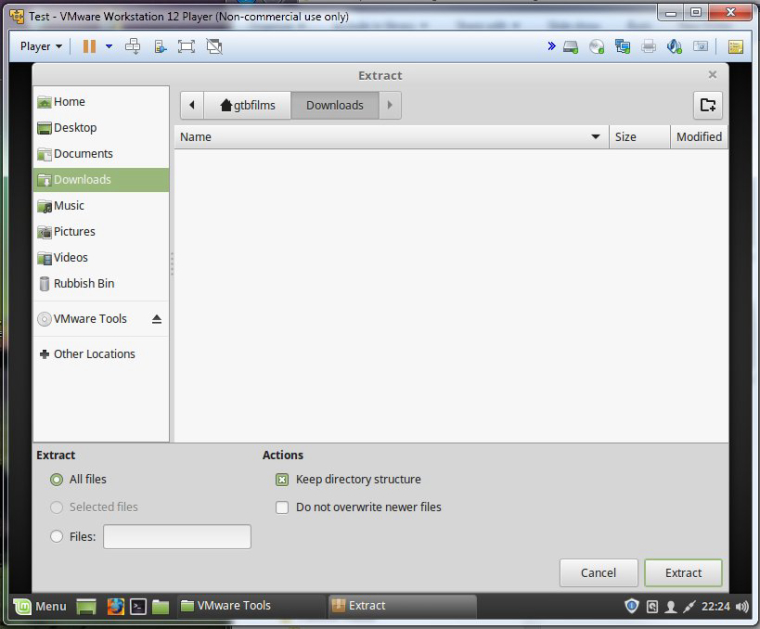
Right click the VMwareTools tag.gz file and select 'Extract To'
Extract it to the Downloads folder.
Navigate to the Downloads folder, then the vmware-tools-distrib folder
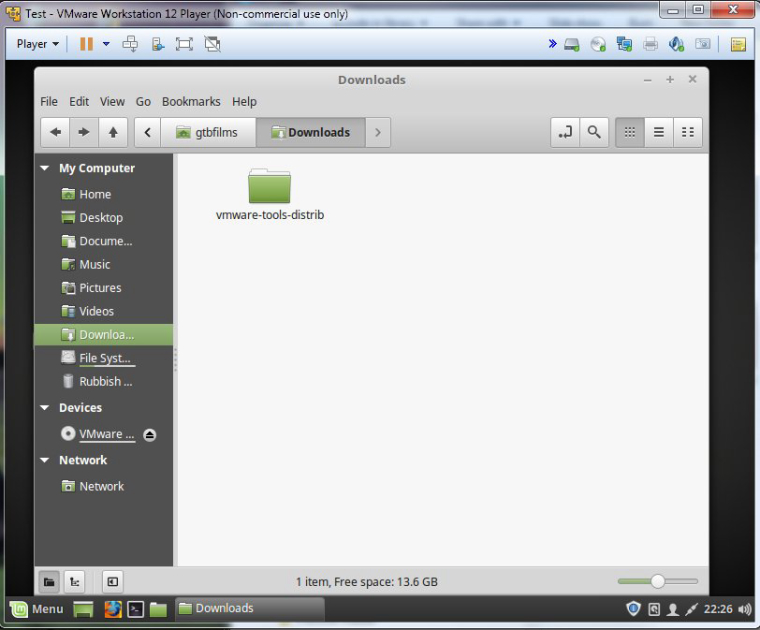
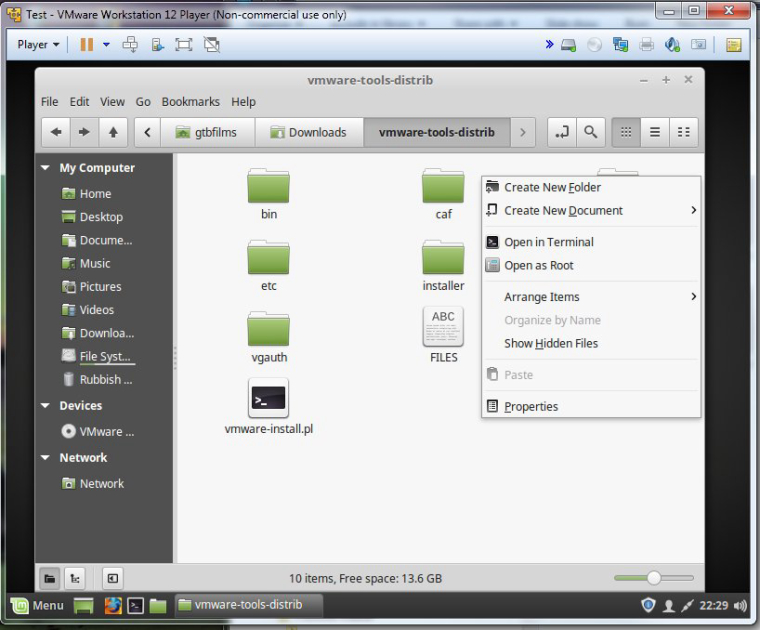
Right-click somewhere in the folder (not on an icon) and select 'Open in Terminal'
A terminal screen opens, type:
sudo ./vmware-install.pl
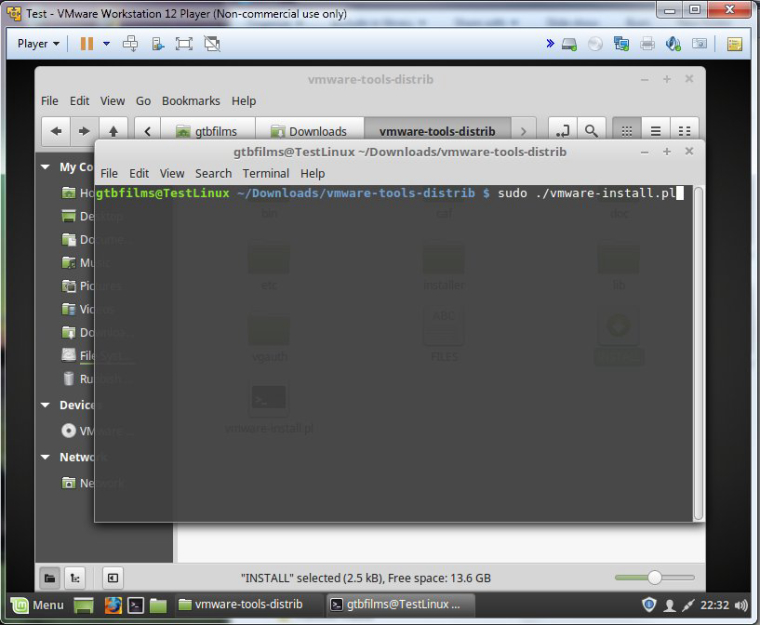
Enter the password you set when you installed Linux Mint
Press 'Enter' to accept all of the default options
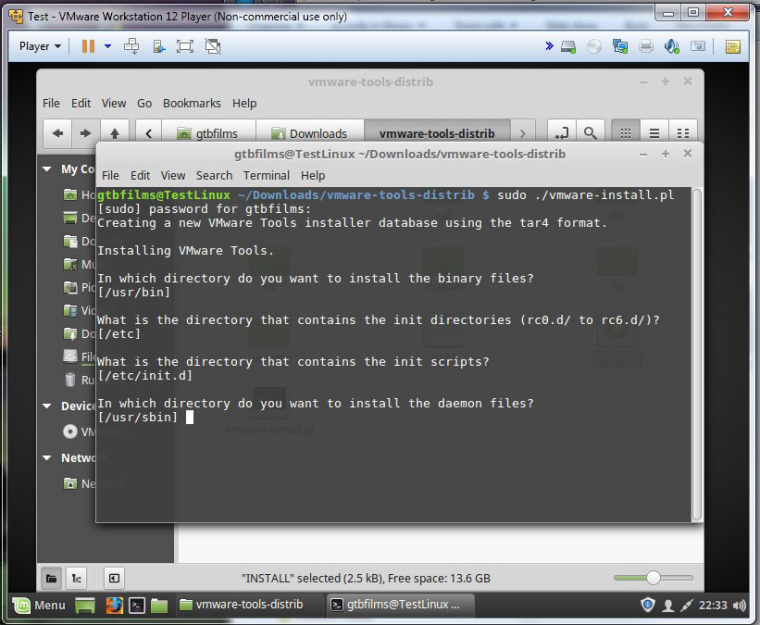
Once the install is complete type exit to exit the terminal window.

Close down the vmware-tools-distrib window to return to the desktop.
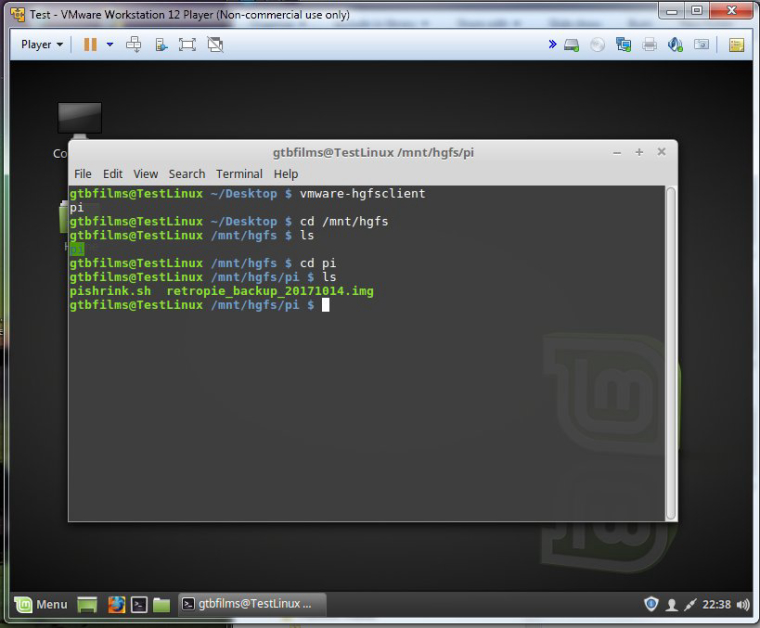
Right click on desktop and open a terminal window.
Check Mint can see the shared folder by typing:
vmware-hgfsclient
This should output the shared folder name
Check the folder is mounted:
cd /mnt/hgfs
lsYou can now access the shared folder.
Right click on the desktop and create a new folder, name it pishrink, we are going to link the shared Windows folder to this desktop folder, to make it easily accessible.
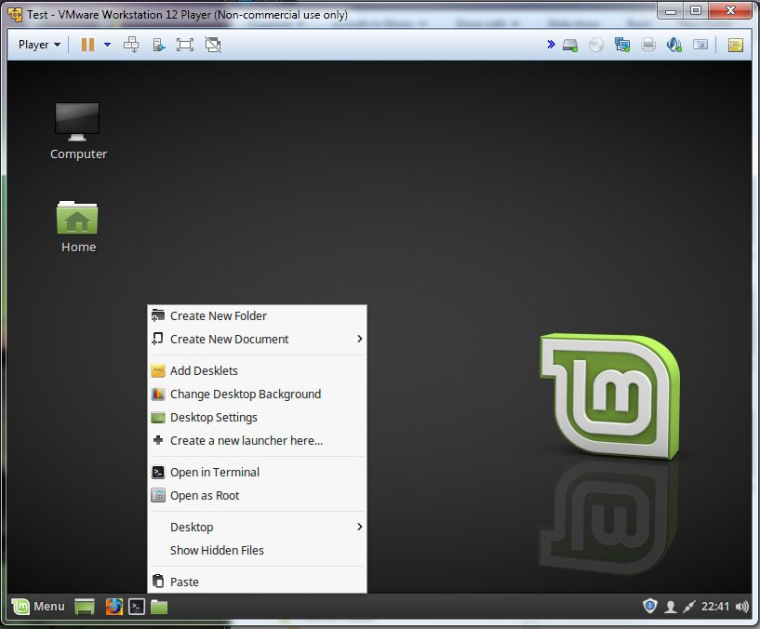
Mount it permanently on the Linux mint desktop by typing the following in a terminal:
ln -s /mnt/hgfs/shared-directory ~/Desktop/Name-of-the-folder
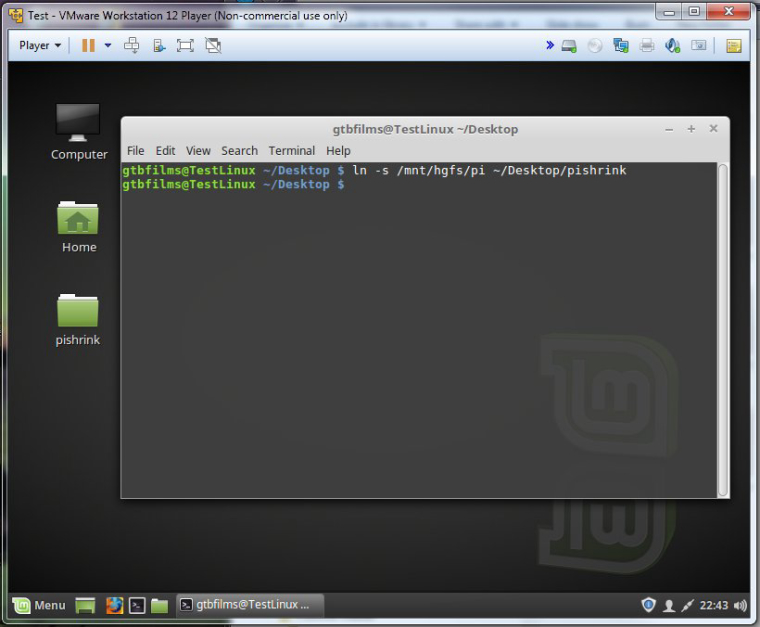
Close the terminal window.
You can now any SD card image files by placing them in the shared folder in Windows, then
starting the Linux Mint virtual machine.Then...
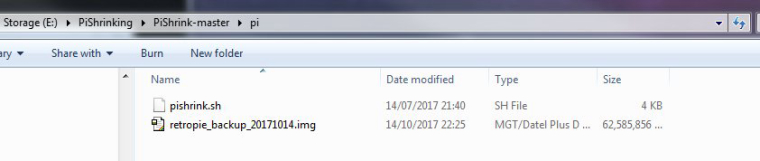
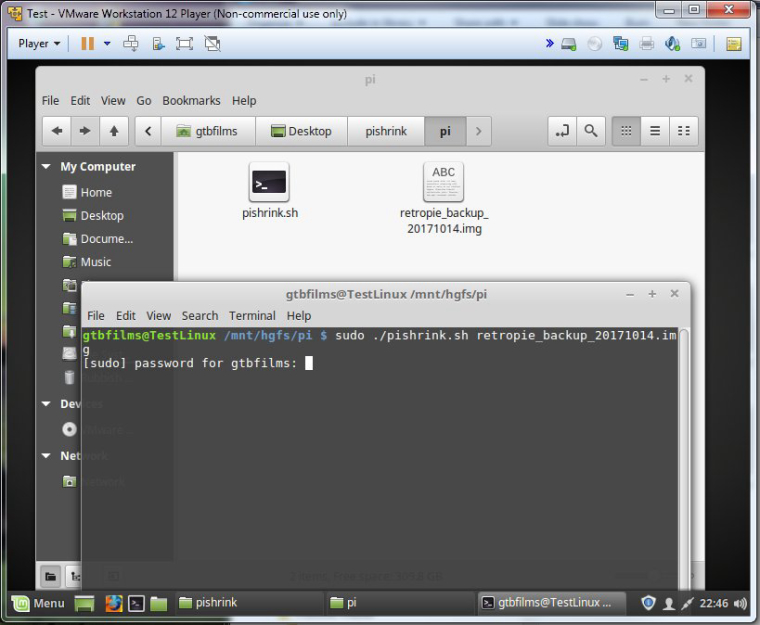
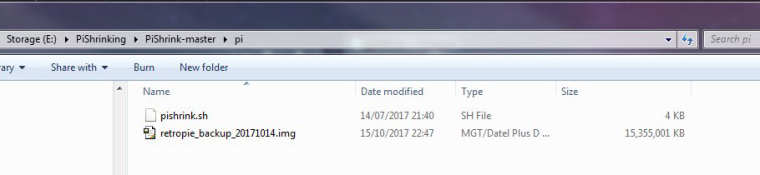
Open the pishrink folder on the desktop, you should see the shared pi folder inside it, open it.
You should see the pishrink.sh file and the retropie image file.
right click in the folder and open a terminal window.
Type 'sudo ./pishrink.sh retropieimagefilename.iso'
Enter your password when asked.
The image will then be shrunk. Once complete a summary of the size reduction is displayed.
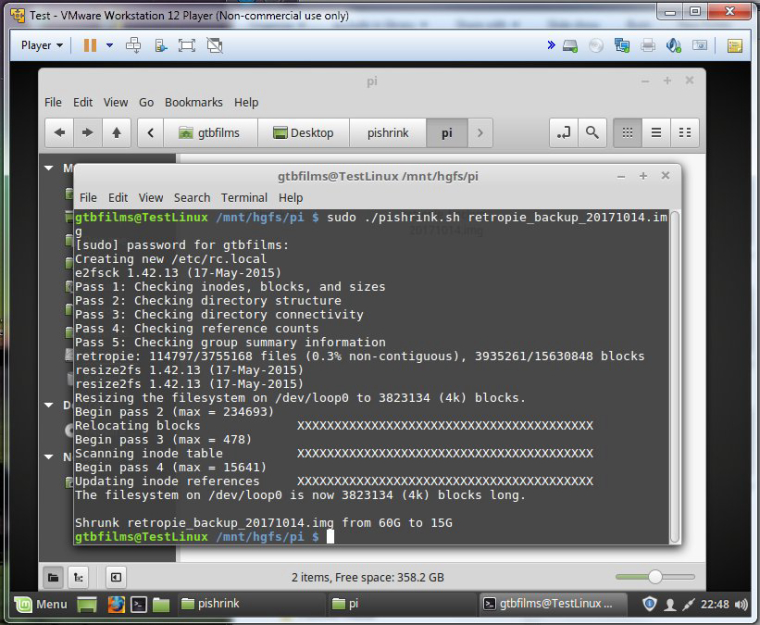
You can burn this image to an SD card (using Win32DiskImager or similar).
The first time a Raspberry Pi boots with this card, it will resize the available file space back to the maximum that the card allows.
-
Excellent! Your post should be pinned!
-
sorry for bump up the old topics
but how about the image that can't be shrink anymore.
is it possible to extract the image then delete some roms
then rebuild the image again?thanks in advance
-
@sicboy101 What is your actual issue you're trying to solve ?
If you follow the guide above, you can read directly the Raspbian system and delete whatever you want from it . ROMs can be also deleted directly via the same method you use to transfer them - Samba shares, WinSCP - so there is no need to use this method just to delete some ROMs. -
@mitu i've got some image files that cannot fit to my SD card.
-
@sicboy101 I see - you can use a live Linux system or the method above (using VMware to get to a linux system) to look inside the image itself before running the shrinking script.
Once you've booted the Linux system and made the .img file available to it, then use the instructions from https://blog.vinczejanos.info/2016/09/06/mount-sd-card-image-partitioned-image-w-o-kpartx/ to 'mount' the filesystem inside the image and perform any modifications you want on it. If you follow the instructions from the page above, the ROMs will be located in the
/mnt/tmp2/home/pi/RetroPie/romsfolder. But, since this might be a 3rd party image with unknown configs and modifications, YMMV. -
@mitu thanks man! i'll try this ASAP.
-
I had an image on a monstrously large 64GB SD card but knew there wasn't near that on there so I wanted to put it on a 16GB SD card. This worked and shrunk my image down to 7.7GB. Windows 7 Professional, 64 bit. Thank you!
-
Excellent guide. However, I ran into this error when running the pishrink.sh:
Creating new /etc/rc.local
retropie: Inodes that were part of a corrupted orphan linked list found.retropie: UNEXPECTED INCONSISTENCY; RUN fsck MANUALLY.
(i.e., without -a or -p options)
resize2fs 1.42.13 (17-May-2015)
Please run 'e2fsck -f /dev/loop0' first../pishrink.sh: line 148: 31375872 - : syntax error: operand expected (error token is "- ")
resize2fs 1.42.13 (17-May-2015)
Please run 'e2fsck -f /dev/loop0' first.ERROR: resize2fs failed...
I tried running "e2fsck -f /dev/loop0" as instructed, but that didn't work either:
e2fsck 1.42.13 (17-May-2015)
e2fsck: Invalid argument while trying to open /dev/loop0The superblock could not be read or does not describe a valid ext2/ext3/ext4
filesystem. If the device is valid and it really contains an ext2/ext3/ext4
filesystem (and not swap or ufs or something else), then the superblock
is corrupt, and you might try running e2fsck with an alternate superblock:
e2fsck -b 8193 <device>
or
e2fsck -b 32768 <device>I'm completely lost...
-
Sorry @bollwerk ,
This is beyond my capability! (I hate these unhelpful Linux errors!)
Hopefully someone who is a lot more skilled with Linux than me will be along shortly and able to advise!
-
@gtbfilms No worries. I found a newer version of the same image today and it fits on the same card. Woot!
At least I got some Linux experience from this exercise. =)
-
@GtBFilms I've been searching for a solution for this for weeks. Great post, really helping. Many thanks
Contributions to the project are always appreciated, so if you would like to support us with a donation you can do so here.
Hosting provided by Mythic-Beasts. See the Hosting Information page for more information.