(COMPLETED) Pi Zero Portable - 3D Printed
-
Hey!
I recently bought my Dad a 3D printer for his birthday; one of those presents which you buy for someone else knowing full well you're going to be using it more than them! I've been scouring the net for a challenge, and I stumbled upon people making raspberry pi portables. In the past, I was an avid Ben Heck-er, I made myself a portable from one of those Nintendo-on-a-chip/Plug and Play consoles, and also tried my hand at a SNES portable; the only issue I had was the time and energy it took to make the case!
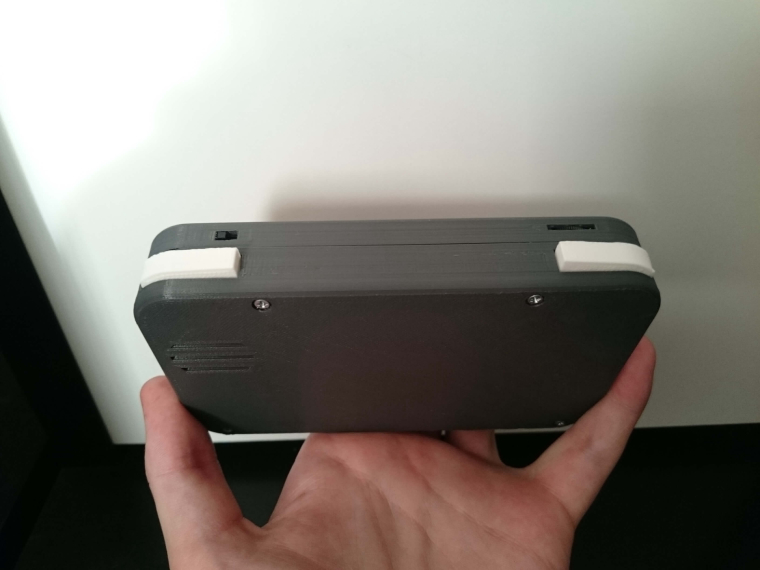
Gone are the days of franken-casing, when I could design my own case on Fusion 360 and 3D print my own design. Using a digital caliper, I measured all the components I had bought, sketched them in Fusion and created a case around the sketches.
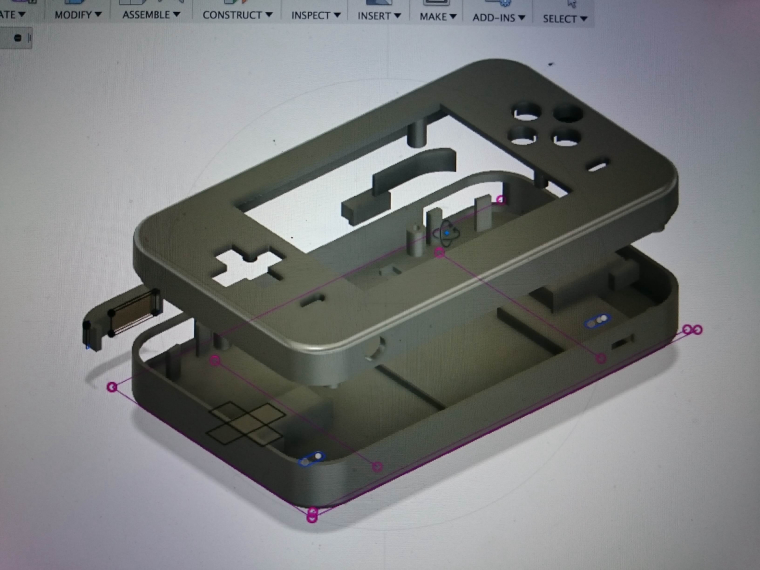
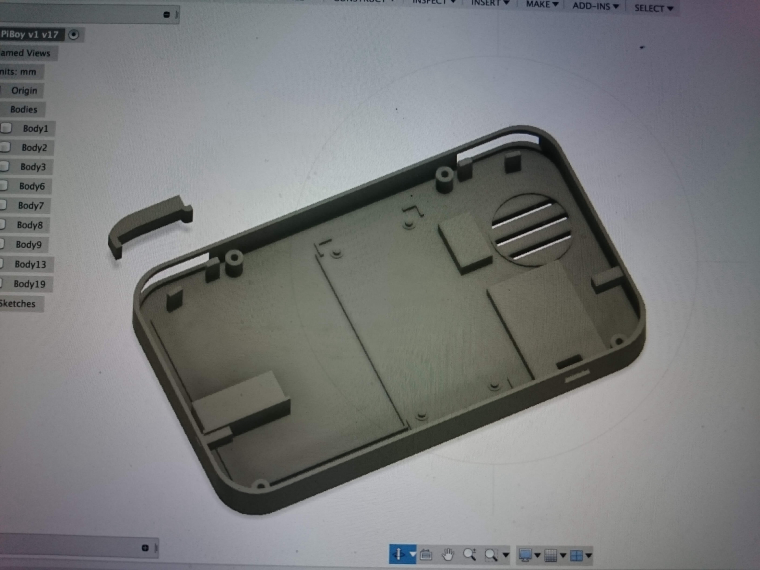
From this, I printed the models on our fancy new printer, and tried initially did a fit test to make sure my measurements were right, made sure the Pi Zero worked on my 3.5" screen.
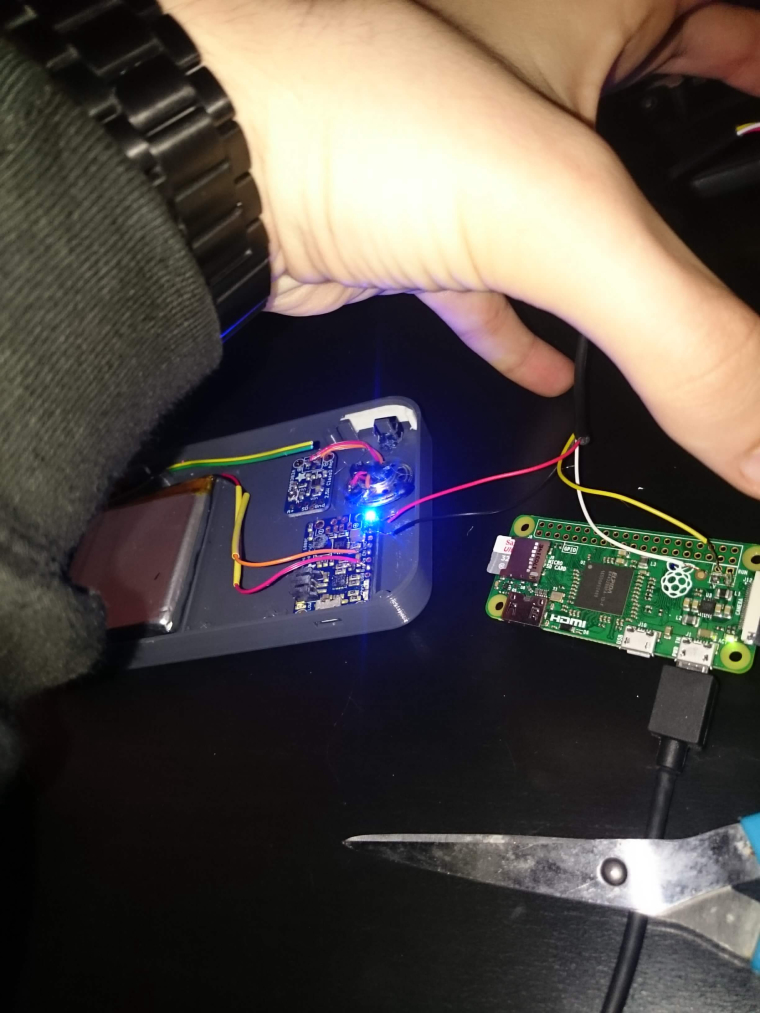
Seeing that everything worked, I then had to burn my image on to my SD card, and figure out how to gain audio out from the GPIO pin. There is a very handy article on Adafruit, which shows you how to get audio out from GPIO#18 using an alternative function on that pin: https://learn.adafruit.com/adding-basic-audio-ouput-to-raspberry-pi-zero/pi-zero-pwm-audio
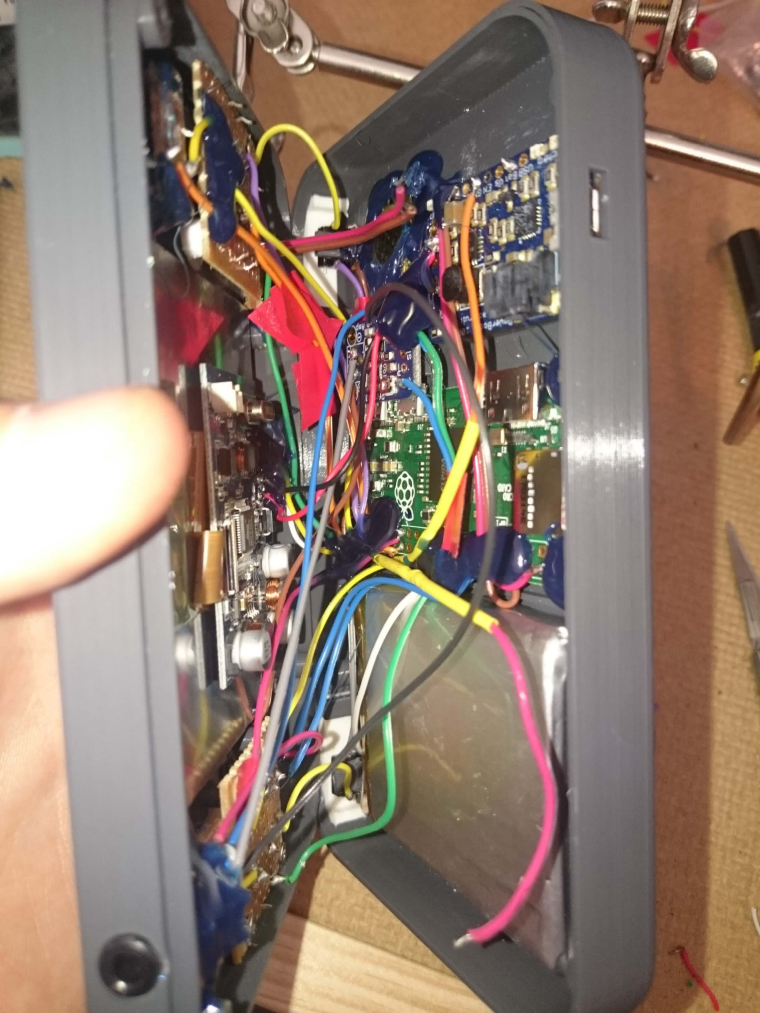
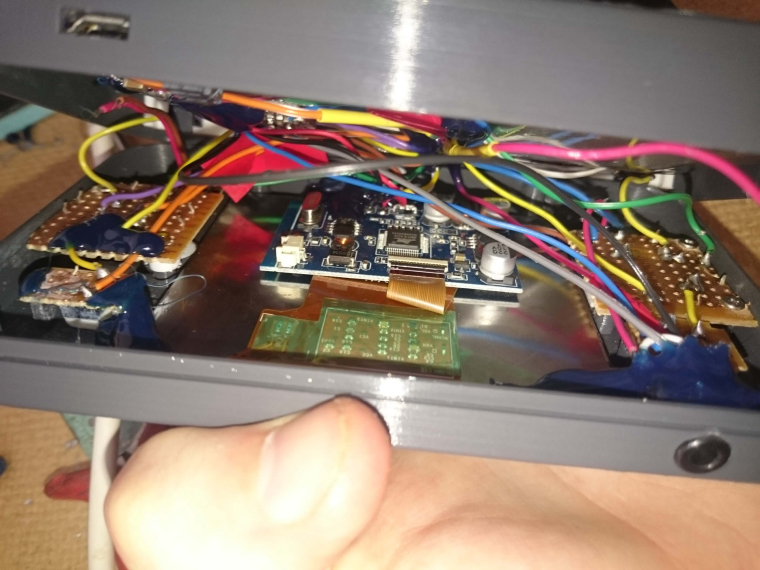
After getting these working, I hard wired everything together and placed it all inside the case (this was the less time consuming part of the build surprisingly!).
N.B. The wiring was not the most tidy of wiring jobs :D
Everything worked first time, which I am very surprised about!
Few things I would change for next time:
-
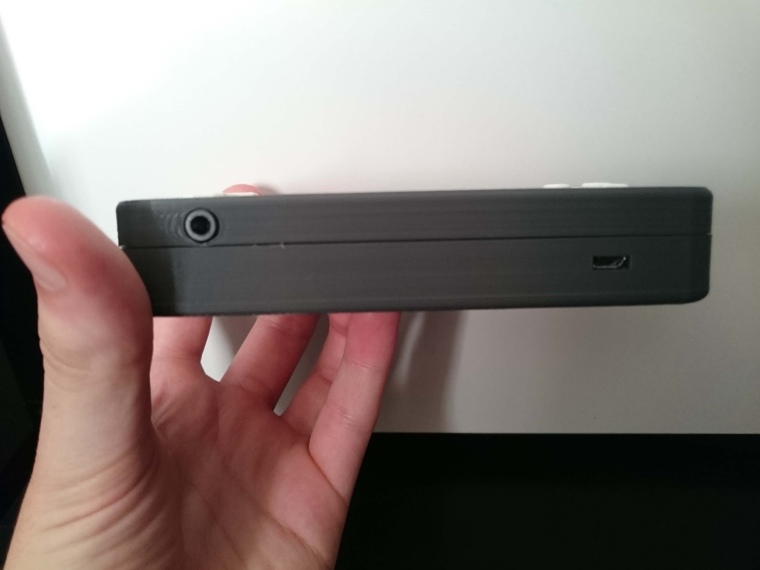
The video out is from one of those rubbish composite reversing screens, the quality is naff, but good enough for a first go. Next time, I would look at getting something which outputs better quality.
-
The audio is not the greatest, it struggles with highs and lows.. I have seen people using USB Audio adaptors to get their sound, or even follow Adafruit's guide to creating a Low Pass Filter. But for the efforts of a first time, the audio works fine :D
-
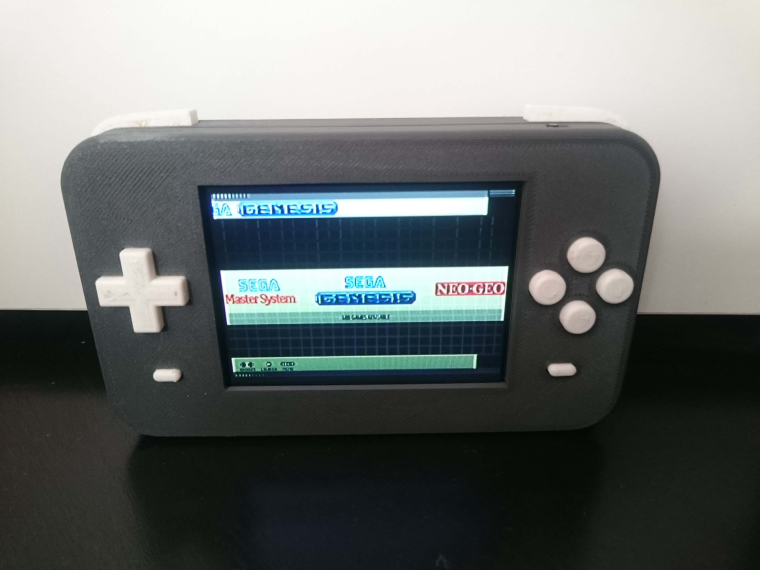
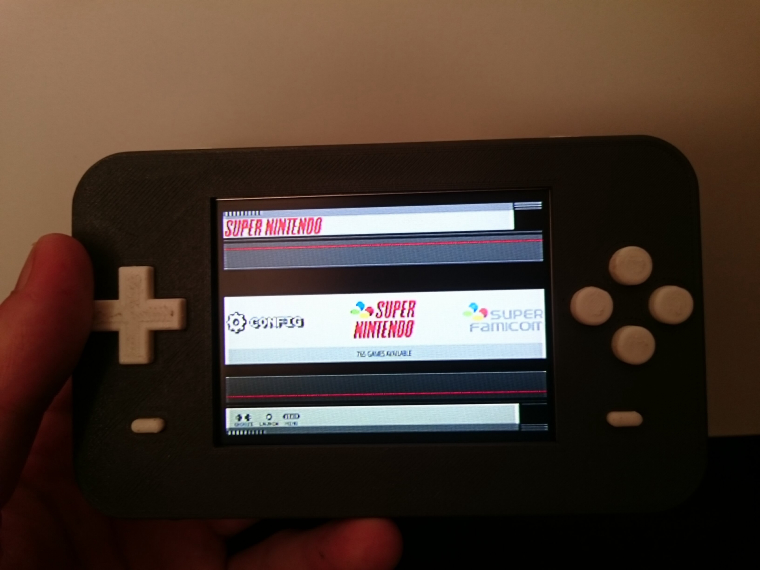
The image which I downloaded, does not have working roms for Arcade and Neo Geo, which is a slight bummer. Not to fear though as the Nintendo and Sega roms work great! And as I cannot remove my SD card now as the Pi is hot glued in place.. it will have to do ;)
-
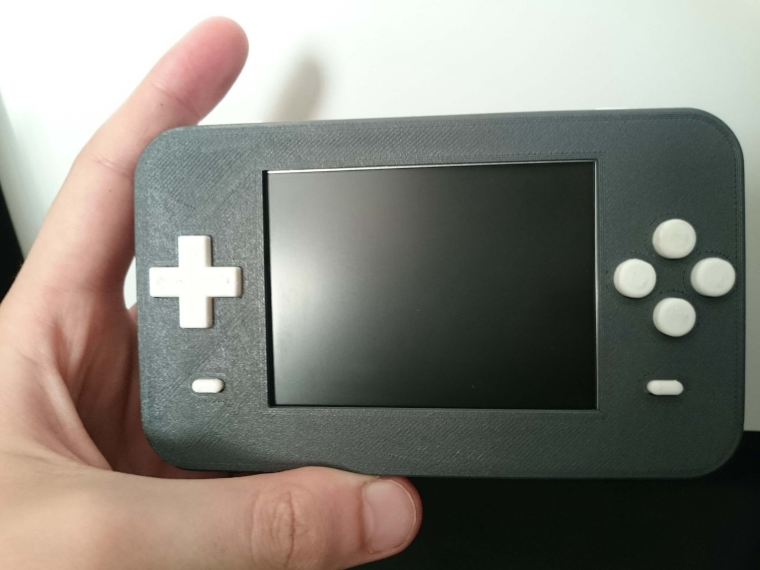
I bought those rubber tactile switches and thought I would try them for the buttons.. I'm not a fan of them for the 4 circular buttons, however they work great on the shoulder buttons!
And there you have it!
Hope you've enjoyed having a nosey at my little project. I'd love to hear what you think and anything you would've done differently!!
-
-
@LukeC Most of the pictures don't show up
-
@lilbud Pictures are up now, phew.
-
@LukeC a possible idea for a screen in the future:
https://shop.pimoroni.com/collections/new-products/products/hyperpixel
Nice clean build. Doesn't look like most of the Frankenstein builds people make for handhelds
-
@herb_fargus Thanks! Once upon a time when you would have to purchase a project box and dremel everything (visions of epoxy everywhere).. Thank goodness for 3D printing.
I will definitely look into one of those crispier screens for next time though - thanks!
-
@LukeC looks sweet man, top job!
-
I'd love to make something like this, but I lack the time, skills, tools and motivation (in that order).
-
Hardware-wise it looks great, but I'm not in any way happy or supportive of downloading a pre built image with Roms in it. That's the kind of thing that keeps damaging the project as a whole, and it seriously isn't hard to set it up by yourself via the official image and doing things by the book. Maybe that's the only thing I'd change for next time.
Thanks for sharing.
What's the power and battery life on it?
-
Great work dude!
-
@pjft I will look in to it for next time, I wasn't particularly happy with the one I downloaded, and now I've seen what people have been doing on the forums I think I'll have to next. But for me, this was mostly an electronics project.
If I remember right, the battery is 3.7v 2500mah; not had a full play on it yet as I've been working in between, but will update once I get some free time!
@AluLagoa Thank you!
-
very clean
nice work
Contributions to the project are always appreciated, so if you would like to support us with a donation you can do so here.
Hosting provided by Mythic-Beasts. See the Hosting Information page for more information.